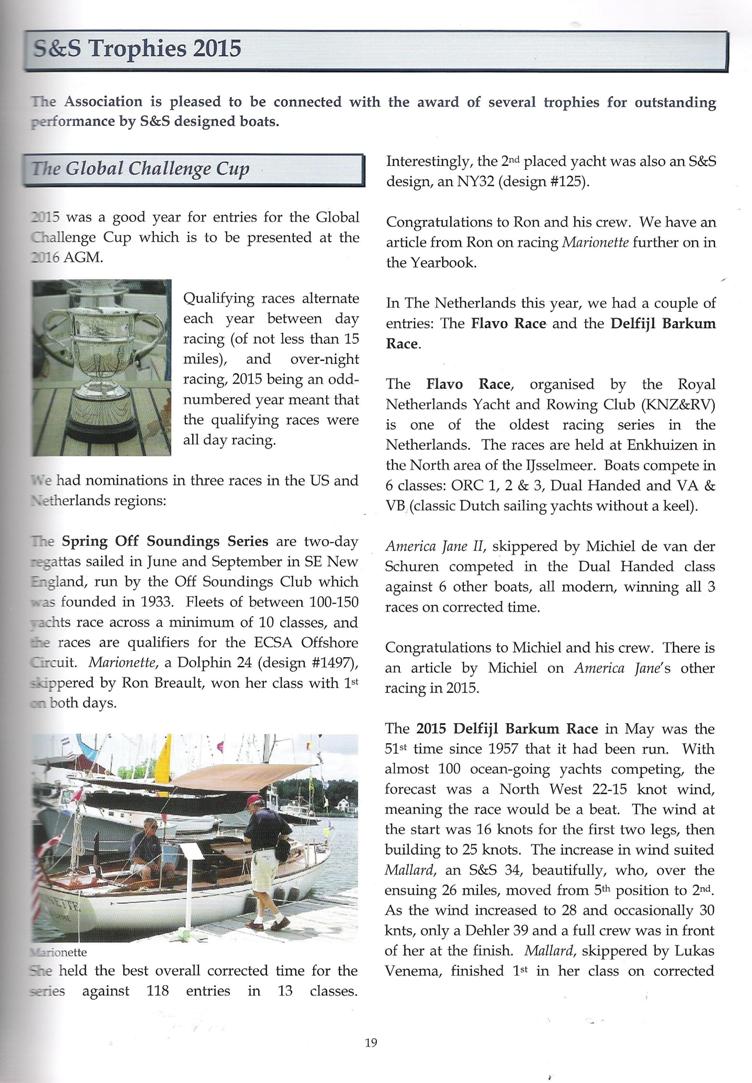
|
August 31, 2022
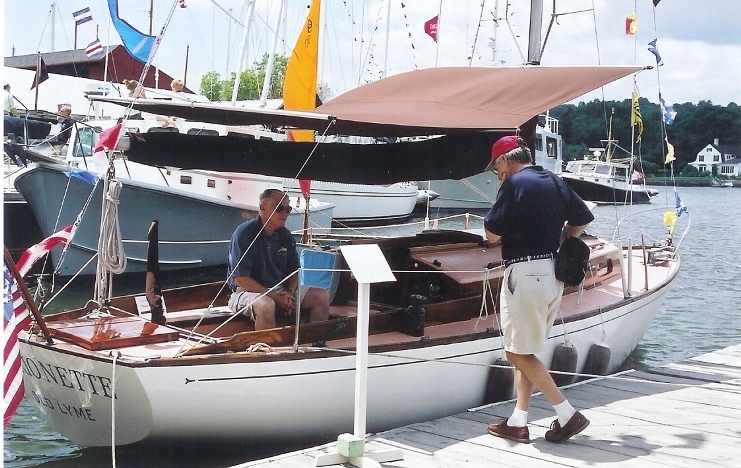
- The Dolphin 24 webmaster received the following note from
Ron Breault, the owner of Marionette for the past 27 years
Hi Ron
There comes a time when decisions have to be made. For me the past year has been full of those decisions. My wife and I sold our house of 44 years in Old Lyme, Connecticut and moved to a senior living facility named Essex Meadows in Essex across the CT River from Old Lyme, where incidently, I bought Marionette 27 years ago at the CT River Museum. Entering my eighties has made solo sailing up in Maine problematic (I blame John Rousmaniere and his article Farewell to the Gulf Stream for bringing this matter to my attention) - and the search for her new caretaker has been tough, but rewarding
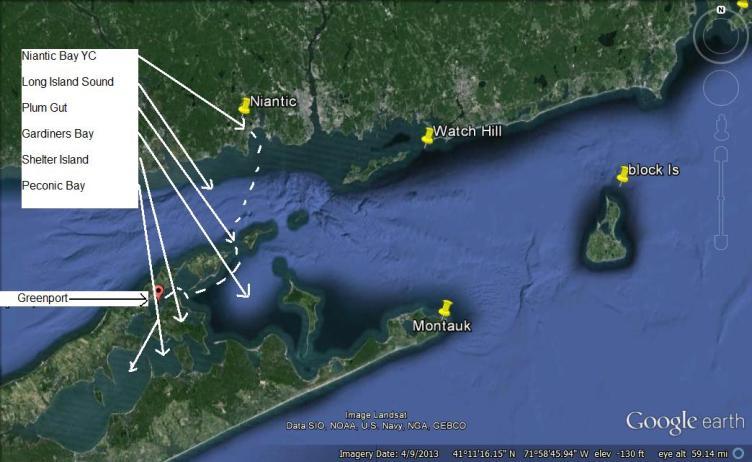
The new owner is Bill Webb who lives in neighboring Old Saybrook. He plans to keep Marionette for the rest of this season at Niantic Bay YC where she's enjoyed her same slip for those 27 years. We'll standby to hear from Bill in coming days.
Thanks for getting this story out to our friends
Ron
******************************************************
September 29, 2022 We received the following Senior DFI report (identity withheld)
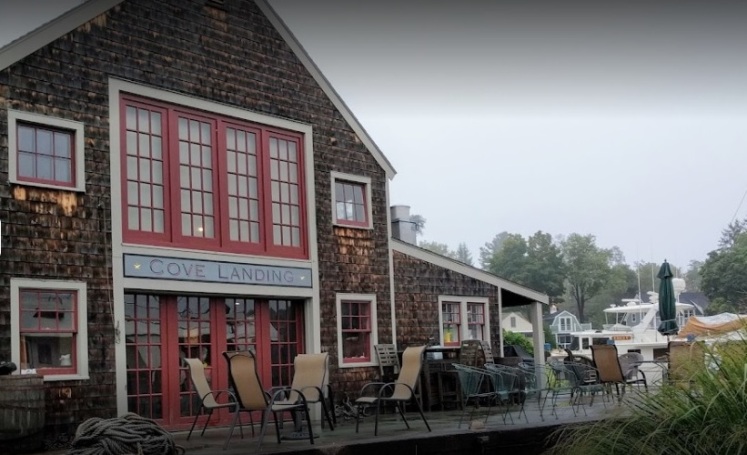
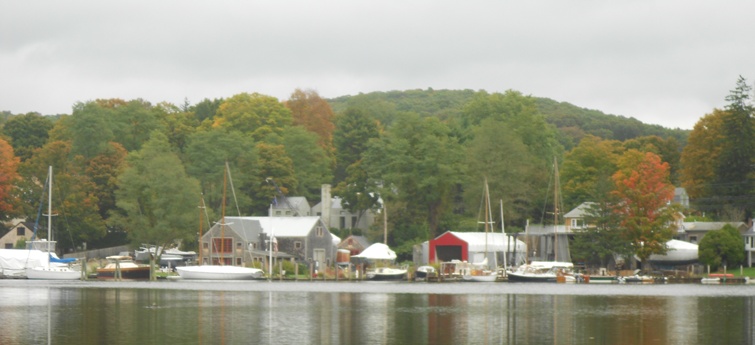
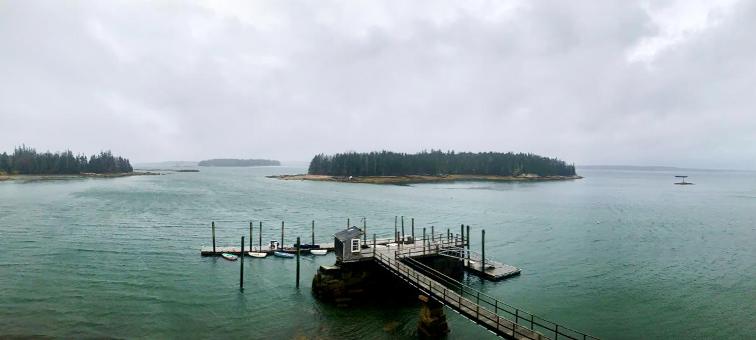
Marionette left Niantic Bay YC and sailed up the CT River into Hamburg Cove where she was welcomed by the Cove Landing marine staff and where she has many times launched and hauled. The following photos mark her successful journey.
|
|
|
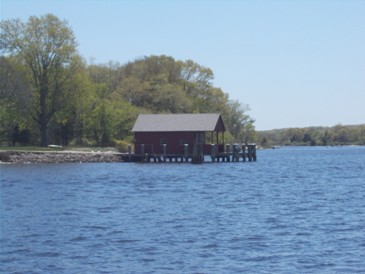
The 'sailor's bar' at Cove Landing is a special place - you store your bottles in view of all but the honor system protects them while you are gone. A tour of the area and access to it is here on their website http://covelanding.com/. The pic below is the destination. |
May 14, 2023 - Sparkman & Stephens Association 2023 Yearbook article Farewell to Marionette - in Stories
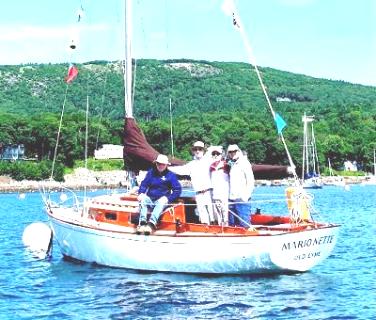
July 30, 2023 - DFI , webmaster, and former owner Ron Breault could not resist taking this photo of Marionette on her new mooring inside Calves Island at the Old Lyme Marina, near the mouth of the CT River
**************************************.
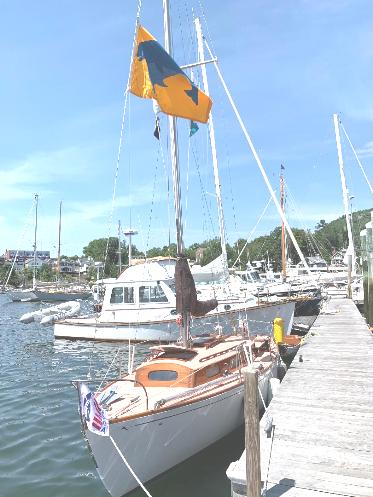
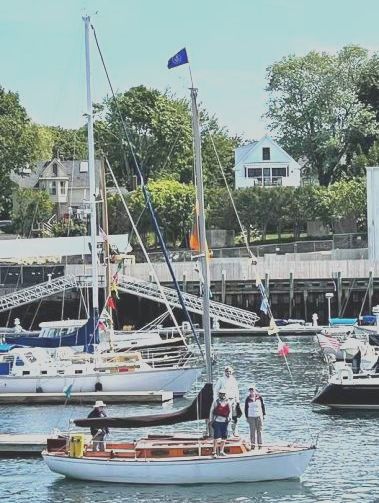
August 13, 2023 - Bill Webb sent in the following update and photo.
Hurrah!! At Last!! Capt Bill, Robin, the Boulder Webb and Bill's brother, wife Amy & Peter McCall all out today on the maiden voyage of Marionette 'a la Webb'!!
On the Connecticut River
************************************
November 2, 2023 - A senior DFI sent in the following pic of Marionette at the Old Lyme Marina out of the water getting ready for her winter season.
******************************************
*********************************
****************************************************
*********************************
This is the history we have on Marscot/O'Day hull #12
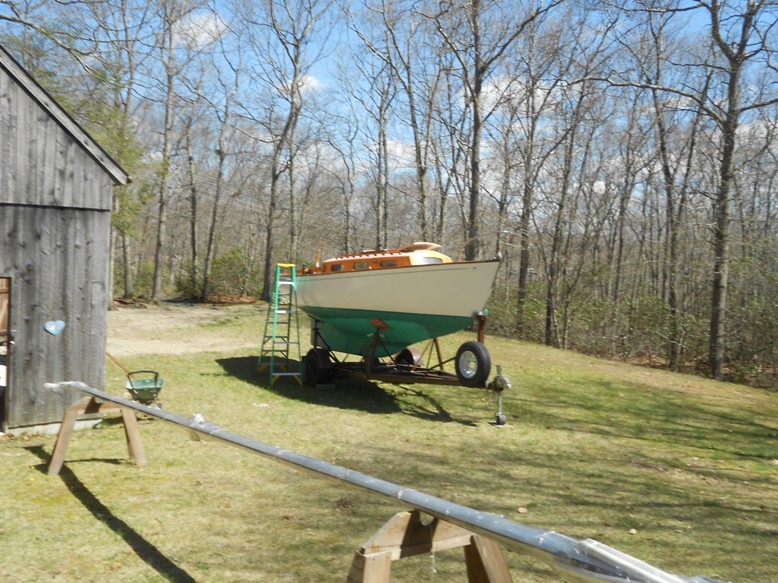
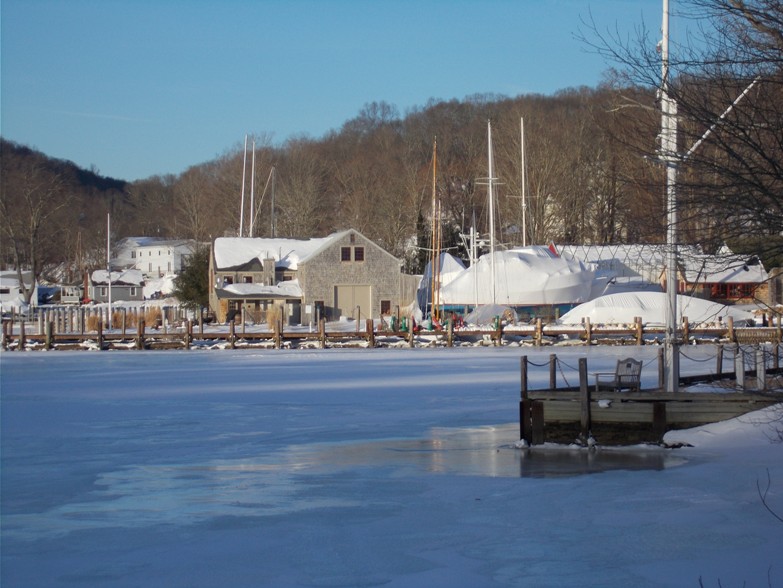
Ready to go, early Spring at Niantic Bay Yacht Club
|
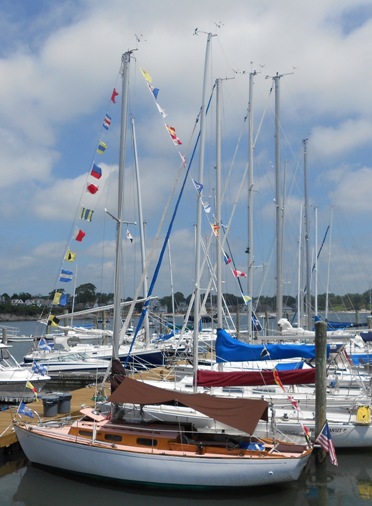
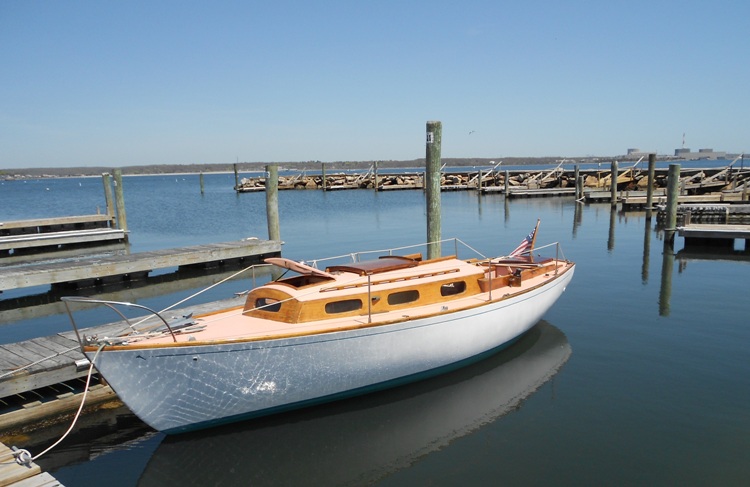
I bought Marionette in 1995 from the Connecticut River Museum in Essex, Connecticut. After 10 years on the hard in a small nearby marina, she had been donated for the Museum’s annual fund raising Thanksgiving auction. The minimum bid was $2000 and no one bid for her. Here she is, at left, all dressed up at Mystic Seaport in 2004 for the Sparkman & Stephens' 75th Anniversary as representative for the Dolphin 24 Class.
Click here for larger image.
|
WARNING: There is a lot of detail here - more than anyone, other than a minutia starved Dolphin owner, could ever endure.
 This story has been told a few thousand times, and this version is true - too. On a December late afternoon, lightly raining (of course), I passed by the Museum and noticed this poor boat sitting in their rear parking lot under a torn tarp (naturally) with a For Sale sign hanging lopsidedly from the bow pulpit. (Is the set up right?) This story has been told a few thousand times, and this version is true - too. On a December late afternoon, lightly raining (of course), I passed by the Museum and noticed this poor boat sitting in their rear parking lot under a torn tarp (naturally) with a For Sale sign hanging lopsidedly from the bow pulpit. (Is the set up right?)
I had retired early from the ‘game’ and was riding around the Essex boat yards looking for a boat to buy and restore - one that I could single hand and maybe race occasionally. (My then current boat was an Atlantic Class racing sailboat named Relish - another story) Before Relish there were a couple other boats - here's a peek at one of them - MARBLES- another story)
Despite the dim light :-) I liked Marionette's lines, so I found a ladder nearby and climbed aboard. The hatch was open, the sole was wet and rain water had half filled the bilge. I found a hand pump in a seat locker, pumped her dry, crawled around the deck, fixed the tarp, went below, sat on the starboard settee and looked around. So began Marionette's new life.
I found out from a staff person inside that she was a Dolphin 24, but that if I wanted any additional information I would have to call a Museum Director who was handling her. Dolphins were quite popular in eastern Long Island Sound in the 60's and 70's and I had an old friend, Stan Secora, who was a marine architect, and was the first owner of Jato, Hull # 7. So I called him. From my description he recognized the boat from years past racing against her. He thought she had been well cared for, and that she could be an ideal boat for my plans. Thinking I had a real bargain coming, that evening I called the Director, introduced myself and gave him the reason for my call. He stopped me in mid sentence and said
“before you go any further, I am a former Dolphin owner myself and I know that, sooner or later, someone will come by who knows what a Dolphin is, and will recognize what a good value this boat is for $2000. We are not going to take a penny less”.
So, I bit my lip and said I’ll take her. For this Director's story, click here.
Marionette's story is a bit unique in that she is a hybrid Dolphin with a fiberglass hull, otherwise all wood. It seems that in May, 1960, or thereabouts, there was a fire or some kind of problem at the Marscot Plastics/O'Day Fall River, MA plant that damaged some of the molds. These molds produced the deck, cabin and cockpit, each in one piece, and the 2 half hulls separately that were later bonded together. Stan Secora told me that when he picked up his boat on May 30, 1960, the 1/2 hull sets for Dolphin #’s 11, 12, and 14 were in the yard. Production on new boats was interrupted, and as one version of the story goes, stopped. O'Day eventually sub-contracted 25 Dolphins to Lunn Laminates in Long Island. This saga is discussed in more detail in the History Section. The aforementioned 3 hulls were sold to 3 guys who were, or became, members of the Pequot YC in Southport, CT. One of these hulls was a complete shell, less cockpit and house - Clark DuBois' Peridot, Hull # 14, the other 2 were hulls only - John McCalley's Windsong, #11, and Hull #12 - TEAL
|
Hull # 12's guy was a Phil Zerega, an engineer who had no prior boat building experience. Sometime in the summer/fall of 1960 he borrowed a trailer and picked up the bare hull at the plant, the 2 half hulls now bonded together, and brought her home to Southport, CT. He named her Teal and propped her up on poppits under a ridgepole and tarp. Then over the fall and winter months he built a beautiful wood boat on that shell - to me an amazing feat. I had always meant to track Phil down and talk to him but never got around to it. The decision to go forward with this website made this mandatory. After several weeks of searching I found Phil and finally got to talk with him. Gradually, I got the story of how he did it. His Teal was launched August 12, 1961. Phil's son Mark stopped by the house to deliver some pictures of TEAL and her construction. Click here to see them. |
Phil Zerega sold Teal to Jim Rice in/about 1966. Jim belonged to the Essex YC on the Connecticut River in Essex, Connecticut. A couple of years after he bought the boat Jim decided to move up to a Tartan 27 (known in some circles as a 'big Dolphin) and sold her to a couple of friends, one of whom was named Watt, and who lived in Cos Cob, in western Connecticut. The friends did not get along and, a year or 2 later, they decided to sell the boat.
Tom Marston, a good friend of Jim Rice, had a South Coast 23 at the time, and raced with the guys at Sachem's Head YC - where there were 5 or 6 Dolphins. He told me he got tired of always finishing 2nd to one or the other of those Dolphins and decided to buy Dubhe. He went down to Cos Cob in 1970(?) and sailed her home. He changed her name to Marionette. Tom was a carpenter at Essex Boat Works and his skills were a perfect match for Marionette's hy-bred construction - a wood boat on a fiberglass hull. He raced her successfully for about 12 years, winning the Off Soundings Club Charles Koch Trophy in 1980.
Dolphin 24 owners of that era were 'connected' to small boat racing, in particular the International 14. Along with George O'Day, Tom was a contributing author to Stuart Walker's book The Techniques of Small Boat Racing by the International 14 sailors of North America. Click here for that fascinating story. And click here for Tom's chapter on Tide and Current.
Tom sold Marionette to a friend in the early 1980's who sailed her only one year before 'retiring her to a small marina in Old Saybrook, CT - where she sat for at least 10 years. Eventually, she was donated to the Connecticut River Museum in Essex where your webmaster found her in 1995.
So, here we are. My 1995 restoration goal was simple. Set her up for single handed cruising and short handed racing, with weight control and traditional appearance major considerations. Cost considerations were in the mix but this is a relative thing – having got her for $2000 means the minimal initial investment expense can forever be used as a defense against the inevitable “in house” complaints about where this restoration project is going. And, remember, your significant other will not be able to contain her remorse at her earlier recriminations when she, at anchor with you on a late summer afternoon in West Harbor (Fishers Island), Cuttyhunk , Nantucket, or Camden, Maine (I’ll get to those Great Lakes, southern and west coast equivalent haunts when you Yankee and Pacific Dolphin owners tell me about them) and, sipping her nicely chilled Chardonnay, watches another couple, motoring in their dinghy to the dock from their 40’ gleaming white, $400K Odyssey Princess or whatever, change course to pass by your stern to say those famous Dolphin words - ‘Pretty Boat”! Priceless.
Webmaster Note: There are other acceptable terms besides "Pretty Boat" that convey this sentiment, although this is by far the most used - its true, it 'fits', not pretentious, and my favorite. Click here for another version of this message.
Pretty boat
I do not have a "before" picture, and I did not take 'restoration' pictures - this will get me in big trouble with the webmaster lurking behind a tree some 12 years later. Marionette has a solid mahogany cabin trunk varnished inside and out, with mahogany combings, toe rail, handrails, winch pads and cockpit trim. The plywood deck and top of the cabin were dynel covered and there were rips in places when I got her. She has a large main hatch and a two panel hatch in the transom deck – both made of mahogany plywood with mahogany trim, and a painted plywood forehatch.
The transom locker inside has a molded opening in the hull for an outboard, storage space on either side for gas tanks, a sealed bulkhead separating it from the quarter berths, a removable panel separating the locker from the cockpit, and a heavy plug that fits neatly in the hull opening for when the outboard is not in use. The panel stores on the side of the cockpit well when access is needed to the engine. More on the transom locker and engine related stuff later. She had bronze genoa track on top of her toe rail and old style bronze winches mounted on built up mahogany pads outside of and bolted to the combing.
|
This boat has no stern pulpit – which I like. She can race without one under the ‘grandfather’ clause. I have a heavy ring mounted on the backstay to which I can, and do as racing conditions warrant, or when single handing, connect snap shackle fitted lifelines from the aft stanchions.
Click here for a larger view. Click the back arrow on your browser to get back here |
|
I installed a new ball bearing traveler with control blocks and cam cleats so that it can be controlled from the weather side. I kept the old heavy, bronze, folding double handle, back stay adjuster but one day I might change this to a multipart block system adjustable from the cockpit – when I can figure out 1) a satisfactory way to lead the control lines back to the cockpit without making too many holes in the deck, 2) without messing up the rear deck hatch and traveler, and 3) still be able to easily adjust the backstay while sitting on either the port or starboard side.
Meanwhile, the adjustable back stay stays mostly unadjusted…This picture also shows the Autohelm 1000 custom bracket (more later) and the pin socket where the Autohelm mounts.
|
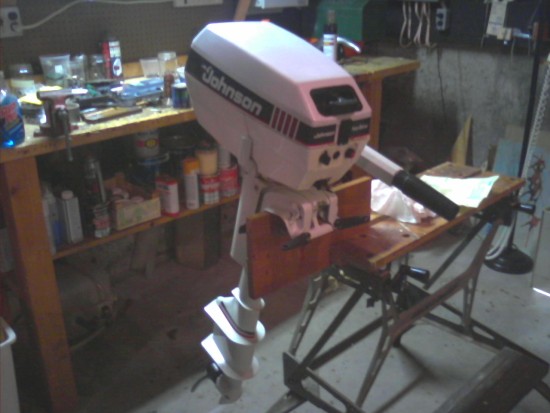
I use a 4hp Johnson 2 cycle outboard that, when not in use, is stored, prop end in first, in a 4 foot long, 12” diameter, heavy wall plastic drainage pipe located under the bridge deck/cockpit and fastened to the starboard side quarter berth locker wall. The mounting screws on the motor can clamp the head to the pipe but this is not necessary as I use a heavy shock cord which is all I need.. Coupled with the companionway step system we have – discussed later – this storage system has been very satisfactory. Click here to see a more detailed discussion of the motor storage, companionway steps, bridgedeck lockers, electric panel and cooler which are all in this same area.
The motor, which I also use as a dinghy motor when cruising, weighs 32 lbs and with its Power Prop drives the boat at 4.7 knots, no headwind and flat water. This meets the Off Soundings Club rule that the auxiliary power be capable of driving the boat at 80% of hull speed in these conditions – it does, just. A 3 gal tank I use for racing runs for 5 hours at full throttle. Subject to conditions I use 20 nm as the planning range. I have two 3 gallon and two 6 gallon plastic tanks. When cruising I usually carry a 3 gallon and a 6 gallon tank that store on either side of the transom locker. The 3 gallon tank is easy to move into the dinghy. Click here for a larger view and more on the transom locker and hatch, engine mount and plug.
I could have bought a long shaft motor, and sometimes I wish I had, but since I planned to use the motor as a dinghy motor as well, another compromise had to be made. (There have been subsequent developments in Marionette's motor program - click here to go there) I can reverse if I have to by twisting the motor but I, and my back, have never regretted not purchasing a motor with a reverse gear – an extra 33 lbs! I have many times wished I had an inboard, and many times have been glad I don’t have one. I raced Atlantics for nearly 20 years – they are Starling Burgess designed classic 30 footers and don’t have any auxiliary power. (For more on Atlantics click here) I am comfortable with sailing in and out of slips – guests and observers are often less enthusiastic. Anyway, Marionette made the decision for me – she did not have an inboard. A brand new light diesel installed is the cost of a 2 week vacation in Provence where the red ocher cliffs are – more on this later.
I have an Autopilot ST1000+ (above left) that mounts on a pin that fits to an almost flush mounting pad in the starboard seat and connects to the tiller via a custom bracket (click for a close up view and more info of this system). Otto is a great crew, a best friend, works well, is reliable and does not drink my beer. He gets his juice from a 12 volt outlet in back of the bridge deck. I have been known to inadvertently kick the cord out of its socket but nothing is perfect. The location of the outlet facilitates use of the 12 volt spotlight - that I never use. I also have a portable spotlight - that I rarely use. The control line for the centerboard winch exits at the back of the bridge deck (above right), through a cam cleat with the excess line stored over a winch handle holder mounted right next to it.
To the right of the cam cleat is a 12 volt power outlet, and to right of it is a socket for a wired remote control for the Autopilot. I don't think wireless was available when I bought the unit - I wish I had wireless. Anyway, its really cool to to sit on the shady side of the cabin top and fine tune the helm - " a little low, up a little, nope, too much...." with no complaints from the helmsman
|
The jib sheets are led from the winches to cam cleats mounted on the inside edge of the cockpit seats making tacking and sheet adjustments for a single hander, or even when racing with crew, very easy.
The bronze winches, as nice as they were, weigh a ton and were replaced with Lewmar #8s. I bought these new at a Defender’s back room sale for $75 - the pair! Sometimes I wish I had the next larger size, self tailing, and double speed, but when I think this I remember that I should have already changed to a smaller jib!
Besides, $75 the pair!!
|
|
|
The spinnaker twing lines, when set up, lead from small Harken blocks that shackle to rope eyes tied to the bottom of the upper shroud turnbuckle, then to a deck mounted block in front of the winch pads, then to a cam cleat mounted near the top of the outside edge of the combing. Not perfect but I did not want a pass-through hole on the bottom edge of the combing. Click here for a picture
|
Large Harken spinnaker turning blocks are mounted on pads near the transom corners and genoa turning blocks further forward. Sliding Garhauer SS track blocks mount on the bronze toe rail outboard track. Unfortunately this track does not run past the forward edge of the combing. so when reaching with a genoa the lead cannot be moved forward past this spot. Someday I’ll fix this. For more on jib/genoa tracks, click here. And for more on spinnaker set up and rigging, click here.
|
The mast has 2 turning blocks at the bottom of the mast. The main halyard and jib halyards can be led through these blocks to cam cleats mounted at the back edge of the cabin top. When racing with crew we use this set up for the spinnaker halyard and topping lifts. Webmaster Note: This subject of running rigging for a Dolphin spinnaker was brought up on the Forum. Click here for a rough sketch and more detail on Marionette's set up.
In this picture the author, John Rousmaniere, as part of the 2004 S&S 75th Anniversary, is inspecting Marionette in the Concours d'Elegance (Best Restored Yacht) competition held at Mystic Seaport, July 10, 2004. Elizabeth Meyer of the International Yacht Restoration School (IYRS), Newport, RI was down below in the forward cabin making copious notes. John was not responsive to a plea from your Webmaster (to be) for a prize category for yachts whose restorations were less than $100K. Webmaster Note: Bolero, having just completed her $4.5 MM restoration, got the top prize
After a thorough inspection of Marionette's single handed set up John came below and had nice things to say about Marionette's traditional interior in white and varnished mahogany trim (see below).
|
Also, I had installed a short inboard track right next to the cabin trunk in line with the shrouds which I think John liked - photo at left. For more on this and jib track generally, click here.
I have a small, heavy cloth, Altantic Class jib (right) that sheets in real tight to a block on this track and is one of my best sails in a breeze – except it is so heavy that I have to roll it to store – a pain in the neck. More on this sail below.
|
|
Speaking of sails I have a ‘newish’ Farrar Sails built, high roach, long batten main, a light 170% and a heavier 140% genoa – the latter a real workhorse, a small working jib – practically useless when trying to point but nice close reaching, the Atlantic jib , a wonderful high pointing sail (see more on this sail below), and 3 spinnakers. The ‘new’ one is a red monster, a dead downwind maxed sail that Farrar also built. In a light breeze it is like an after burner on a Dolphin.
Up forward on the port side (starboard side would be better but that's another story) is a 9’ aluminum spinnaker pole mounted in deck fittings. There is also a set of traditional Danforth bronze deck storage anchor fittings, a bronze deck fitting for the anchor line, and another bronze screw type ventilator for the anchor locker.
|
The forward hatch above the forward ‘cabin’ (maybe this term is a bit ostentatious for a Dolphin, after all it is also the head on my boat) is painted the same color as the deck and has mahogany trim. Mounted in this hatch is a solar/battery powered stainless steel vent that runs continuously. It does not have an on/off switch and the fan hum can be annoying at night. The fix is a ball point pen or anything nearby of the right size, jammed in to stop the fan – this does not seem to harm it in any way. As of July, 2013 its been operating for about 15 years with only 3 rechargeable battery replacements.
|
Deck color – this NOT pink! All this varnish work required the proper background deck color, plus it had to be historically correct. First I removed all the hardware and stanchions, stripped off the dynel, and repaired a few soft spots in the deck. I bonded a thick fiberglass plate under the mast step. Then I sanded, epoxied coated and resanded the decks and cabin top. Then came the paint job. This deck is Red Ochre, patiently researched by the writer at the Blunt Library at Mystic Seaport, based on the red ochre paints the 17th-19th century French boat builders used. This was custom matched and mixed from a high quality Benjamin Moore alkyd enamel base by our local hardware store’s paint dept – as this color is not available at any price from a marine paint supplier – color # 2A23-4 Claret Jug?! Readers of the late Patrick O'Brian's Jack Aubrey series should need not be reminded that, in the wooden boat era, the British Navy always highly regarded a French prize because their ships were so well built, were beautiful to look at, and carried excellent wines….
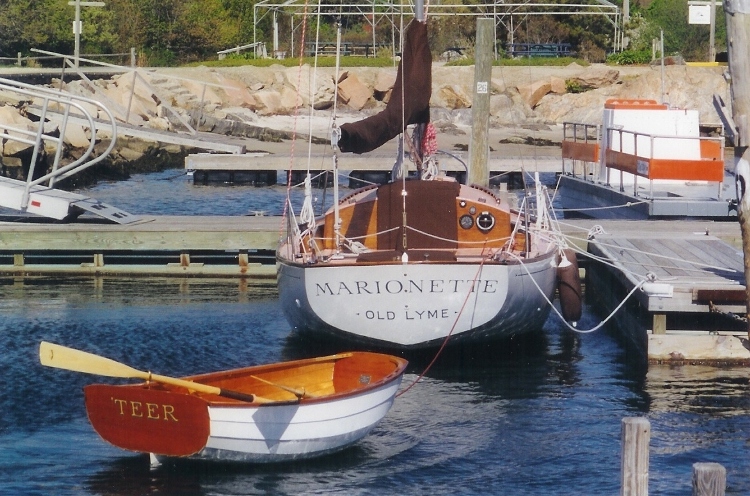
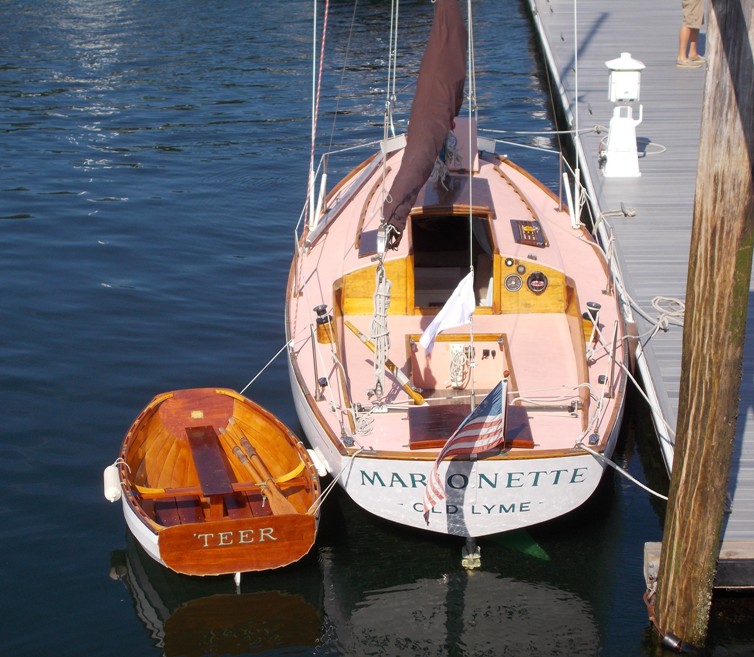
Before I go below I must say a word about dinghies. I have 2, an inflatable, Pup, and 'TEER, who deserve their own pages. Its one thing to restore a boat, another to build one. I built 'TEER. Her picture is worth a thousand words. Click here to find out more.. Pup would feel bad if did not tell you to click here to see her.
Down below, Marionette has a traditional looking main cabin, off white cabin top and hull sides, paneled doors, seats, varnished trunk cabin and trim. The sole plywood is painted burgundy so wine spills don't show.
There is a galley to port (left above) that had, when I got her, a small ‘refrigerator’ below the counter. I removed the refrigerator and replaced it with a single seat. Below and behind this seat are dedicated galley lockers. The seat converts to a shelf for a single burner butane stove at the same counter level as the galley sink forward of it. The sink has a neat bronze hand pump I found in a used marine parts store. It is connected to a 10 gallon flexible tank beneath the port quarter berth. The cushions also help convert the V-berth to a king. Some day I'll get better pictures of the galley set up. August 1, 2009. here they are. Note that the galley sink is covered with a hand made, fitted cutting board...
|
To starboard, there is a small 2 seat settee with a hanging locker forward that I modified to accept shelves – sometimes I wish I kept it as a hanging locker. Please note the blue accents- cockpit throwable cushions that double as back settee cushions here, and the blue denim curtain that separates the two cabins. I modified the settee so it can convert to a small, rather snug, table for 2, or a chart table, or even a table for 4 with its unique leaf system. This picture taken from the forward cabin looking aft shows the table. In the foreground to the left is the locker containing shelves that used to be the hanging locker. Click for a larger view of Marionette's Table and lots more details, including the seating for four option - and the entertainment center.
Above the seat backs and galley, on both sides, are shelves with mahogany fiddles. Aft there are 2 quarter berths with lockers below. In the starboard side quarter berth locker is a single Group 31, 105A AGM battery (upgraded to a 135 amp gel cell in 2013)and a mounted, but portable, battery charger. (click here to see this set up in detail) I wired 6 cabin lights back to a panel I installed in the bridgedeck.
|
|
The companionway steps are ingenious - a previous owner built them. They consist of two simple, 1” mahogany boards.The lower board slides into cutouts in the trim pieces on the edges of the quarter berths. The upper board is suspended by large diameter ropes fastened to rings in the bridgedeck bulkhead. It rests against the bulkhead and the pipe through which runs the centerboard uphaul wire, secured by removable pins.
This system is secure, very light, looks good, and is easily removable to access the wide open storage spaces under the bridgedeck and cockpit. Click here for pictures and more on these steps.
The refrigerator was replaced by your basic removable top, small cooler that fits on the port side under the lower companionway step between the quarter berth locker and the centerboard uphaul wire pipe.
When I got Marionette the space below the bridgedeck and behind the first companionway step was totally open except for the centerboard uphaul winch. In this space I built a full width multiple compartment locker with panel doors that houses all the boat’s winch handles and extra blocks on the port side, the up haul winch, and an electrical panel on the starboard side. If I had to do this again – and I may – I would have no electrical panel, just a few fused switches. This is the second panel I put in this less than ideal location below the companionway - susceptible to rain and wave spray.
I use an oil lamp a lot, and what few cabin lights I need could be local battery powered LED type lights.
More on this in a later technical discussion. Click here for pictures of both the cooler and panel. |
|
While I had the boat stripped out I took some pictures of the interior joinery that might prove useful for people restoring hi bred Dolphins - wood decks, cabin and cockpit on a fiberglass hull. Click here to see those pictures.
There is a large mahogany encased internal arch that supports the mast and that divides the main cabin from the forward cabin. This makes for an open, large cabin feeling in a Dolphin - we are speaking here in relative terms...The V-berth has a standard pump out head under the aft center section which is plumbed directly to a custom built holding tank in the forward vee of the hull under the v-berth. We have legal, lockout plumbing, and a rule that, when racing, this tank is EMPTY. There are fill in boards at the aft end that make the V berth very comfortable for two. The fact that the head is underneath the sleeping accommodations is an occasional complication - but not for a male singlehander....
I built a removable partition with mahogany vent louvers to separate the V-berth from the anchor locker in the peak. There are full length mahogany trimmed shelves on either side, and lockers below the seats on the aft sides of the v-berth. A heavy denim curtain (faded blue jeans type material) that fastens to one side provides for privacy. This is not a universally admired solution to the privacy issue but I like it. For a larger view and more pictures of the forward cabin as the head compartment click here.
|
I finally got around to getting pictures with the cushions in. Solo, I tuck up on the starboard side, without the inserts. To convert to a king size berth two boards stowed on the sides fit into the opening and the 2 cushions from the main cabin port side seat fit perfectly over them. The 2 eyes staring out are the reflective patches on the medical kit which stores neatly in a small gap at the forward end of the cushions.
Its the small things that count. The arcing dolphins hooked hug made by the Admiral fits neatly in the v berth cutout space, and one's toes, upon leaving their toasty warm spot in the sleeping bag, are not discomforted by a cold damp wood sole. The card received with the tin of homemade chocolate chip cookies made a colorful reminder of what sailing is all about.
|
|
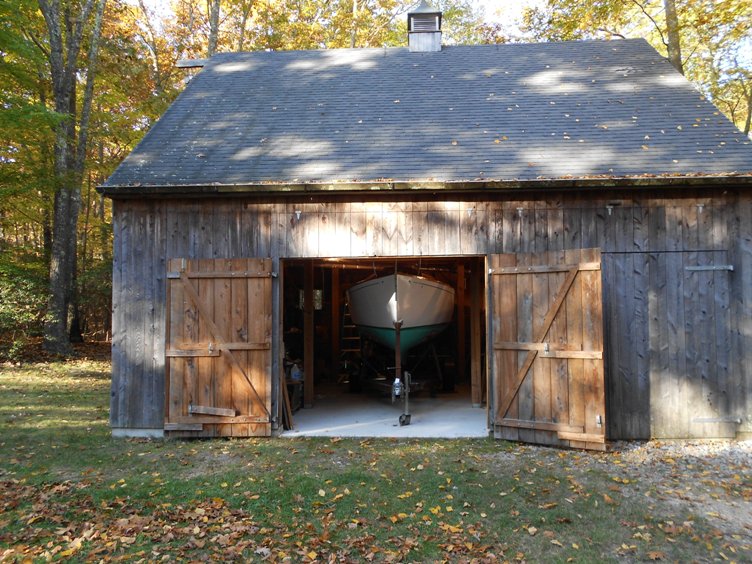
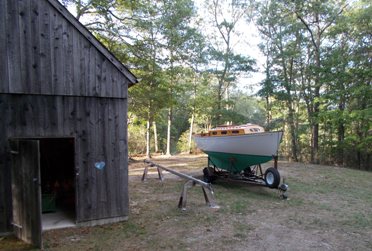
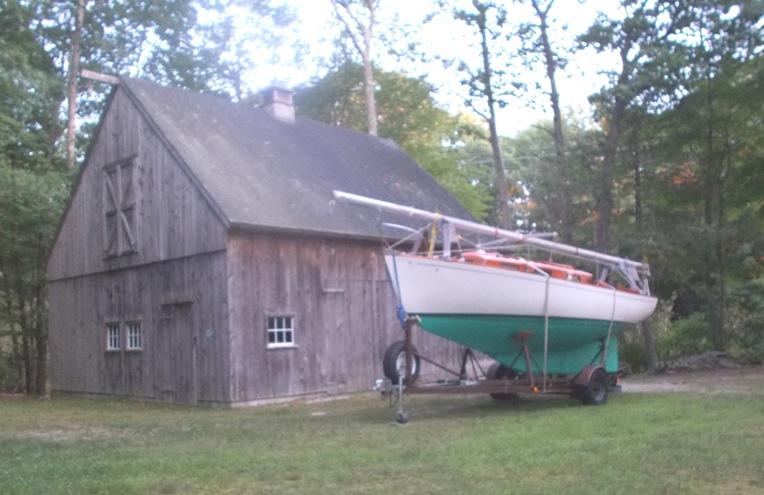
Inevitably, a proper post and beam barn, with a 2nd floor wood shop and a small loft above that, was designed and built. She is on a poured foundation. These are the primary set of doors making up a 10'x10' opening for a Dolphin. Note the 3 door system.To the left is an 8' x 8' bay which was then occupied by a 51 year old classic wooden runabout very slowly undergoing her 2nd restoration. The third set of double doors out of view, leading out from the second floor, is used for large objects produced in the wood shop behind them - like the afore mentioned most beautiful dinghy. Click here for more Barn. |
The shop is modestly equipped to suit the equally modest skills of the writer, a table saw, band saw, drill press, large work bench, a grinder, a large table for drawings and stuff - and, naturally, a small refrigerator!
There is a link at left to the Barn, and from there you can link to the shop tools, or you can go to them directly by clicking here. The windvane above it all, is, of course, a copper sailboat.
|
|
|
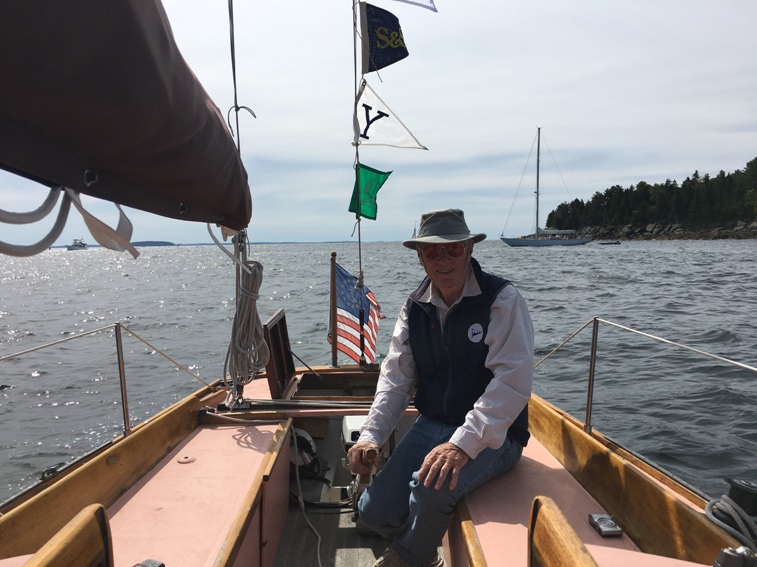
I would be remiss not to mention Marionette's racing success . She is still competitive especially in the conditions we like - 5/10 knots and lots of upwind and dead downwind legs - and with my kids aboard as crew. She won her Class in both races in the 2008 Off Soundings Club's Spring Series out to and around Block Island off the shores of Rhode Island. And, she had the best corrected time in the entire 132 boat fleet for the Around the Island Race! Proof? . Click here |
Here she is in one of her her favorite racing positions, leading bigger boats to the mark. Note the reef.
Another favorite position is dead down wind, astern of bigger boats in a light breeze. Jibing on subtle shifts we can work her up and past grumbling skippers rechecking their trim, peering over the side for kelp on the keel, etc. Click for larger image
|
|
|
In this recently re-discovered photo, taken at the Off Soundings Club Spring Block Island regatta in 2005, Marionette is in 'Dolphin Country' - in close to a shoal rocky shore with a good breeze. The water is flat in here - outside where the big boats are there's a mean 2-3' chop that Dolphins really don't like! She is moving fast, traveller is down, shorthanded as usual, and she's wearing her Atlantic jib. A friend, who raced on both Atlantics and Dolphins back in the '60s, told me that they used an Atlantic jib in strong breezes on the Dolphin and it worked really well. This is an old jib from our Atlantic, Relish A-91, a heavyweight cloth sail, about 7/8ths height on the forestay, with short battens. The sheets lead to a short track inside the shrouds right next to the cabin trunk. |
In this photo she is in cruising mode somewhere - maybe Hadley's Harbor in the Elizabethian Islands near Woods Hole. The swim ladder moves around but when placed in line with the shrouds you can pull yourself up hand over hand on the lower part of the upper shroud, thus keeping the water out of the cockpit. More on ladders? Click here.
Then a rinse off with solar powered warm fresh water from the black shower bag hanging off the mast, and after toweling off, you walk back all warm and tingly, to pick up your waiting, nicely iced Vodka and Tonic. Nez Pas? Click for larger image.
|
.*********************
In 2008, Marionette again sailed to Maine - parts of this cruise are covered in a couple of stories in the Stories Section. Click here for a story about a repair job that lasted the whole summer, and click here for a story about a meeting with Rod Johnstone and Ragtime. Below is one of my favorite pictures of her, taken of her on this cruise, and currently my moniter background - a foggy morning at Rockport on the tip of Cape Ann, Massachusetts.
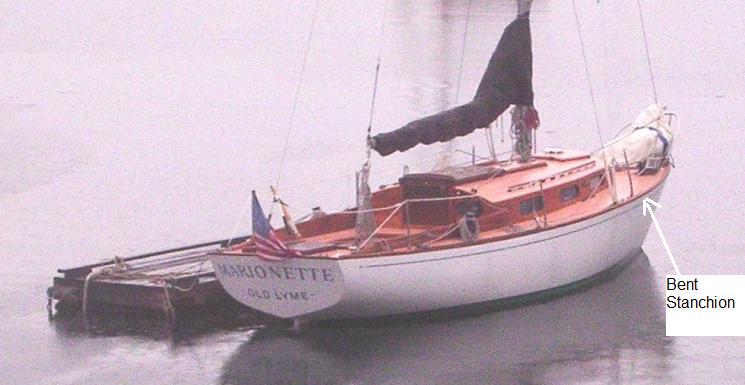
This picture, and bent stanchion, resulted in a repair project - click here to go there
Someday, I'll collect the notes and photos of this 2008 cruise and have a proper story.
**********************************************
|
June 17, 2010 Marionette raced and won her Class again in the 2010 Off Soundings Club Spring Series - a 2 race series - race 1 from Watch Hill, Rhode Island out to Block island, and next day, race 2, around Block Island.
Race 1 was a drifter, a long day with no one in our Class finishing within the 7 hour time limit so the race was abandoned - probably good for us since we were not having a great race. But, at the party, we did not lose the opportunity of accusing our faster boat competitors of luffing up at the finish line to let the time run out as they were justifiably concerned that with the time-on-time scoring our handicap advantage would crush them!
Race 2 on the 2nd day was the traditional Around the Island Race - a 20 mile counterclockwise course in 10-15 knots, going to 18 knots on the last weather leg, bright sunny skies - a glorious Block Island racing day for the 121 boat fleet.
Marionette won her Class by 7 minutes on corrected time, 9 boats including 2 Pearson 30s, 2 Pearson 31s, a C&C 30, a Beneteau 30, a Ranger 26 and a Holland CTM 1/2 ton.
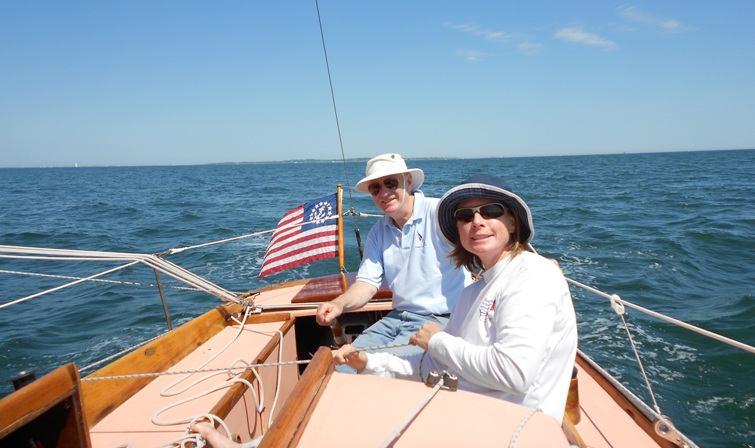
In the stronger puffs we had downwind surfing conditions on the backside of the island, nearly broaching on one occasion. We were racing with a crew of 3, your webmaster as movable ballast, pole jiber and worried navigator/parent, helmsperson daughter Nicole, and the main, jib, spinnaker trimmer, big brother, tactician, and all else that needs to be done, son Mike - a better 2 of 3 crew is hard to imagine. |
|
Postscript June 19, 2010 Thanks to Dick Morris crewing on Spirit, Norm Peck's Morgan 36 passing us offshore, here is Marionette under her big spinnaker in close to the bluffs on the south side of Block where bigger boats fear to go - Mike trimming, Nicole helming, your webmaster ballasting and looking for rocks...
Racing short handed in a breeze on Marionette is always exciting. Since we have hank on sails (in the spirit of tradition), choice of starting jibs is important as we do not want to change jibs unless critically necessary. The wind was pretty light so we started with a 170 jib, and used our big red spinnaker. On the last weather leg the wind got up to maybe 18, way too much for that jib - perfect for our 140 in the bag below. The 170 jib has a couple of tack grommets, the highest one maybe 12 inches up the luff so we were able to reduce luff length and sail area some, and we had a single reef in the main. Still overpowered but manageable enough to finish - and win! |
At the party after the race a number of guys who had owned or raced on Dolphins in the past came over to congratulate - a Dolphin moment!
|
Leaving Block on Sunday, a rainy, foggy day, we lost the water pump on the 4 hp Johnson to what appeared to be a plastic bag sucked into the intake! Naturally, no spare on board. After a couple of hours and the help of the expert mechanics from Class C-6 competitor Tigger, Too, we decided the only thing to do was put Marionette on a mooring, and take the ferry, with motor in hand, get her fixed back on the mainland, and come back later in the week to get her.
This story is not yet finished. The water pump is fixed and the motor is running superbly - but leaking water like a lawn spinkler. Seems like the relative gaskets got fried when the motor overheated. These are special order items from some place in the Midwest so daughter Nicole and I have borrowed an outboard and are taking the ferry back out to Block Island tomorrow and sailing Marionette back to Niantic Bay YC in Connecticut - about 6 hours as the tide is serving.... Stay tuned.
|
***************
|
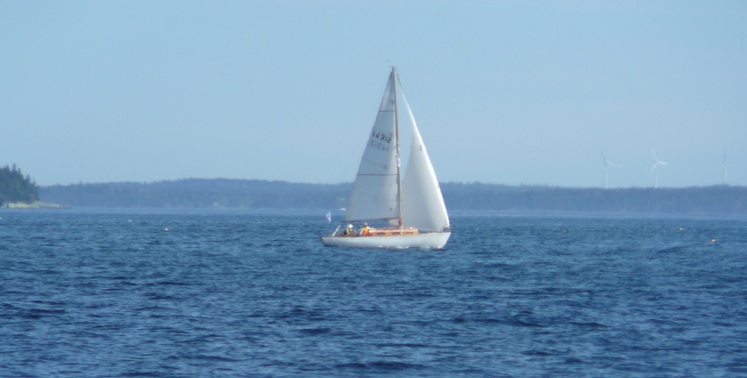
June 18, 2010. A glorious 6 hour sail from Block Island to Niantic Bay. The picture at left is the Race Rock lighthouse off the southwest shore of Fishers Island guarding the entrance to Long Island Sound.. Interesting development. The borrowed motor was a (60lb) 2.5 hp Yamaha 4 stroke. It pushed Marionette at 5 knots! in flat water. The best my Johnson 4 hp can do is 4.7 knots, same conditions. The engineer owner of the Yamaha told me that 4 stroke motors deliver relatively more torque to the prop than 2 strokes. This needs further investigation....
Postscript. The special order gaskets needed to repair the Johnson 4 hp took nearly 2 weeks to get, effectively closing the 'cruise to Maine" June 22 - July 1 window. Some thought was given to trailering her up but not having a tow vehicle meant an $800 fee plus costs to derig, haul, then rerig and relaunch - maybe $1500+? Decided to wait until next year... |
July 29, 2010 - Check out Marionette's Cruise to Newport in the stories Section.
*********************
July 11, 2011. Well, it's a year later and Marionette is finally back in Maine. That ongoing story is covered in the Stories Section, Marionette's Log, Summer, 2011 - click here to go there. This update has to do with the motor issue. We now have a back up. A nearly identical motor, but with a 5" deeper shaft, was found for $25 at a local marine education facility. It had been donated to them along with a 22' sailboat. The motor was stored indoors and, while appearing almost brand new, was not running. I got it for $25, and spent $400 rebuilding it at the shop that has taken care of my present 15 year old Johnson 4hp. Their comment on seeing the motor for the first time was that it looked almost new. The 'new' engine with its deeper shaft adds 3 lbs in weight (35lbs), but it should provide better top speed performance. We'll see.
After a few weeks waiting for parts and inspecting and cleaning the guts, replacing all the gaskets, the throttle control, water pump, etc. I am told its like a new motor. Field trials are scheduled in Maine and a report will be forthcoming. Stay tuned.
Note the shaft extension
August 8, 2011. I'm sure many have been waiting for news of field trials on the above motor - and this report is overdue. Basically, trials were successful. The "new" motor drives Marionette at least 1/2 knot faster than the original motor! And there have been additional developments including the acquisition of a 3rd motor. Click here to go to Marionette's motor page. September 28, 2012 update - new sea trials indicate that this longer shaft motor drives Marionette nearly 1 full knot faster than the short shaft. Details are covered on the Motor Page.
****************************
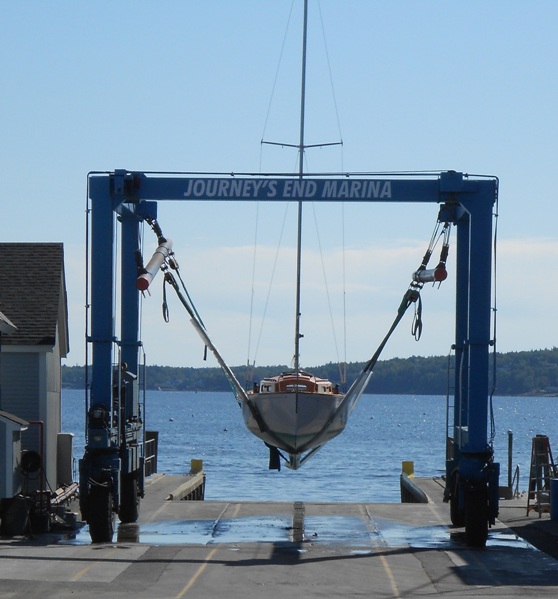
September 19, 2011. Marionette, ready to be hauled at the end of her shortened 2011 Summer Cruise. Flawless work, again, by the yard crew at Journey's End Marina in Rockland, Maine. That story was covered in the Stories Section, Marionette's Log, Summer, 2011 - click here to go there.
gotta like this shot....
*********************************************************
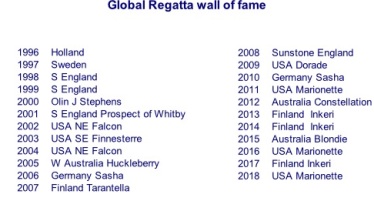
April 10, 2012. The winners of the 2009, 2010 and 2011 Sparkman & Stephen's Association Global Challenge Trophy were announced. Marionette was named winner of the 2010 Trophy for her win in the Off Soundings Club Around Block Island Race held in June, 2010. In 2009, Marionette finished 2nd (to Dorade!) in this international competition.
Normally, winners of this trophy are announced at the S&S Association Annual General Meeting (AGM) in the year following the year raced. The Trophy (see picture at left) will be engraved with the winner's names and presented at the Association's 2012 AGM in Dyvig, Denmark, May 10-13.
For more on this Trophy click here.
|
.
Here is a List of Winners Since the Trophy's Inauguration in 1996
1996 Holland
1997 Sweden
1998 S England
1999 S England
2000 Olin J Stephens
2001 S England Prospect of Whitby
2002 USA NE Falcon
2003 USA SE Finnesterre
2004 USA NE Falcon
2005 W Australia Huckleberry
2006 Germany Sasha
2007 Finland Tarantelle ll
2008 Sunstone England
2009 USA Dorade
2010 Germany Sasha
2011 USA Marionette
2012 Australia Constellation |
Website: http://www.sparkmanstephensuk.info/ss_association_trophys.html.
|
**********************************************************
November 12, 2011. Another Internet ether search of the Jim Huxford Dolphin 24 website found the following 1999 post
Subject: Dolphin registry - Marionette, Hull #12
Date: Wed, 13 Oct 1999 17:00:55 EDT
From: Ronbreault@cs.com
To: jhuxford@apci.net
Jim
What do I have to do to join the 'Association' ? My son just bought 'Passage' O'Day Hull Number 10.
Ron
****************************************
April 16, 2012. Today's expected high temperature, 87 degrees. Gone sailin'? Nope, paintin'...
*******************************************
|
|
June 12, 2012. Marionette won her class again in this year's Off Sounding Club Spring Series. This was a light air event - which are a Dolphin's favorite conditions. The regatta had a great turnout - 138 boats in 12 classes.
Click here for a full report. |
October 1, 2012. It's been a quiet summer - after racing in June we had a little bit of day sailing, nothing exciting, no more racing, no Maine cruises..... but Marionette decided to close out her 2012 season on a high note.
Click for details
|
****************************************
February 13, 2013. A lifeline stanchion replacement project is completed and detailed in the Technical Section. Click here to go there.
********************************
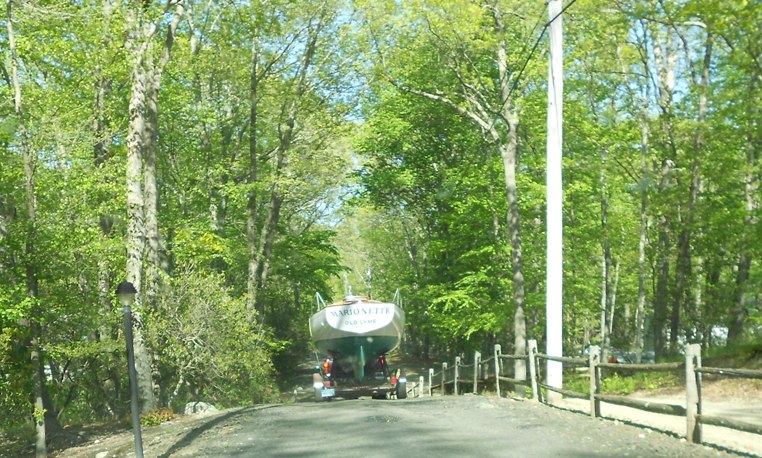
June 3, 2013. Ok, its a new season for Marionette with lots of probably overly amibitious plans. The feature will be a delivery/cruise up the New England coast to Maine in late July, day sailing in August based at Bass Harbor on Mt Desert Island in Maine, some short 2-3 day Fall cruises in and around Penobscot Bay, and a decision yet to be made about keeping her up there over the winter for a full season in Maine in 2014. It all has to start somewhere. Here is Marionette's start a couple of weeks ago - her first trip this season.
Stay tuned
Somebody has to do it!!
|
July 4th, 2013. There is good reason to celebrate ....
Marionette was unofficial greeter to famous Mystic Seaport schooner Brilliant overnighting in Niantic Bay.

|
*************************************
July 9, 2013. The broken centerboard winch functionally, if not yet cosmetically restored, (see story here http://www.dolphin24.org/technical_cb%20winch.html) Marionette left Niantic Bay July 8 for a short, 10 mile mini shake down overnighter at West Harbor, Fishers Island, New York. Nice morning breeze, 10-15 knots, broad reach, arrived Fishers Is Yacht Club docks at 11.
Peggy Benkard's, Sloop du Jour, Marscot/O'Day #21 on her mooring off Marionette's port quarter
|
After lunch (this time I bought!) Peggy and I conducted an extensive review of various Dolphin matters at the Fishers Island Library, making good use of their large screen computer monitor.
One tidbit surfacing on this trip was the discovery that Porpoise, another Marscot/O'Day Dolphin 24, based summers at Fishers Island but whose home port was Peach Blossom Creek in the Chesapeake Bay area, won the Around Fishers Island Race (year still to be determined)
|

Leaving Fishers Island the next morning - again in the fog
August 3, 2013. Well, the Maine cruise is off and the operative phrase is "wait 'til next year". A quick overnighter across Long Island Sound to Greenport and Shelter Island, while not exactly a 9 day cruise to Maine, helped ease the pain.
Click here for the (photo) story
**************************************************
August 28, 2013. The Sept/Oct 2013 issue of Good Old Boat Magazine has an article on pages 30/31 titled "Readers Answer our Photo Call". This was a call to readers to submit action shots to be considered for their cover. Your webmaster, of course, answered the call and submitted the following photo which appears as #3 in the article. The occasion is returning from Block Island (on the horizon) and the Off Soundings Club's Spring Series in 2012 - in which Marionette won her class (Click here to go there)
Caption from Good Old Boat Magazine. "Ron Breault's Dolphin 24 heads home from Block island, Rhode Island, with Ron and his daughter Nicole who trims the spinnaker" (photo by son Mike)
***************************************
Sept 8, 2013. The pressure on a webmaster to keep a log is relentless. Even the short trips can hold interesting stuff especially if you keep a camera in the cockpit, and a picture is worth 1000 words.. Click here for 2 day log on Marionette's short round trip trip from Niantic to Stonington, Connecticut at the east end of Fisher's Island Sound.
****************************
September 11, 2013. We put up a short story tied to Dolphin 24 model building. Click here to go there.
********************************
October 22, 2013. Its that time of year - Fall in New England. Click on each picture below for a larger view, click your browser back arrow to get back here
|
|
Going to get her |
Backing in at the Cove Landing Boat Yard |
Colors not quite at peak yet - hauling too early?
|
|
bottom's not too bad, considering... |
Next, the Concordia yawl |
Hauling out time at this boatyard on a beautiful New England Fall day can be inspirational, and humbling....click here to see that beauty off the Concordia's port quarter
|
|
Going home |
mast got there first |
Safe Harbor
Now, list making begins, not yet in priority order - sand and paint topsides; paint bottom; permanent repair for centerboard winch locker; replace automatic bilge pump?; new depth sounder?: paint decks; sand and varnish toe rail, coamings, house, hatches, trim; clean up and paint transom well; reinforce top companionway step; refurbish spinnaker pole; wood frames for portlights?........
********************************
July 3, 2014. Given the number of sister ship updates received so far this Spring it seemed in order to have your webmaster provide a Marionette update. She is not yet in the water - she is undergoing a 'major' refit in the barn based on the partial list appearing above. We have taken a one year 'sabbatical leave' on her slip for this season at Niantic Bay YC. 'The Plan', this year, is to trailer her up to Maine in late July for an August/September season there.
1) Her fiberglass surfaces inside have had a fresh coat of paint; 2) her portlights inside have had, at last, a trim ring painted; 3) the centerboard winch locker is almost finished - top companionway step reinforced; 4) the transom well inside has been painted; 5) the toe rails have been sanded and varnished/2 coats; 6) the topsides have been chip filled (3M Acryllic white putty), sanded, undercoated, and 2 finish coats applied (Brightsides White) Note: The 10 foot test was passed, and, there was a close call to report - 2 different $7000 quotes for stripping and Awlgripping Marionette's topsides were successfully filed away in the drawer.....
Still ahead 1) tape/paint the cove stripe and the boot stripe. Note: The transom got a pass this year - minor touch up only 2) repair paint chips and paint cracks in deck, repaint deck; 3) varnish coamings, house, wash boards and hatches; 4) touch up varnish down below; 5) Flitz polish the outside of the portlights 6) one fresh coat of bottom paint; 7) wash and paint trailer 8) reinstall stanchions and lifelines 9) wash mast and grease standing rigging 10) get trailer serviced/brakes checked, etc 11) check out/run 2 motors 12) load Marionette with her sails, running rigging, anchors and rodes, cruising gear, 2 4hp motors, dinghy, etc., etc., etc
Photos to follow, promise....
*************************************
July 11, 2014. (some) photos, as promised, plus an update. Webmaster Note: 8 days to wait for photos might seem like a long time but some of you guys make us wait for years!
|
Marionette makes me keep a little black book in which my chores are listed and checked off when done. Still more unchecked than checked. She is out of the barn so I was able to wash her and the trailer and she would let me take her picture.
A side note: If I had hired myself as an worker the EPA would have closed the barn down for exposing my worker to an unsafe workplace sanding dust and paint/paint thinner fumes....
The picture below left is taken at the proper reasonable distance so as to be sure and pass any painting examination by those dubious of my hand brushed finish. An exception is the close up of the O D - not as nice as Bill Thomas' Ruby but then he's a pro.
Click on the photos for a larger view
|
|
If not familiar with the O D story, click here and go to bottom of the page |
**************************************
August 10, 2014. Its been nearly a month - the work was mostly done, enough to get Marionette up to Rockland, Maine launch her and start her Summer log, 2014. Click here to go there
********************************
October 9, 2014. Marionette was delivered from Blue Hill to Bucks Harbor, Maine on August 28 by Senior DFI Nicole Breault and husband Bruce Stone. This delivery is captured in the Stories Section - click here to go there. They had strong breezes on Eggemoggin Reach and while tacking back and forth near the top end of the Reach they attacted the attention of famed Calendar of Wooden Boats photographer Benjamin Mendolwitz who sent us the following picture.
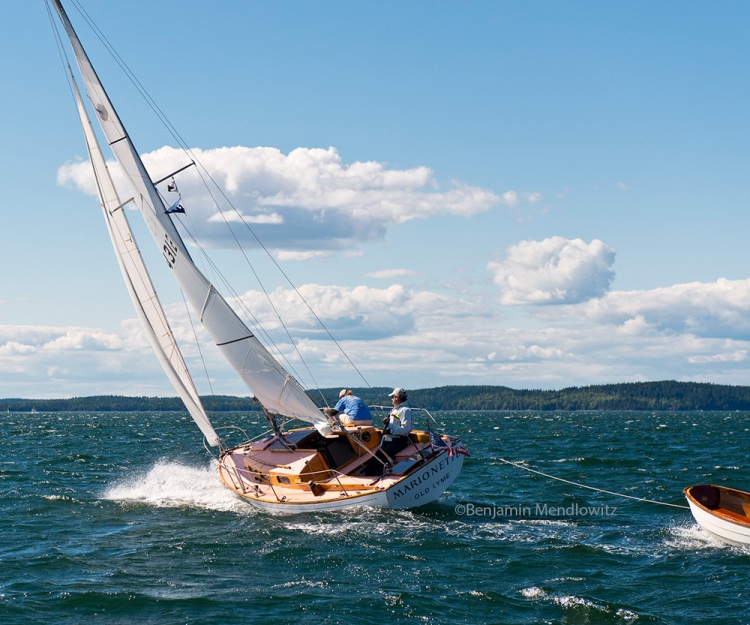
Click here for a larger view
*****************************************************
May 2, 2015.Hard winter here in New England. But finally, we are getting ready...
OK, what's with the bottom paint job? I had about 1/2 quart left from last year. Bottom was in pretty good shape after a fairly short season last year up in Maine's 'cold' waters, so I just painted the waterline, rudder and keel joint. Micron CSC Ablative is $200/gal and an executive decision was made. A few days in the water and no one can tell - will have to take a little abuse launching her but....
**********************************
May 7, 2015. Launched, Marionette's 55th year - and she got a 'pretty boat' from Paul, the yard manager. Click here for a short pictorial in the Stories Section (updated May 15, 2015).
**************************
June 15, 2015. Marionette wins her class, again, at the Off Soundings Club Spring Regatta, Block Island, Rhode Island. Click here to see the report in the Stories Section.
|
|
This mug is heavy when filled with beer |
The OSC Commodore congratulates |
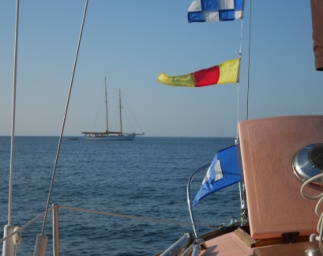
Marionette at Paynes Dock, Block Island, flying her battle flag, and her Class flag (A)
******************************************
June 18, 2015 The Sparkman and Stephans Association picked up "Marionette's Delivery" story (August 2014) and ran it in a 6 page story in their 2015 yearbook. We were in nice company - there were several stories about member boats, including one about Dorade. You can see Marionette's story as it appeared in the Stories Section on this website by clicking here
Click on the photos for a larger view

Click on the photo for a larger view
********************************************************
July 27, 2015. A couple of days ago, we received the S&S Association invitation for submissions for the 2015 season Global Challenge Cup trophy to be awarded in 2016. Marionette would feel bad if we did not submit her Off Sounding Spring Series results. So we did - stay tuned - the winner will be announced early next year. Click here to see the submission.
*******************************
April 14, 2016. We received the following email announcing Marionette as the winner of the 2016 Challenge Cup award. Here is the link to their website page covering this announcement. http://www.sparkmanstephensuk.info/page100.html. Regular readers of this page know that this is the second time Marionette has won this award. Click here to go to check out the Global Regatta and Marionette's results over the past few years.
Subject: Global Regatta results for 2016
Dear racers,
The final results for the Global Regatta 2016, based on races sailed in 2015, are now ready.
1. Ron Breault in Marionette
2. Michiel de van der Schueren in America Jane Ii
3. Michiel de van der Schueren in America Jane II
4. Lukas B. Venema in Mallard
The presentation of the Challenge Cup will take place at the AGM in Lagos Portugal, May 22-22. It would be a pleasure if you all could be there.
The announcement to the membership will be later this week, but I wanted you to know before the publication.
It is a strong motivation and source of pride to see the S&S yachts still going strong. I thank you for your commitment and great example to us all.
Regards
Steen Riisberg
Webmaster S&S Association UK & Ireland
*******************************
May 25, 2016. Below is a copy of the announcement that appeared in the 2016 S&S Association yearbook regarding the above award. Click on the image for a larger view
This article refers to another article later in the yearbook submitted about Marionette. Click here to go to it.
**************************************
June 7, 2016. This great photo of Marionette racing at Block Island in the 2015 OSC Spring Series appears on http://dolphin24.org/marionette_osc_spring_series.html, and deserves to be here on her home page as well.
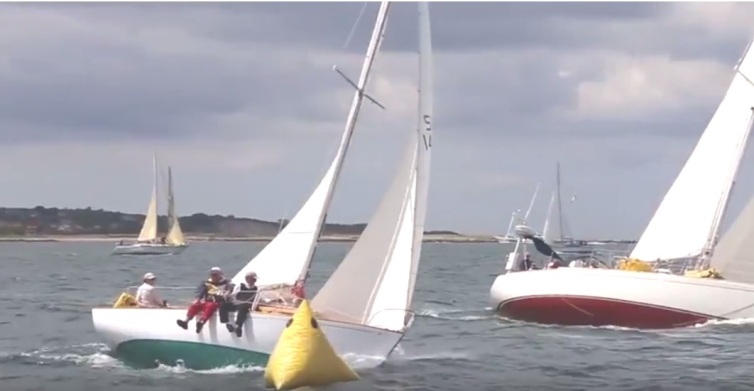
Photo taken from the 'Rock the Block" video, Marionette winning the pin at the start of Race 2
***************************************
July 15, 2016. Enough already with Marionette's 2015 doings - the 2016 season is here, admittedly a bit of a late start, but she is now in Maine and her 'log' is is process. In a couple of days we'll have a link to the beginning of that log but for now we have a couple of photos to put here. Webmaster Note July 17, 2016 - Click here to go to Marionette's Log, Summer, 2016.

Marionette and 'TEER ready for their 5 hour trip to Maine - click here for a larger image

Foreground - Marionette at Merchants Landing, Spruce Head Island, Maine - far background Camden Hills - click here for larger image
Stay Tuned - the 2016 log will fill in the gaps
********************************************
September 26, 2016 Faithful readers of Marionette's log know she got back from Maine the 1st week in September. Here at right she is waiting to be stripped of all her gear and sails (to be properly cleaned and stored) ; hull and deck washed, mast washed/WD40'd/wrapped and stored; 'TEER moved to the 2nd floor in the barn; Move her into the barn; winterize her - all DONE!.
Now the hard part that should have been done this Spring - scrape, sand and paint the inside hull; sand and paint inside wood surfaces and lockers; sand and paint inside wood trim; paint deck; sand and varnish outside wood; sand and paint the motor well; find out what's wrong with the electrical panel and (fix/replace? the automatic bilge pump; fix delaminating motor well panel cockpit panel; paint/varnish "TEER; refasten sawhorses (getting wobbly) - I could go on.....
|
|
Almost
|
Done (well, not quite)
|
**************************************
February 14, 2017 - The girls, Marionette and Passage, are snug in their barn celebrating Valentine's Day
*****************************
April 30, 2017. Time to get to work. Moved her out of the barn and washed her yesterday. When she's out of the barn she knows we are on a short leash - I can't forget her because I have to drive right by her, and also I get to see her non stop from the house windows.
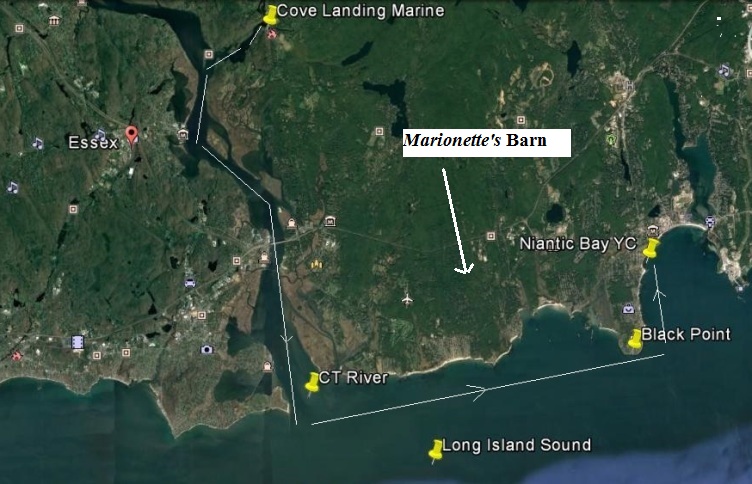
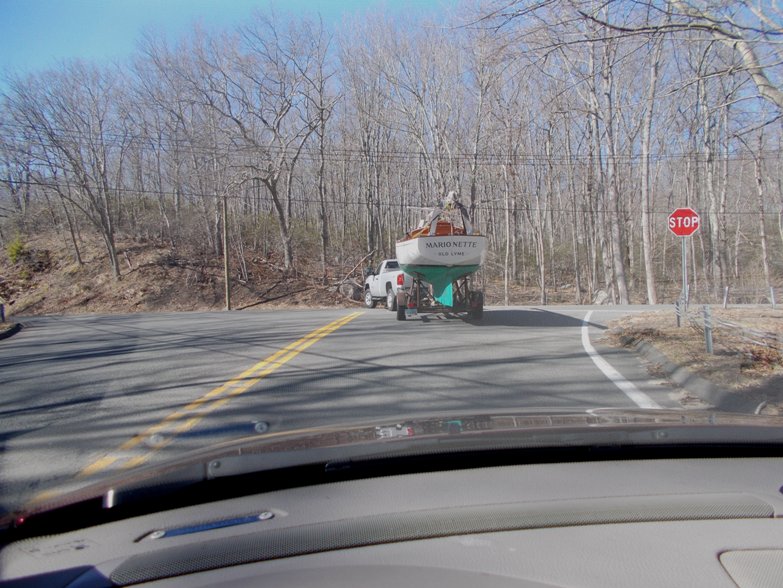
Docks go in at the club on May 13. Plan to deliver the boat and mast on May 14 to the Cove Landing Boat Yard at Hamburg Cove up the CT River, step the mast and launch on May 15 early in the morning, set up sails, lifelines, halyards, sheets (already tired), sail/motor down the river, then east on Long Island Sound to Niantic Bay. High tide at Essex is 3:19PM. Its about about 20 miles, mostly with the current - leave about 2:30/arrive before 7.....
Have 2 weeks to finish painting down below (inside hull already done), touch up painting outside here and there (really needs some major work...) load all her gear, unwrap and clean mast.....maybe replace the battery?! (report coming)
Click here for a larger image |
|
Stay tuned
May 1, 2017 Check out this article in Sailing Scuttlebutt
May 26, 2017. Well, best laid plans of mice and men...... Trailered her the 5+ miles from her barn to Cove Landing Marine in Hamburg Cove on Sunday, May 14 (Yep - Mother's Day...) Got mast stepped and launched on May 18. We had heavy rains, needed a new battery ($278!), had electrical panel problems carried over from last season, replaced burned out Auto Tiller Socket ($47 - Otto was pleased), outboard #1 cover fitting problem (update inTechnical Section), etc., etc..... Finally left Hamburg Cove, Tuesday May 23, at 8:30AM, arrived NBYC at Noon - motor sailing, main only, the whole way.
***********************************************
June 12, 2017. Just back from a 4 day trip from Niantic Bay via Stonington to Block Island and return - the Off Soundings Club Spring Series regatta - 2 races Marionette 'retired' in Race 1, then she won Race 2 - the around Block Island Race. Detailed report posted on Marionette's Log - 2017. Click here to go there. Here's a couple of pictures
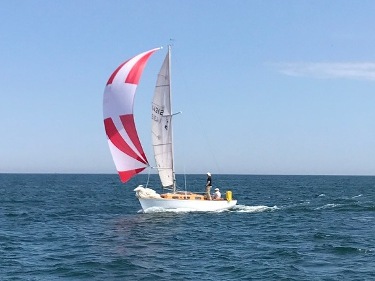
Marionette flying her 'big red monster' racing off Block Island
photo credit Charles Therriault
Ron - I was sailing aboard Brightside (Elan 31S) when we sailed near you on the east side of the island. The boat looks (good) and it was moving well. Hope that you had a good weekend.
|
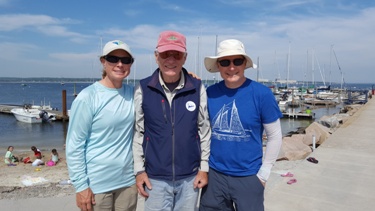
Marionette's crew - Webmaster in center and his 'kids' Nicole and Mike
Photo credit - Diane Rothman
Nice to see you and the "kids" today - Diane
click on either of the photos for a larger image
|
******************************
July 14, 2017 - updates on Marionette's rebuilt trailer and Marionette's Log, 2017
*****************************************
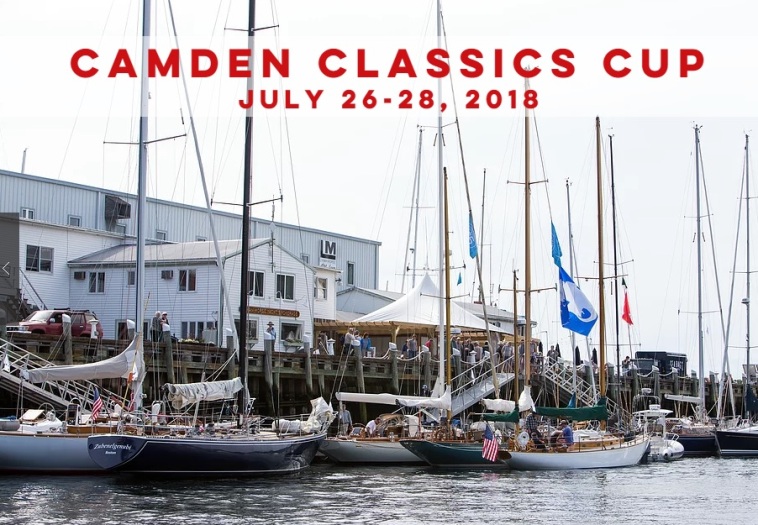
August 7, 2017 - Stu Polhamus (Equinox, Yankee #237) sent in this photo of Marionette taken from the Race Committee boat at the Dolphin 24 NE Championships/Camden Classic Cup
And, Brian Connelly, a crew on Senshin, a Center Harbor 31 (Brian is looking to buy his own Dolphin!) , sent in these 2 photos of Marionette leaving Camden harbor on August 4 for a very foggy trip to Rockport where she was being hauled for her road trip home. Click the photos below for a larger image.
***********************************
A webmaster photo taken at the New England Dolphin 24 Championships
Postscript photo - added November 14, 2017 This photo below appeared in Marionette's Log, 2017, and re-surfaced today in a 'TEER page update. Website staff thought it also should be here on Marionette's page.
August 4 - Marionette and 'TEER in Camden, Maine ready to leave for Rockport
July 21, 2020 Postscript Note: Above photo selected as Cover Photo - The Book, Voyaging with Marionette
******************************************
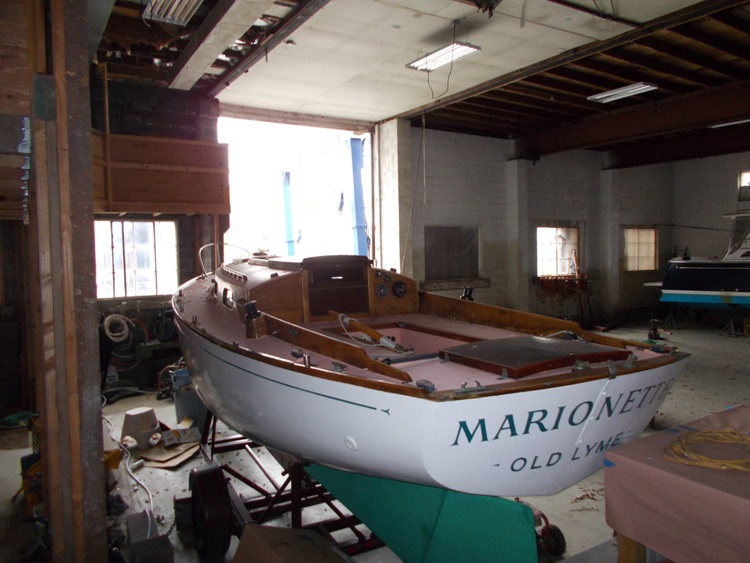
November 5, 2017. All good things must come to an end. The season was too short but the good news is that Marionette is going to get a new dress as a reward for her performance winning the Dolphin 24 New England Championships - details are covered ad nauseum in her 2017 log. A new dress, in her lingo, means professionally redone topsides (sanded down to gelcoat, minor repair touchups and Awlgrip - 2 coats) stripped deck, recoated, and all wood sanded, rewooded as necessary and 7 coats of varnish. Below she's in her shed at Cove Landing Marine - patiently waiting. No rush - we have all winter......
 e e
September 5 - in her shed at Cove Landing Marine - Patience
*************************************
November 5, 2017 - Update, she has been moved from the shed to the shop (right).
and,
her new dress will now also include a lightly sanded bottom and a fresh bottom coat - Hydrocoat SR
Click on the photos for a larger images
|
|
Patience.......
********************************************
January 8, 2018 Sunday afternoon drive up to Hamburg Cove and Cove Landing Marine - cold, ice but at least she is inside. Work on her new dress starting soon
On the right is Hamburg Cove YC's flagpole - quiet day......
************************************
January 15, 2018. Sunday afternoon, beautiful but cold day. Good time for a ride to Cove Landing Marine to check out progress. Work has started! We'll put a couple of photos here and start a new page in the Technical Section called Marionette's New Dress. Click here to go there
Sanding off 25+ years of faded, pitted, chipped, cracked varnish - click the photos for a larger image-
************************************
January 28, 2018. Progress........click the photos for a larger image
|
7 coats of vanish coming....
|
|
|
************************************
February 10, 2018 - Progress report - Marionette's new dress - click here to go there
***********************************
April 6, 2018 Just in over the transom - Marionette wins the 2018 Global Challenge Cup - for the 3rd time!!! Click here for the details.
************************************
May 3, 2018. Marionette's racing plan for 2018 is taking shape.
Entered! Marionette's homeport, party time!! Dolphins welcome!!
Next - the following long weekend - out to and around Block Island
|

File photo - Winning the pin - OFC Spring Series
Click here for a larger image
|
Dolphins Welcome!! http://offsoundings.org/#
Next - July 27-29, Camden, Maine
4 Dolphins entered already - click here to go to our Dolphin24.org website for this regatta
**********************************
May 3, 2018. Check out Good Old Boat magazine's Facebook post https://www.facebook.com/search/top/?q=good%20old%20boat
*****************************************
May 27, 2018. Still some work to do but she's back with her new dress http://dolphin24.org/12_new_dress.html

At her barn getting ready to go to her slip at Niantic Bay YC - click here for a larger image

At Niantic Bay YC
********************************
June 8, 2018. Racing update.....Marionette's 2018 season gets off to a 'slow' start. We got a 4th of 8 at the Early Bird
regatta in Niantic, Connecticut on June 3. A Pearson 26 won, followed by 2 J-24s, and then Marionette. We beat a Tartan 34, a Beanteau 31 and a Pearson 30 DNS - 15-20 knots gusts to 25.....Then, today, we had to cancel our entry this weekend in the Off Soundings Club Spring Series regatta out to Block Island due to a webmaster bad cold!! We were double handing and a 'sick' crew is a safety hazard.....
*************************
July14, 2018 A little late updating this - your webmaster attended a Designer Series (https://designerseries.org/) presentation at the New York YC in Newport, Rhode Island. Their 2018-2019 Honoree is Sparkman & Stephens. Click this link for the story http://dolphin24.or g/designer_series_SS.html. Also, we started up Marionette's Log for 2018 concentrating on her upcoming trip to Maine - click here to go there
*****************
August 12, 2018 - October 18, 2018
Multiple updates on Marionette's Log, 2018
She's back in her barn for the winter
|
|
*****************
December 21, 2018 - Just arrived - in time for Christmas - Marionette's Sparkman & Stephens 2018 Global Challenge Cup keeper trophy - 3rd win 2011, 2016 and 2018. She was 2nd to Dorade in 2009 (http://dolphin24.org/dorade.html)
click here to go to the Challenge Cup page.
|
|
******************************
May 24, 2019. Just received my copy of the S&S Association's 2019 Yearbook. They have an article written by Marionette's buddy. Click here to go there.
**********************
June 6, 2019 Well, its D Day. Marionette was supposed to have been launched and in her slip at her home club, Niantic Bay YC, and this morning on her way eastward on Long Island Sound/Fishers island Sound to Noank, Connecticut for an overnight stay at Ram Island YC, followed by an early morning start tomorrow for Watch Hill, Rhode Island and the start of Race 1 of the Off Soundings Club Spring Series - Nope - the other part of life took priority....
Marionette is in her barn, waiting, but D Day is D Day and other duties take priority. One is replenishig the nearly depleted wine cellar. This is tradionally done at a liquor store across the Connecticut River in the town of Deep River. There are 2 ways to get there - west via Interstate I-95 then north on Route 9, or, when an uplift is needed, by the ferry from Hadlyme to Chester, then a short drive to Deep River.
So, first a short ride to Niantic Bay YC to wish good luck to other, more fortunate members competing in the Off Soundings Club regatta. then back to Marionette's barn to sooth her, then the Rt #1/#156/#82/#148 car ride to the ferry at Hadlyme. A beautiful day on the river., and with historic Gillette Castle watching, I got on the boat and crossed the river. Nice ride. And, I will have enough wine to drown my regattaless sorrows.

My photo of Gillette Castle taken leaving the eastern shore
|
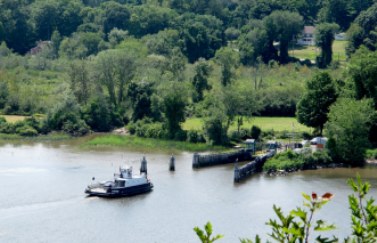
'File' photo of ferry approaching western shore
|
Click on the photos for a larger image
***************************************************************************
July 15, 2019 Getting ready to go to Maine for the Camden Classic Cup/Dolphin 24 NE Championships. First - repair the leading edge of the keel, damaged when sailing in heavy fog from Brooklin, Maine to Camden last October we hit a submerged rock. This is covered in Marionette's log 2018 The Fall repair project did not look right so this was redone
|
Something did not 'gel' right
|
When time permits we'll get a work page up in the Technical Section on materials used. Click on the photos for a larger image
*****************************************
July 25, 2019 - Finally got a start on Marionette's 2019 log. Click here to got there.
********************
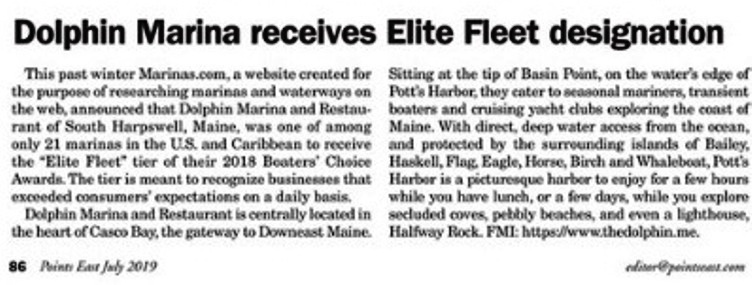
August 6, 2019 Marionette's 2019 Log has the details of her participation in the Camden Classic Cup regatta. Inside the bag of goodies given to each compettor was a copy of Points East Magazine, and on page 86 was an article about the Dolphin Marina and Restaurant in Casco Bay. The marina had received the Boater's Choice 'Elite Fleet' designation, one of only 21 such marinas in the US. The award is given to those businesses that exceed their customers expectations on a daily basis. Besides the obvious connection in their name why did we notice?
Twenty or so years ago son Mike and I left Cape Ann, Massachusetts at about 6:30AM and Marionette enjoyed beautiful sailing conditions up thru the Isle of Shoals and off the Maine coast. We carried our spinnaker for 12 plus hours!!!, accompanied by dolphins in our bow waves and whales along side, all the way into Casco Bay, just past Portland. Weaving our way thru the outer islands we wondered where we would anchor. Coming around an island and with growing concern, we saw this marina - The Dolphin Marina! We had arrived!! It was the most memorable day of sailing ever - and the ending was perfect
The next morning Mike got a cab to take him to the Portland airport for his ride back home and Marionette and I continued 'our voyage' up the coast of Maine.
And, just in over the transom, the obituary of Phil Zarega, the man who built Marionette/Teal - click here to go there.
**********************************
August 18, 2019. This is a Marionette 2019 log photo that deserves to also be on her homepage. It was included in an Allison Langley's video of the 2019 Camden Classic Cup regatta - a really neat shot of Marionette, double reefed with her blade sail set on a pole. Breeze was 14/15 knots, gusts to 18.
Webmaster on the helm, son Mike setting the pole (Note Tilley crew hats)
*****************************
September 29, 2019 The webmaster spent some time this morning looking at photos of a couple of beautiful Dolphins (Tedwin and Feather), and you know who got jealous.
The setting for beautiful photographs is really important and she made me look thru her photos for a good example. Below is a picture taken in August, 2018, Center Harbor, Brooklin, Maine (right - click here for a larger image)
Below - Marionette is on her mooring behind Chatto Island, with the light from Eggemoggin Reach peaking thru the island trees.
|
|

Click here for a larger image - worth the click!
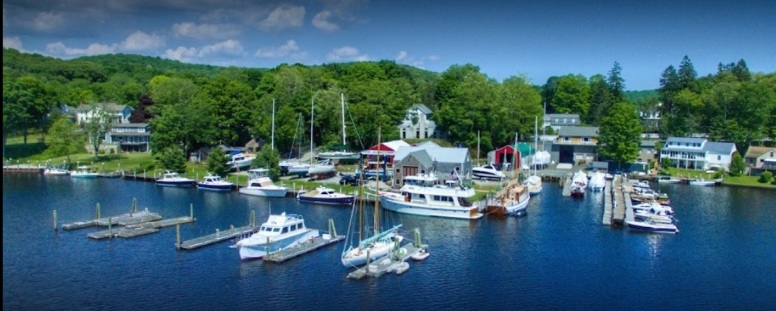
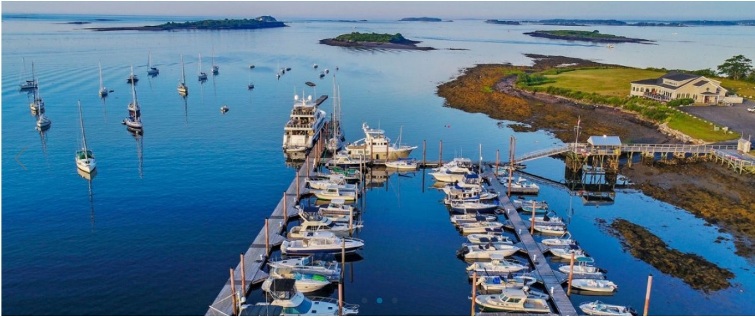
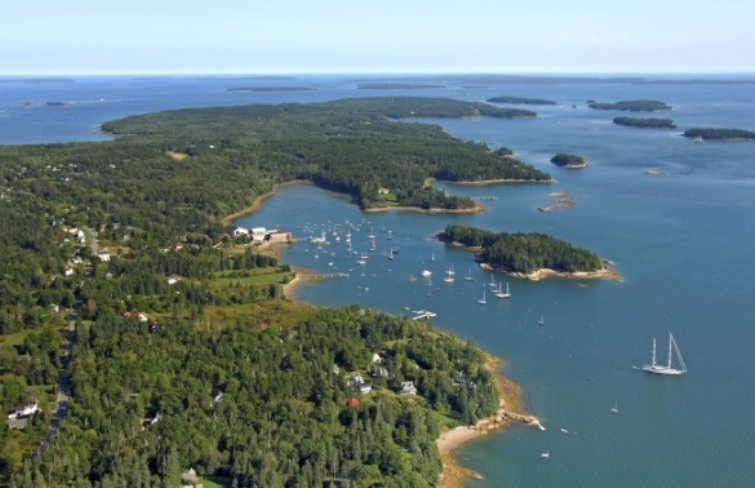
Postscript July 21, 2020. The above picture was used in the Why the Book article just published in the July issue of Windcheck magazine Looking back it seemed that we did not do justice to this beautiful location. Below is an overhead view of Center Harbor and its protecting Chatto Island.
*************************************
January 2, 2020. Its been a quiet Fall and Winter, so far, but there is news. Marionette's partner has been working on a book celebrating their 25 years together. Click here to go there.
******************************
July 21, 2020. Update - Boatwise, quietness has continued into this Spring and Summer, so far. The combination of the Covid 19 pandemic, its impact on webmaster and crew travel, cancellations of Marionette's favorite regattas, (Spring Off Soundings, and the Camden Maine Classic Cup), a threatened rotator cuff operation (thankfully avoided so far), and lots of work finishing up and getting THE BOOK published (http://dolphin24.org/Our_voyage.html ) have together kept Marionette safely quarantined in her barn.....
***************************************
October 18, 2020 - The Sparkman & Stephens Association has posted a Marionette article on their member yachts page and on their social media page.
Click here to go to their member yachts page.
October 24 Postscript - The page has been updated to include a reference to the book publisher, and a link to the Why the Book article.
Click here to go to their member yachts page.
*********************************
December 20, 2020 - We got a foot of snow on the 18th/19th. I finally got around to shovelling and checking on Marionette in the barn - she was happy to see me, thanked me, and asked how the book was going. . .
Click on the above images for a larger image
***************************************************************
February 17, 2021 - click the link below to go to that page.
Marionette and 'TEER have been accepted as entries in the Worldwide Classic Boat Show
Stay tuned
******************************
March 26, 2021 - What a difference a few weeks make - she's out of her barn and I'm working on getting her ready. She told me it was about time!!! and she was looking forward to going to Maine http://dolphin24.org/camccc2021.html
Click on the photos for a larger image
************************************
March 30, 2021 - She's on her way to Cove Landing Boat Yard in Hamburg Cove, Lyme, Connecticut for a little TLC.
Click here for a larger image.
******************************************************
April 29, 2021 - Getting closer

Waiting - repairs on leading edge of keel, bottom paint, topsides cleaned and wax.....
|

Ready for launch |
Click on the photos for a larger image
***********************************
May 1, 2021 Well, she's launched but setting the mast was delayed due to rain forecast and high winds. Stay tuned......
Click on the above photos for a larger image
********************************************
| May 10, 2021 - Working on Marionette in a boat yard like Cove Landing in Hamburg/Lyme Connecticut is stimulating. Here's 3 of our neighbors..... |
|
|
|
Click on the photos for a larger image - and stay tuned
**********************************
May 15, 2021 - 12 Noon May 14 - it was time to go - high tide so current with us going down river and then still with us going east on Long Island Sound. Four hours Hamburg Cove to Niantic Bay YC.

Above - Leaving Hamburg Cove boat yard
Right - CT River Marker
|
|
Ely Ferry House (coffee this morning with Morgan Ely)
|

Amtrak RR bridge - operator expecting us....
|

two lighthouses at mouth of CT River
|

Marionette in her slip at Niantic Bay YC
|
Click on the photos for larger images
Postscript May 16, 2021 - Just in over the transom - a drone shot of Niantic Bay YC confirming Marionette's arrival
************************************************
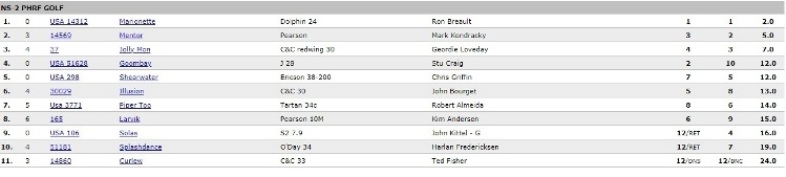
June 13, 2021 - Marionette won both (!!!) races in her class at the 2021 Off Soundings Club Spring Series Regatta and had the best overall corrected time in Race 2 of all 74 competitors. Racing was on 22+ mile courses held in eastern Long Island Sound and Fishers Island Sound. Conditions on Friday, June 11 were 10-12 knots, up to 15+, choppy especially in and near the Race. On Saturday June 12 conditions were light to sometimes no wind, occasional showers.

Stay Tuned
July 22, 2021 - Ready to leave for Camden, Maine and the Camden Classic Cup regatta - departure 5AM tomorrow! Beat the Friday/weekend traffic... Click here for the updated Scratch Sheet
Postscript - Click here for more details and trophies http://dolphin24.org/osc2021.html
***************************
July 25, 2021 - In Camden waiting to get her mast, rafted next to an 80' giant.....
*************************
August 10, 2021 - Some things take a while. Here the Camden report - first, a copy of the race results
Conditions were 'variable' - westerly/north westerly with puffs up to 15 knots. Courses were mostly reaching set up to follow the western shore. This favored gaff rigged boats - ie., the class winner Frolic, a Dark Harbor 17.5 (design right LOA 26.8'/LWL 17.5')
We rec'd a neat email from Frolic's co-skipper, Polly Saltonstall, who was responding to our congratulations and some photos Marionette's crew took.
"Thanks for these great photos. It was fun finally to meet you guys in person. You sailed your boat so well, but those courses really did favor the gaffers. It would have been great if we had had proper windward/leeward legs. Anyway, Marionette is very pretty and fast and you get the gold star for best starts!
All the best
Polly"
|
|
Polly and Frolic's co-skipper John Hanson, Jr are respectively the editor and publisher of the Maine Boats, Homes and Harbors magazine.
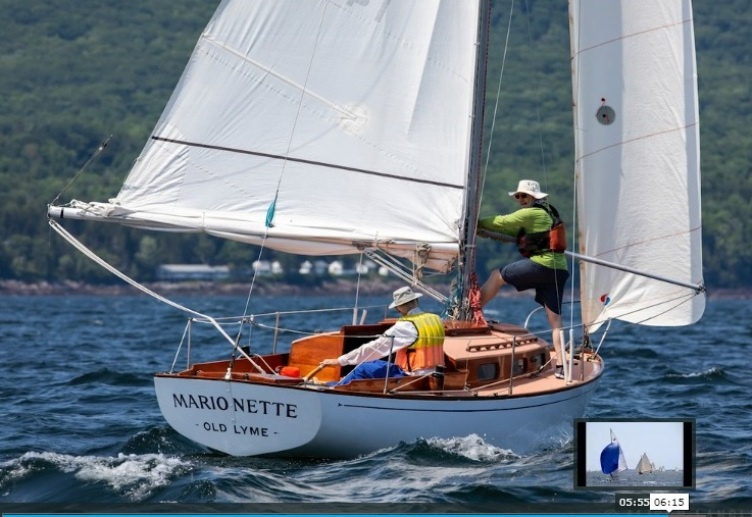
Their March/April 2021 had Marionette on their cover (photo right) and inside an article by your webmaster about his book - Voyaging with Marionette.
Click here to go see the article.
A 'gallery' to follow....
|
|
As promised here's a few pics
Marionette's crew
L/R - Webmaster, Bruce, Nicole, Mike
|

Camden inner harbor float
"TEER ready
|
Battle Flag
|
On parade
|
Marionette was hauled and will be spending the winter at the Lyman Morse yard in Camden. More on this in coming reports
****************************************************
August 23, 2021 - Marionette crew, Nicole Breault wins the 2021 US Women's Match Racing Championship held this past weekend at San Diego YC - her 4th win in this championship, and she was unbeaten in every race!
Click here for the official results
Click here for the article that appeared in the Sailing Scuttlebutt newsletter,
Click here for the US Sailing article
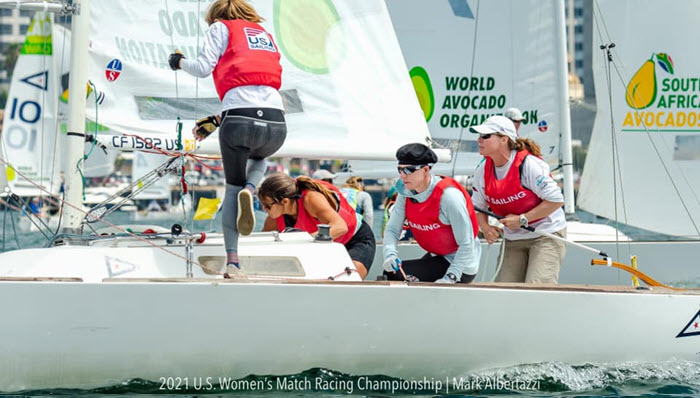
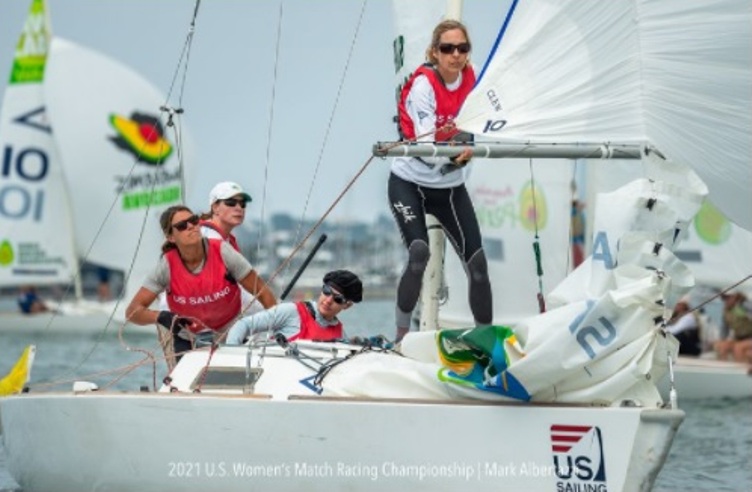
Photo credits Mark Albertazzi
**********************************
November 23, 2021 - In over the transom an email and great photos of Marionette taken by John Williams, a local Camden photographer who knows Marionette - minor edits.
Hi Ron
When I turn my desk chair and look down Arey Ave I can see Marionette, recently arrived, now parked in Wayfarer’s Bean Yard. (Webmaster Note: Marionette will be wintering in Camden!!) We met and talked, if ever so briefly, last summer down on the Camden docks. Here is a photo of you and Marionette taken last July 30 during the Camden Classics Cup Race. Thought you’d like to see.
It’s also in this album. https://www.flickr.com/photos/johnarey/albums/72157719750126867
Will keep an eye on your boat. We live here in Camden year-round. Look forward to possibly crossing paths again, perhaps next summer, when sailing season begins once again.
Below is what I see of her from our house in Camden. Will stay in touch and let you know when I see Marionette go under her winter cover. And I look forward to seeing you in the future when you are up here.
Happy Thanksgiving,
John
waiting for her winter cover
December 9, 2021 POSTSCRIPT
Under cover
****************************************************
December 23, 2021 - Its that time of year and, in over the transom this morning, a Holiday greeting from one of Marionette's favorite harbors/boatyards - Brooklin Boat Yard at Off Center Harbor, Eggemoggin Reach, Brooklin, Maine |
|
Marionette's 'mooring' is normally in the lee of Chatto Island (center) but she also enjoys being tied up at the dock with viewers above (also, including photographers!) passing down compliments

Above - Center Harbor and Chatto Island on the eastern end of Eggemoggin Reach
Right - Marionette on 'her' mooring in the lee of Chatto Island
|
|
********************************************
January 24, 2022 - Marionette has entered the 2022 Classic Boat Show!
May 15, 2022 - Marionette's Log, 2022 - Maine to Connecticut - in Stories Section
*********************************
|
|


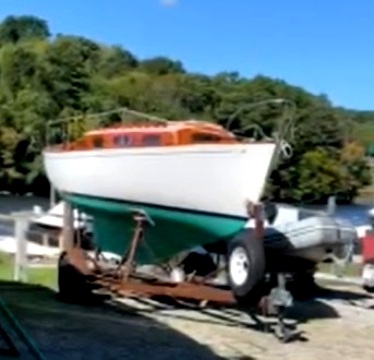
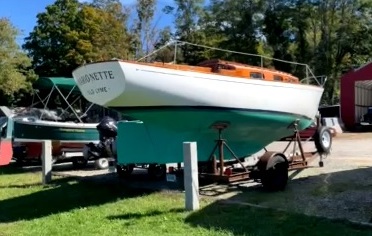
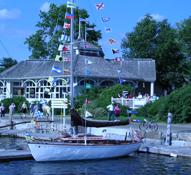
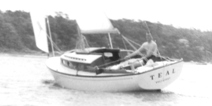
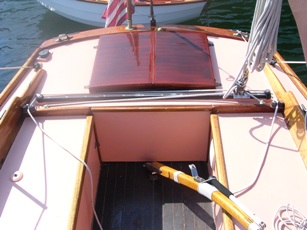

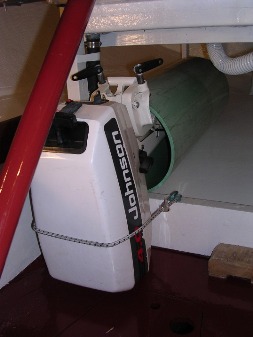
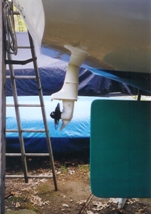
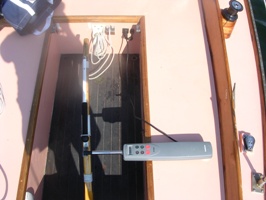
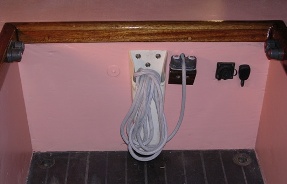

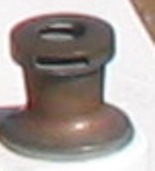
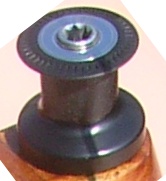
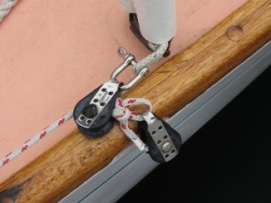
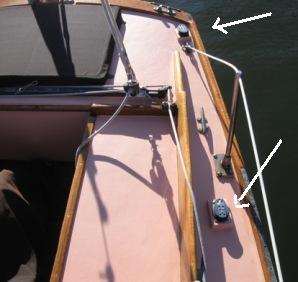

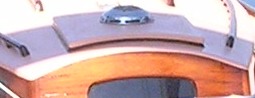

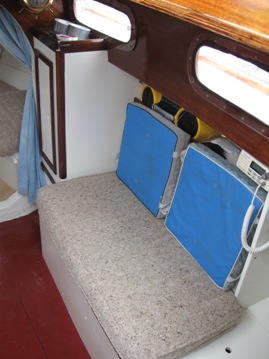
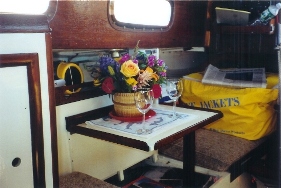

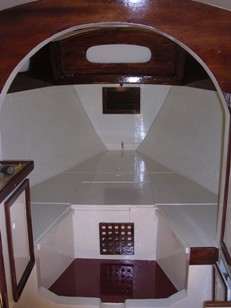
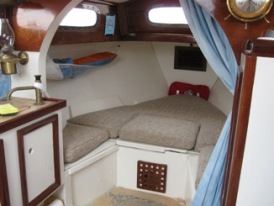
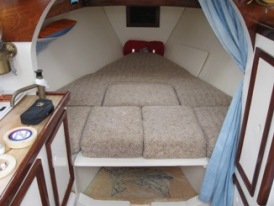
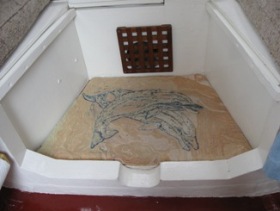
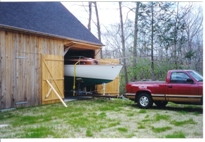
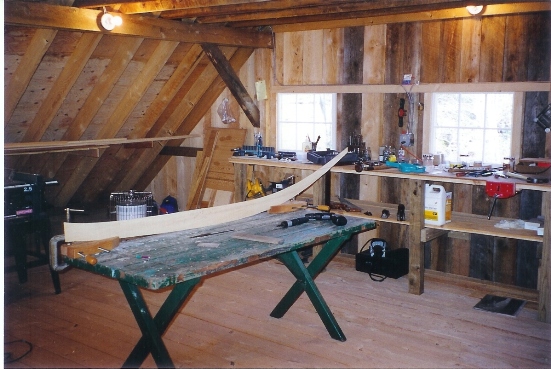
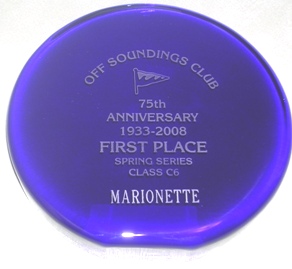
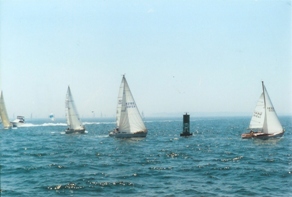

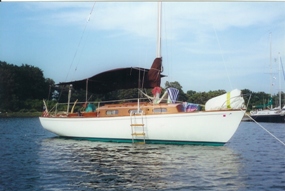
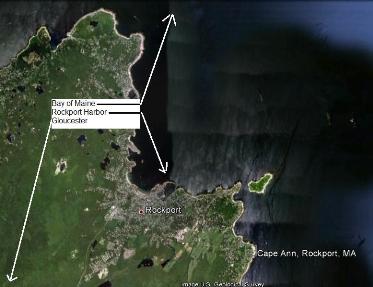
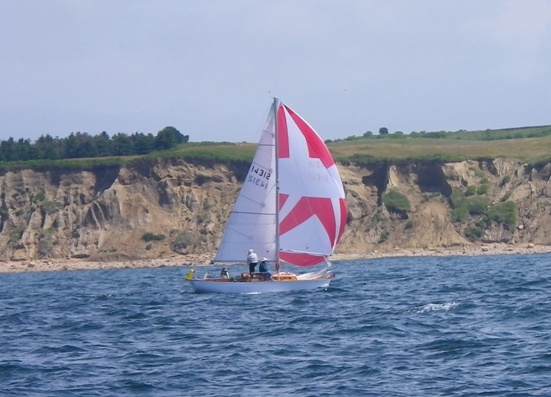
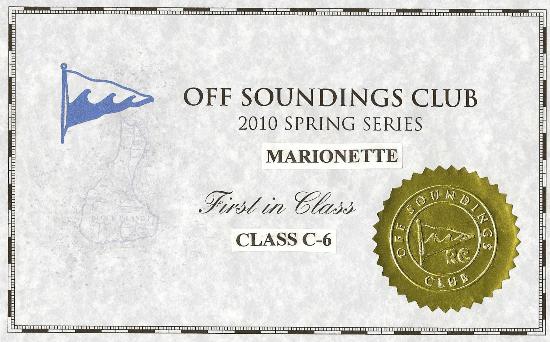
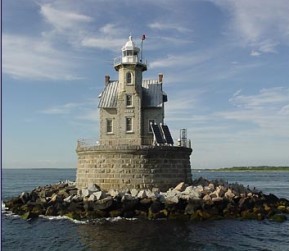
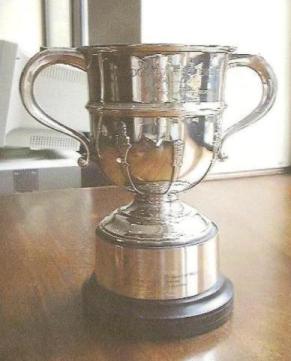
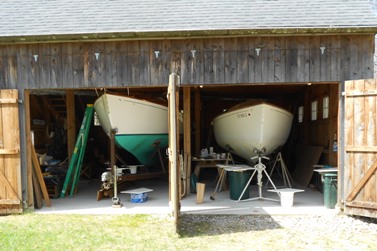

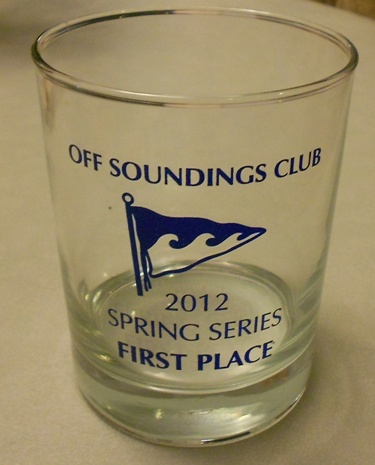
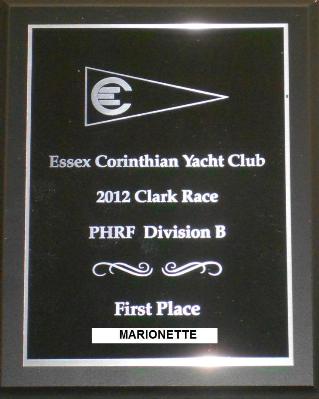
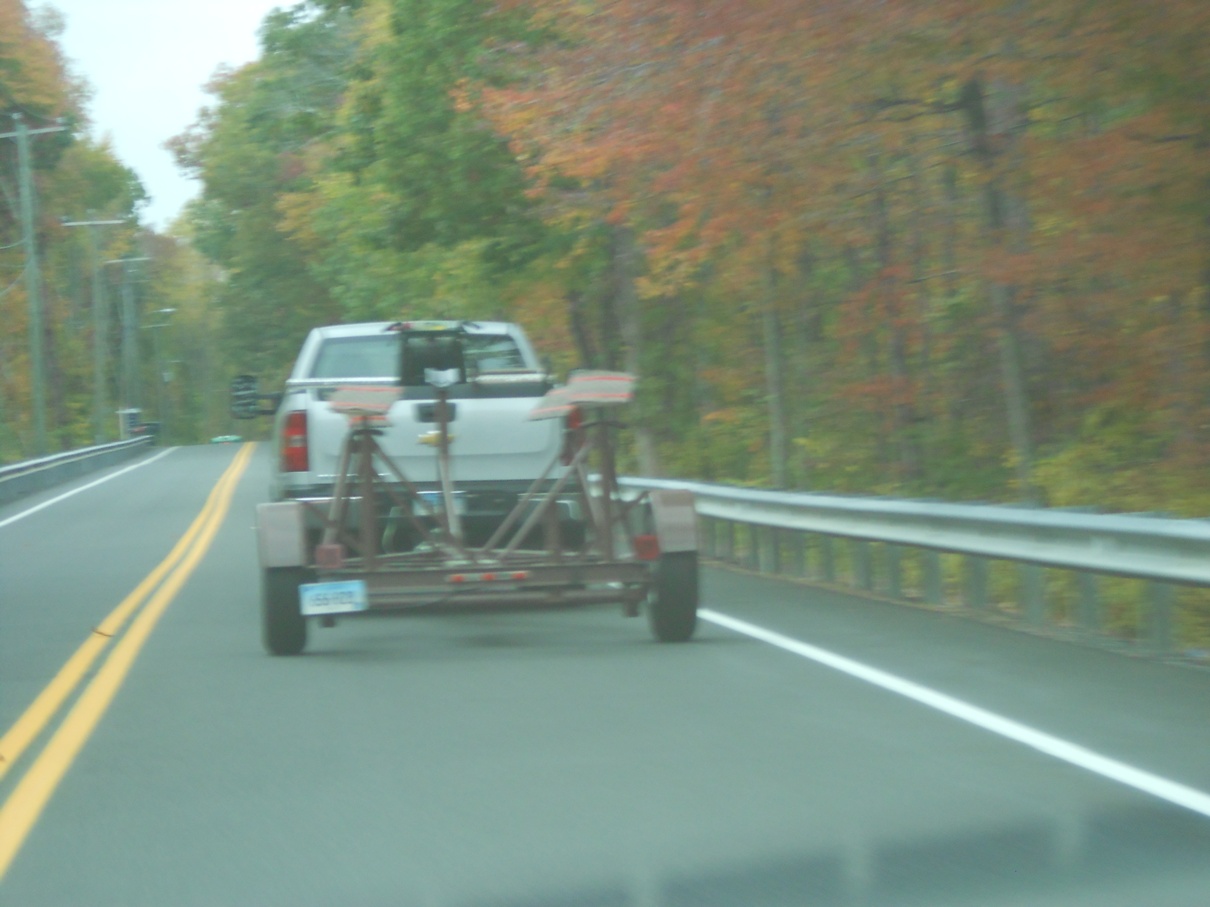
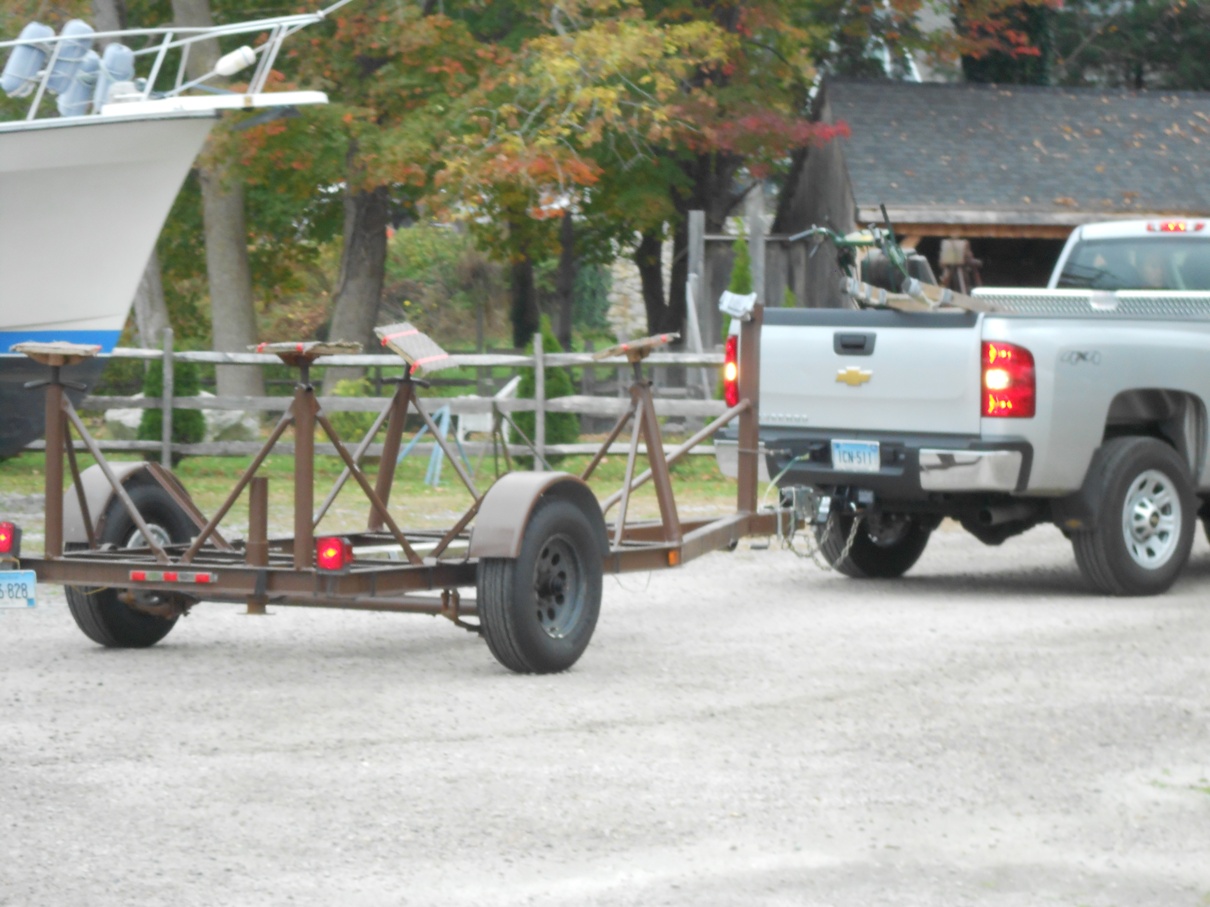
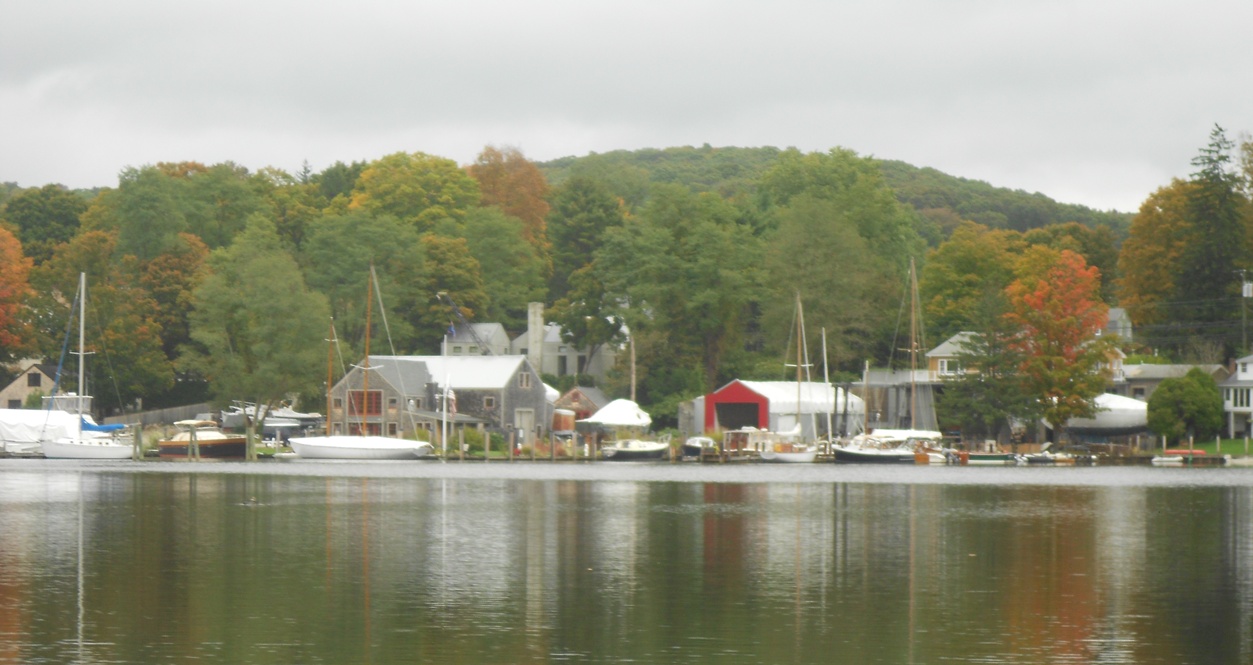
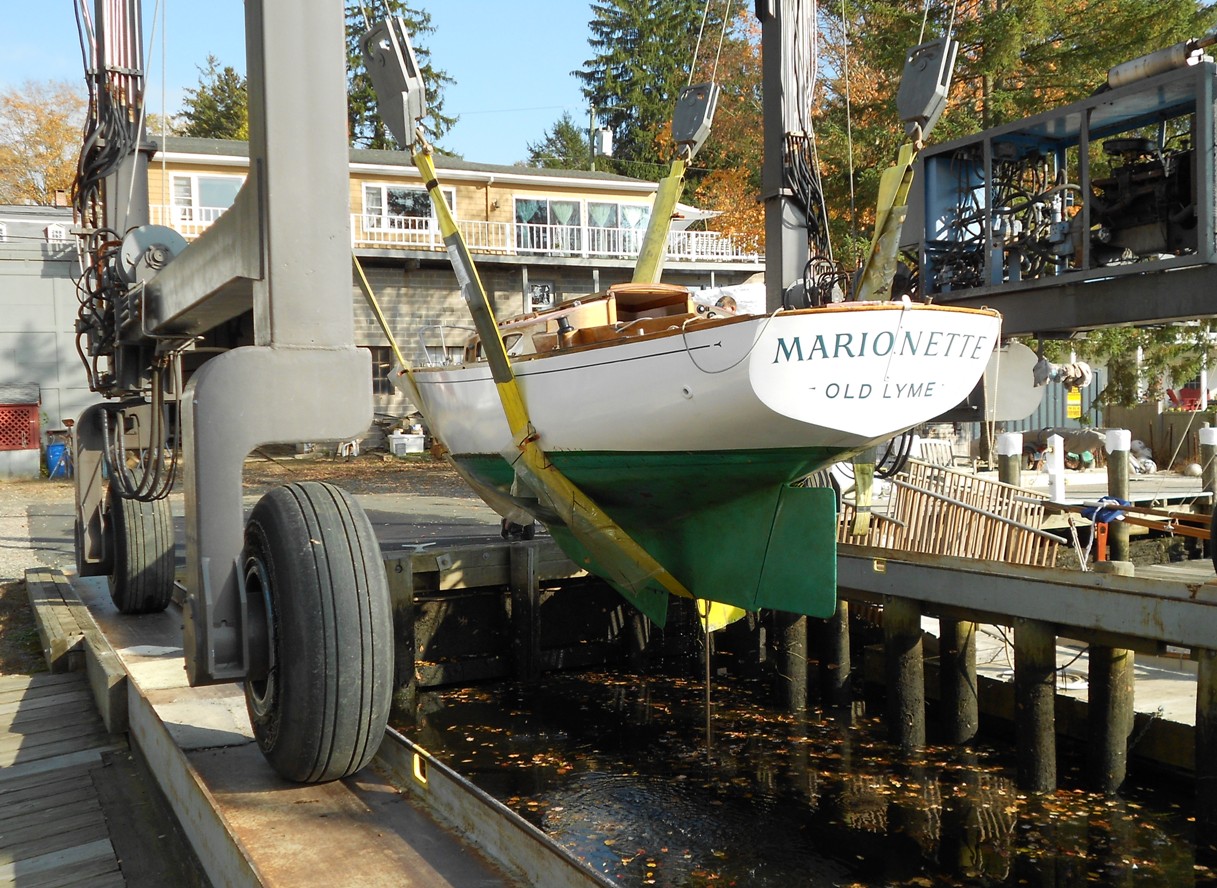
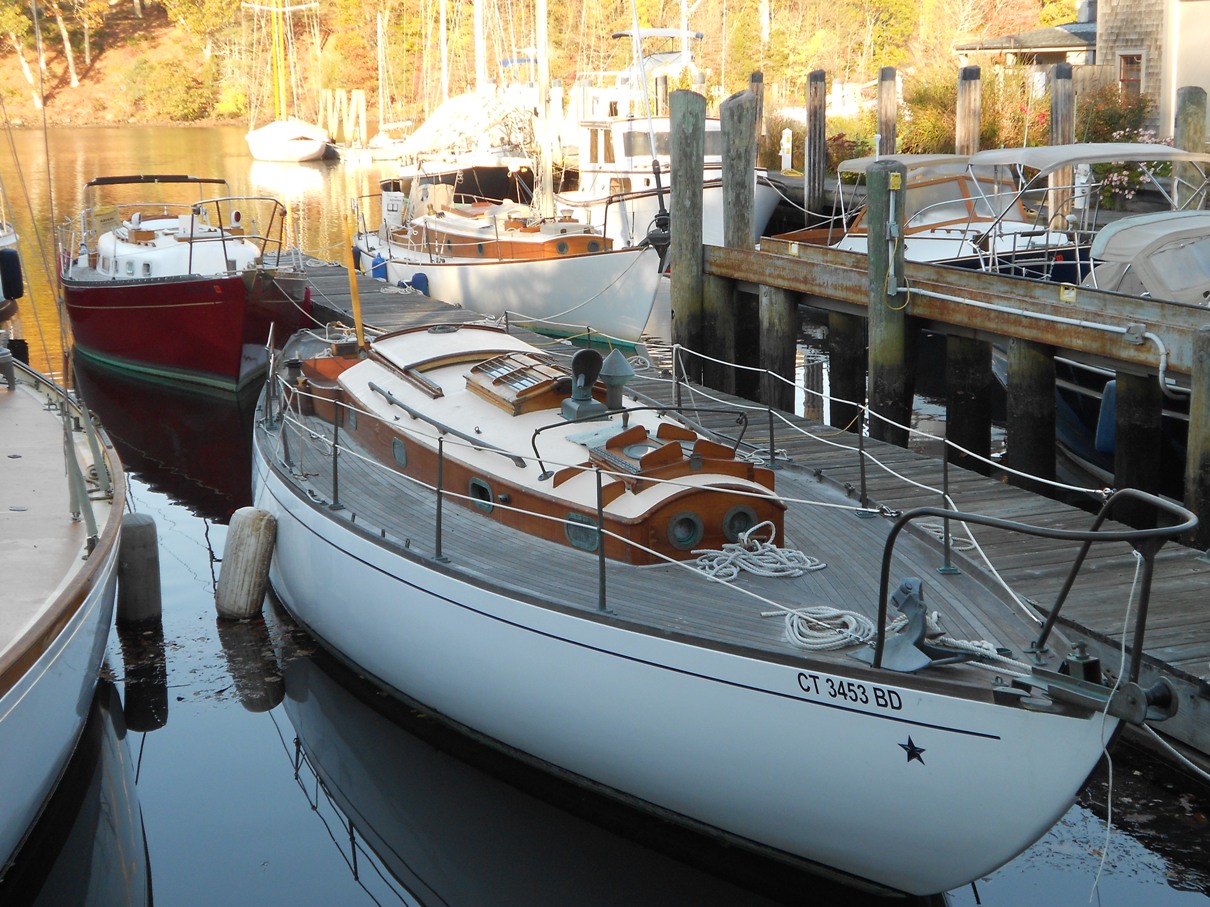
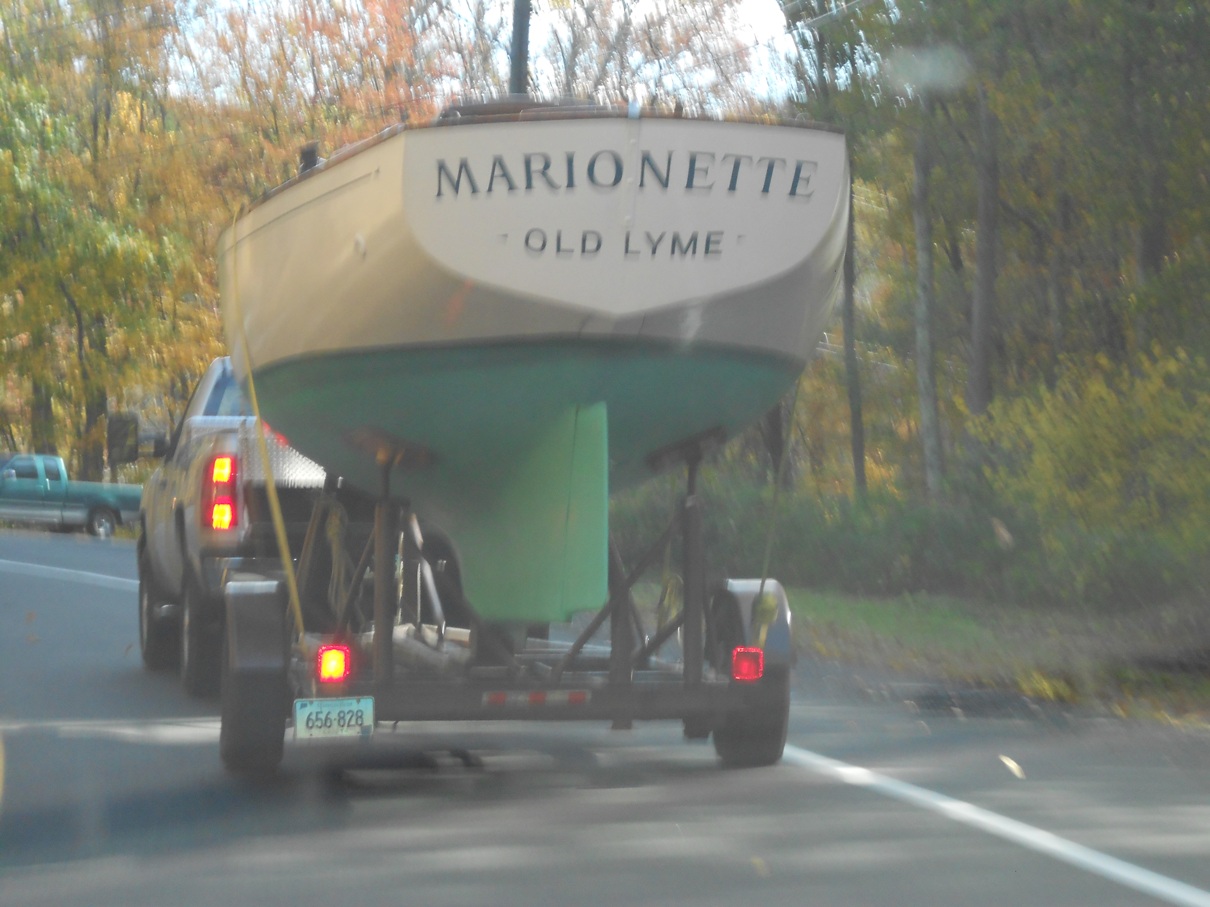
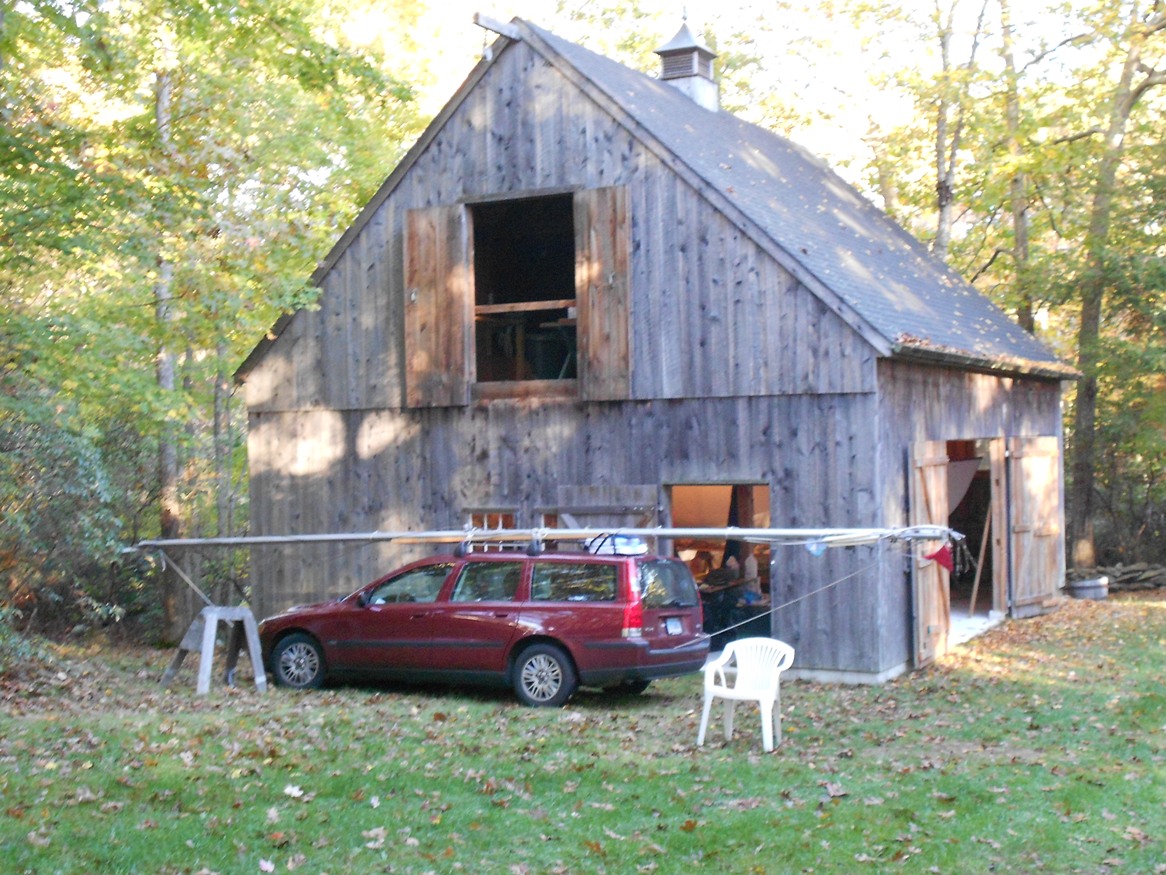


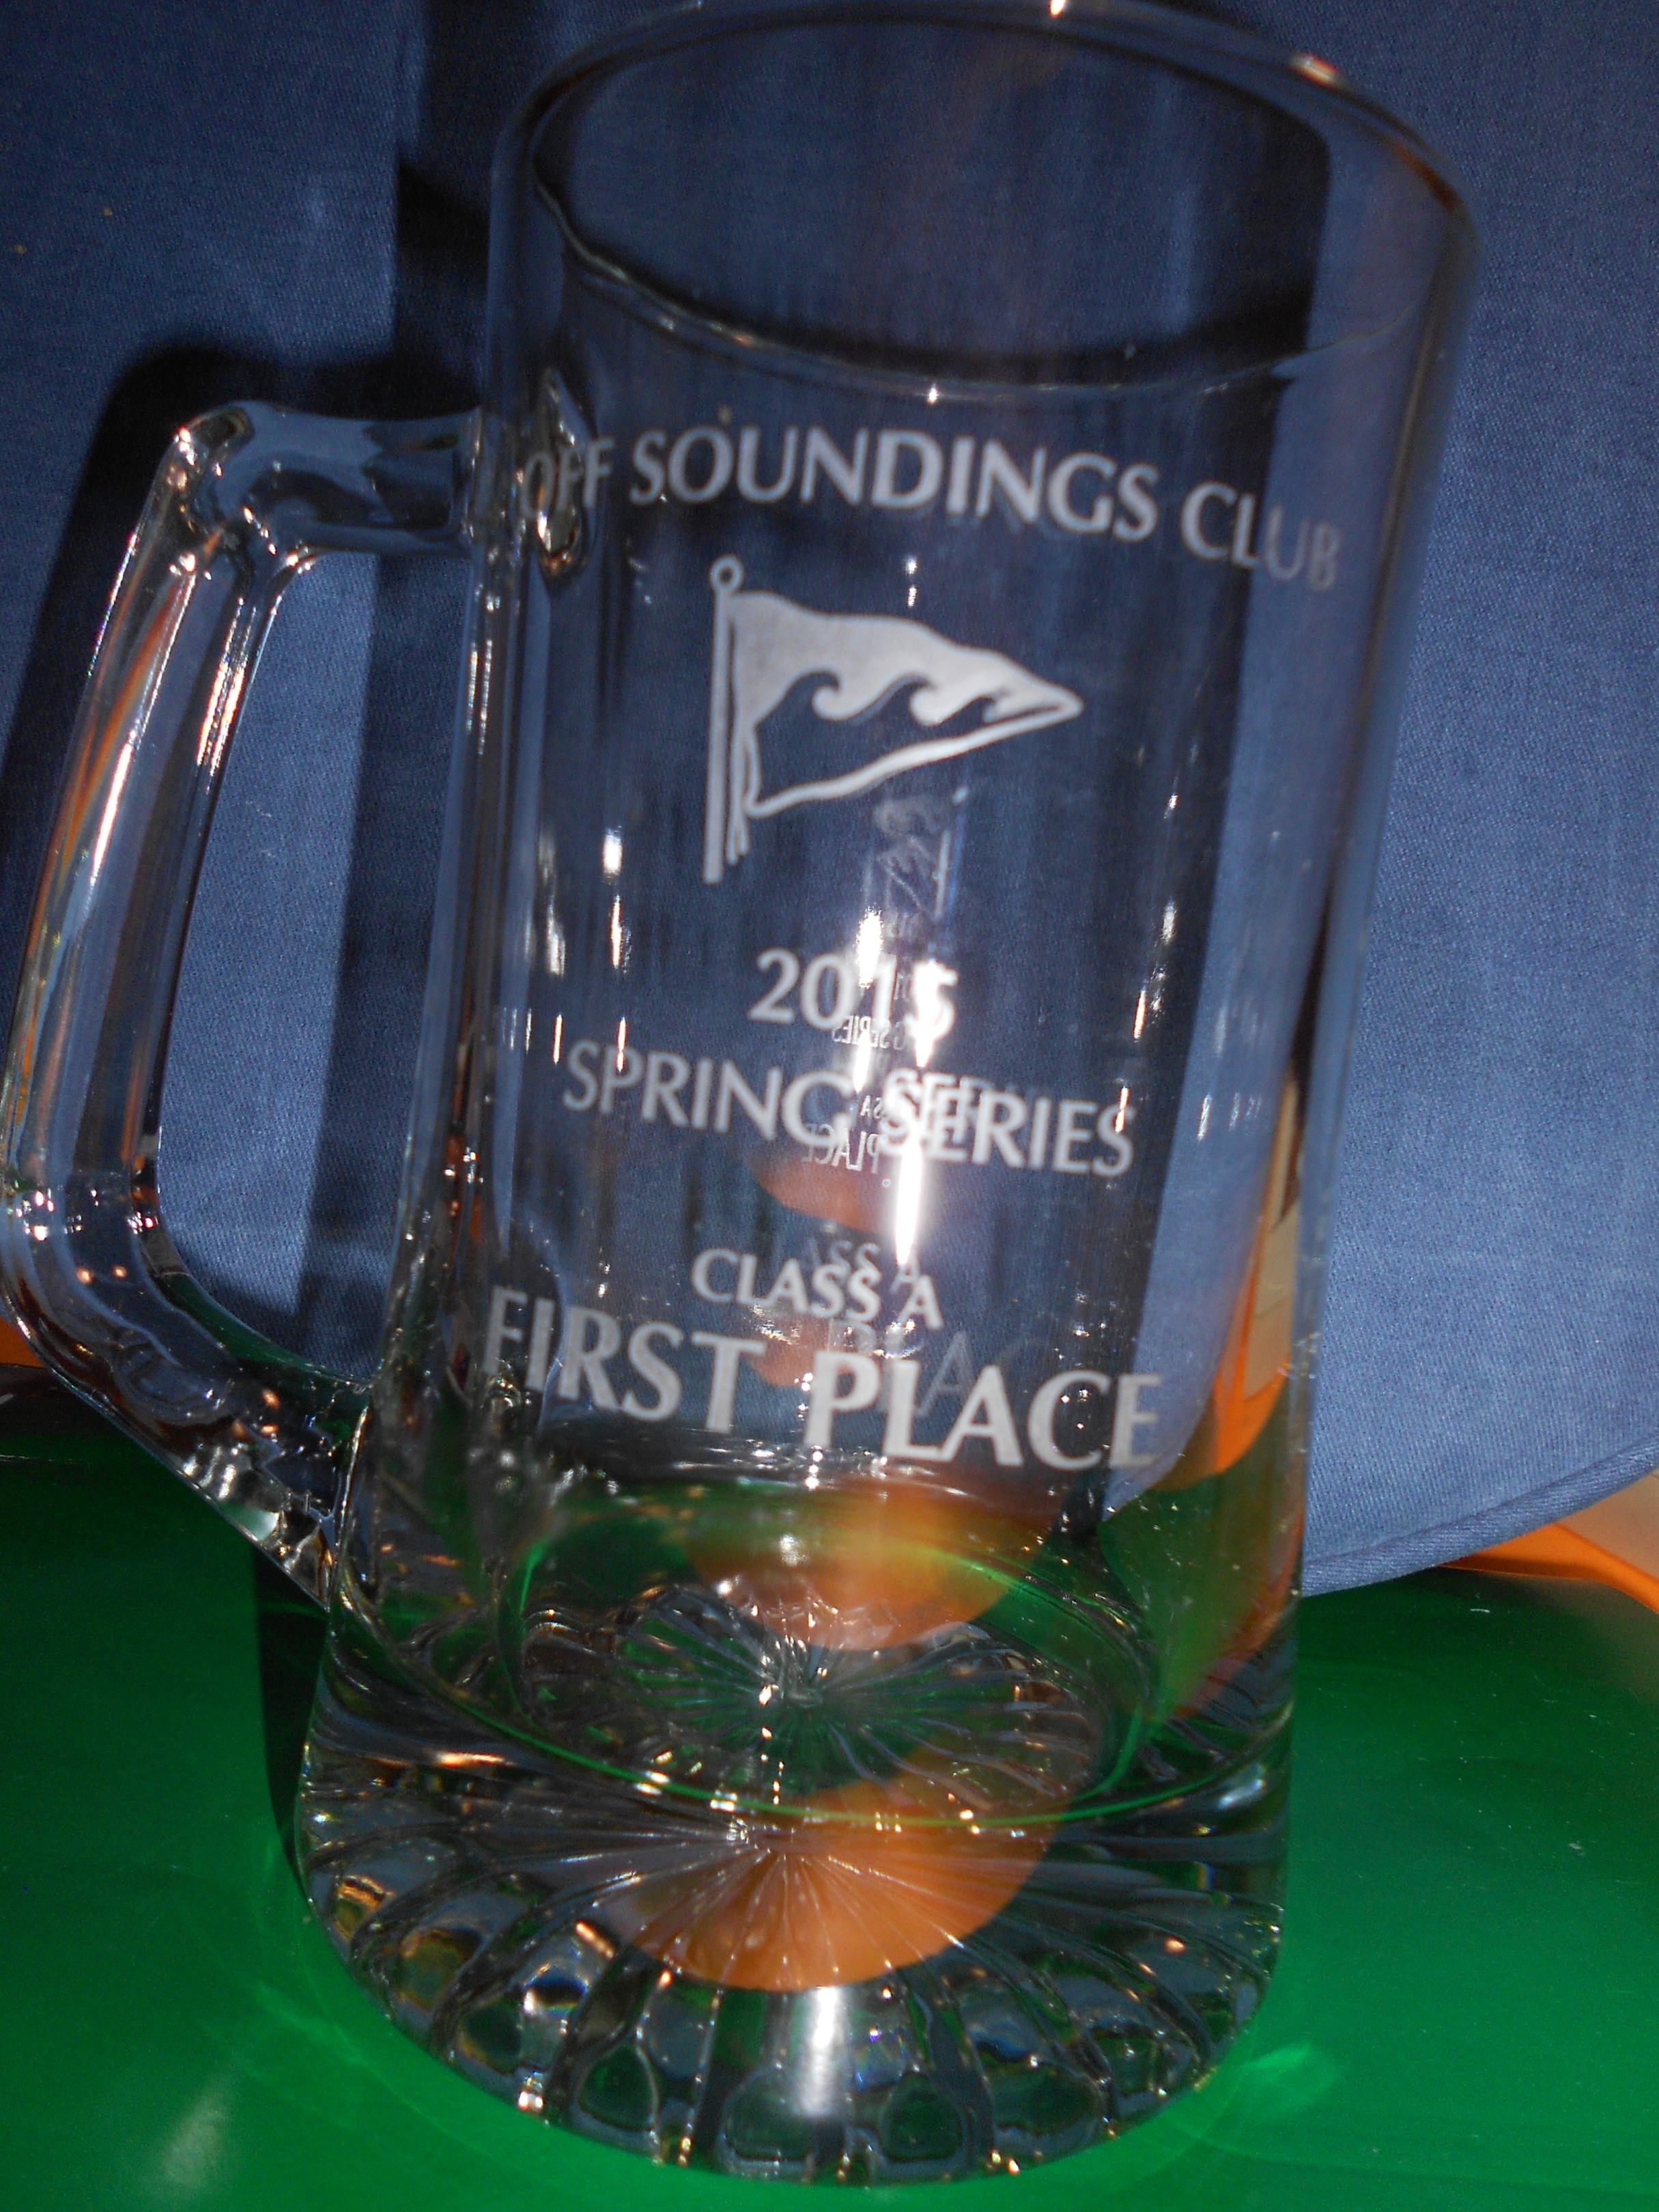
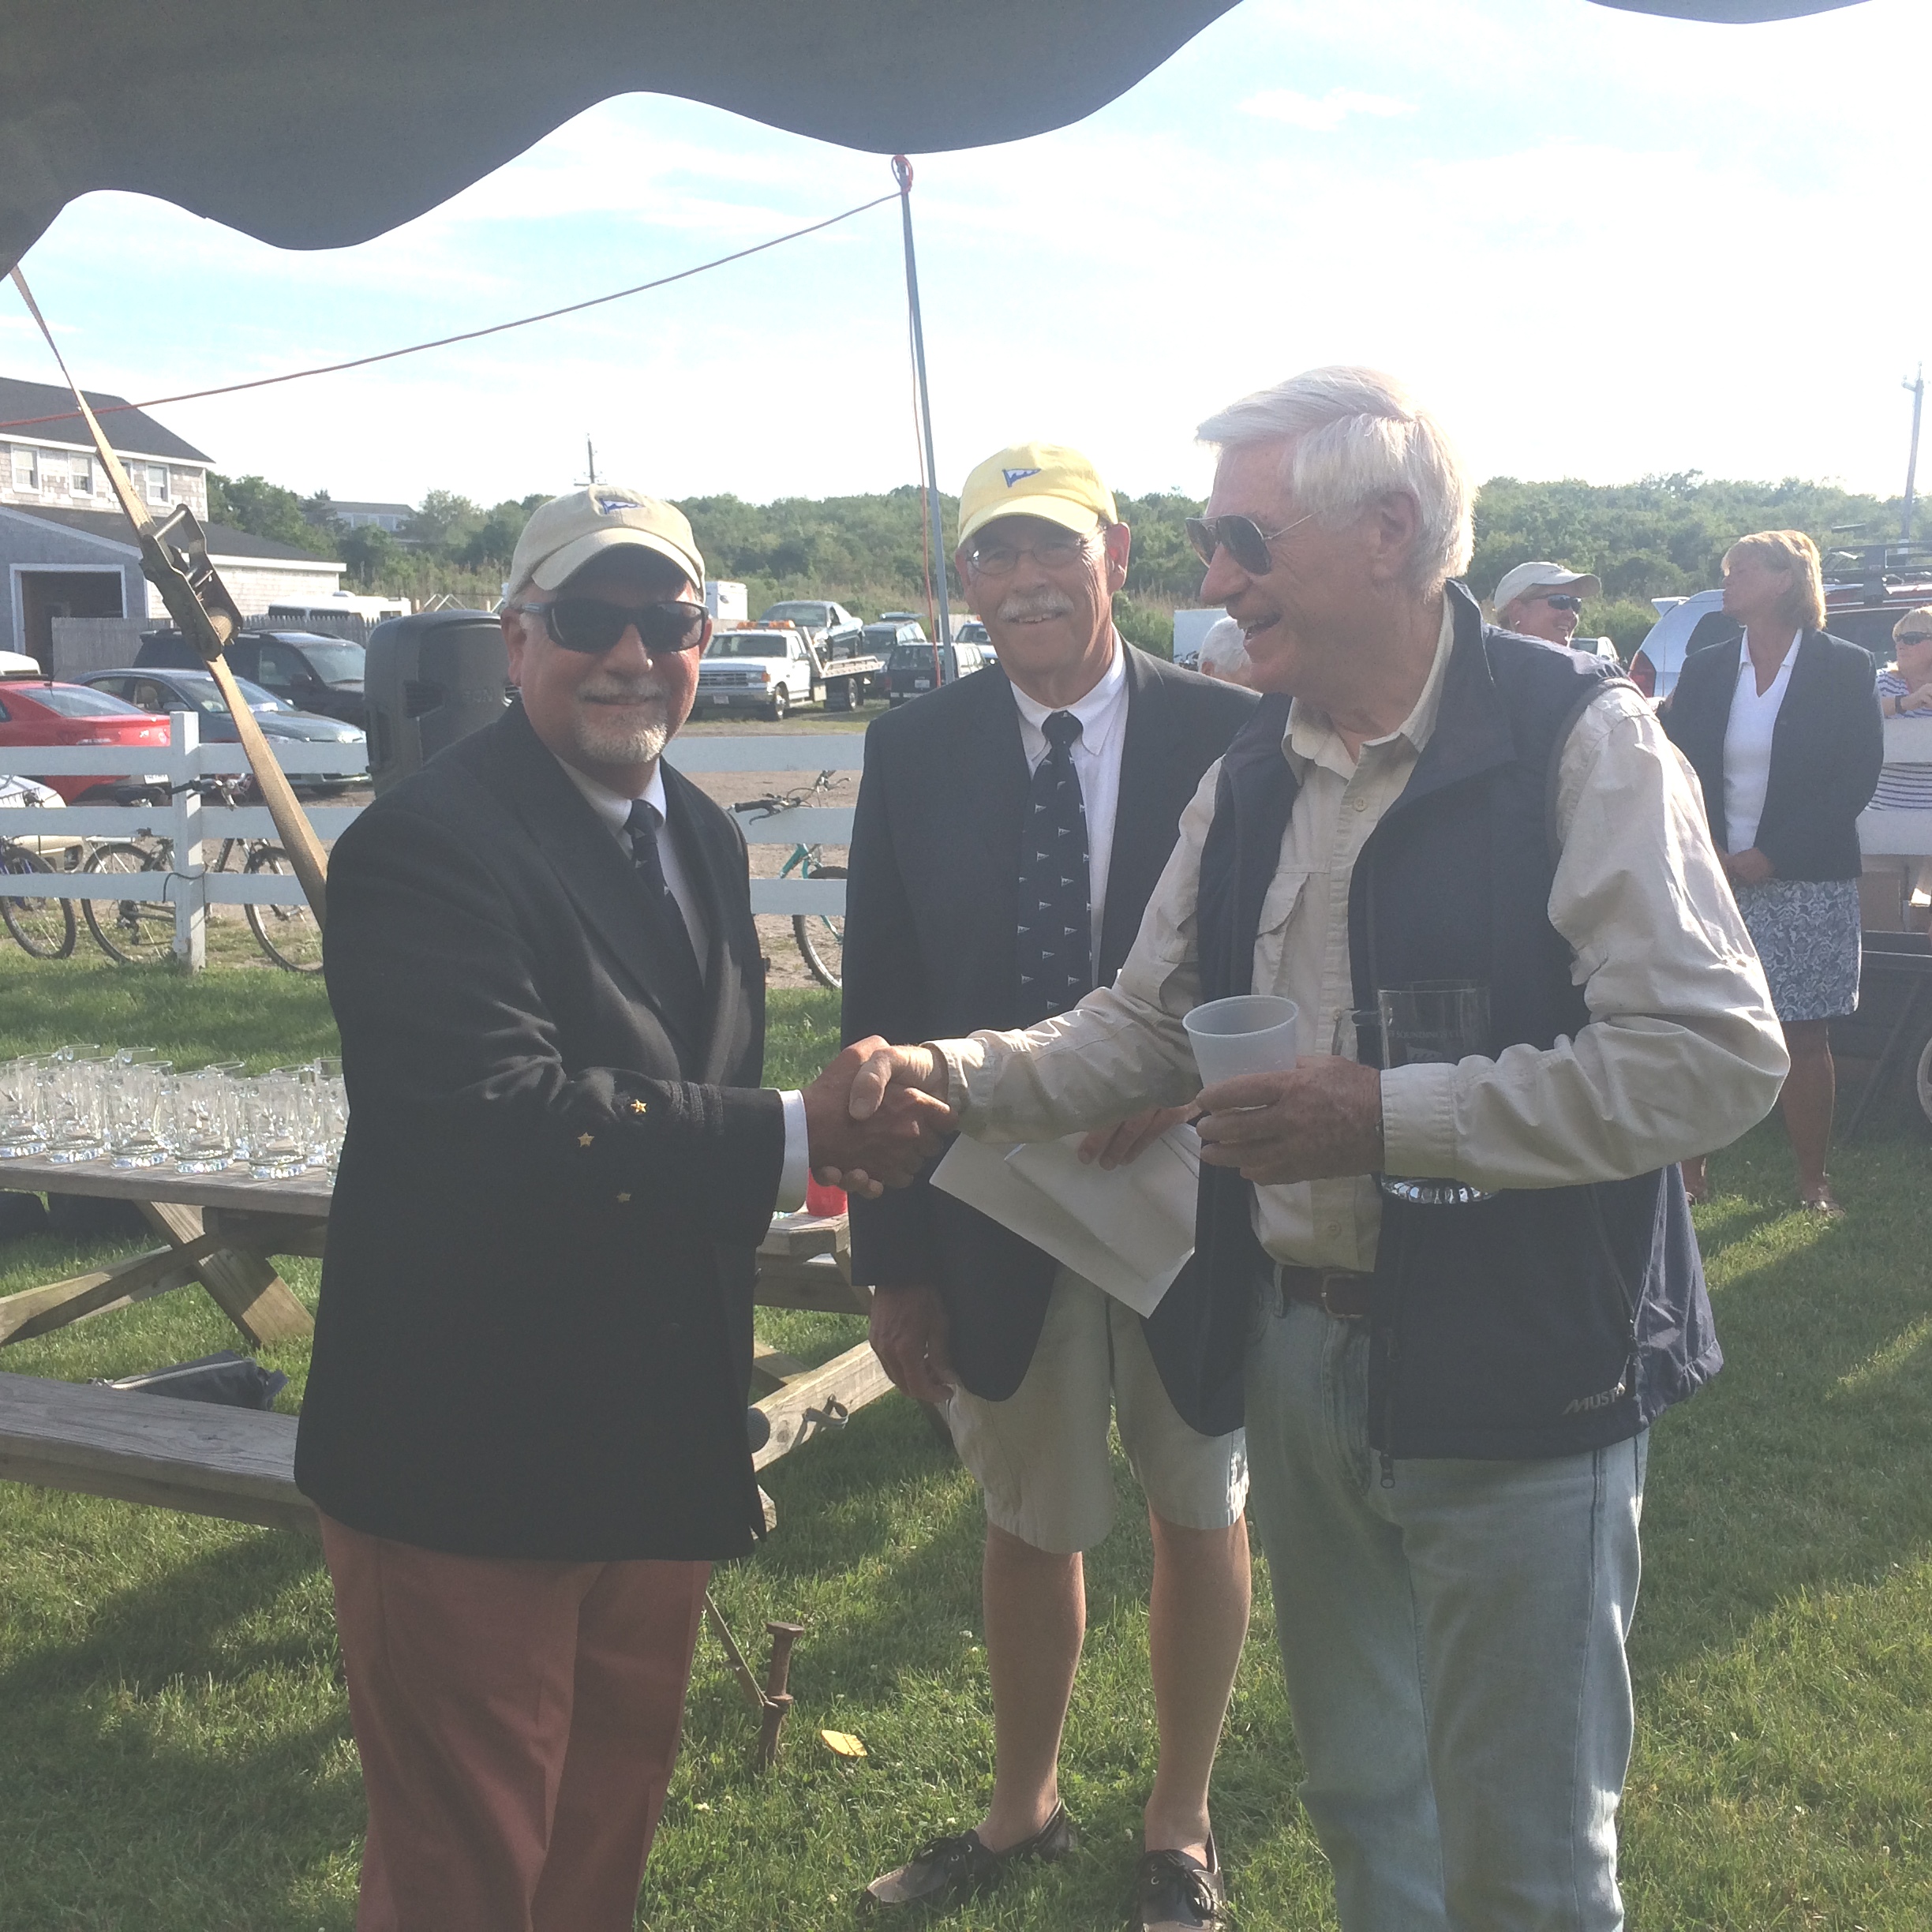


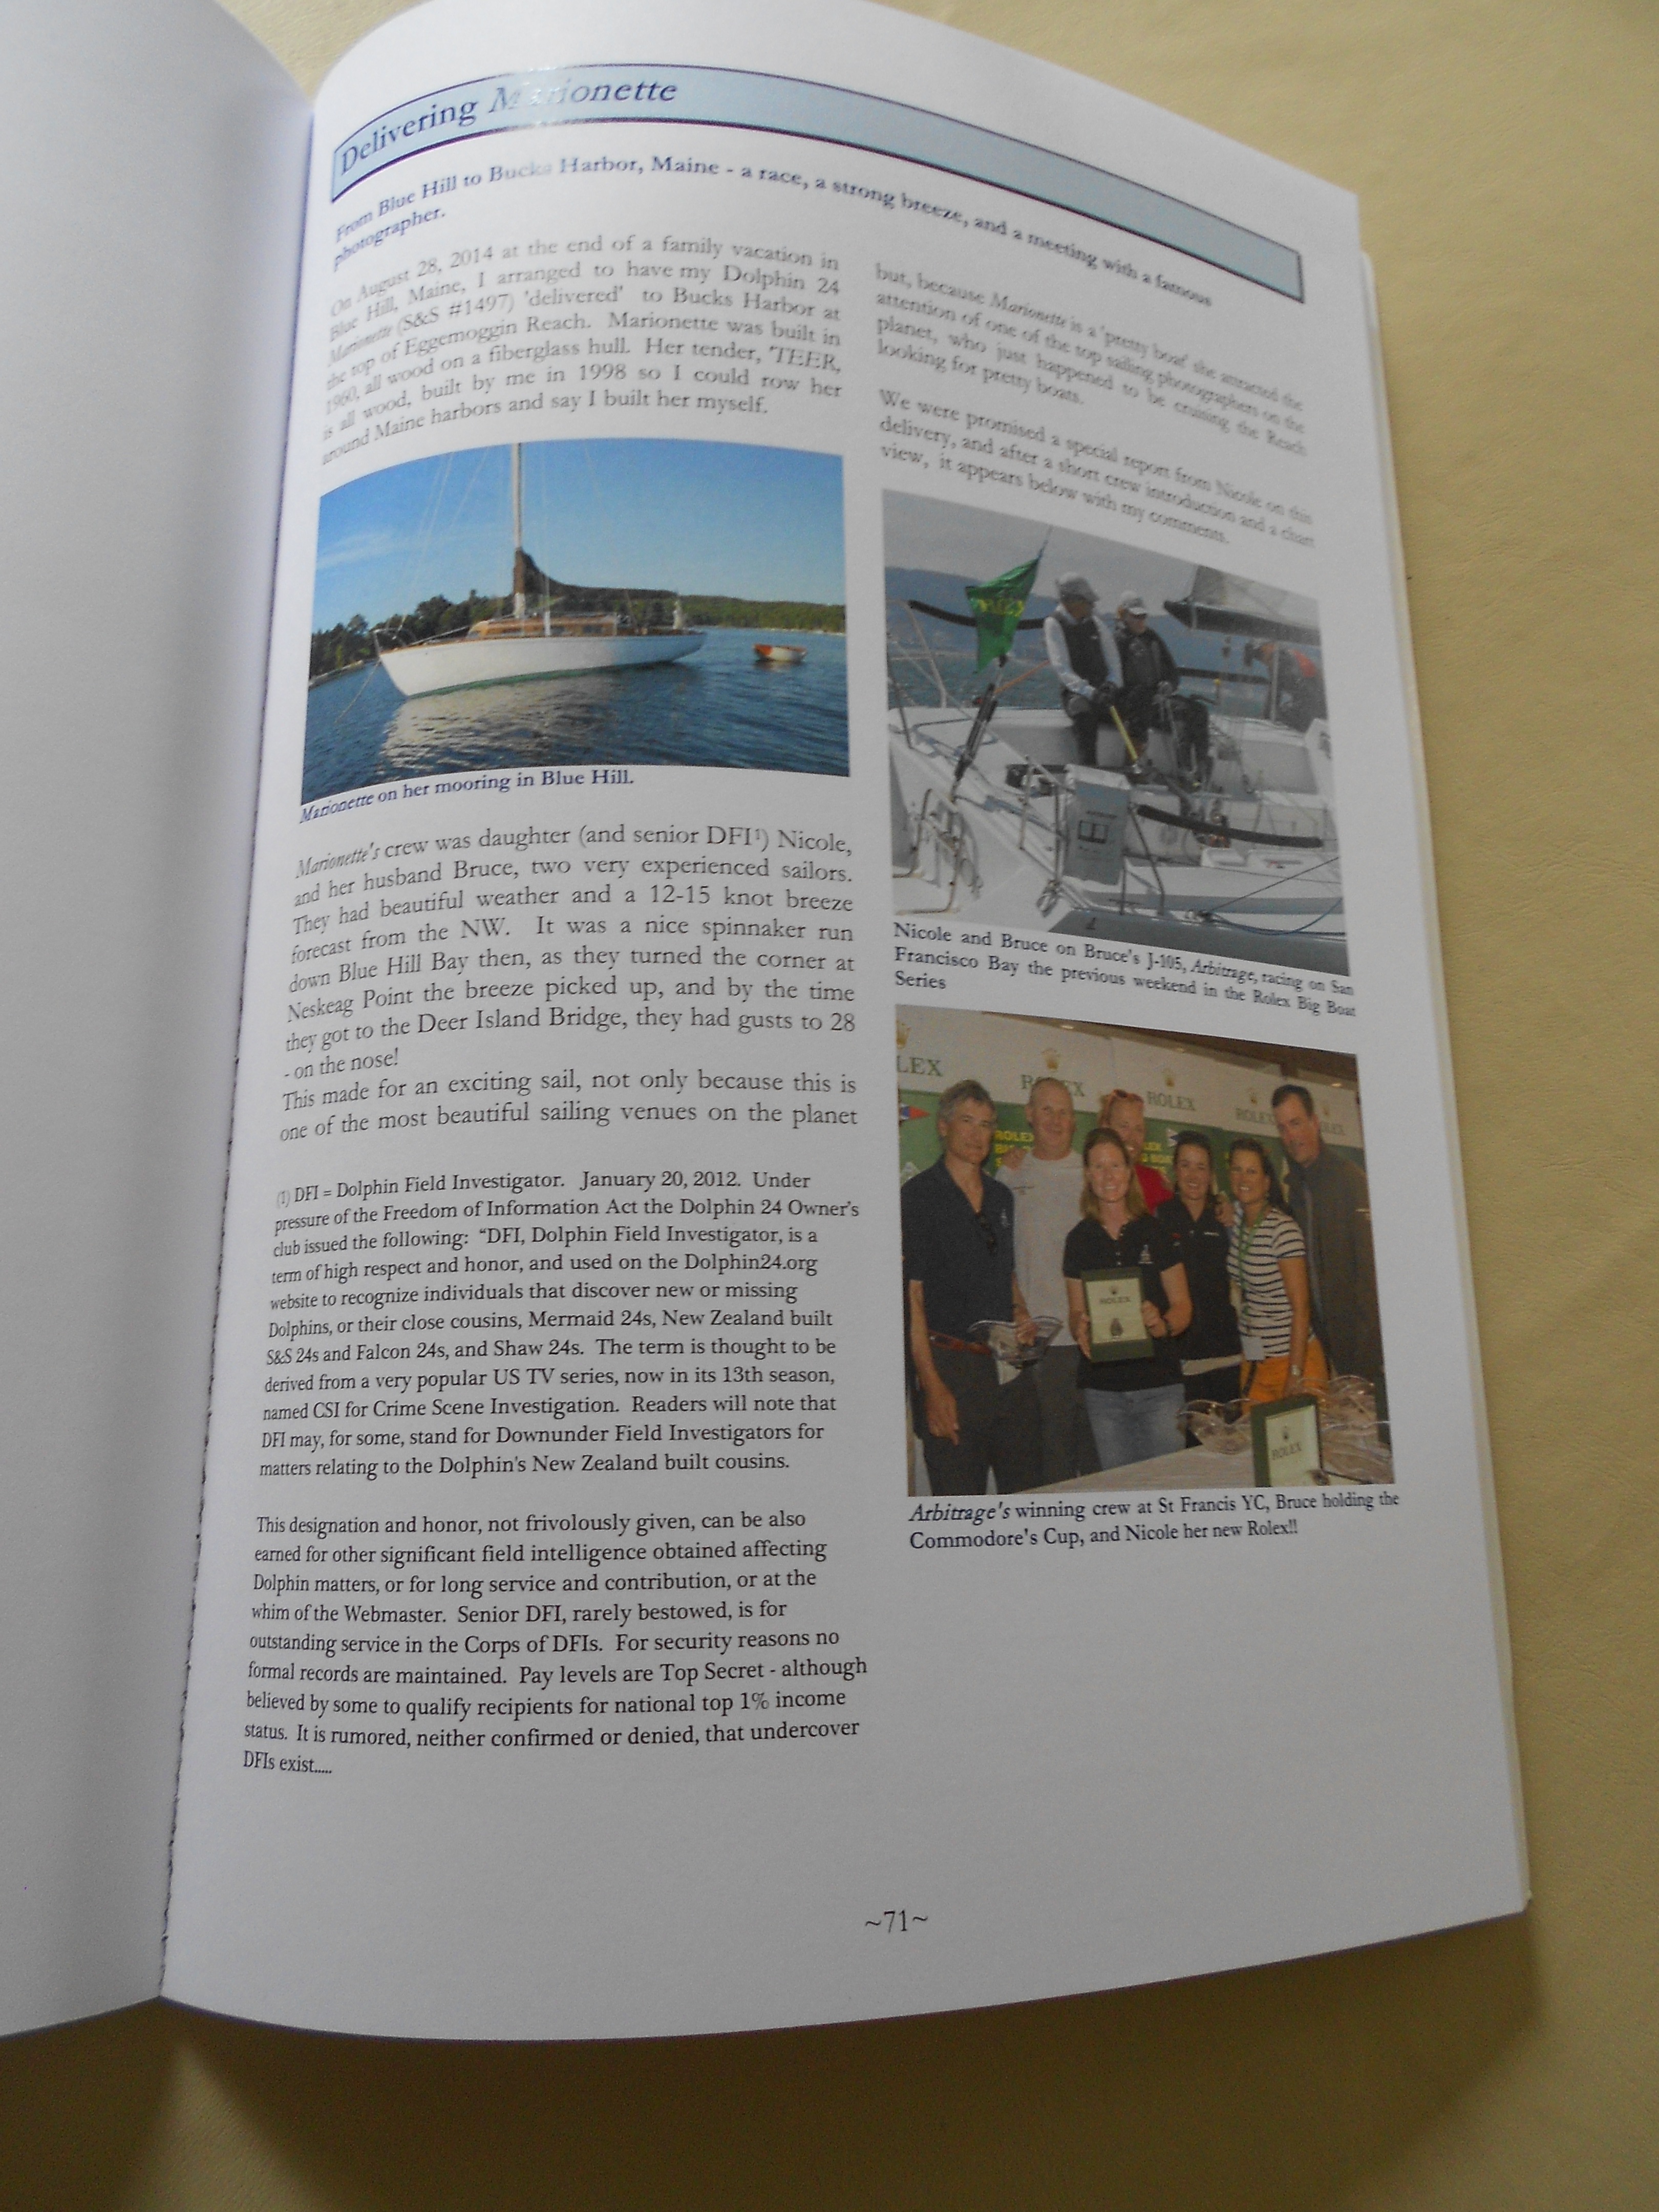
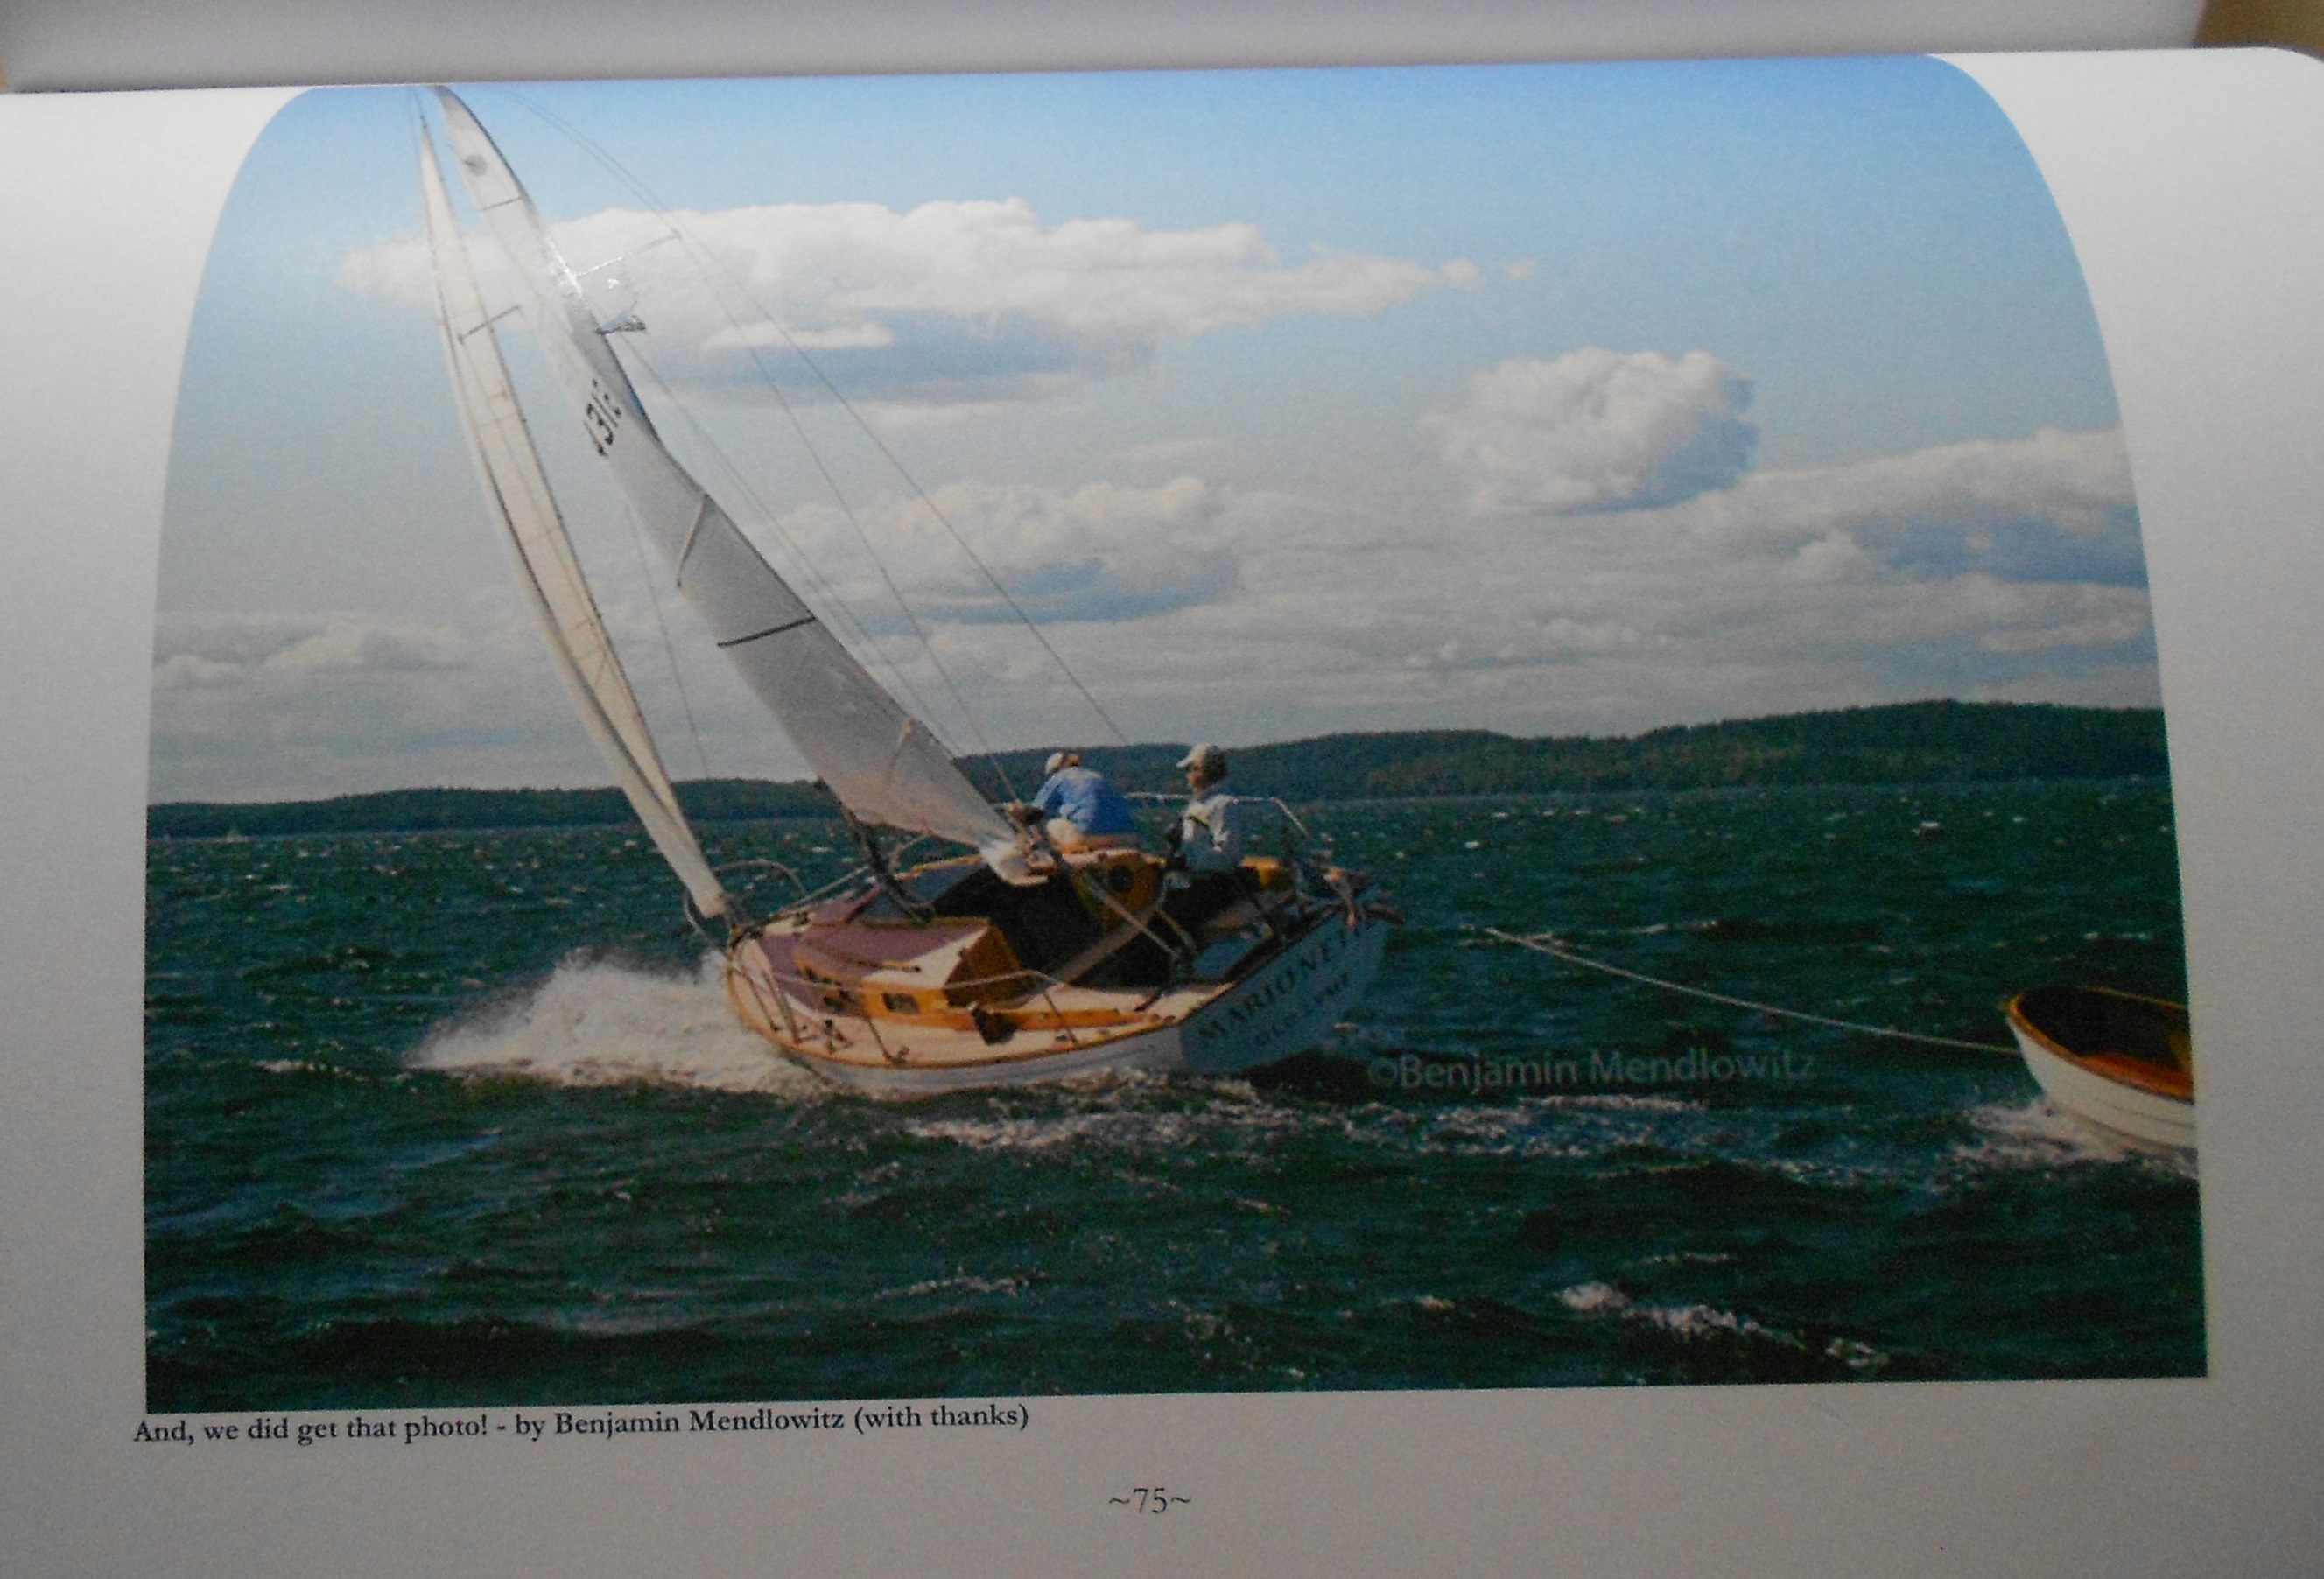

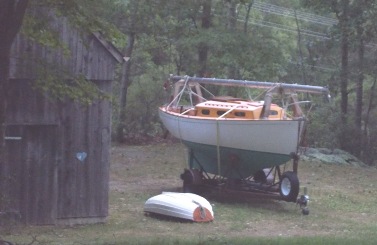
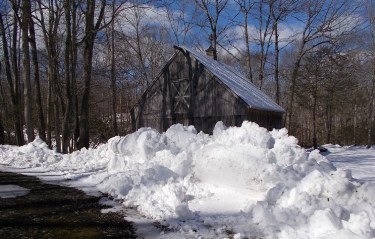
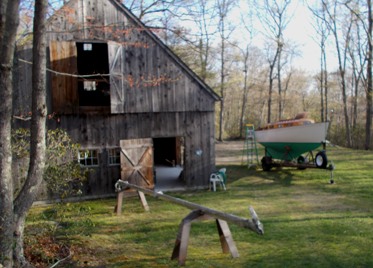
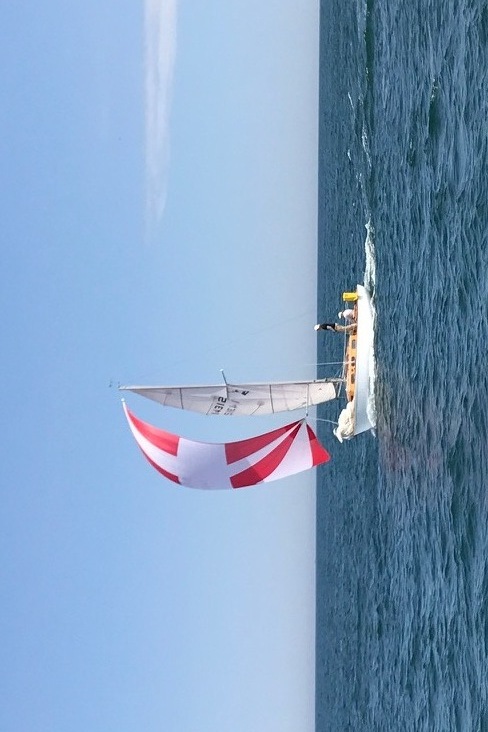
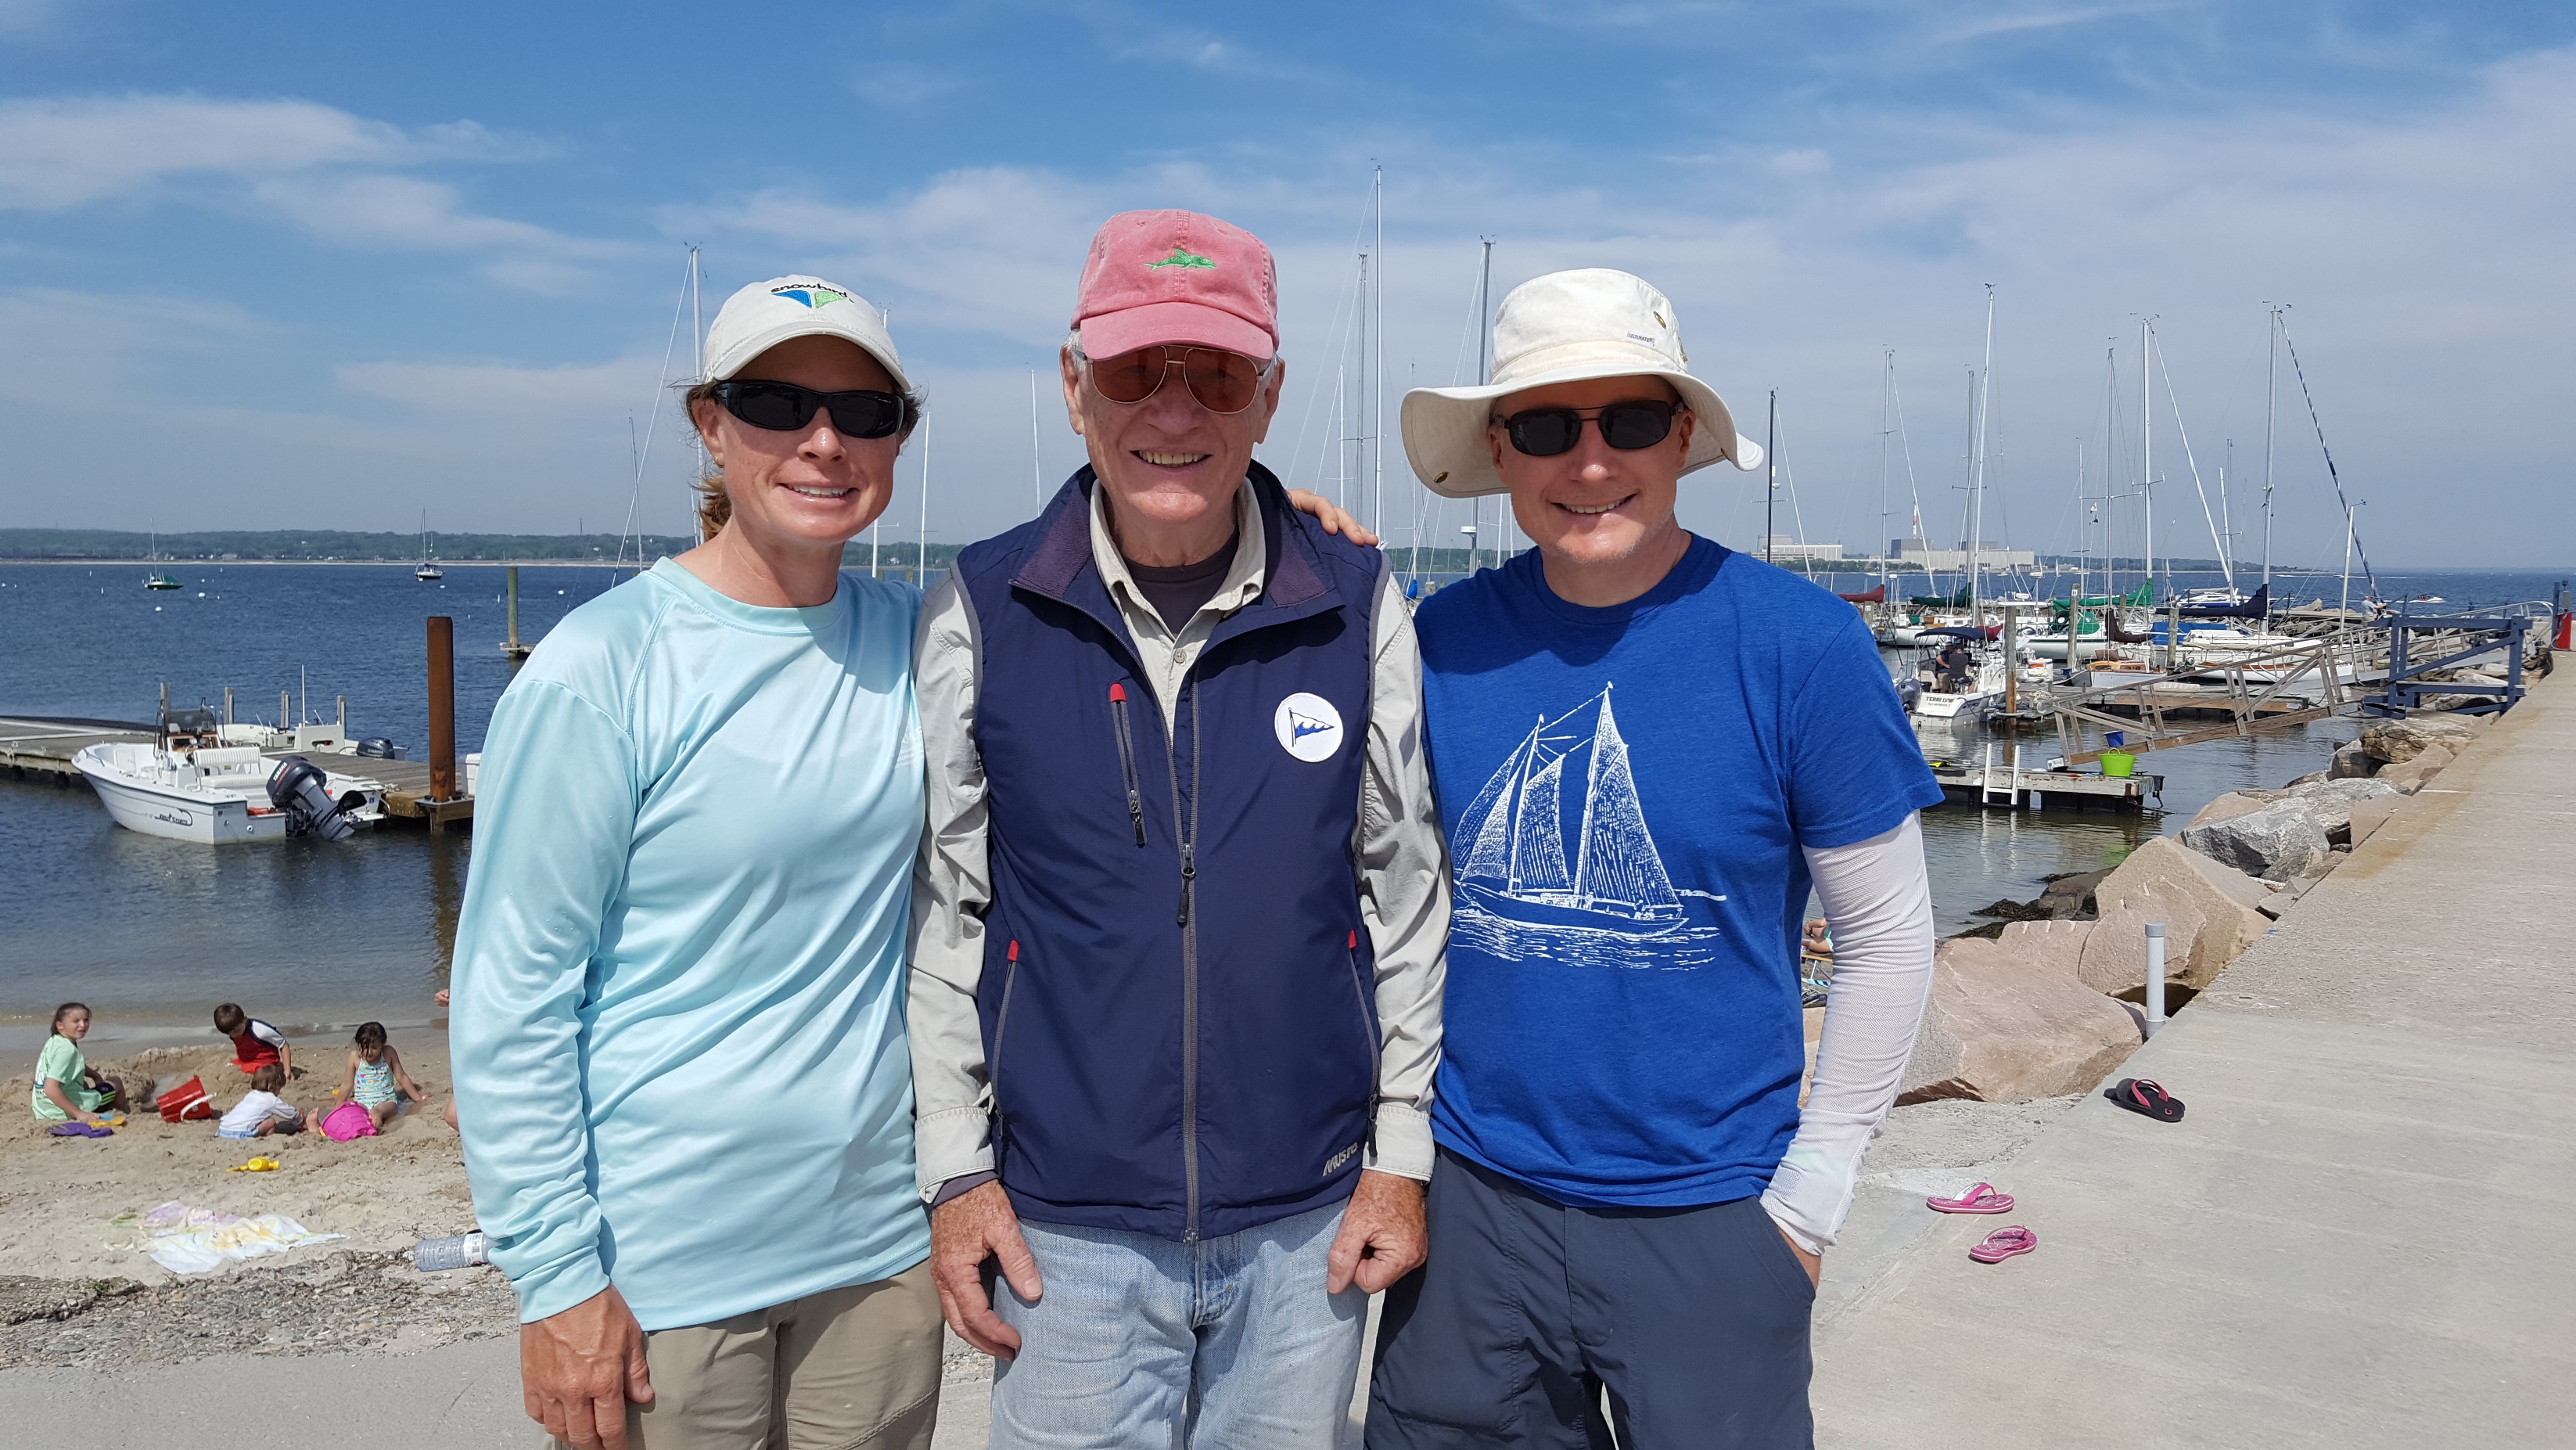
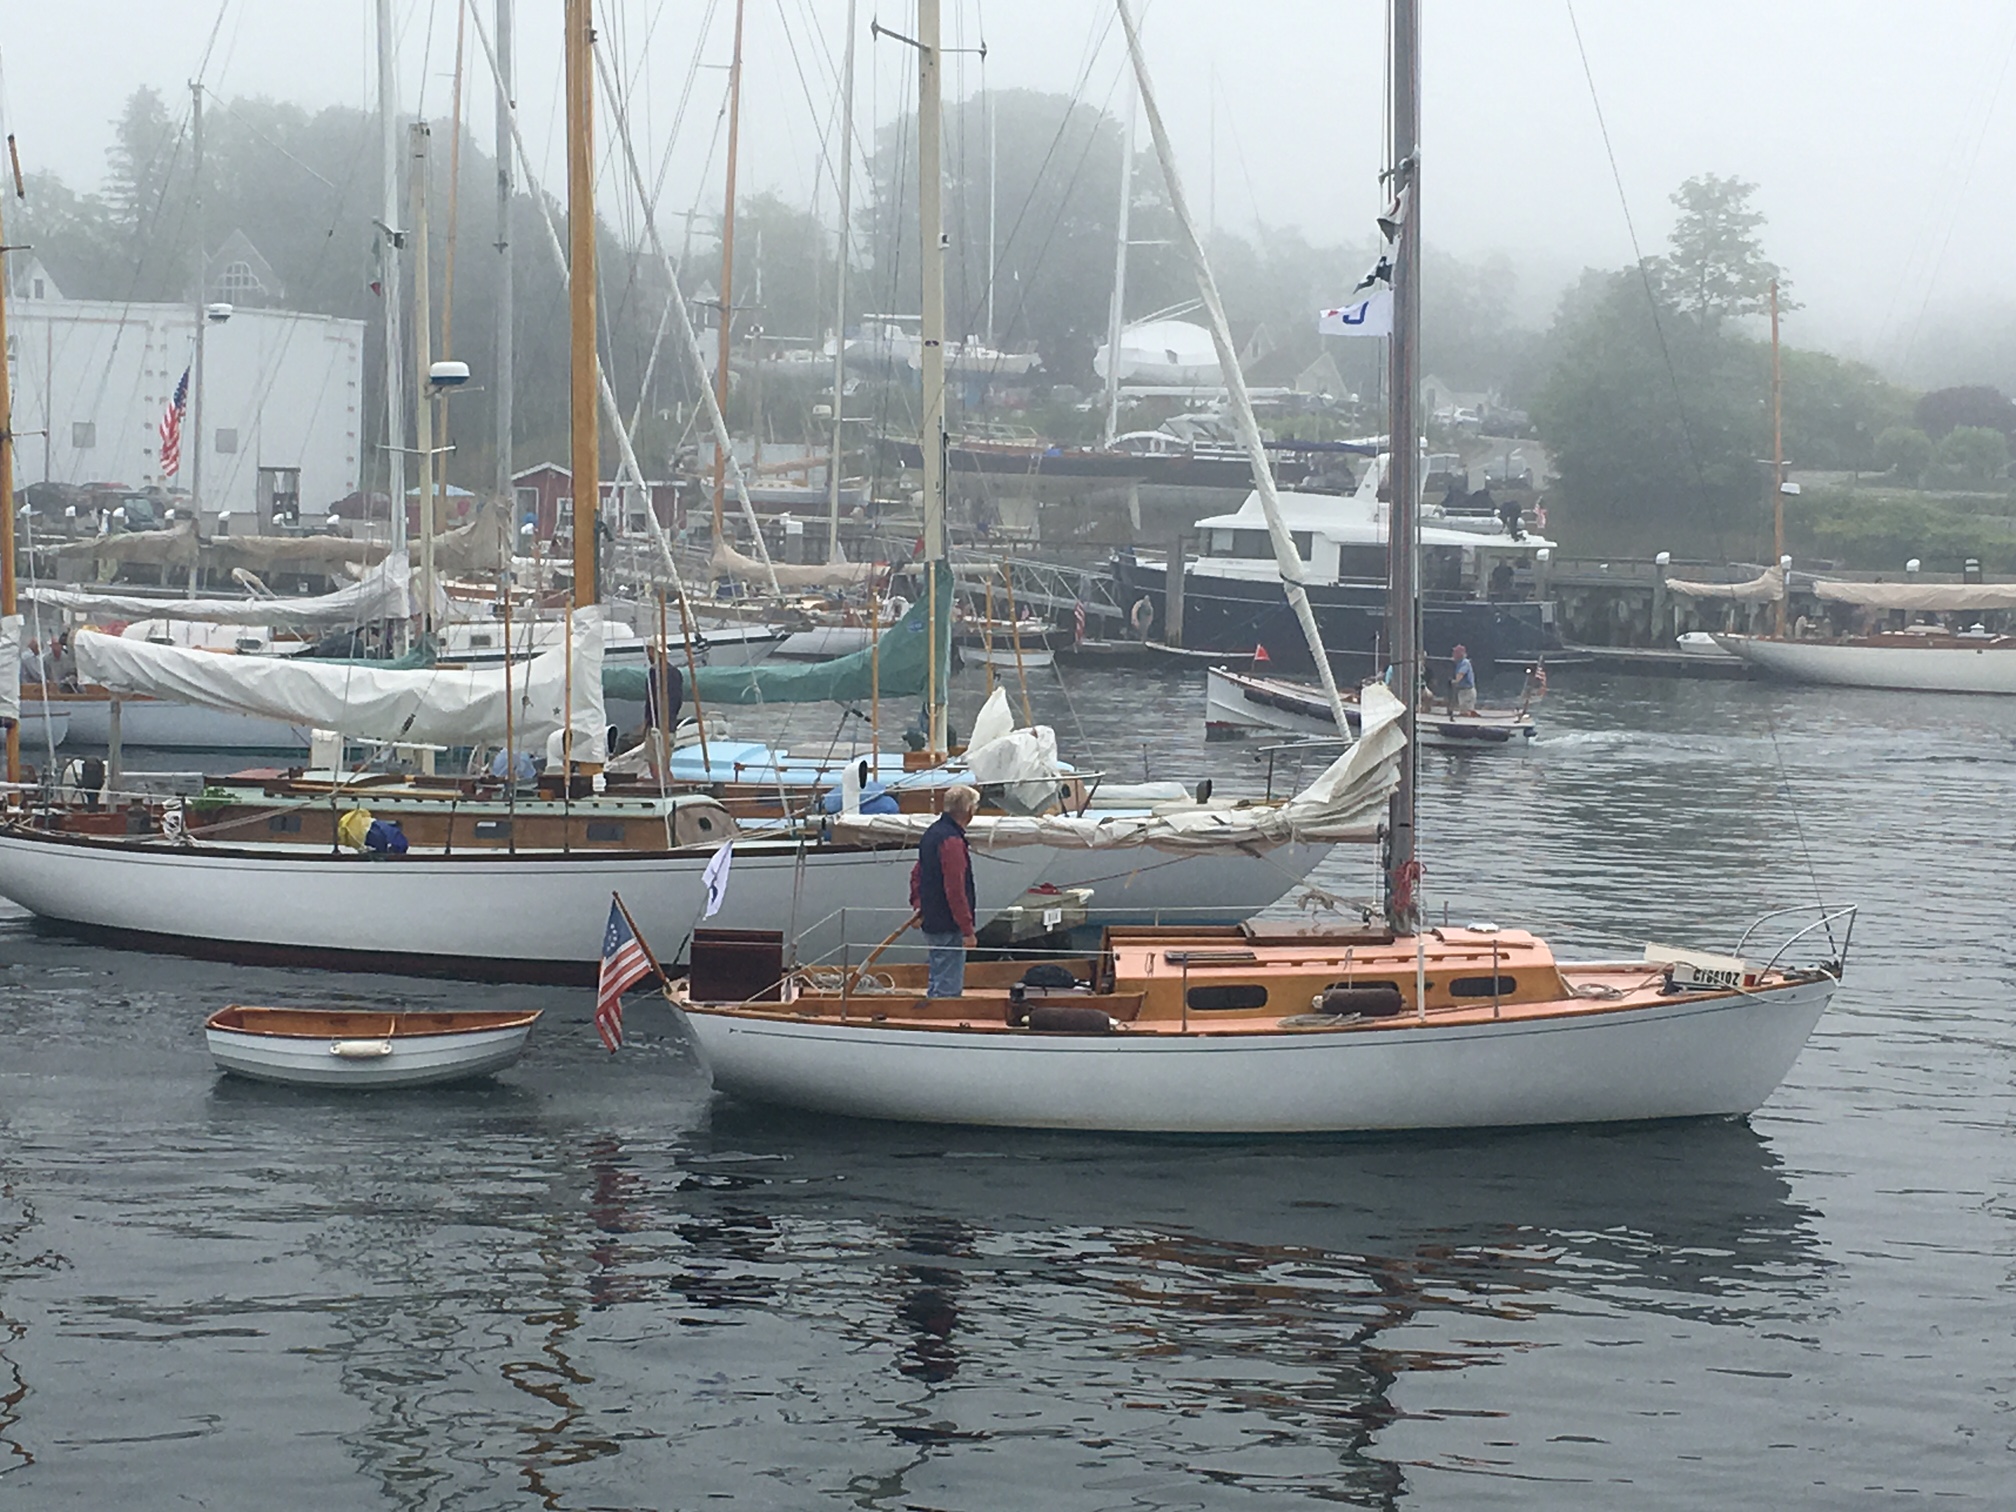
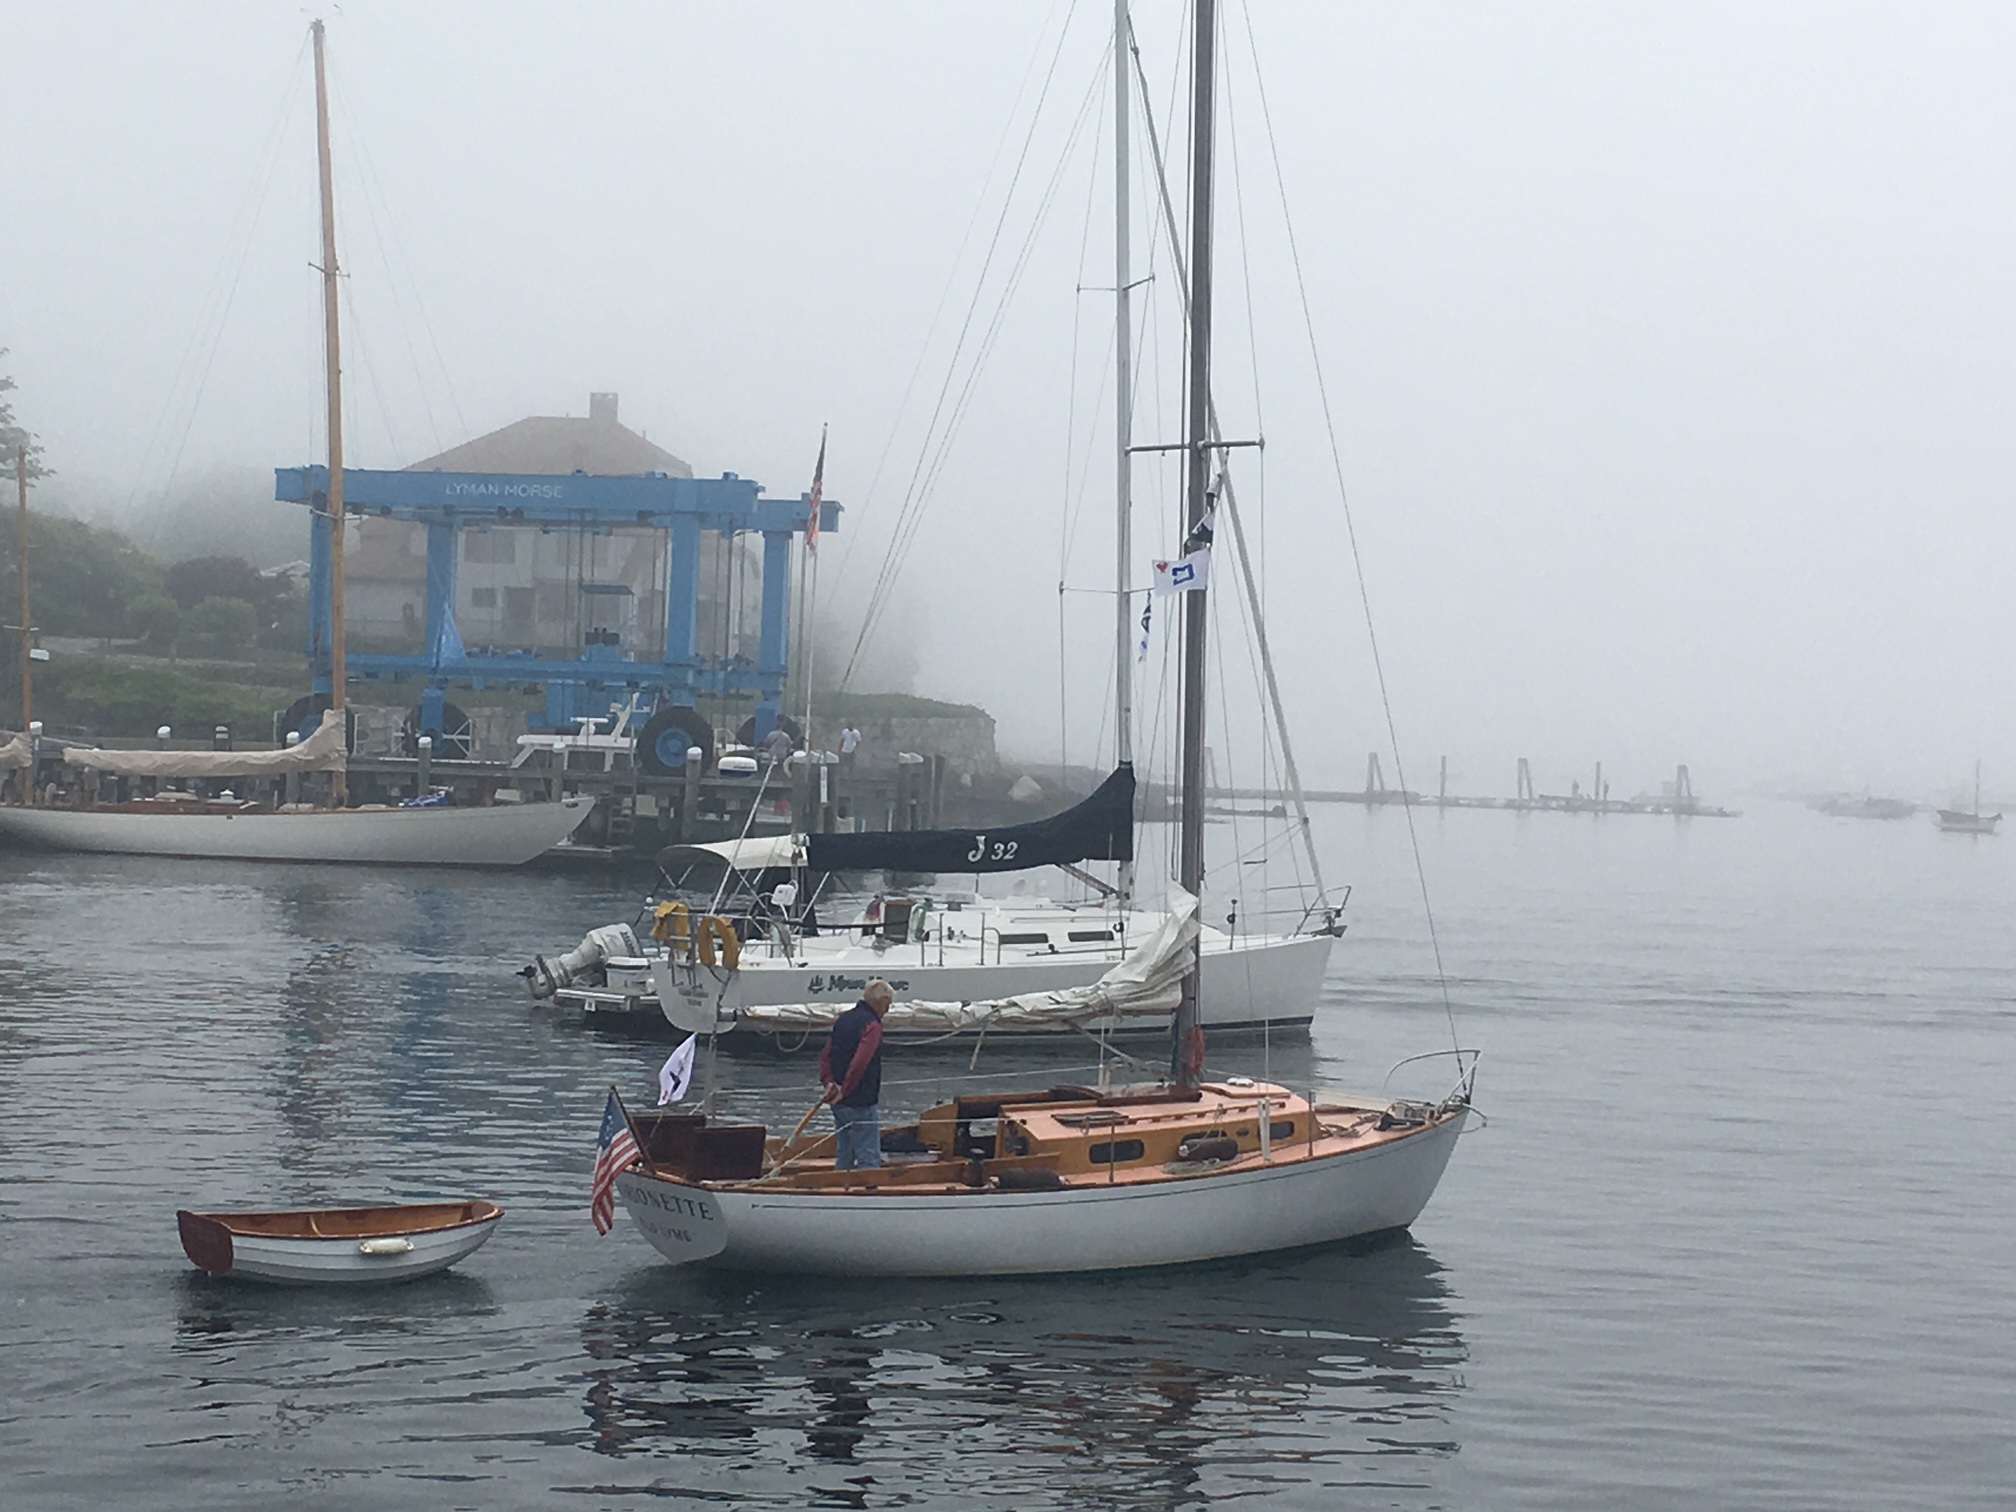


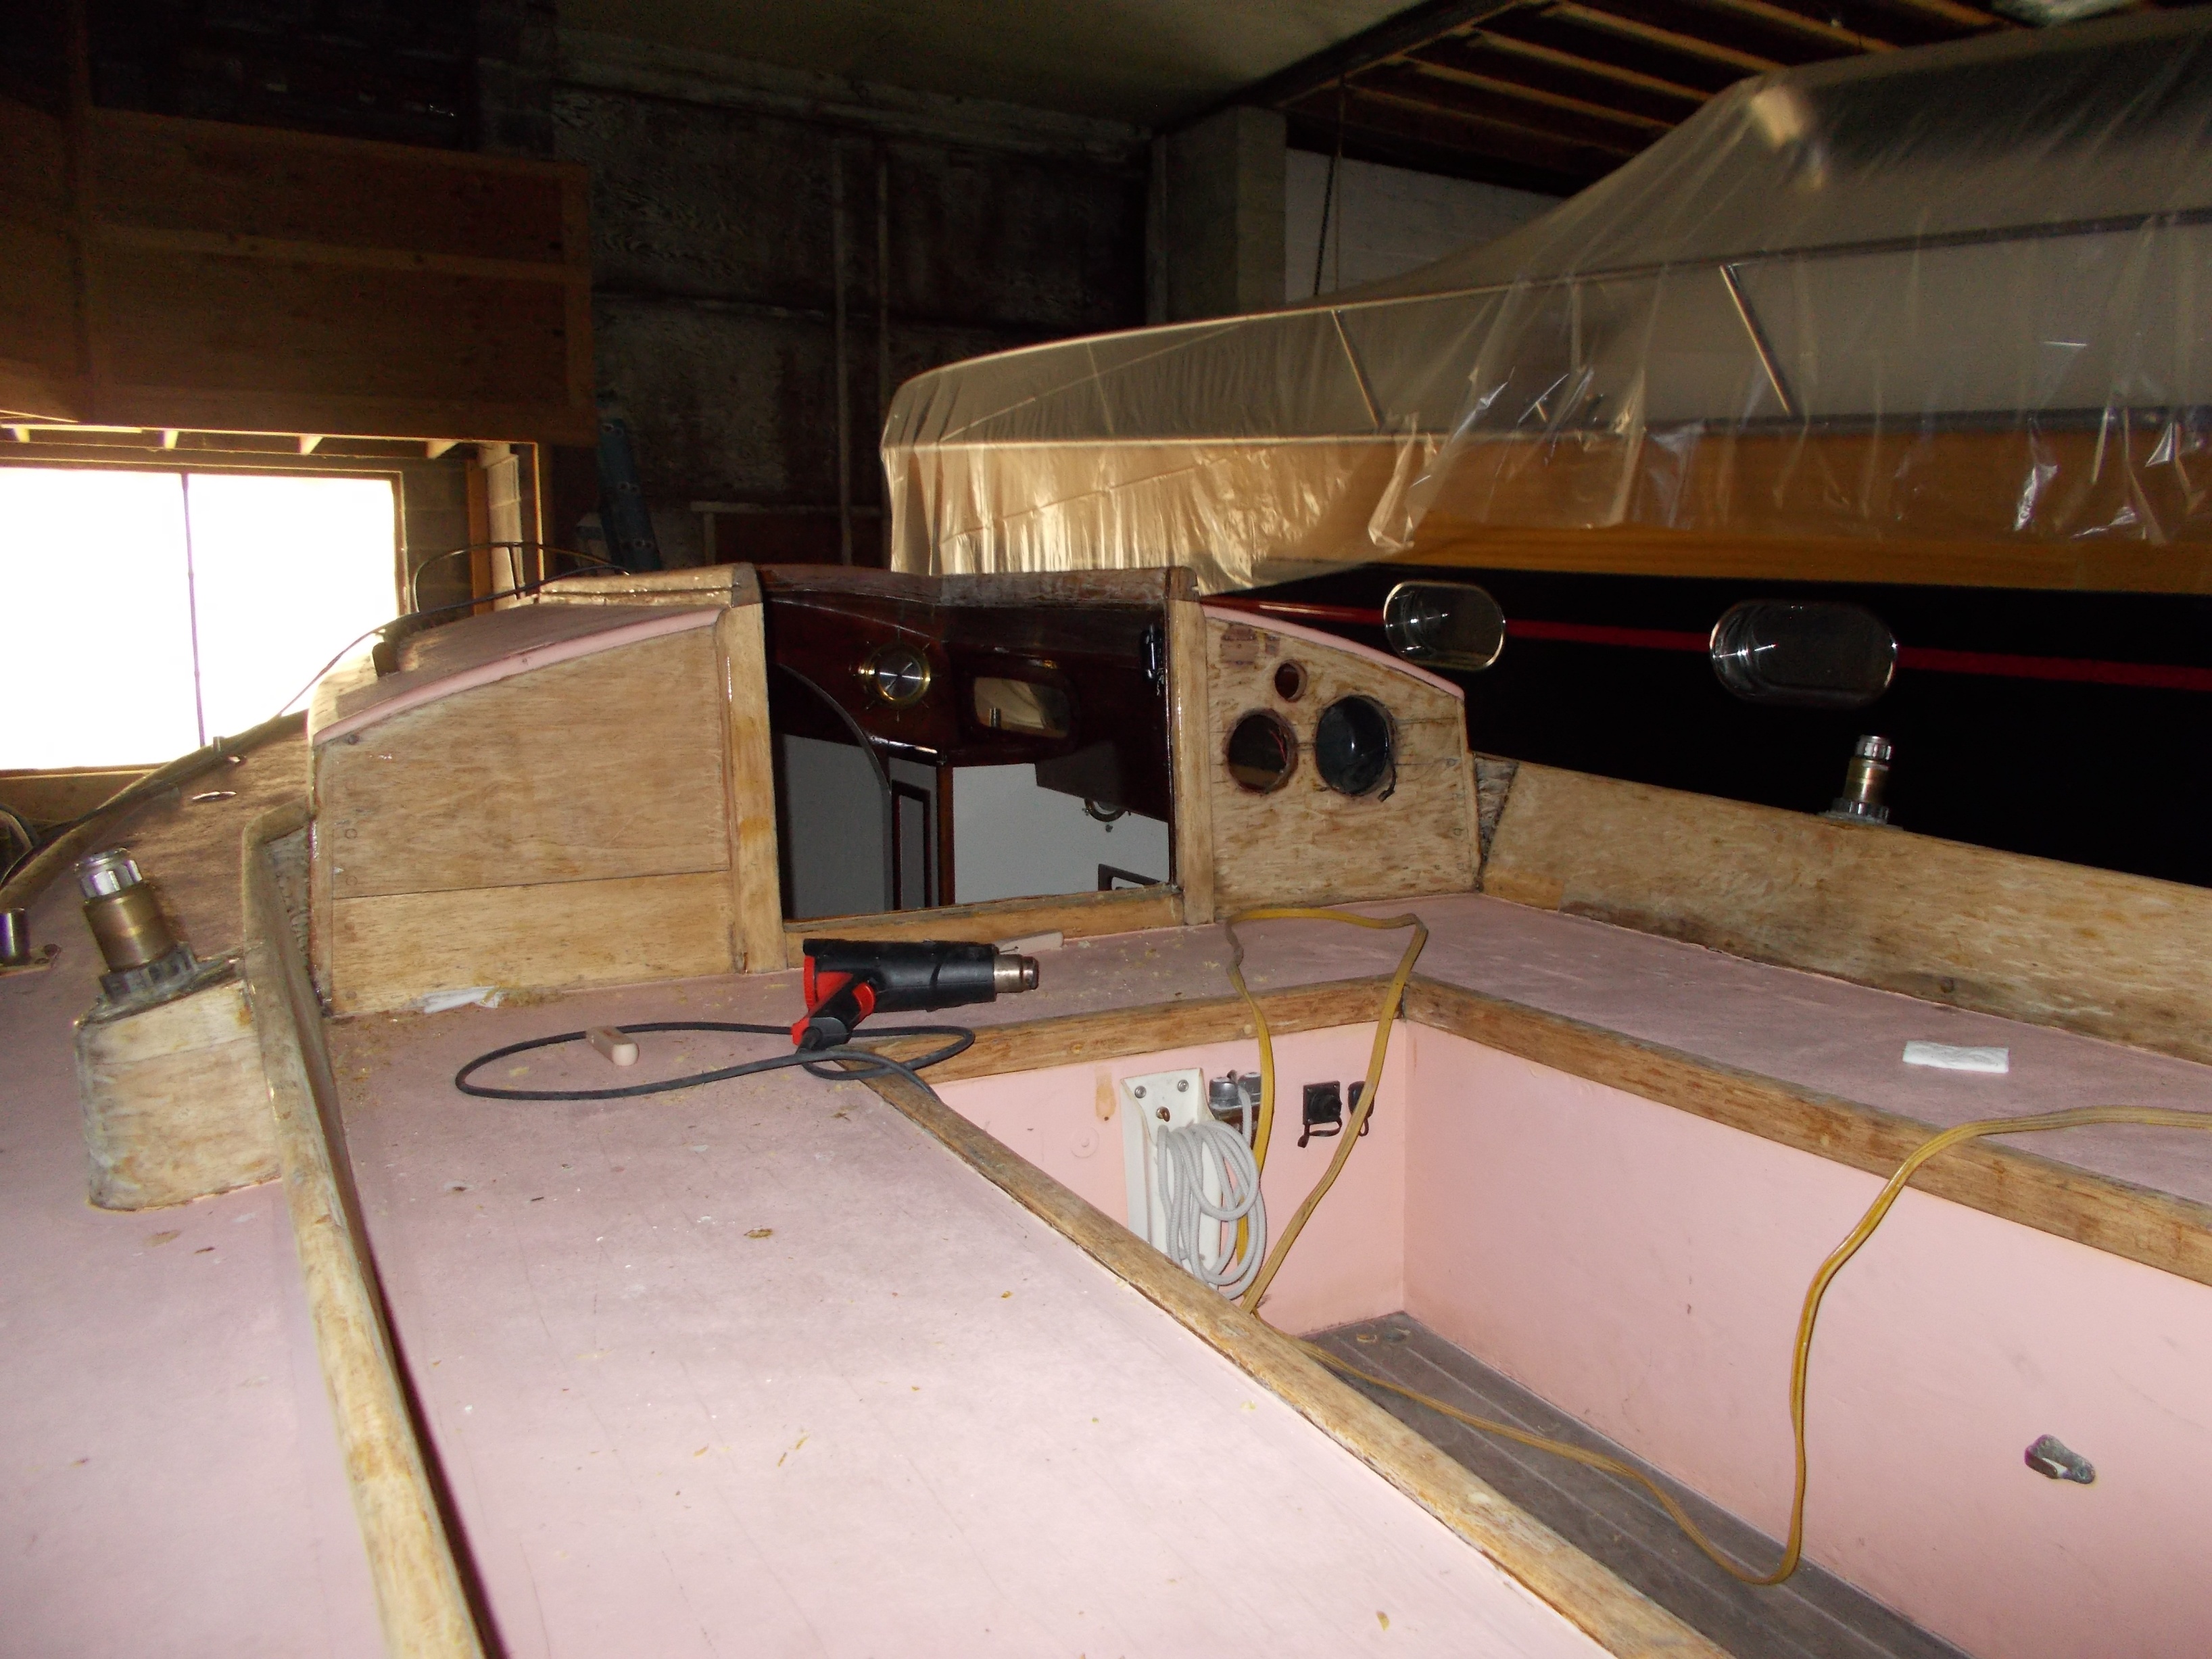
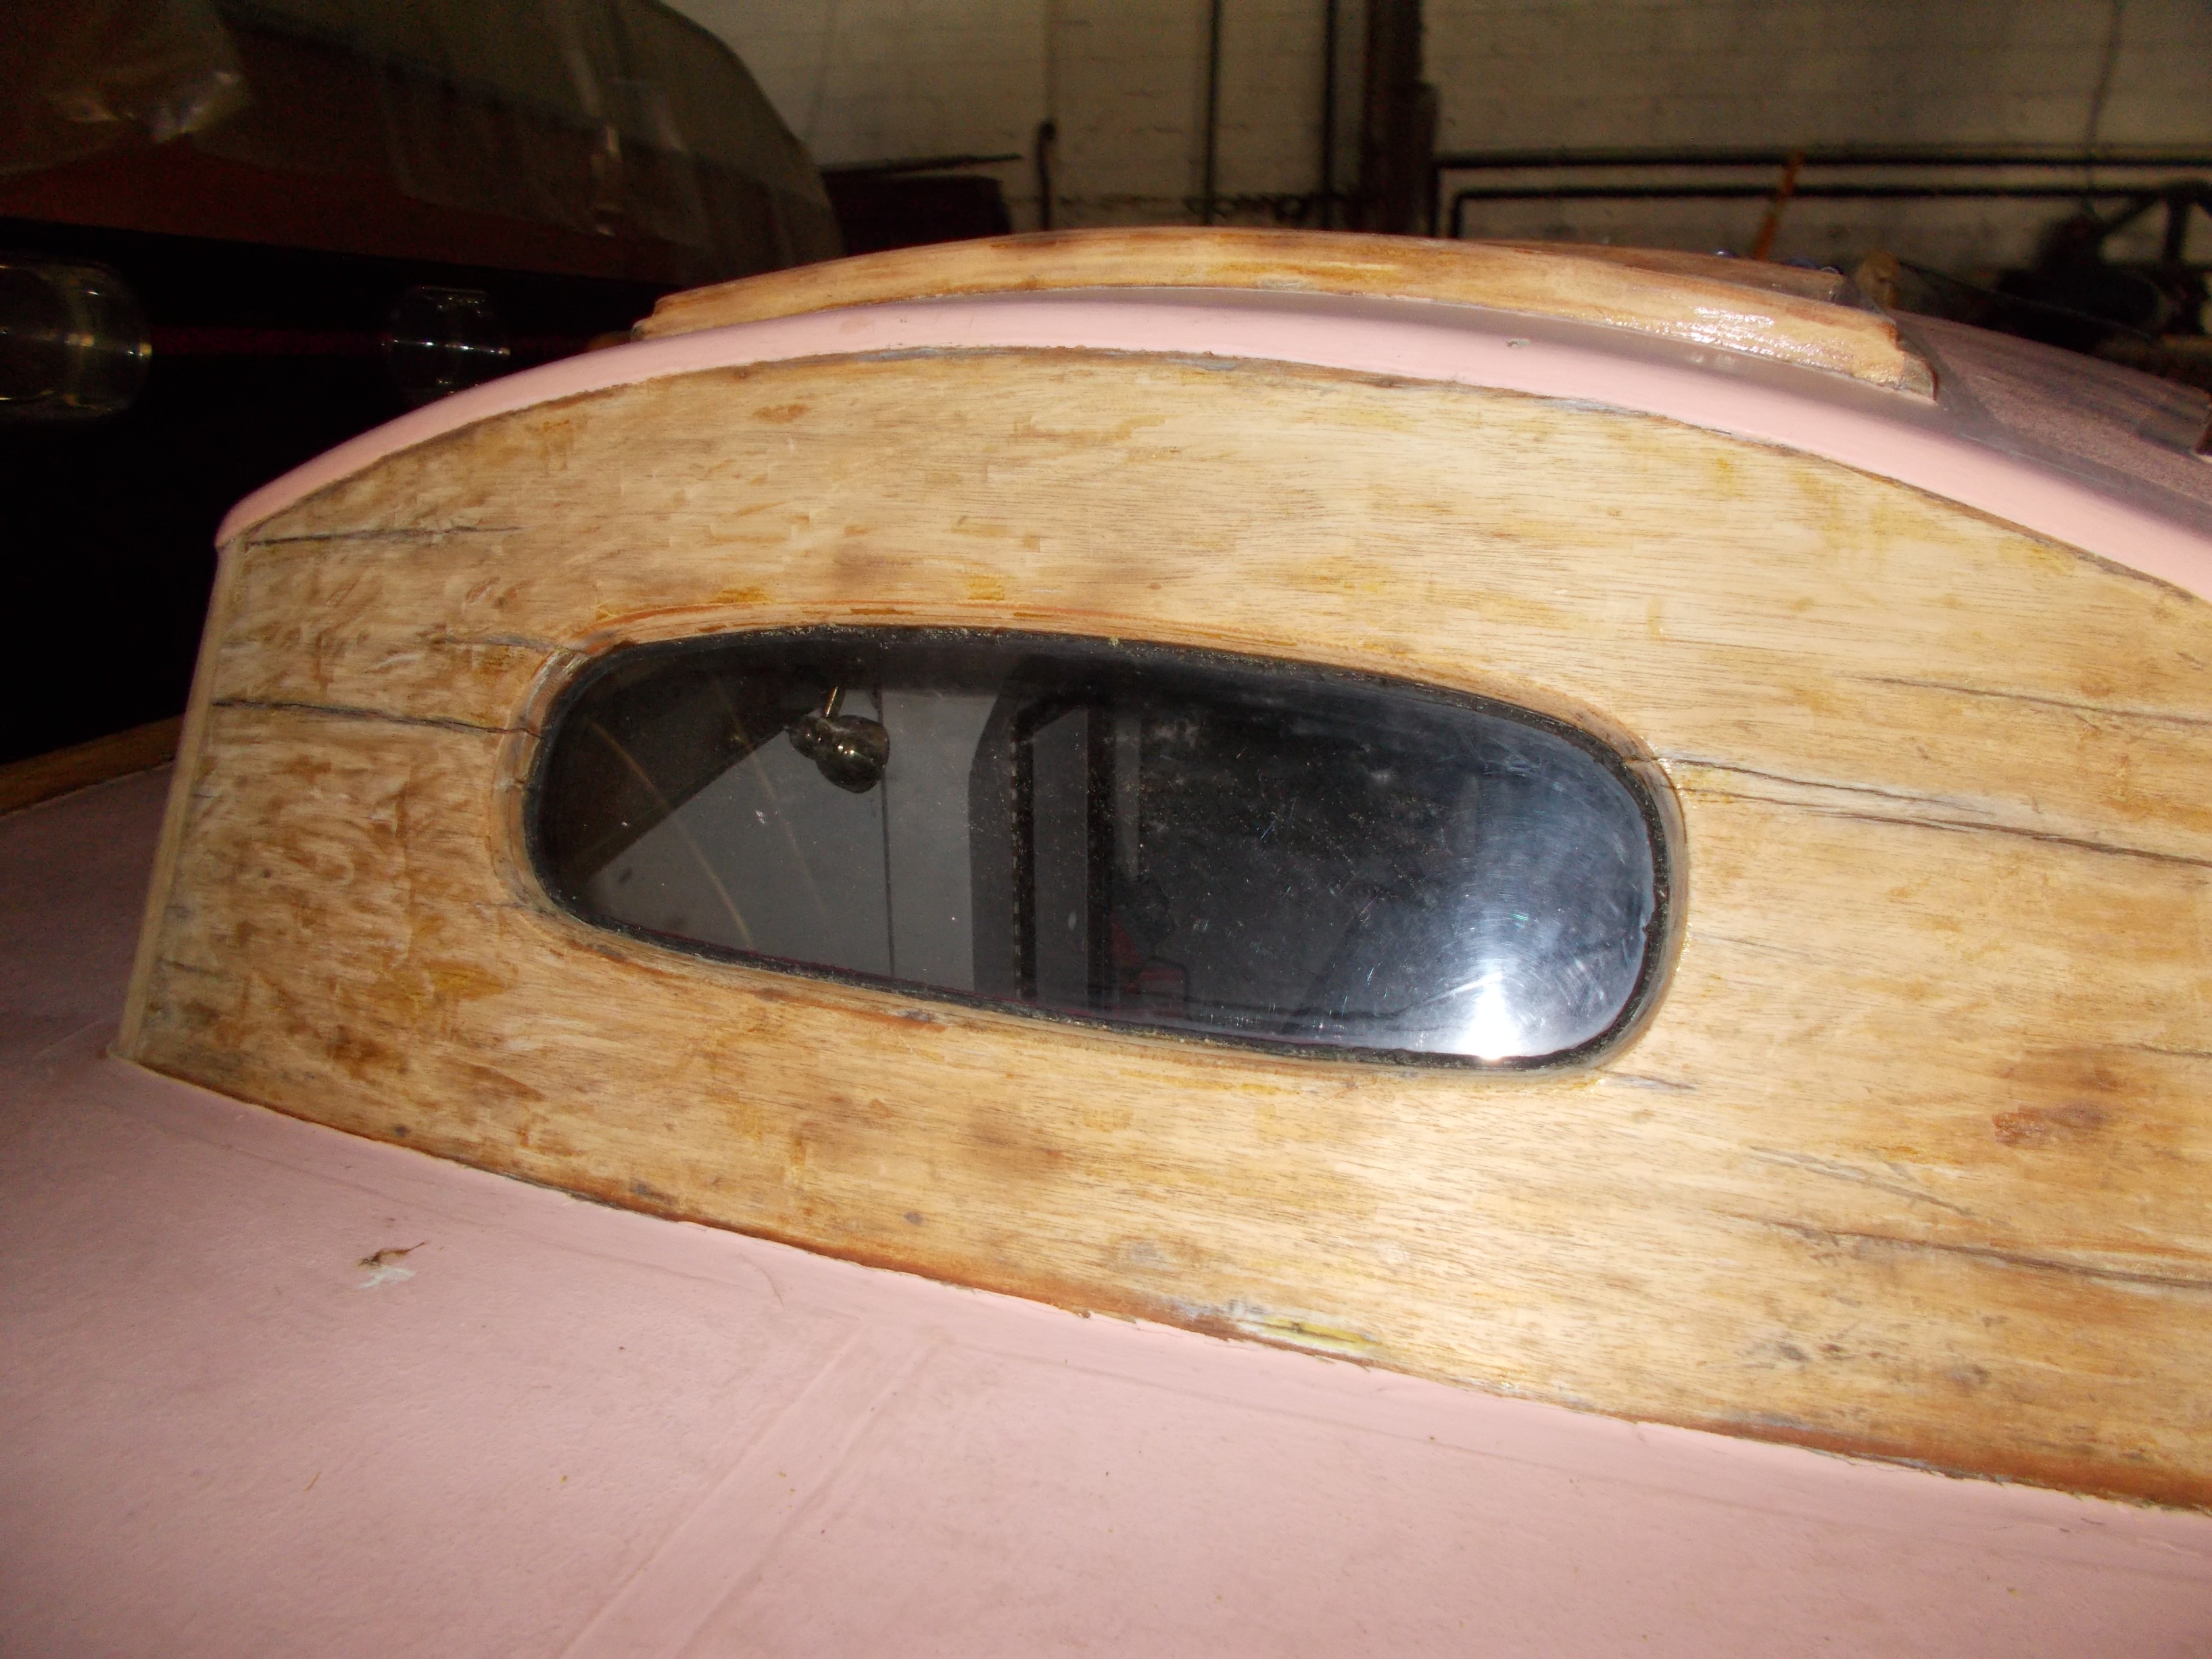
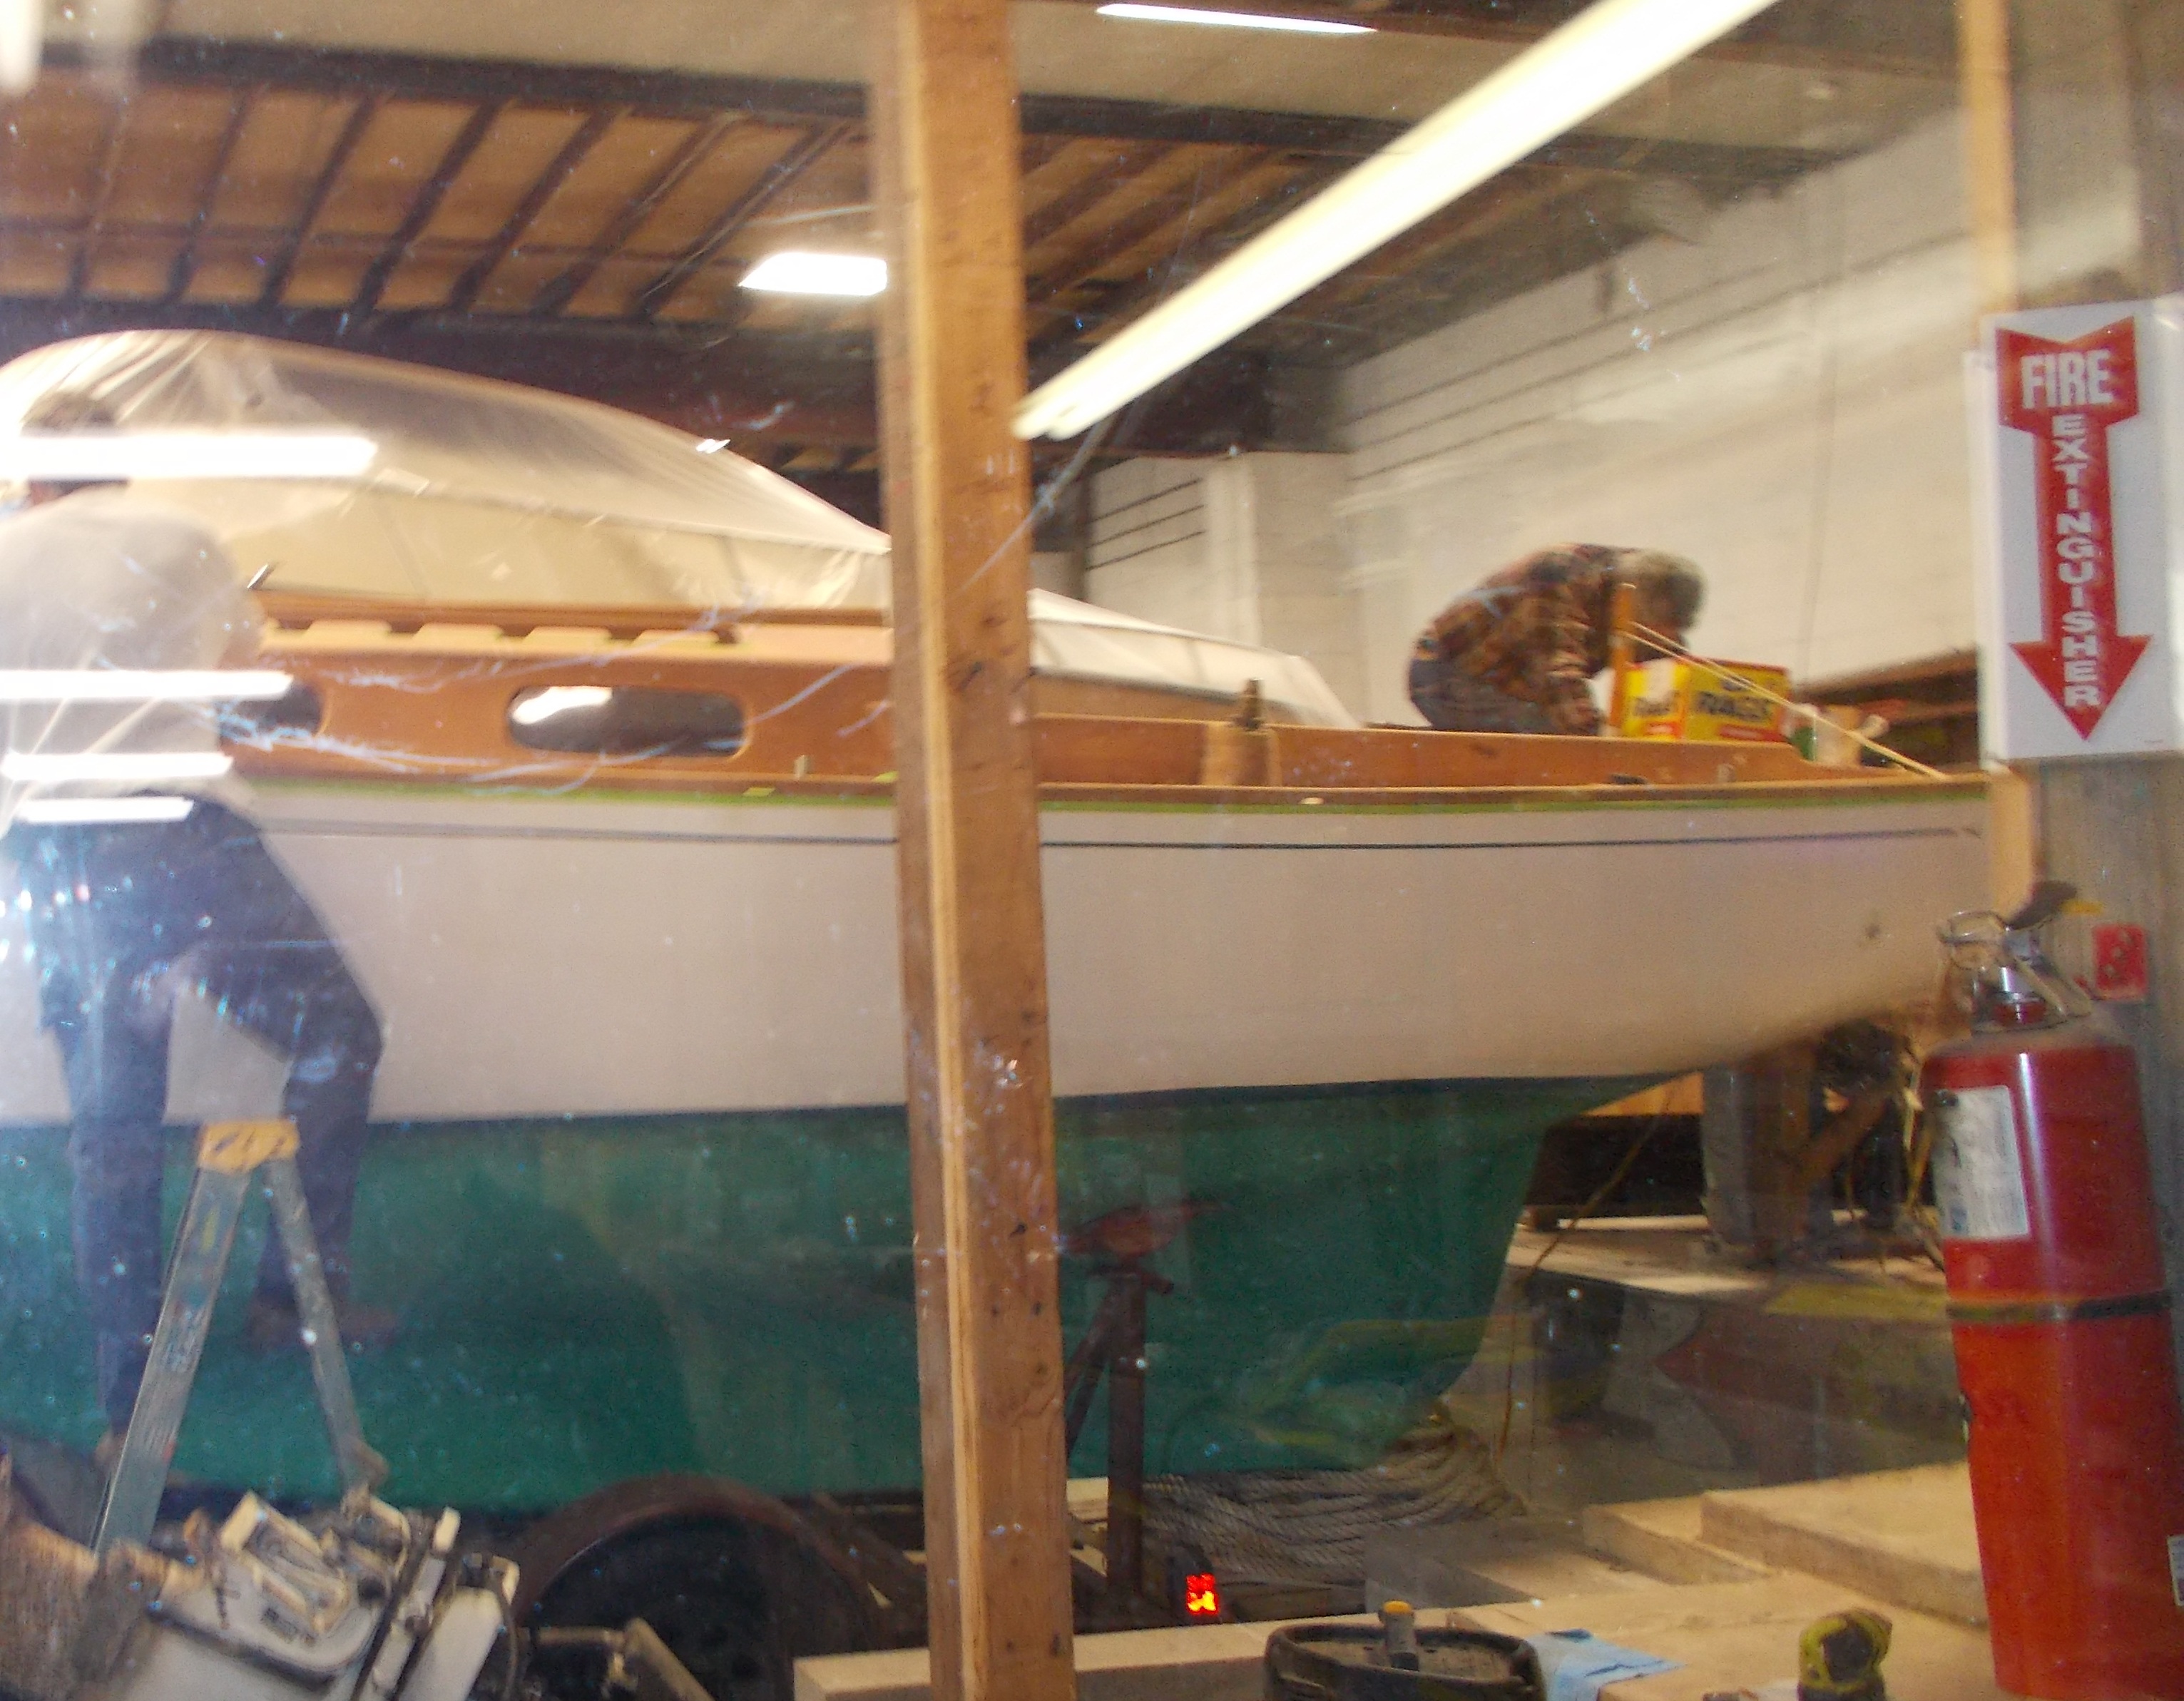
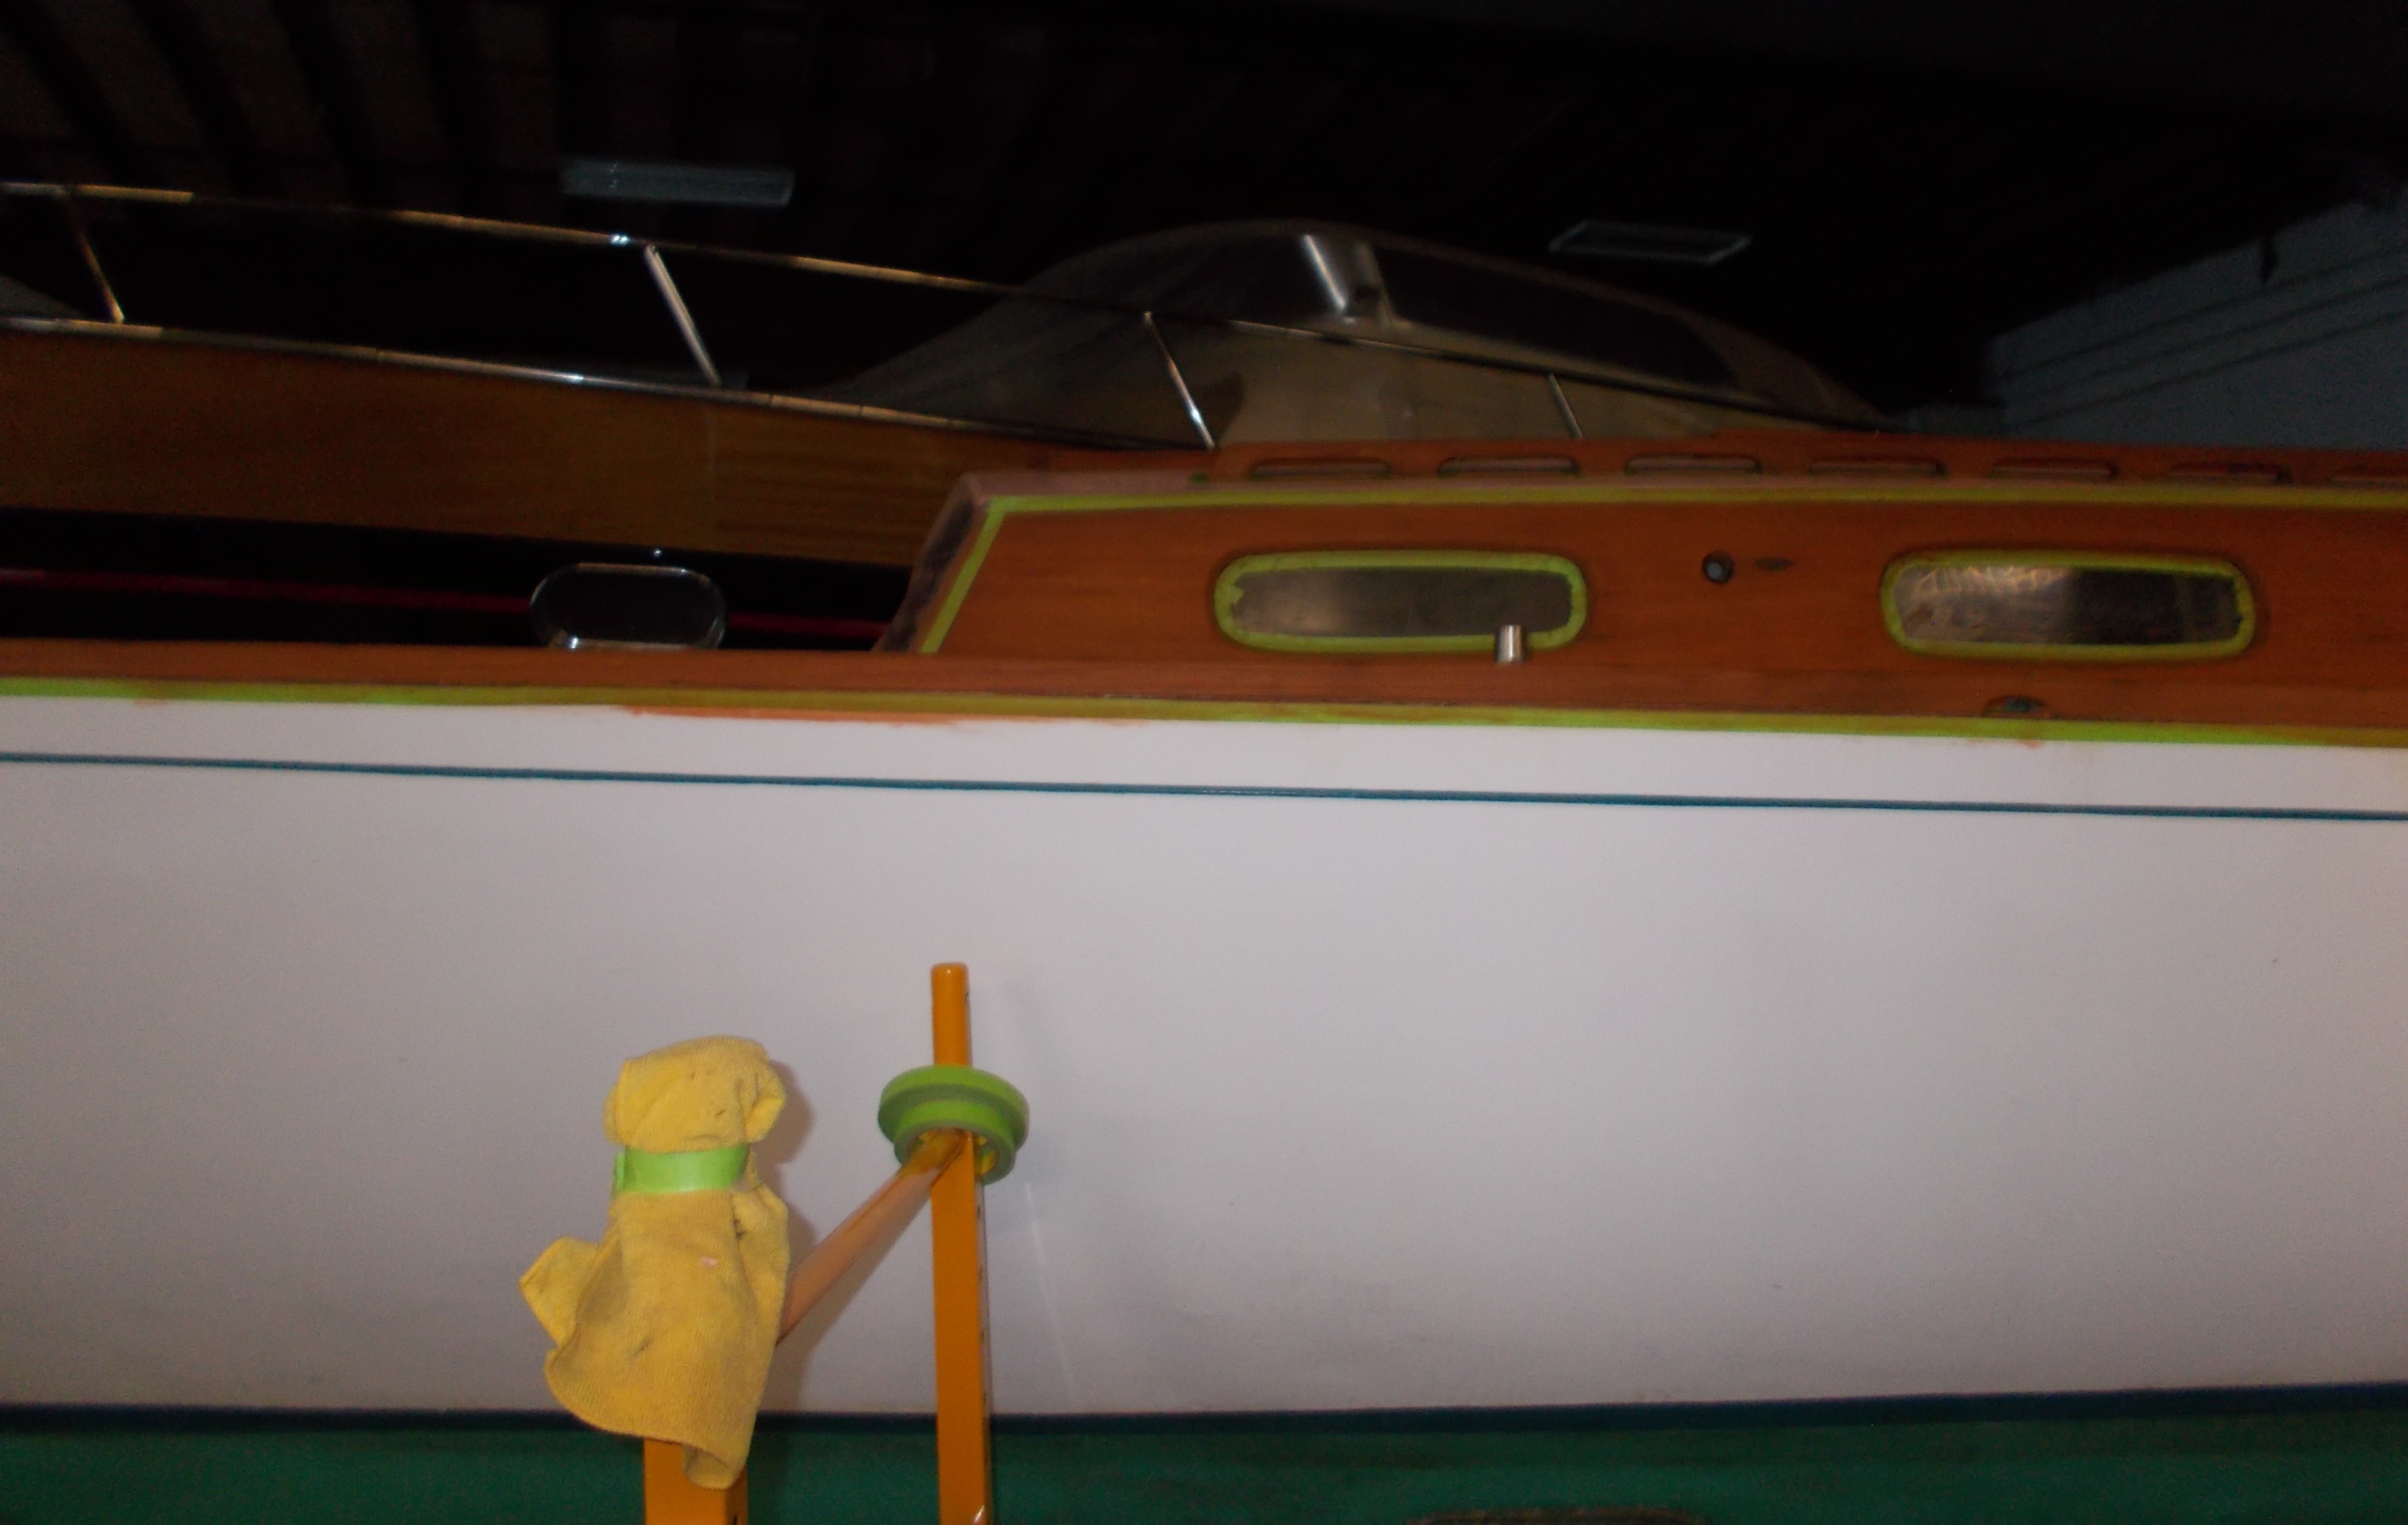
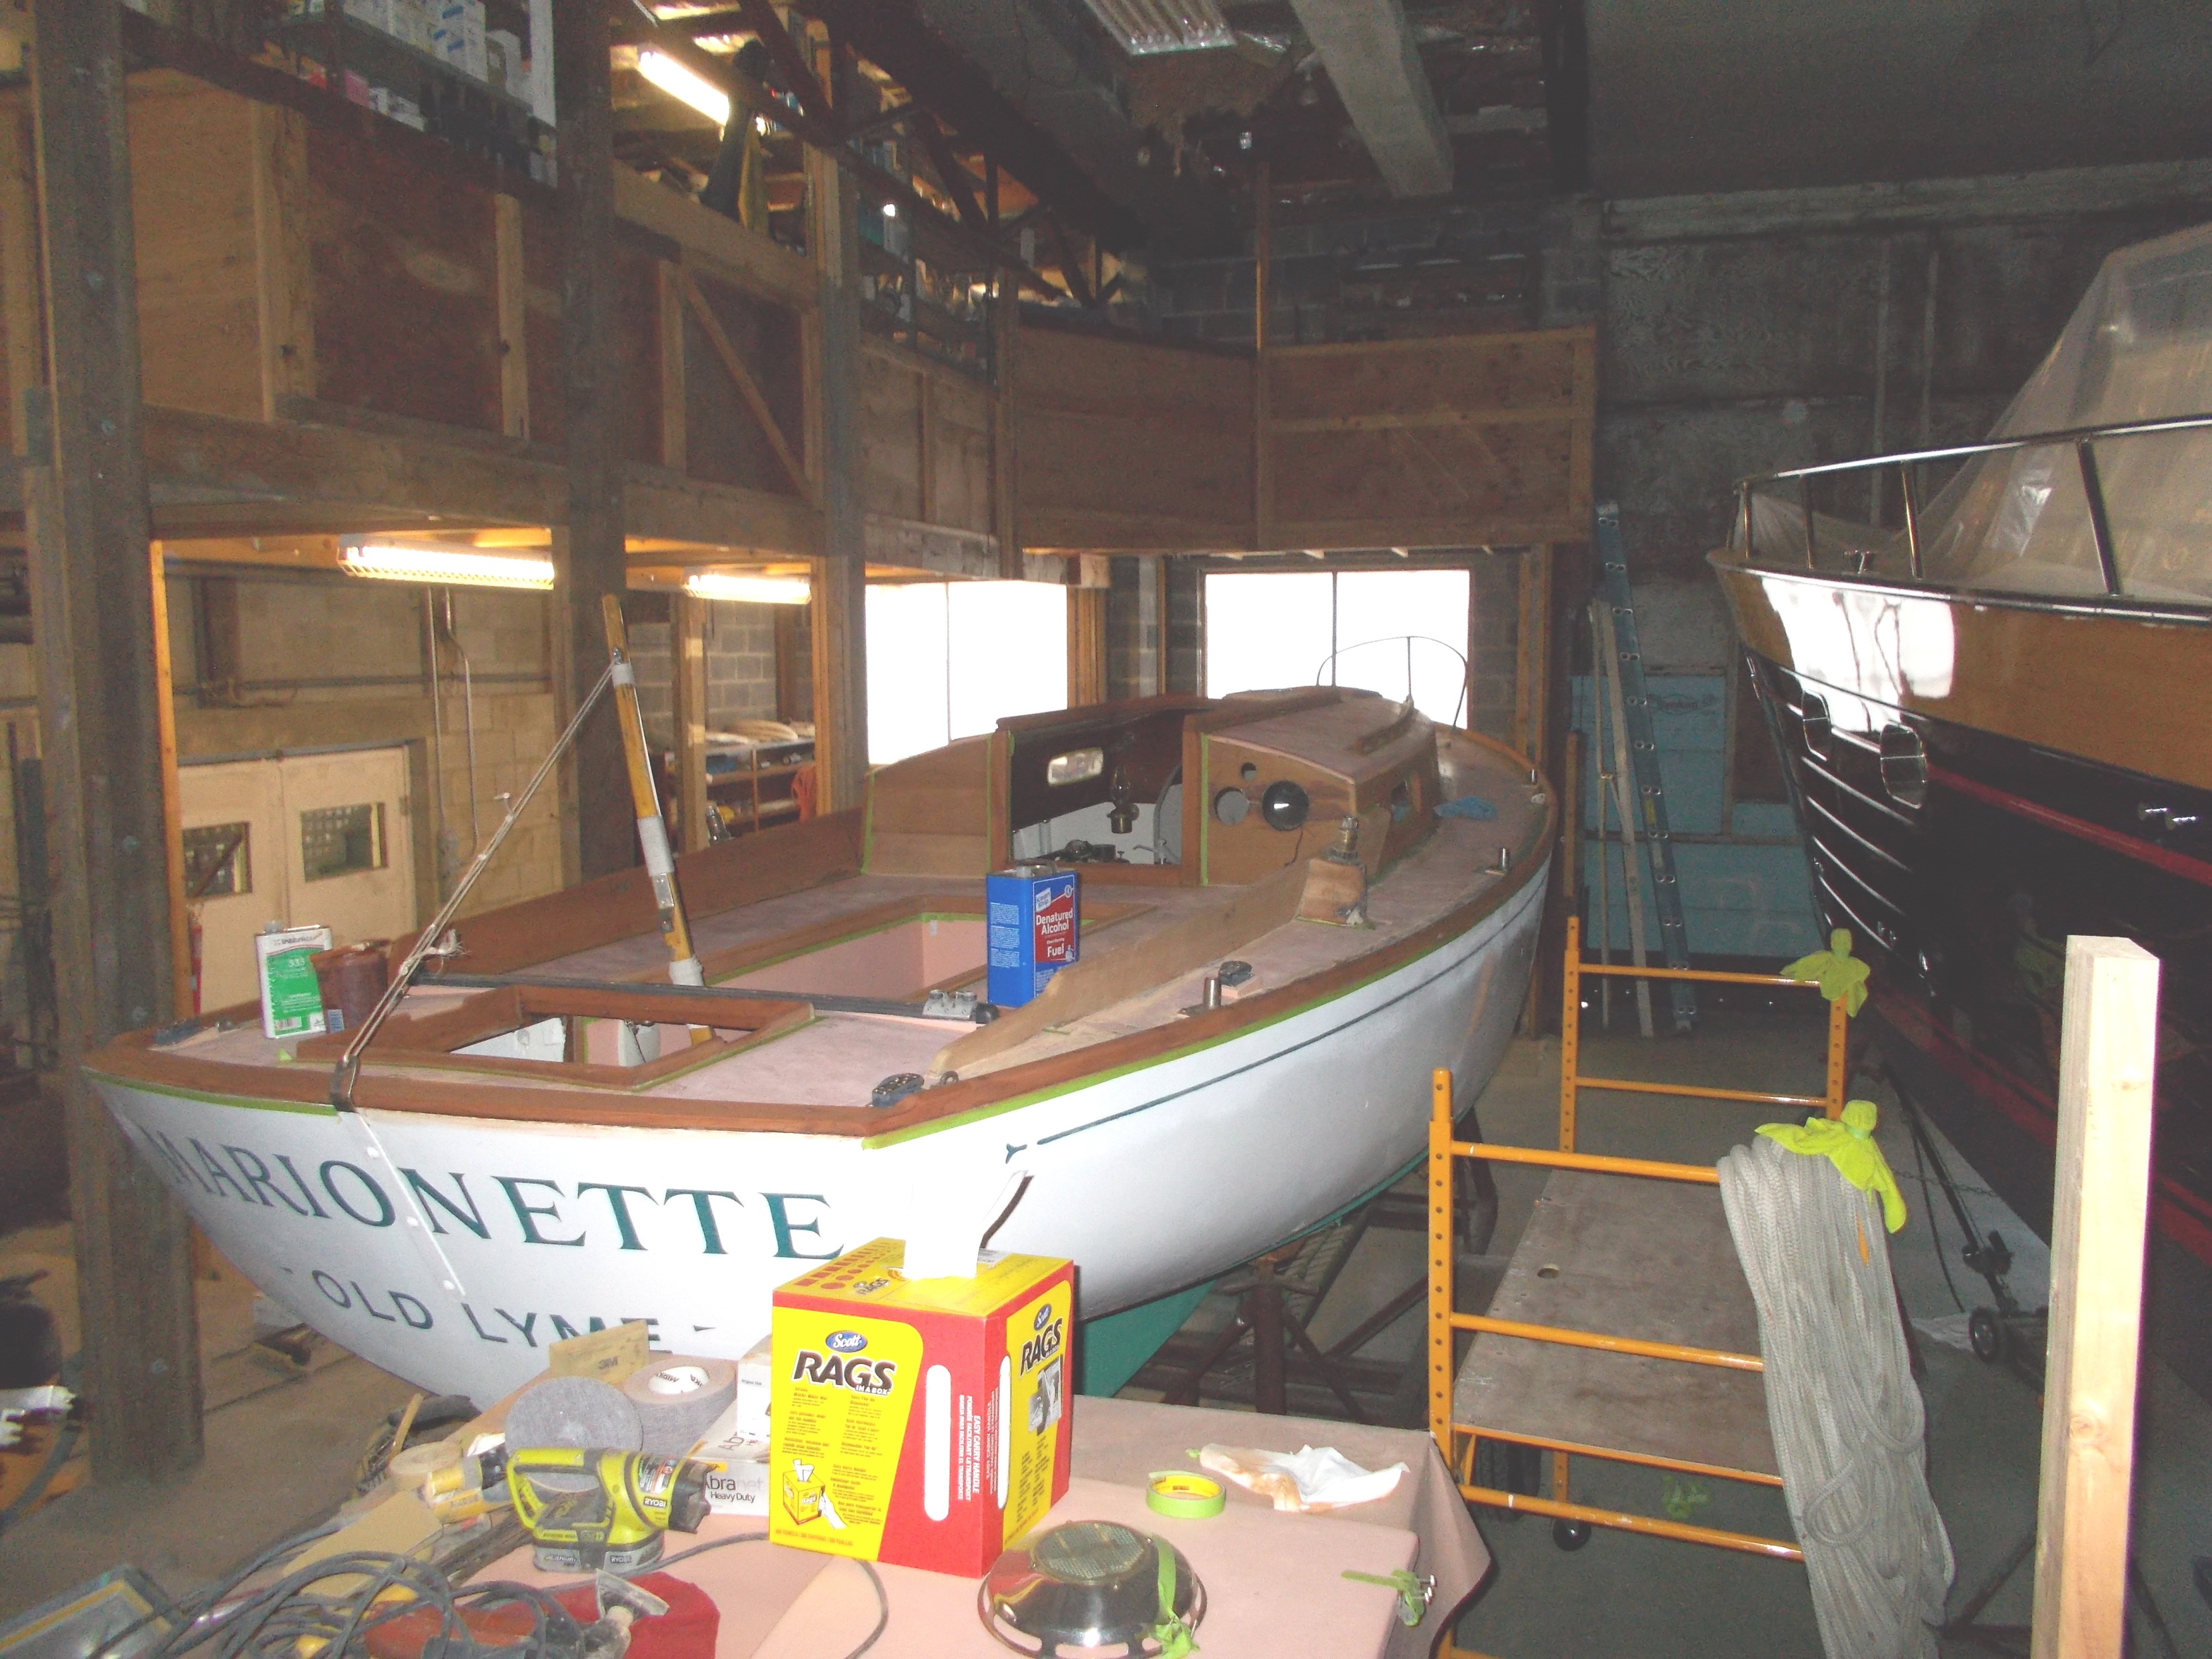
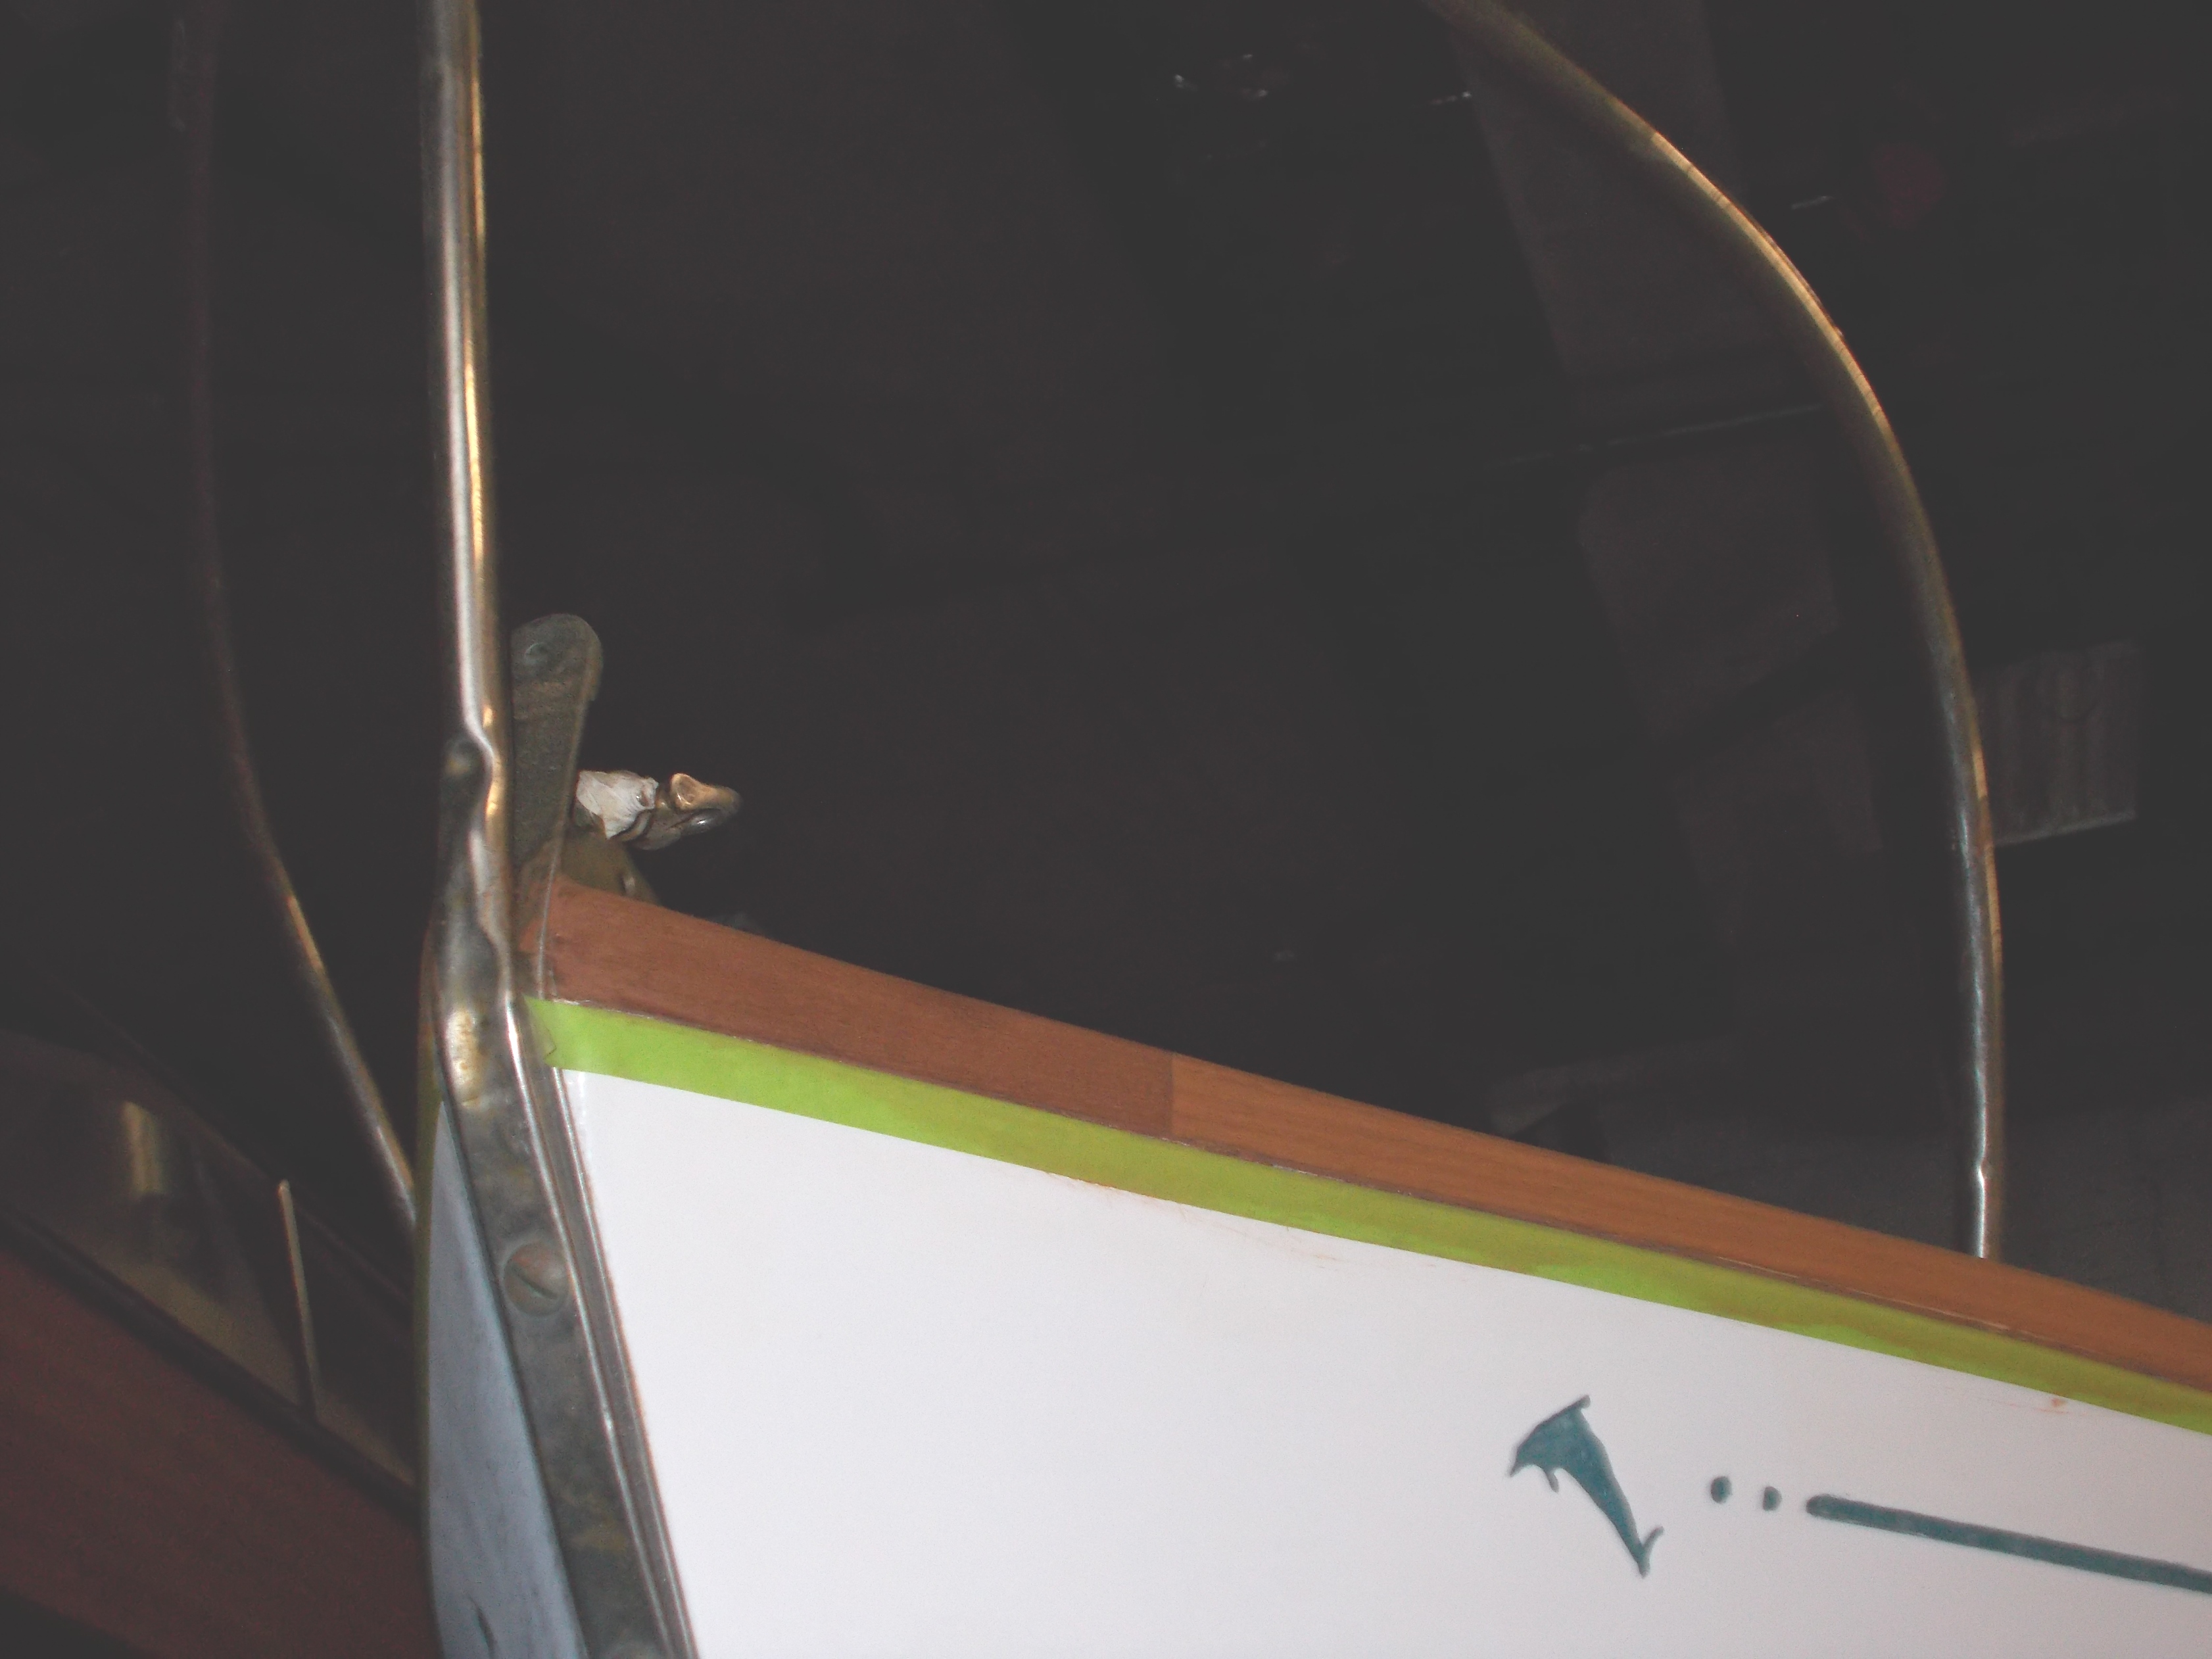
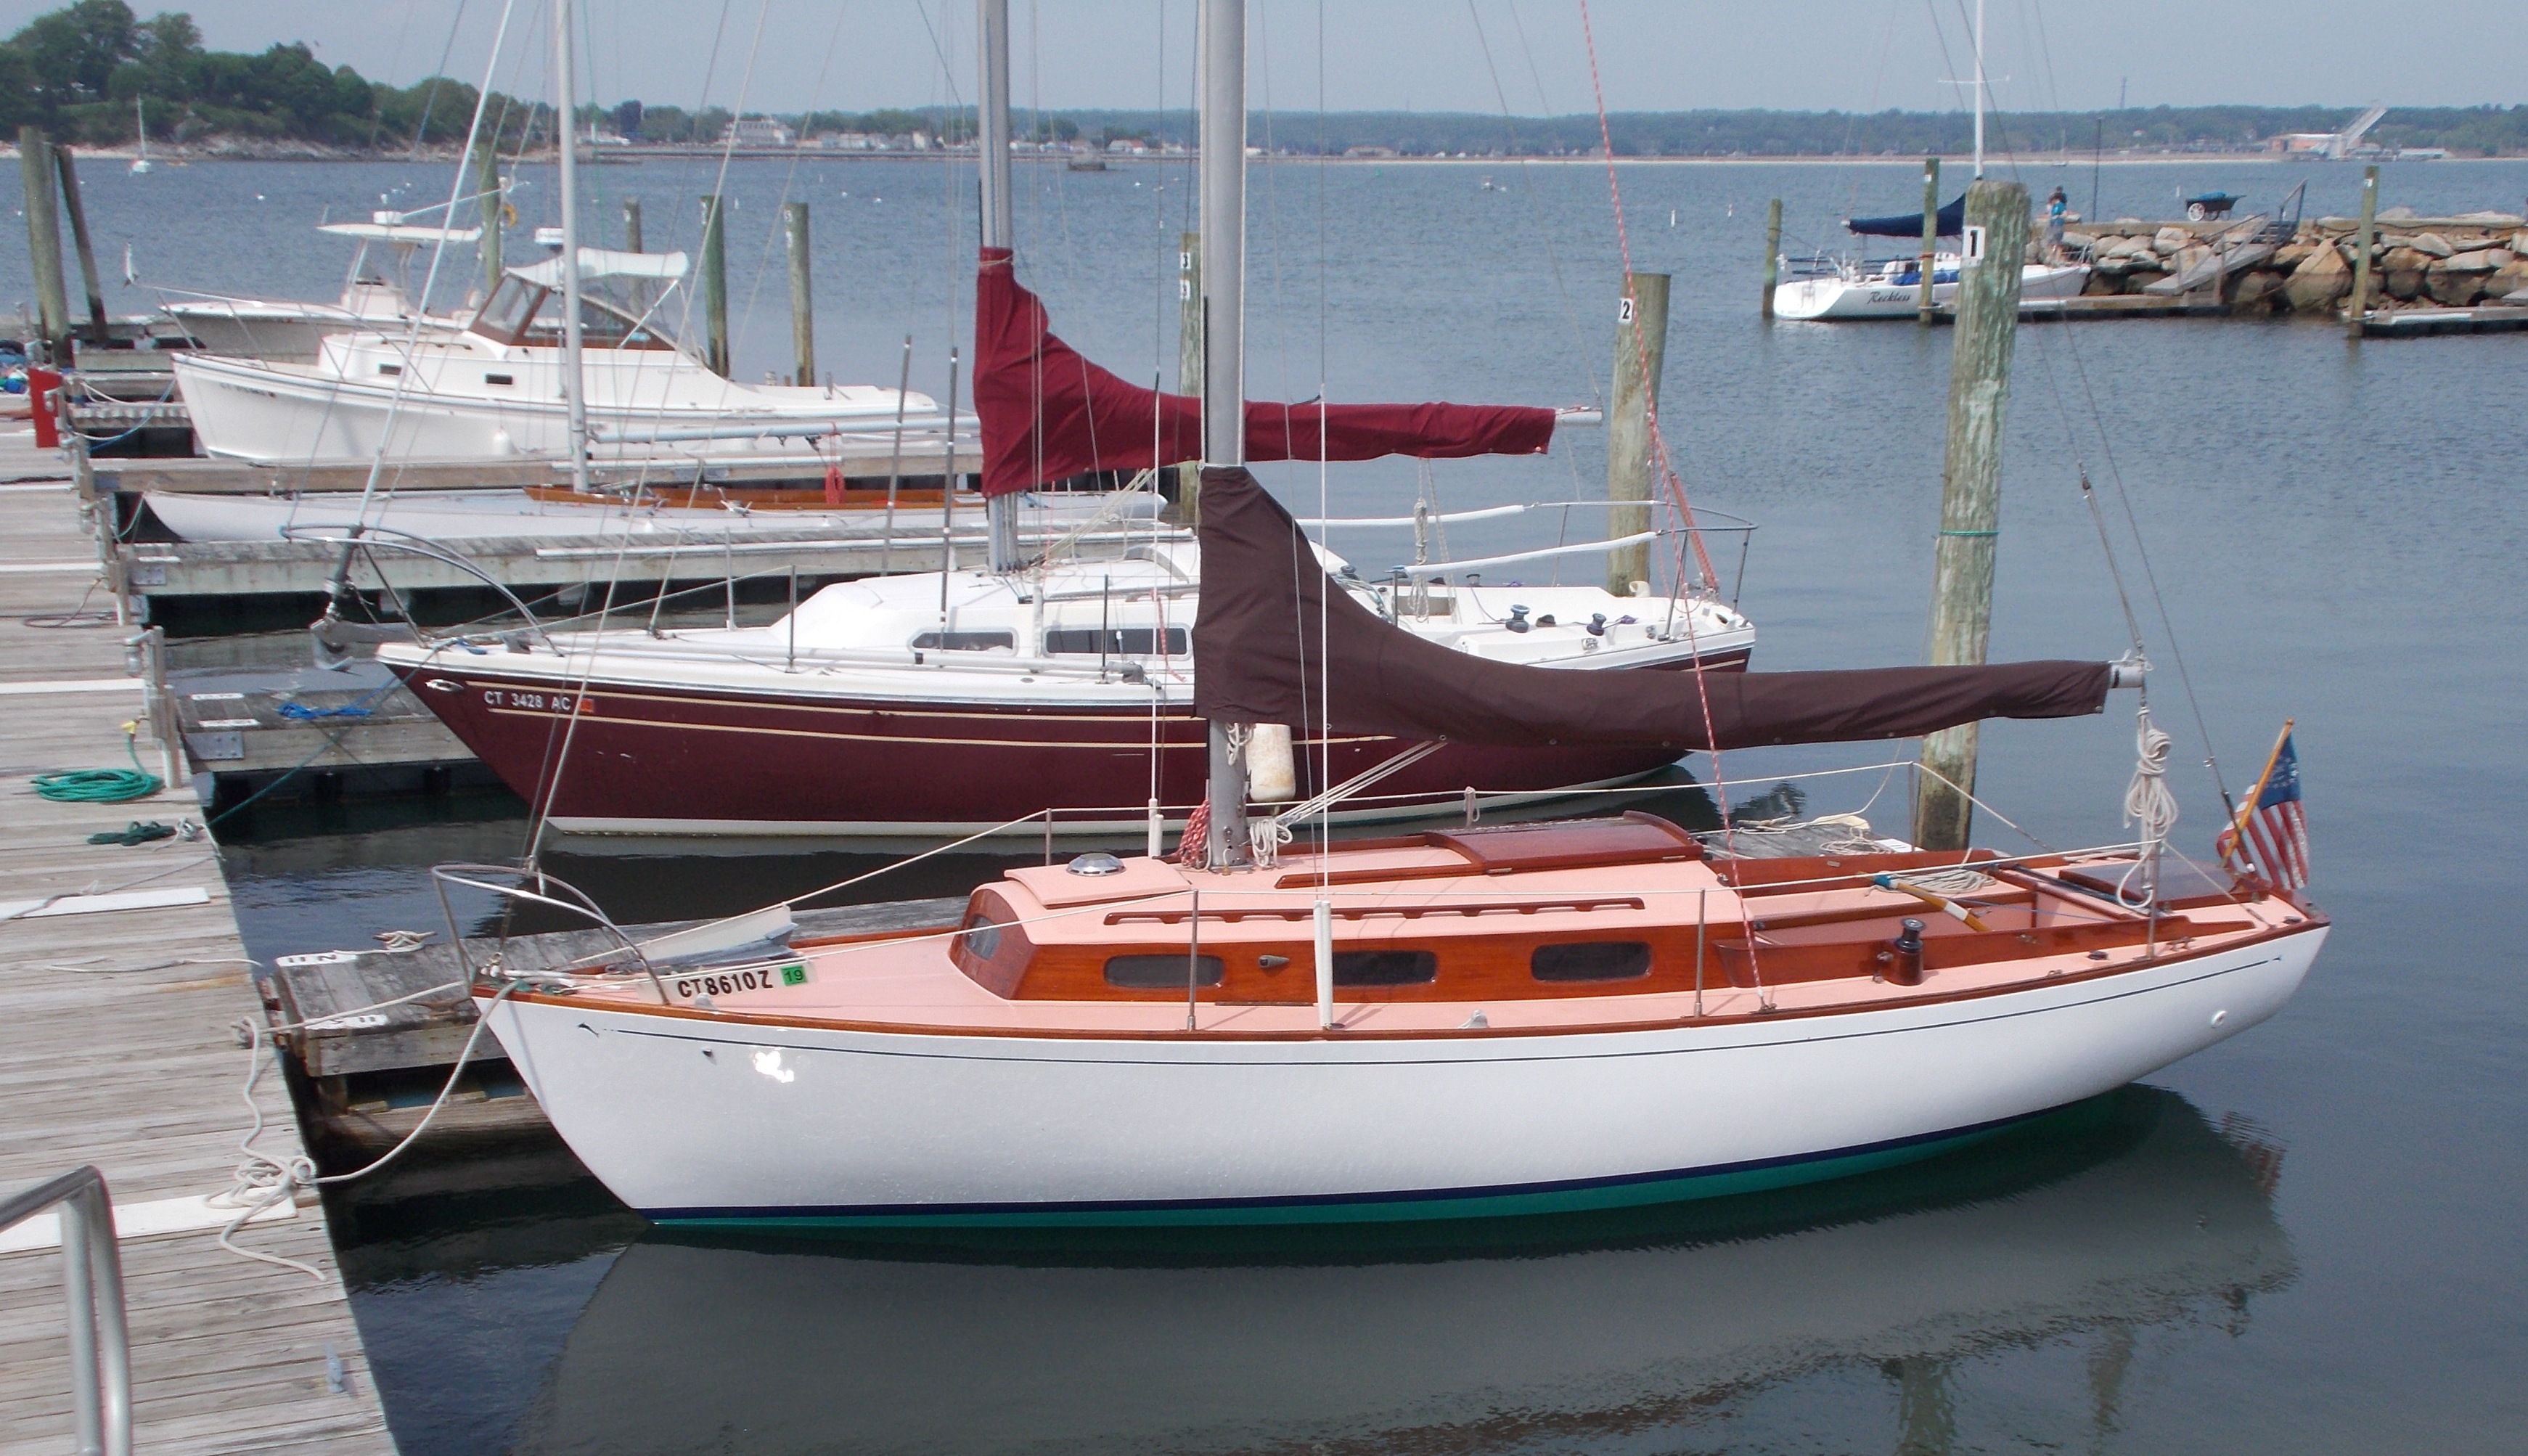
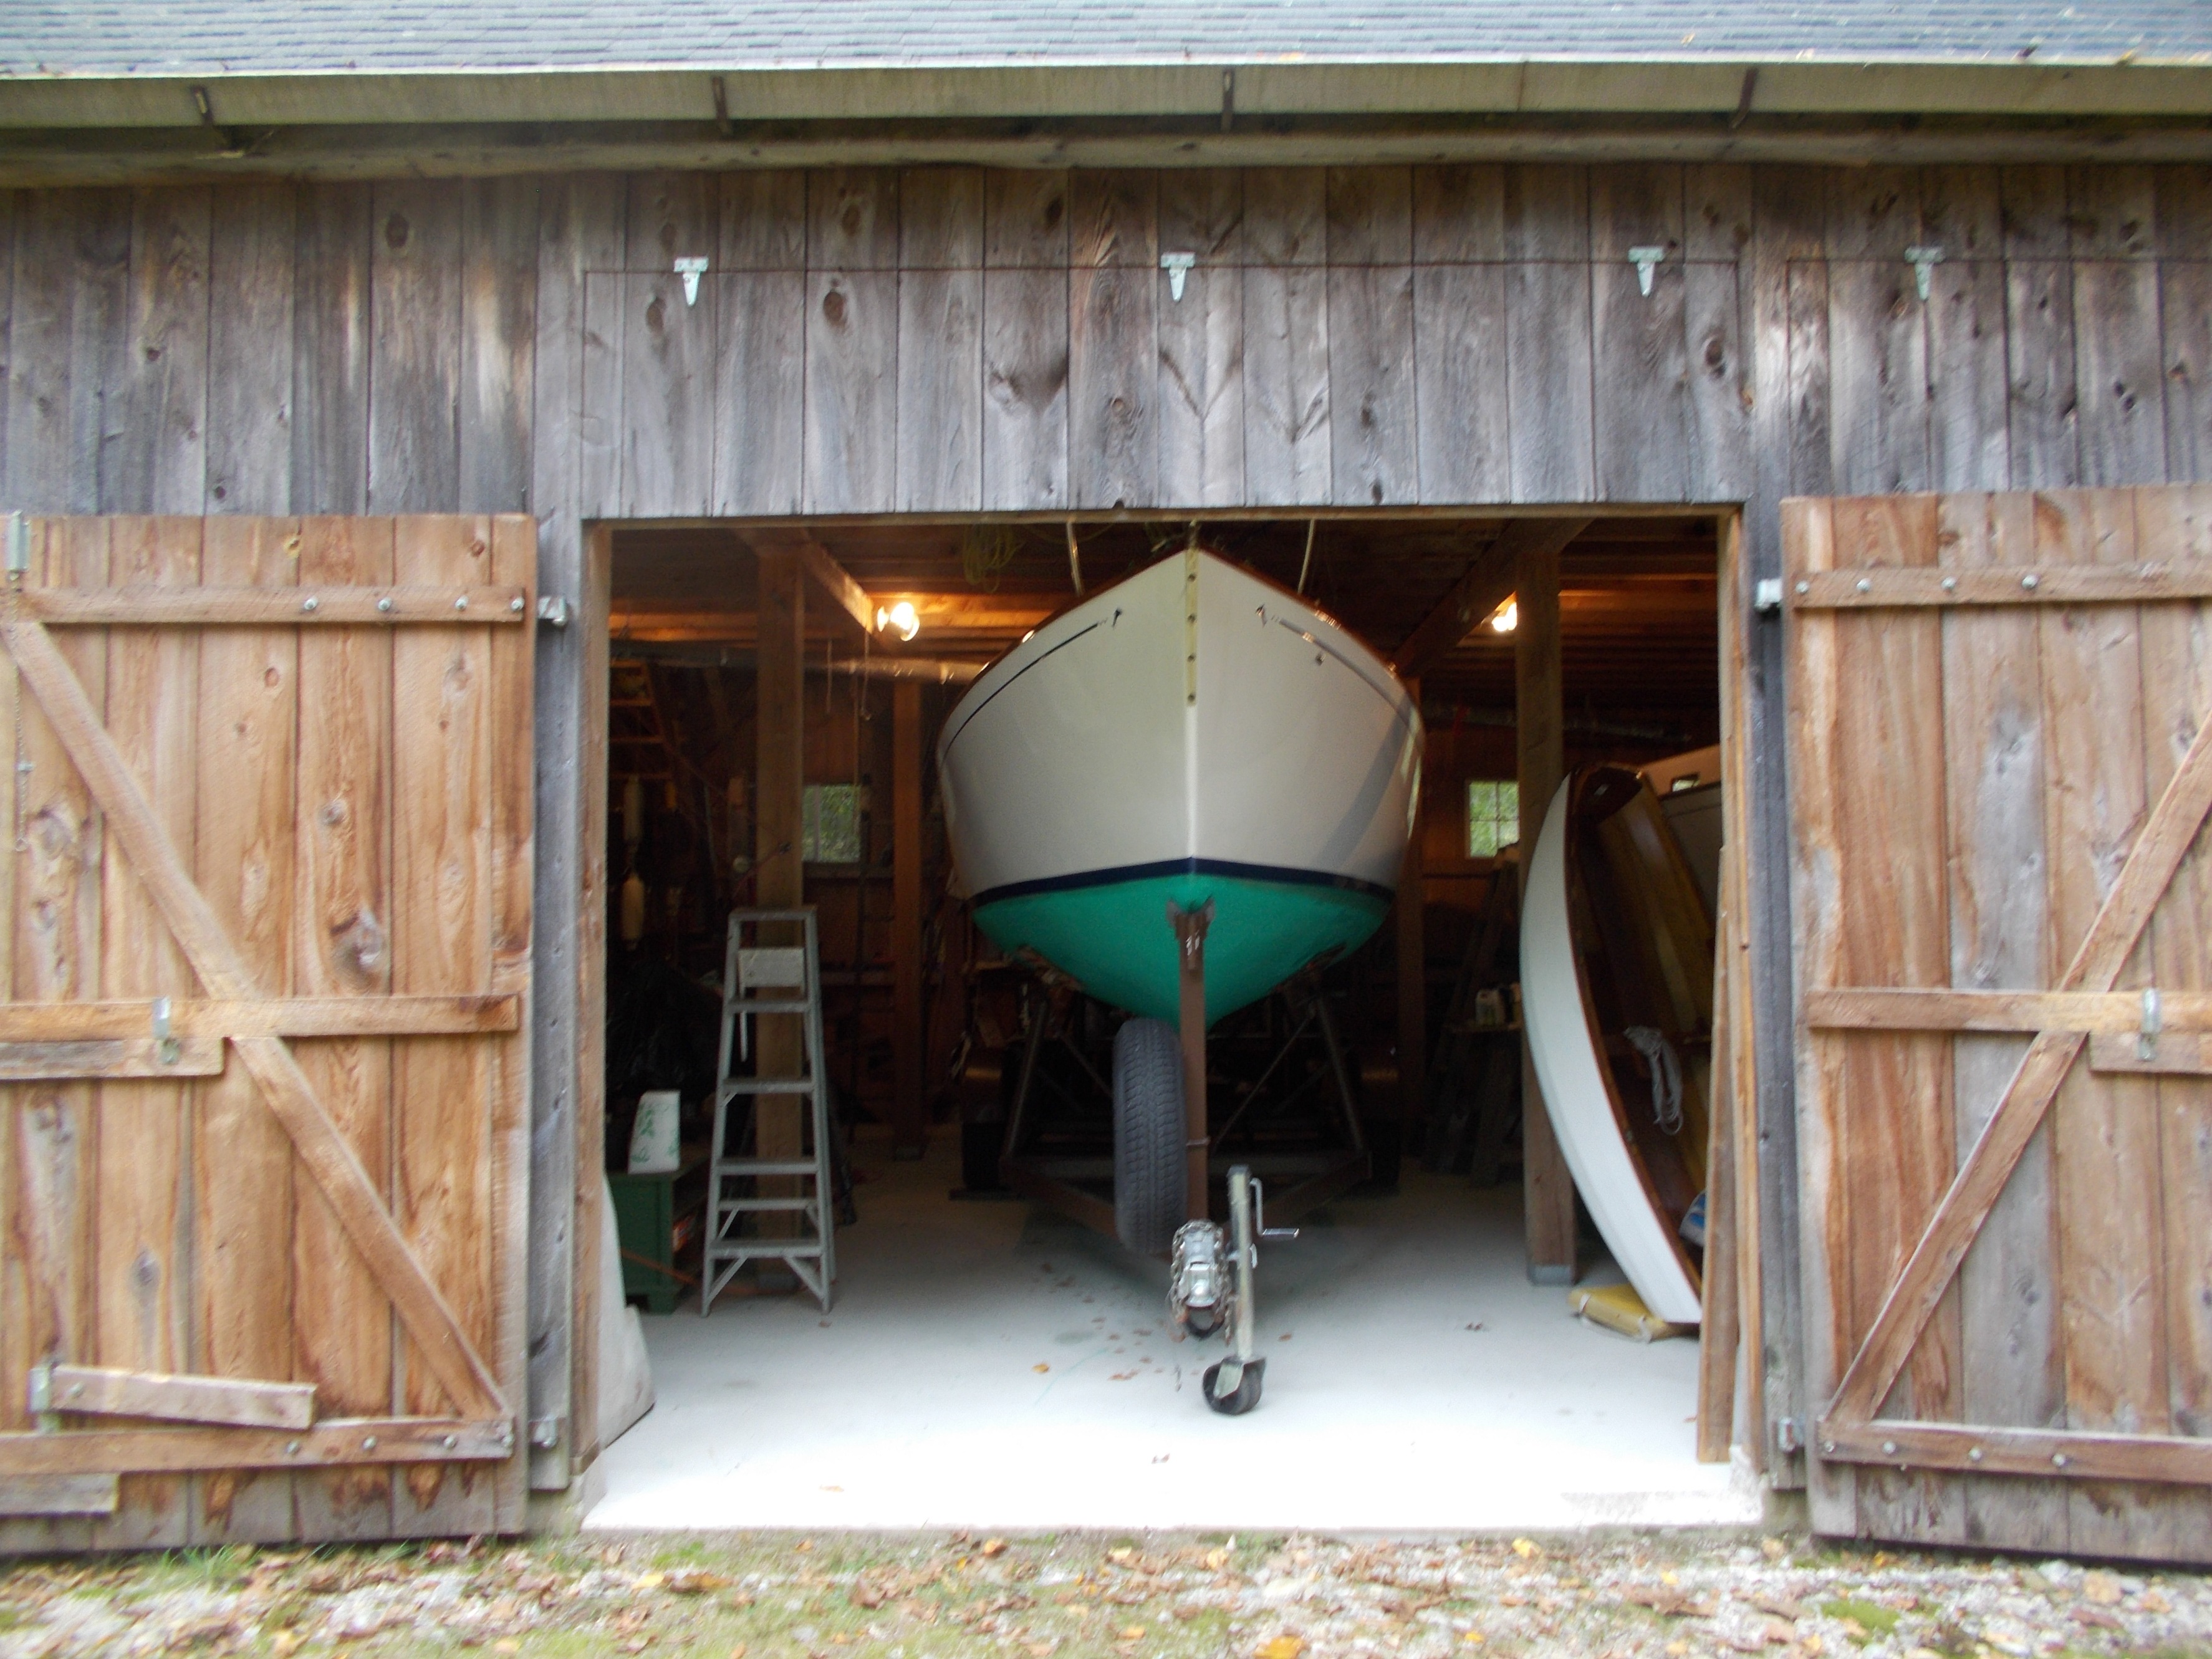
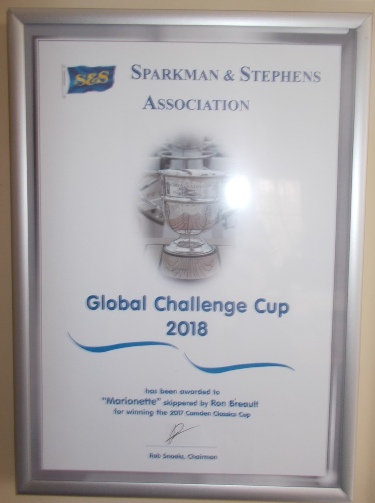
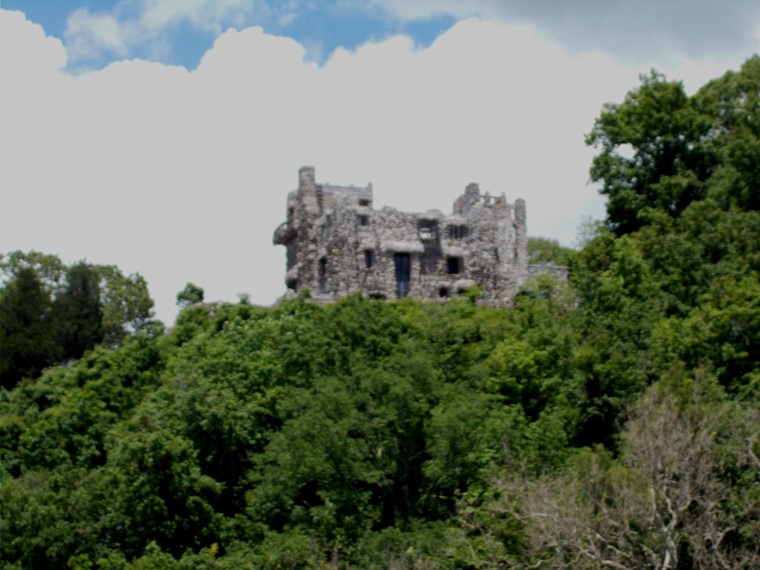

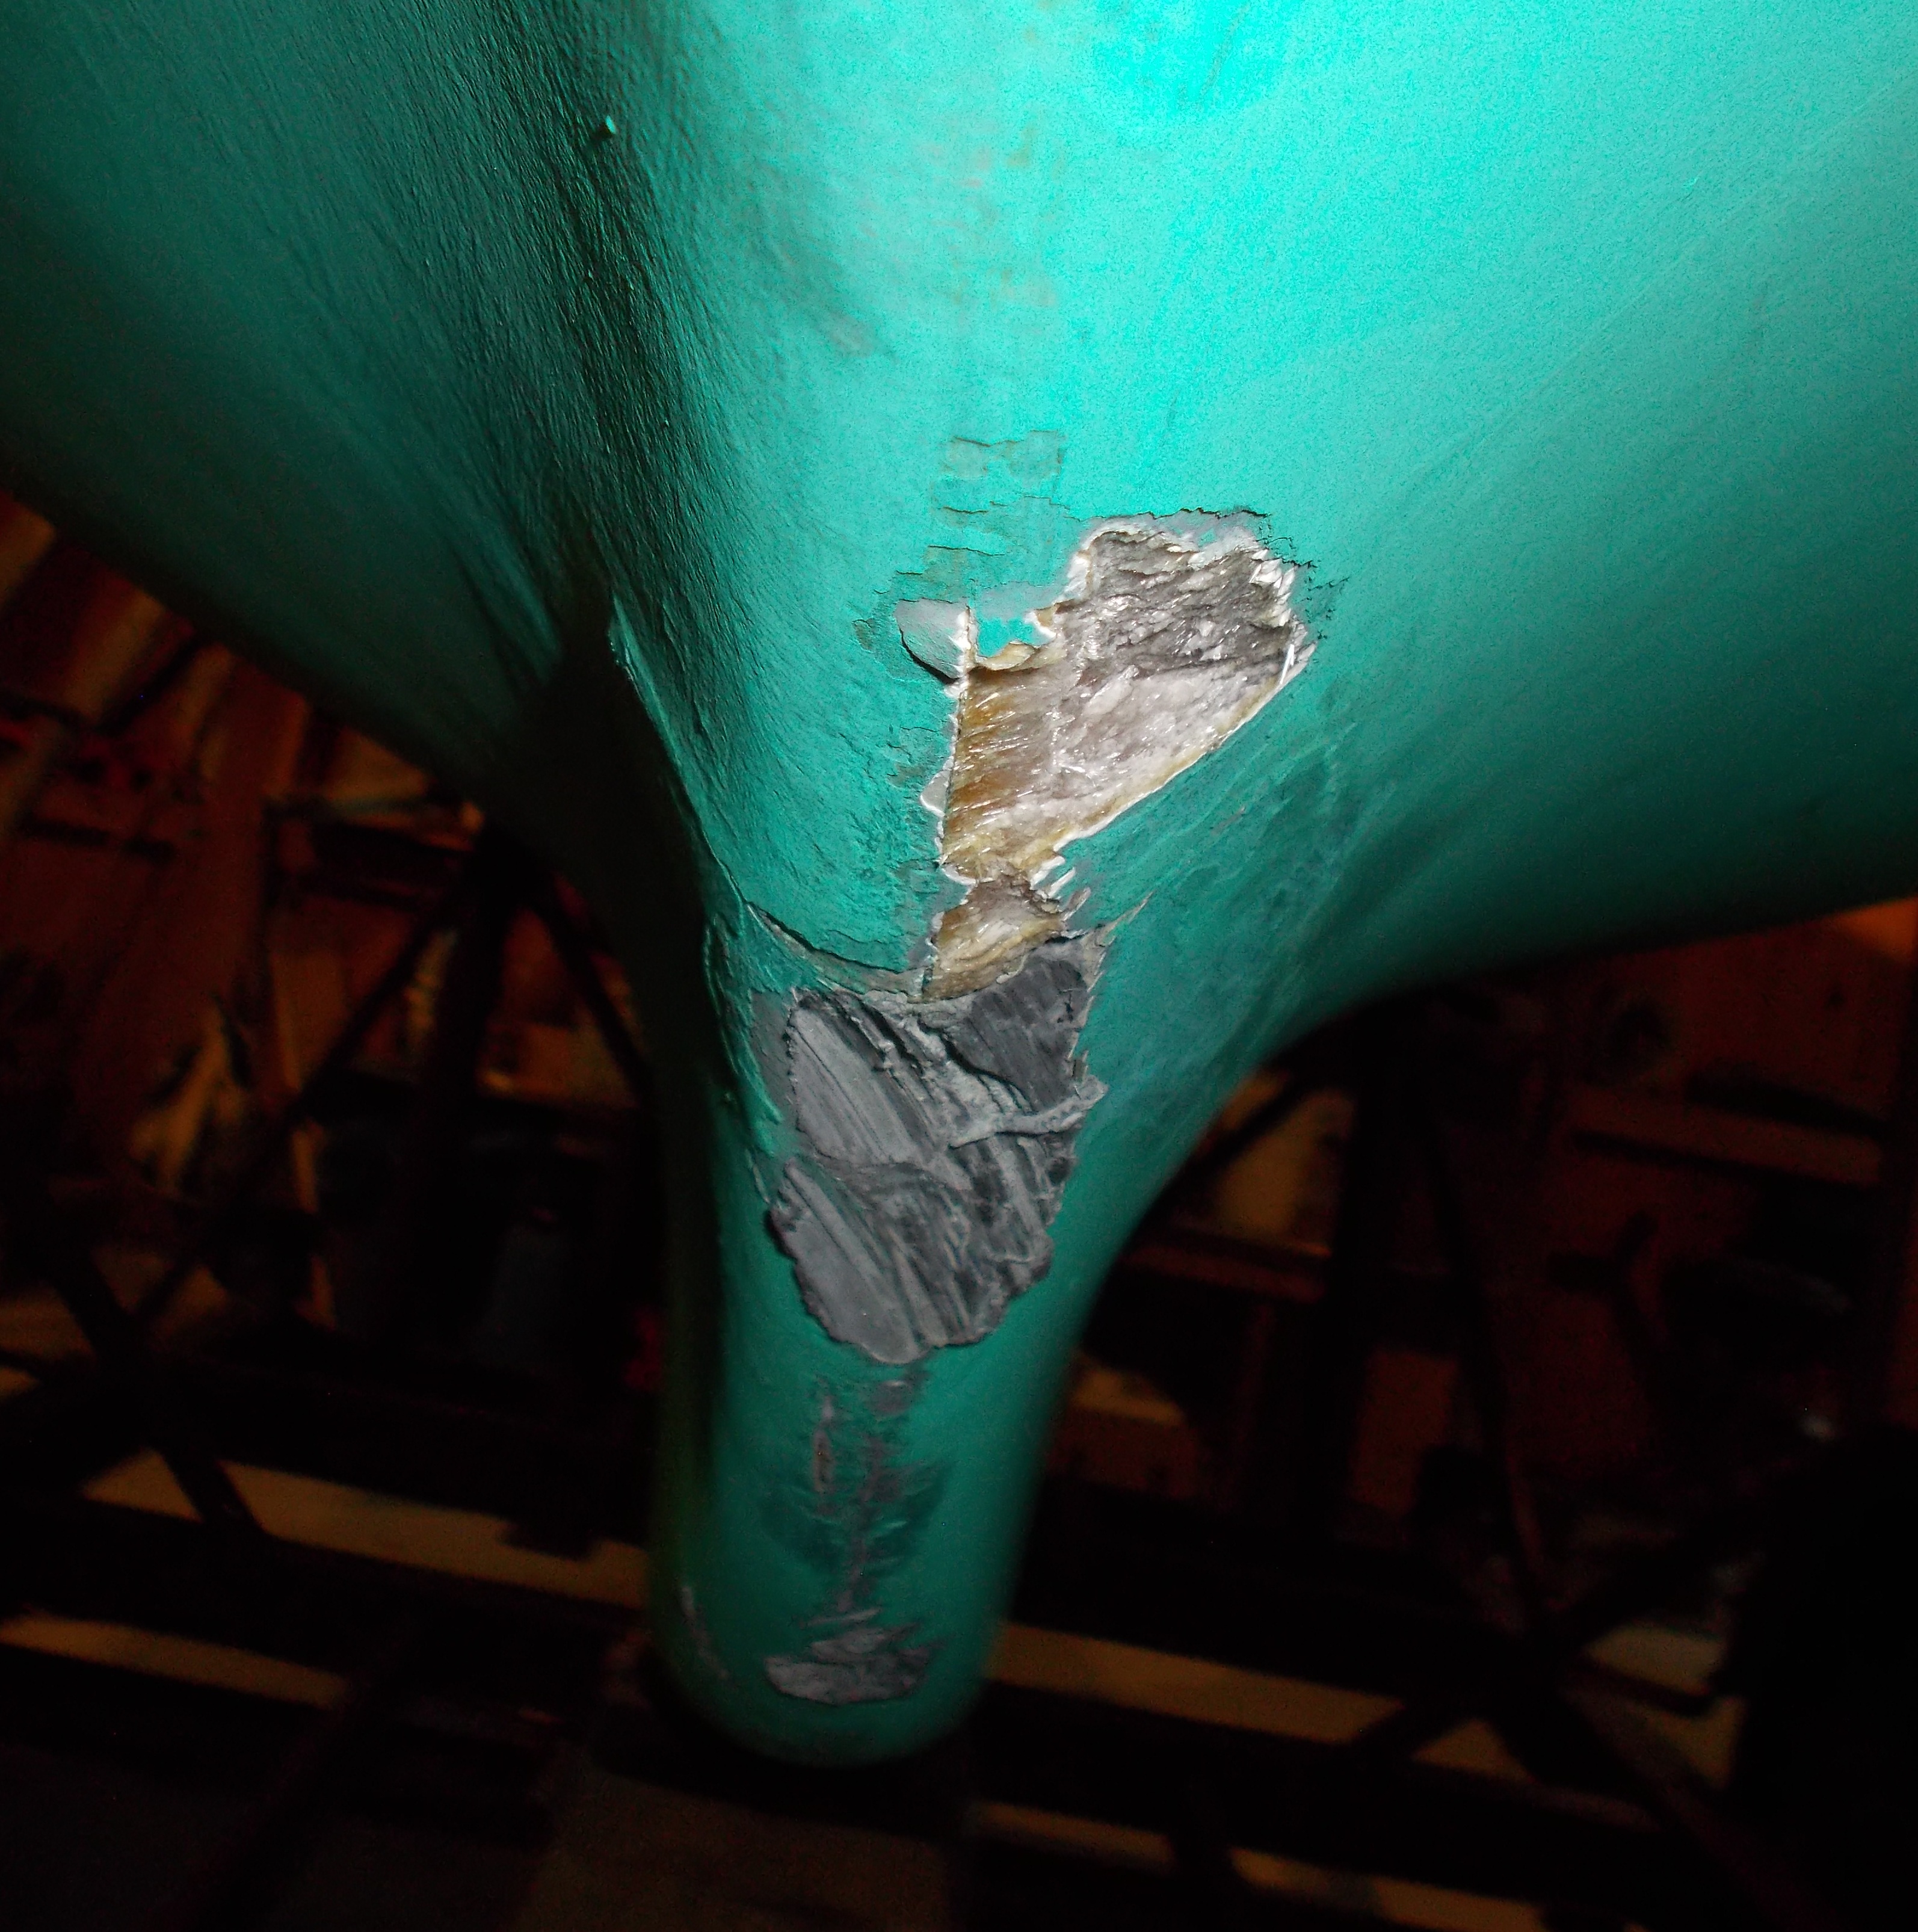

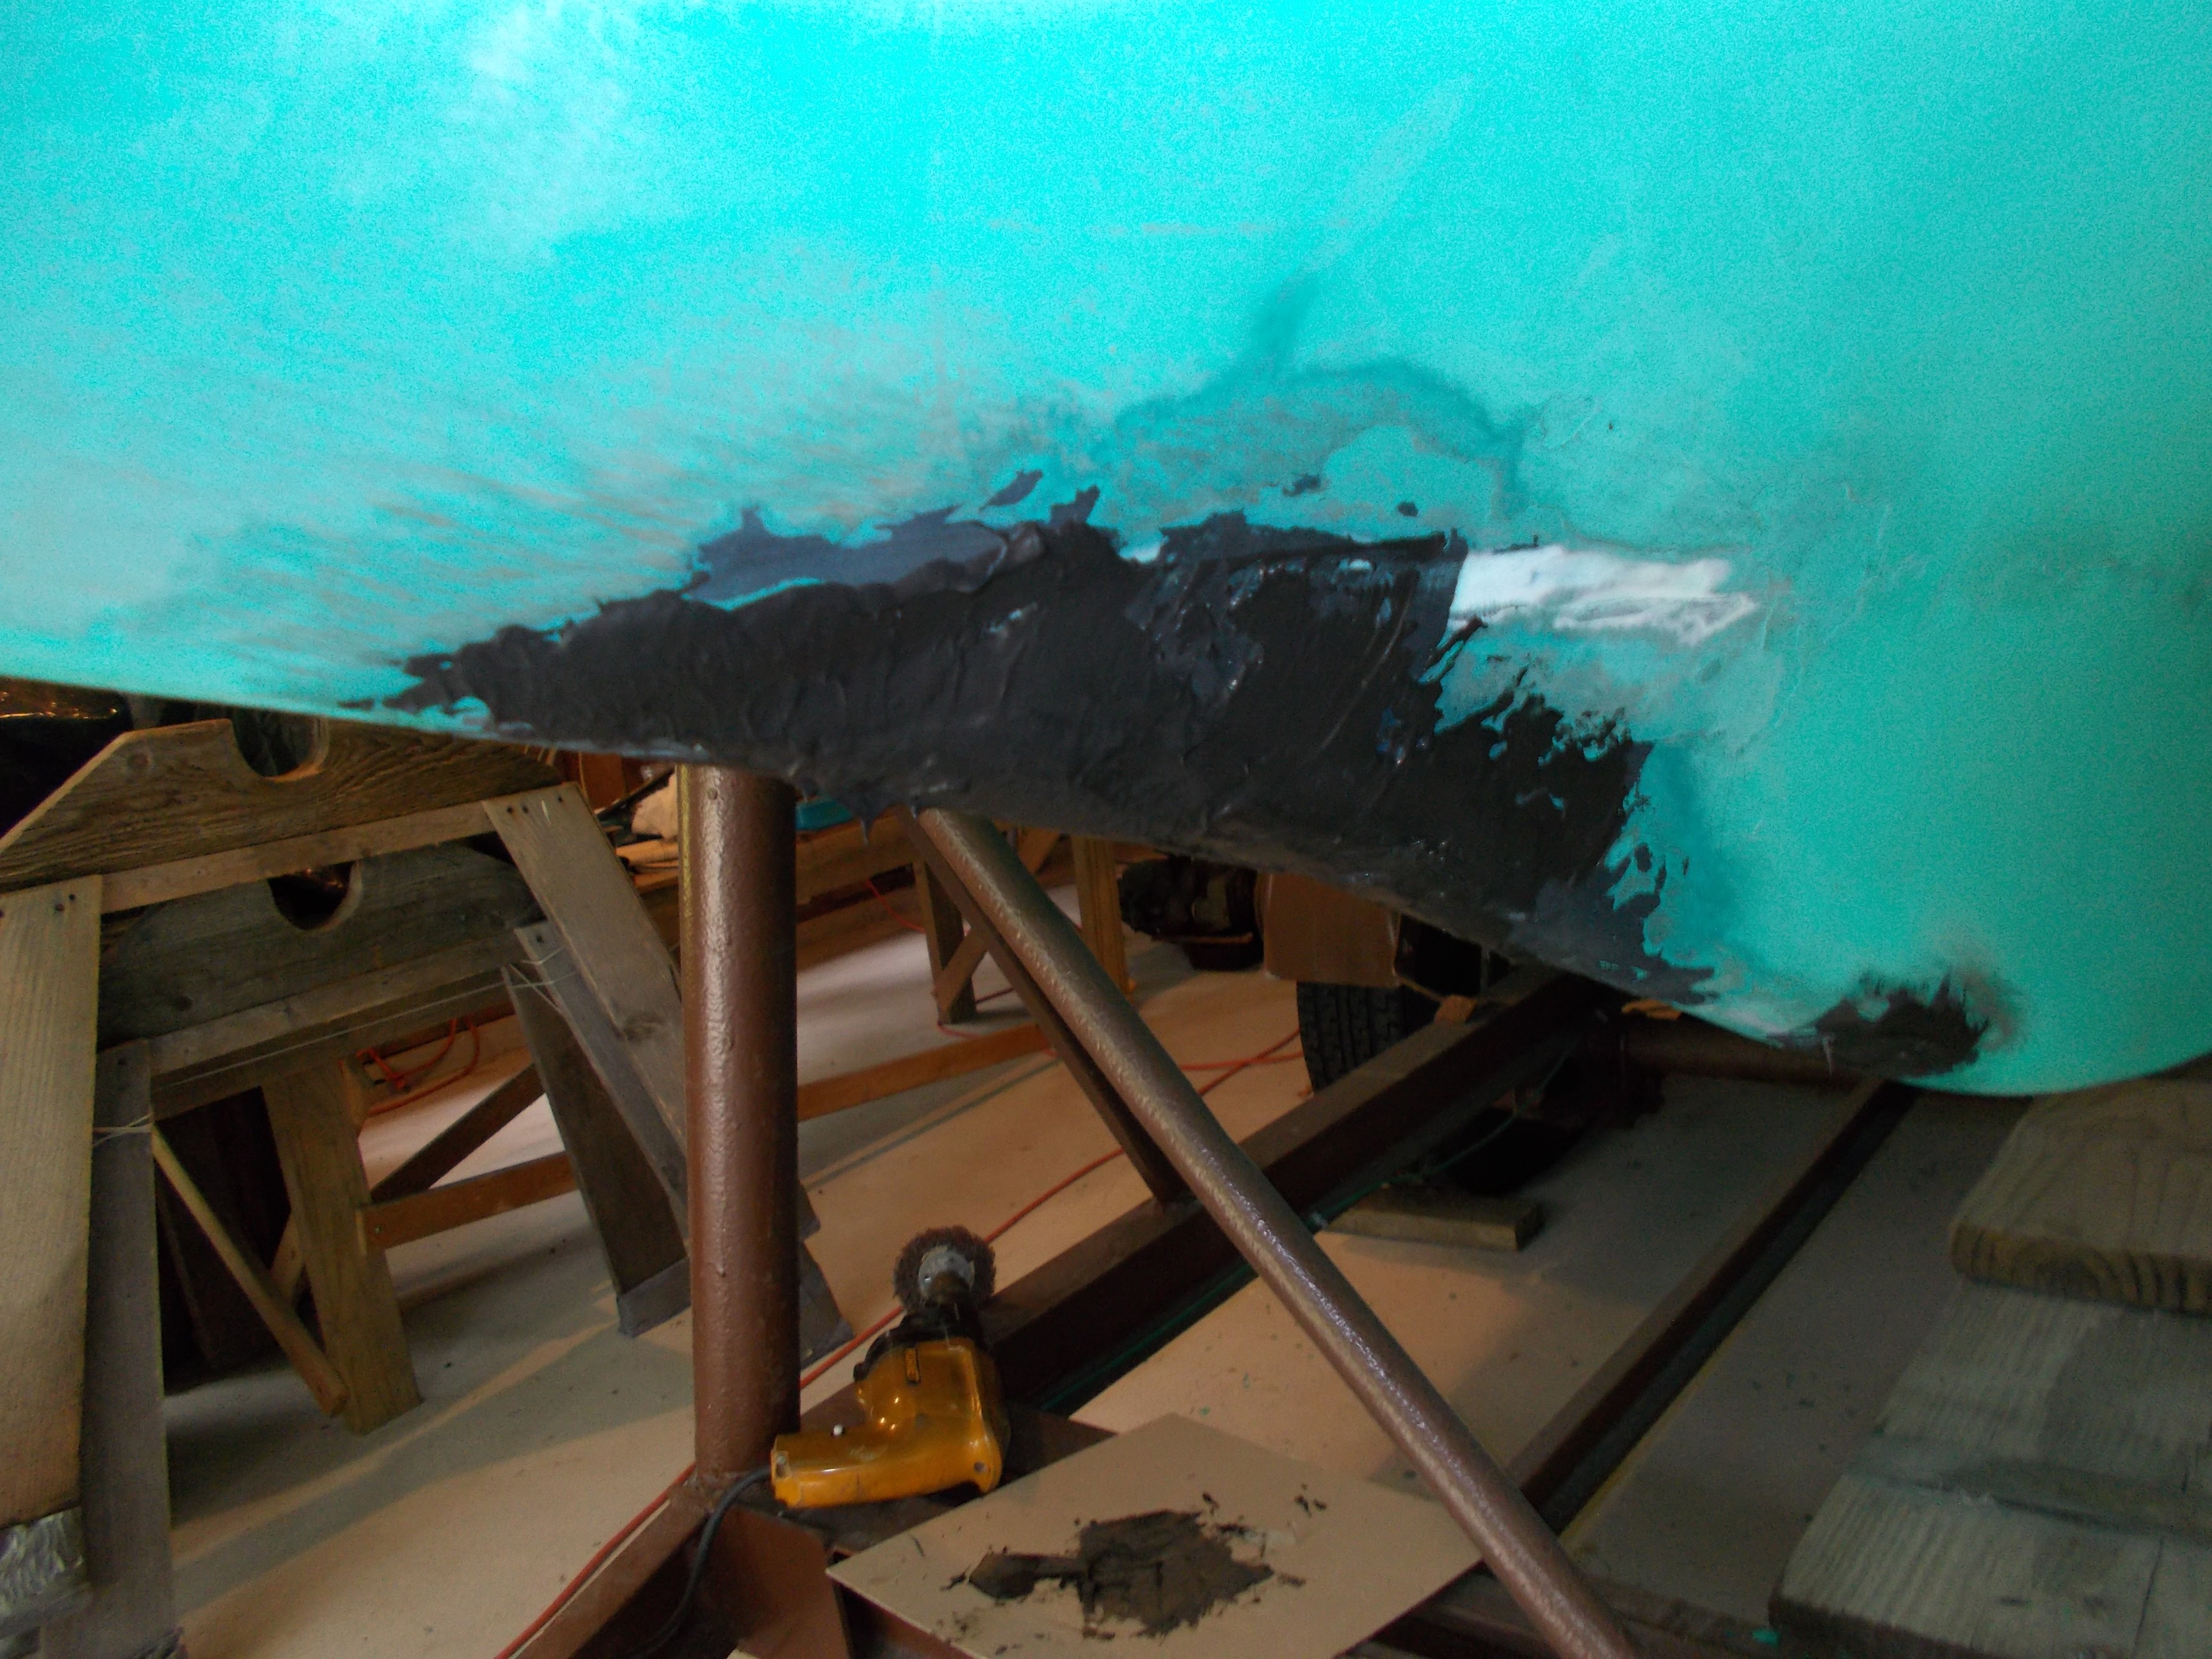
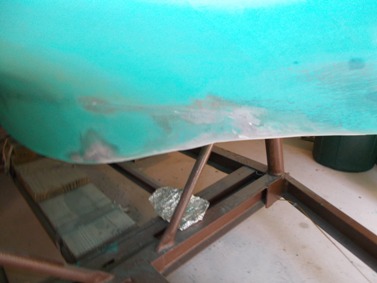
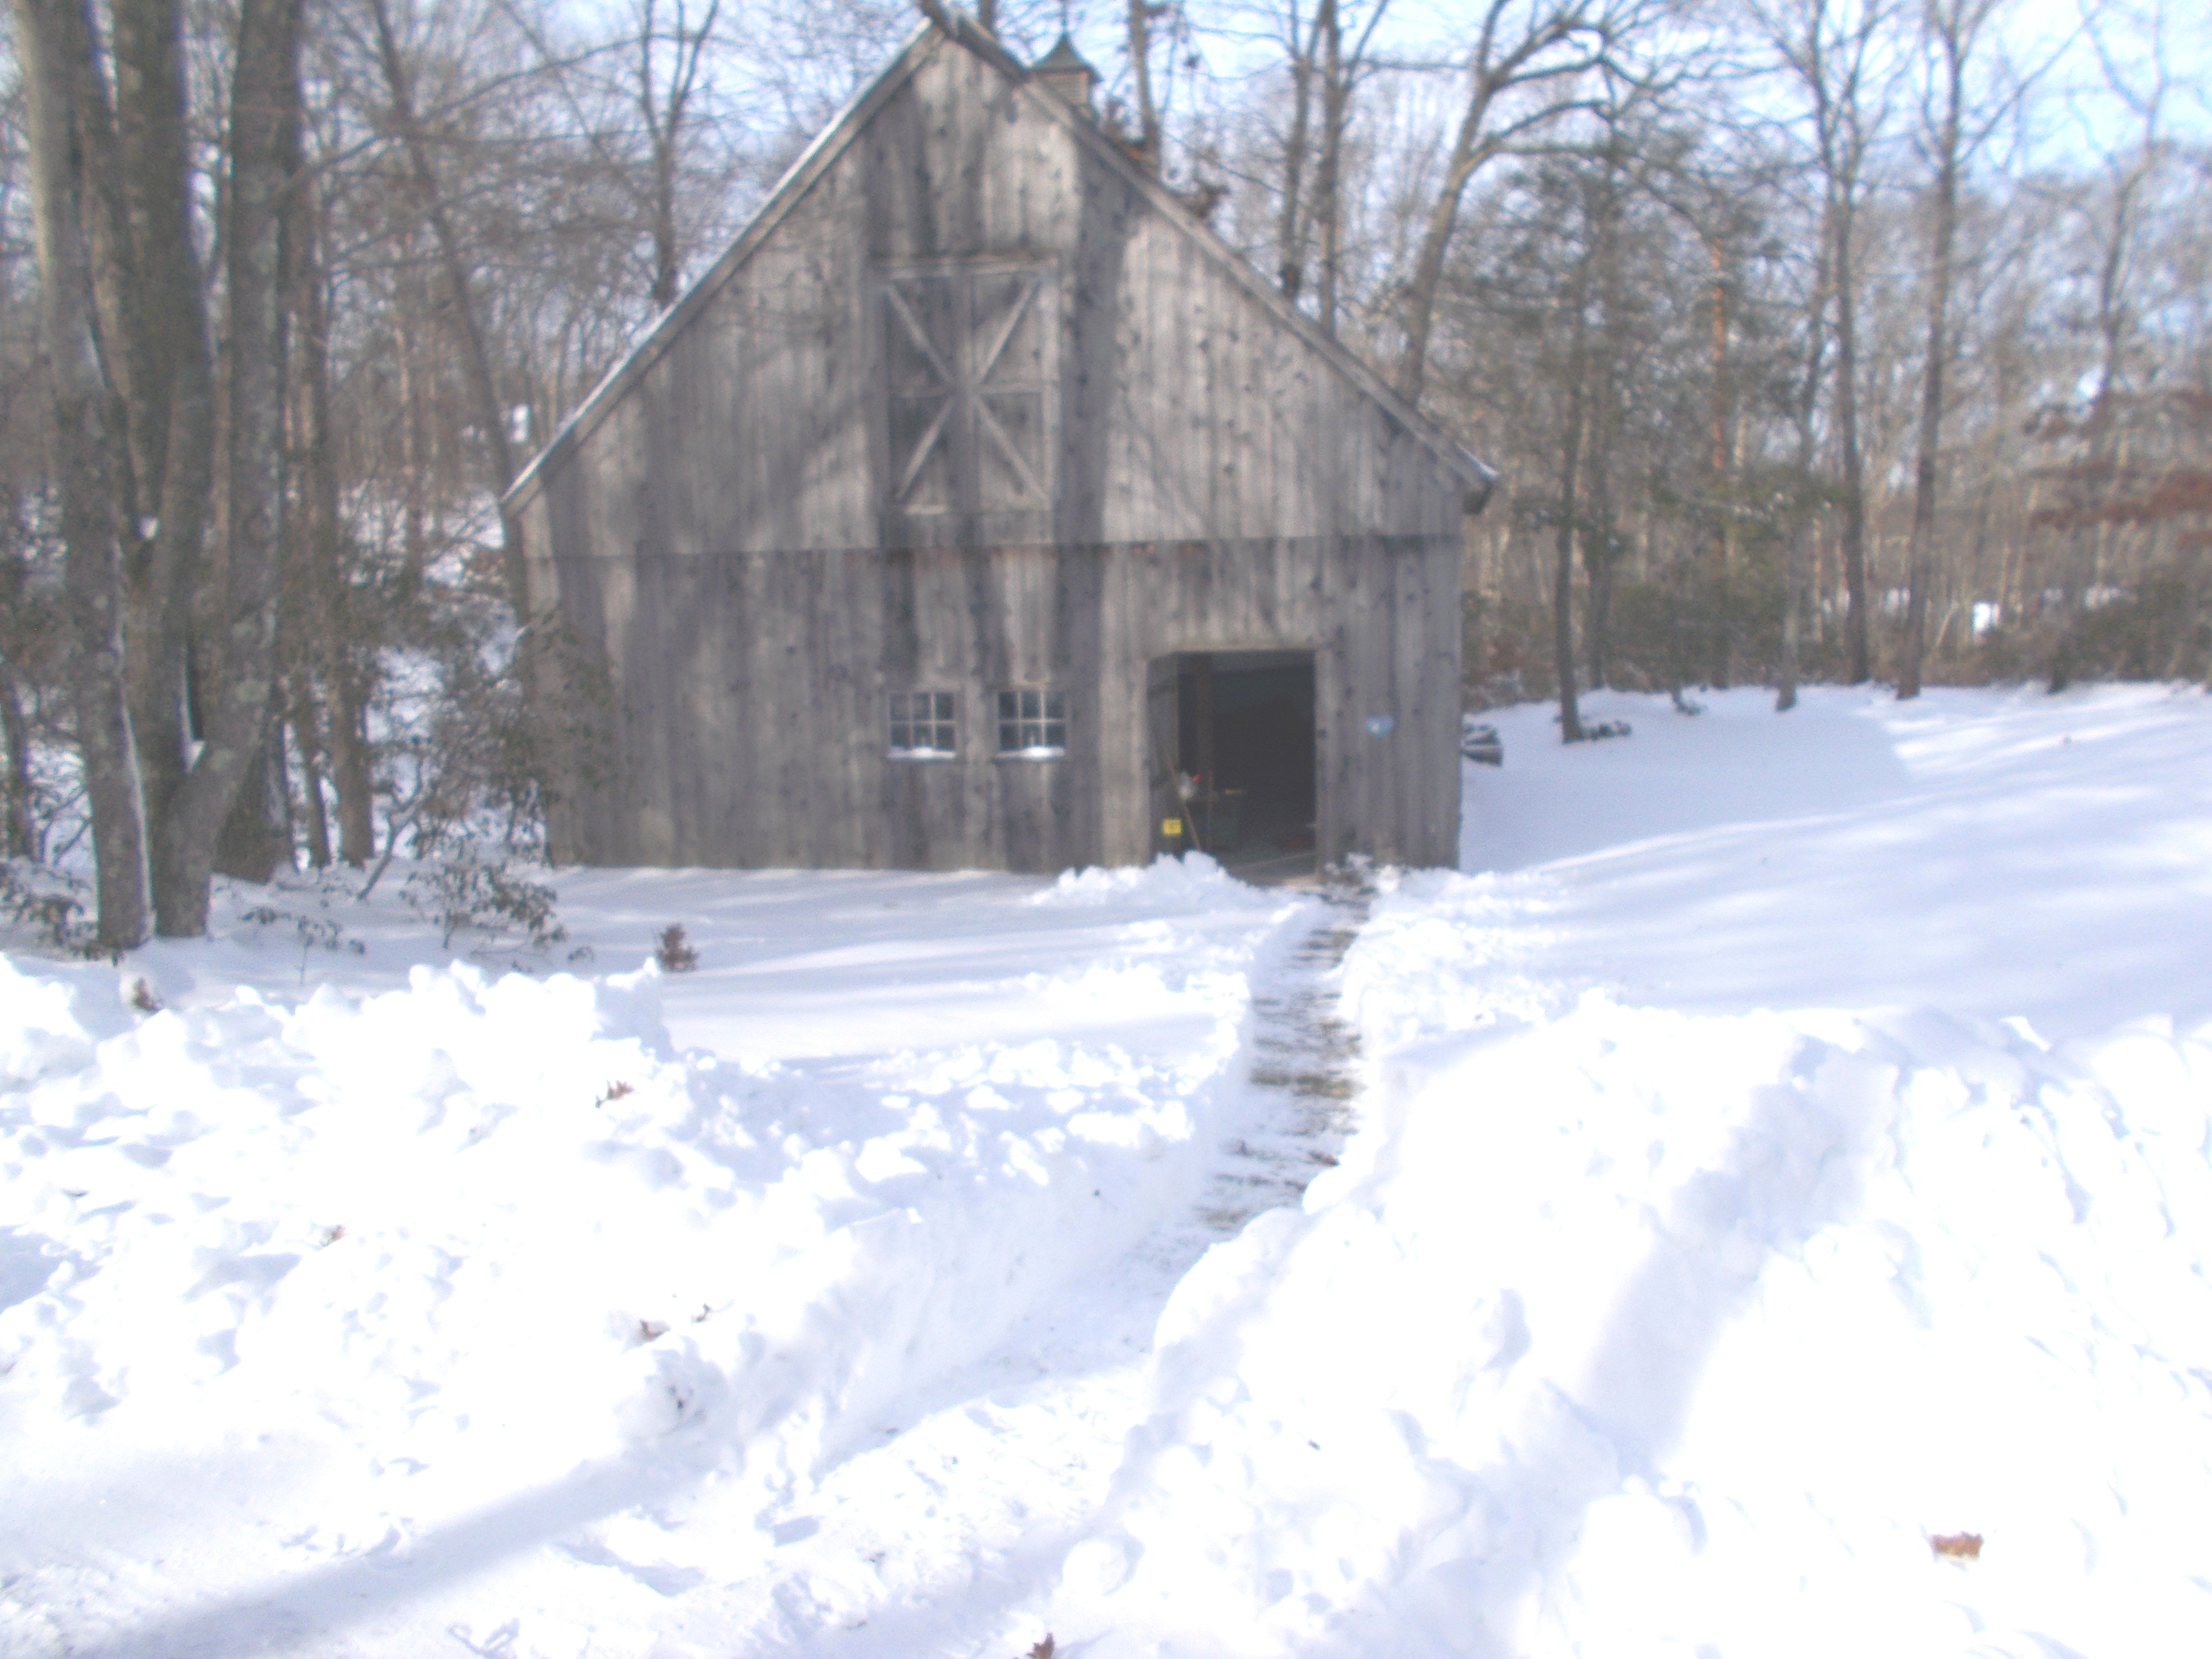
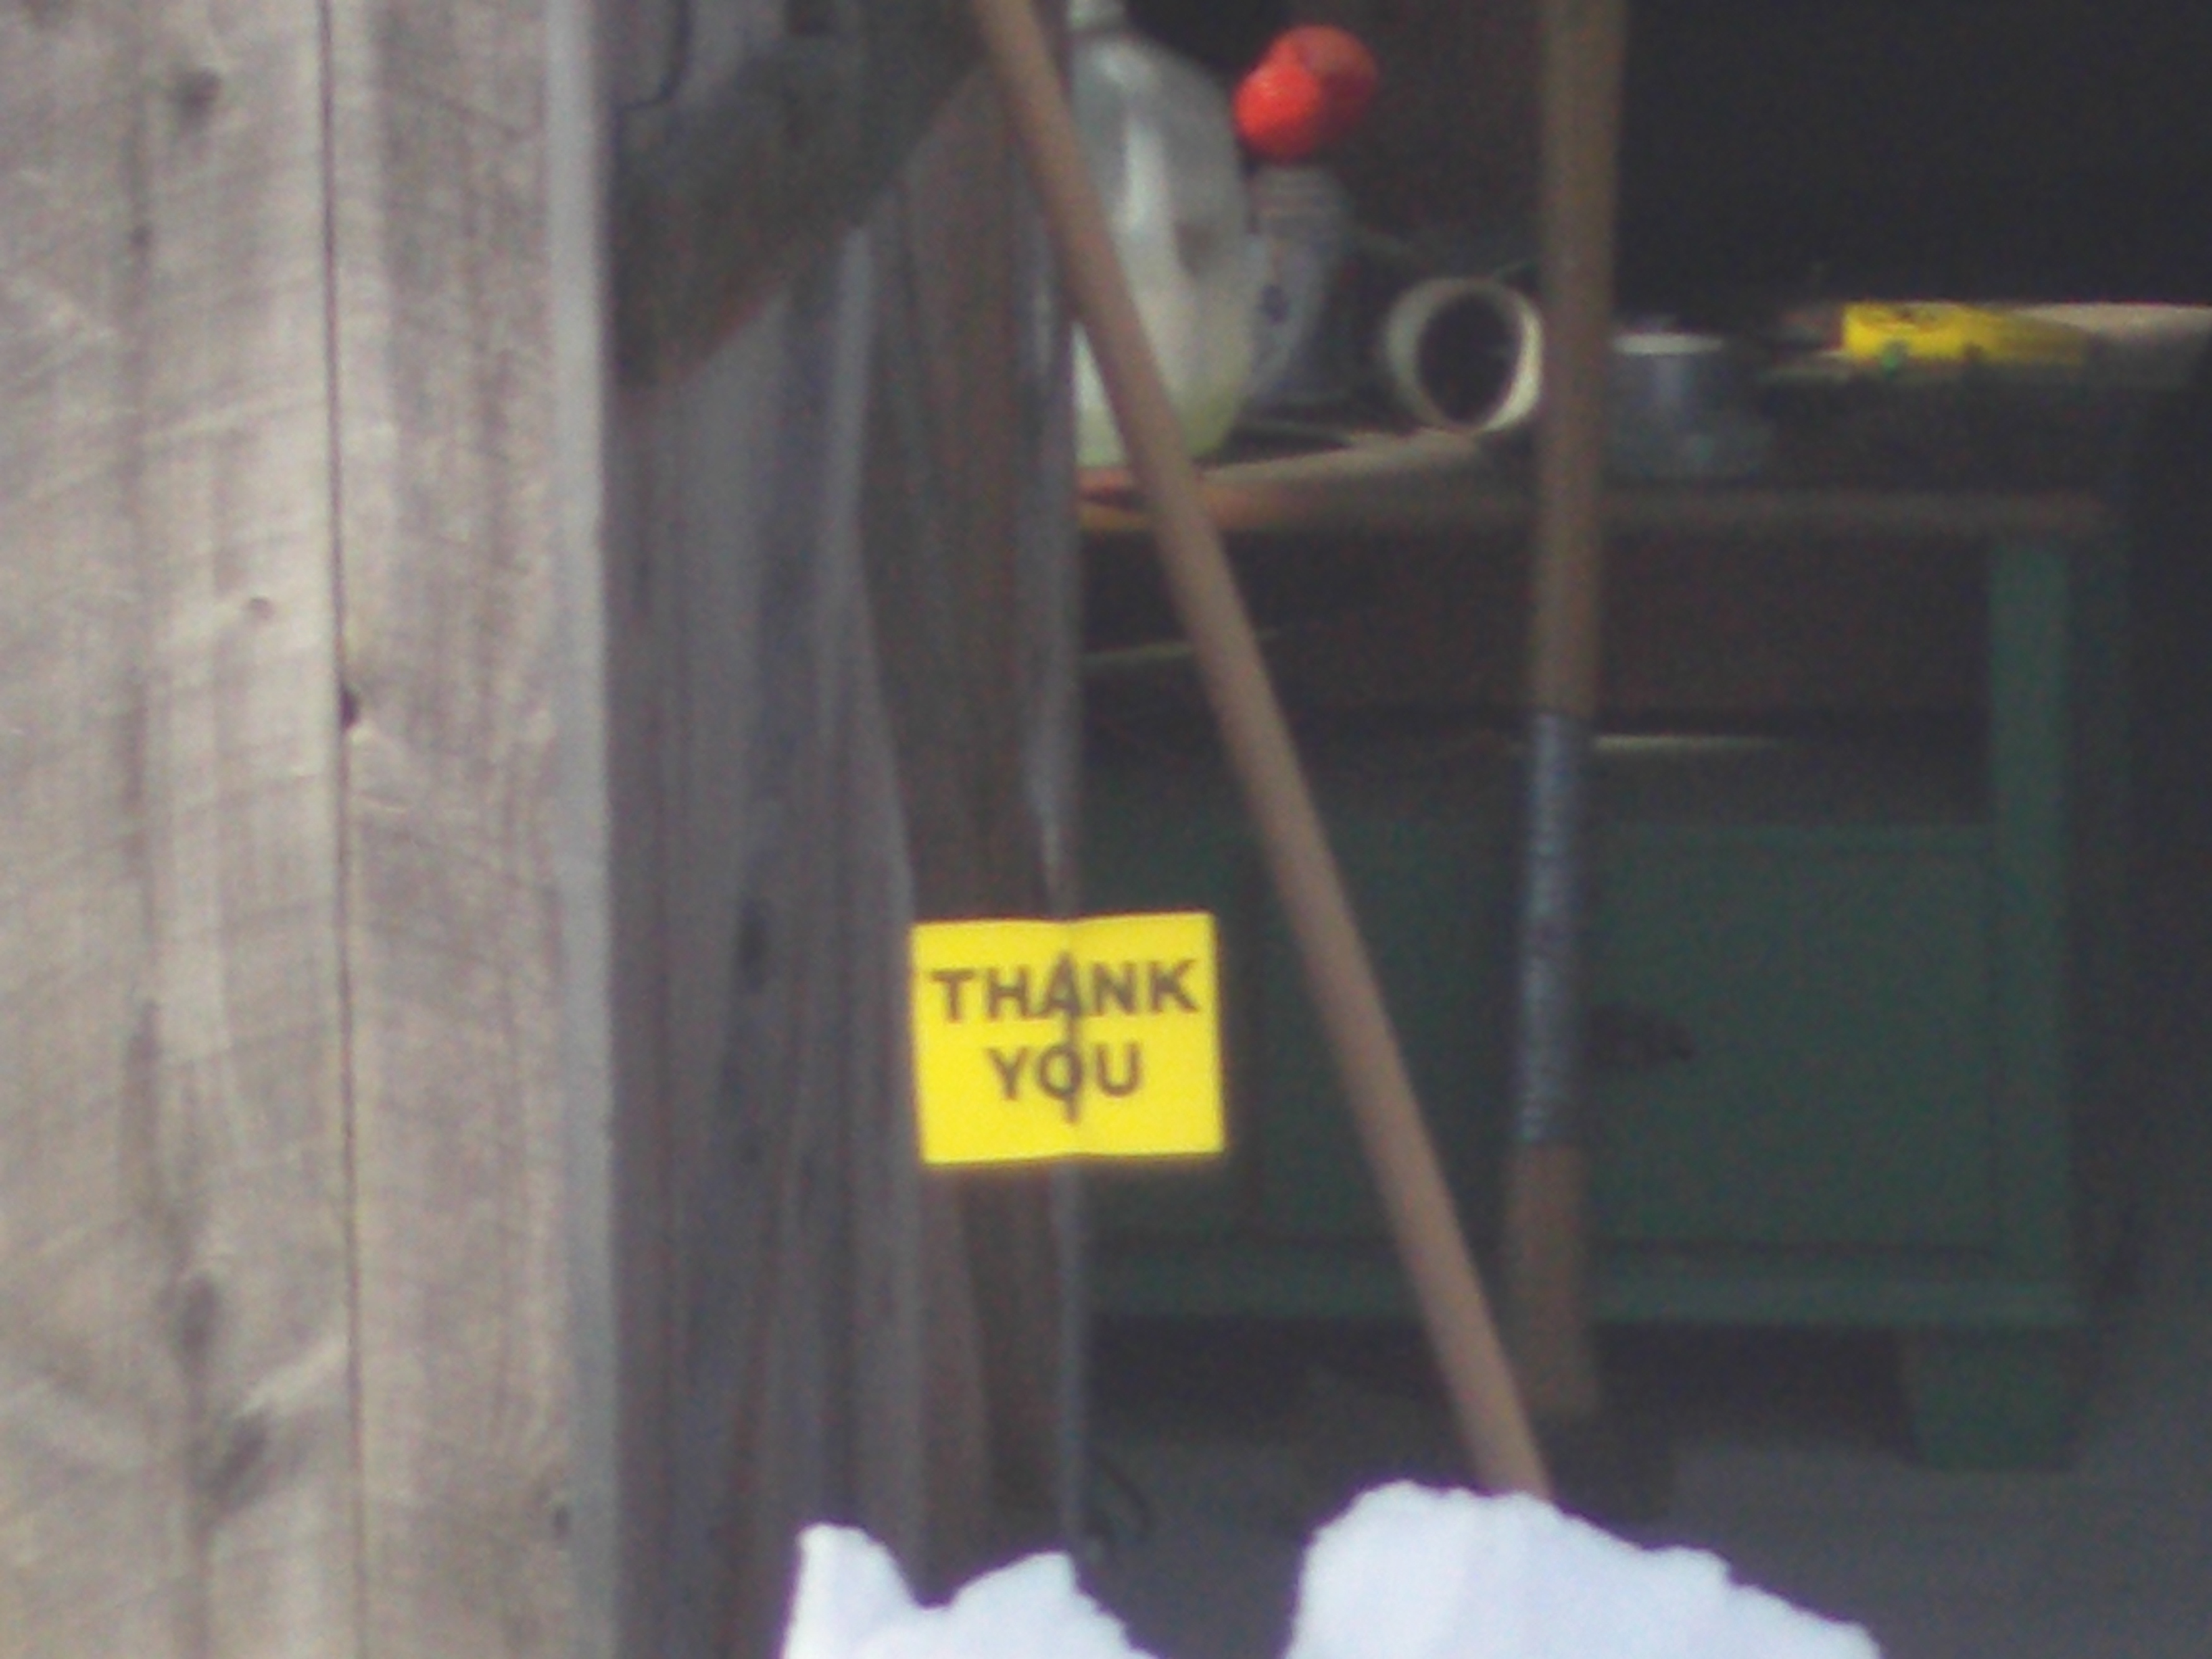

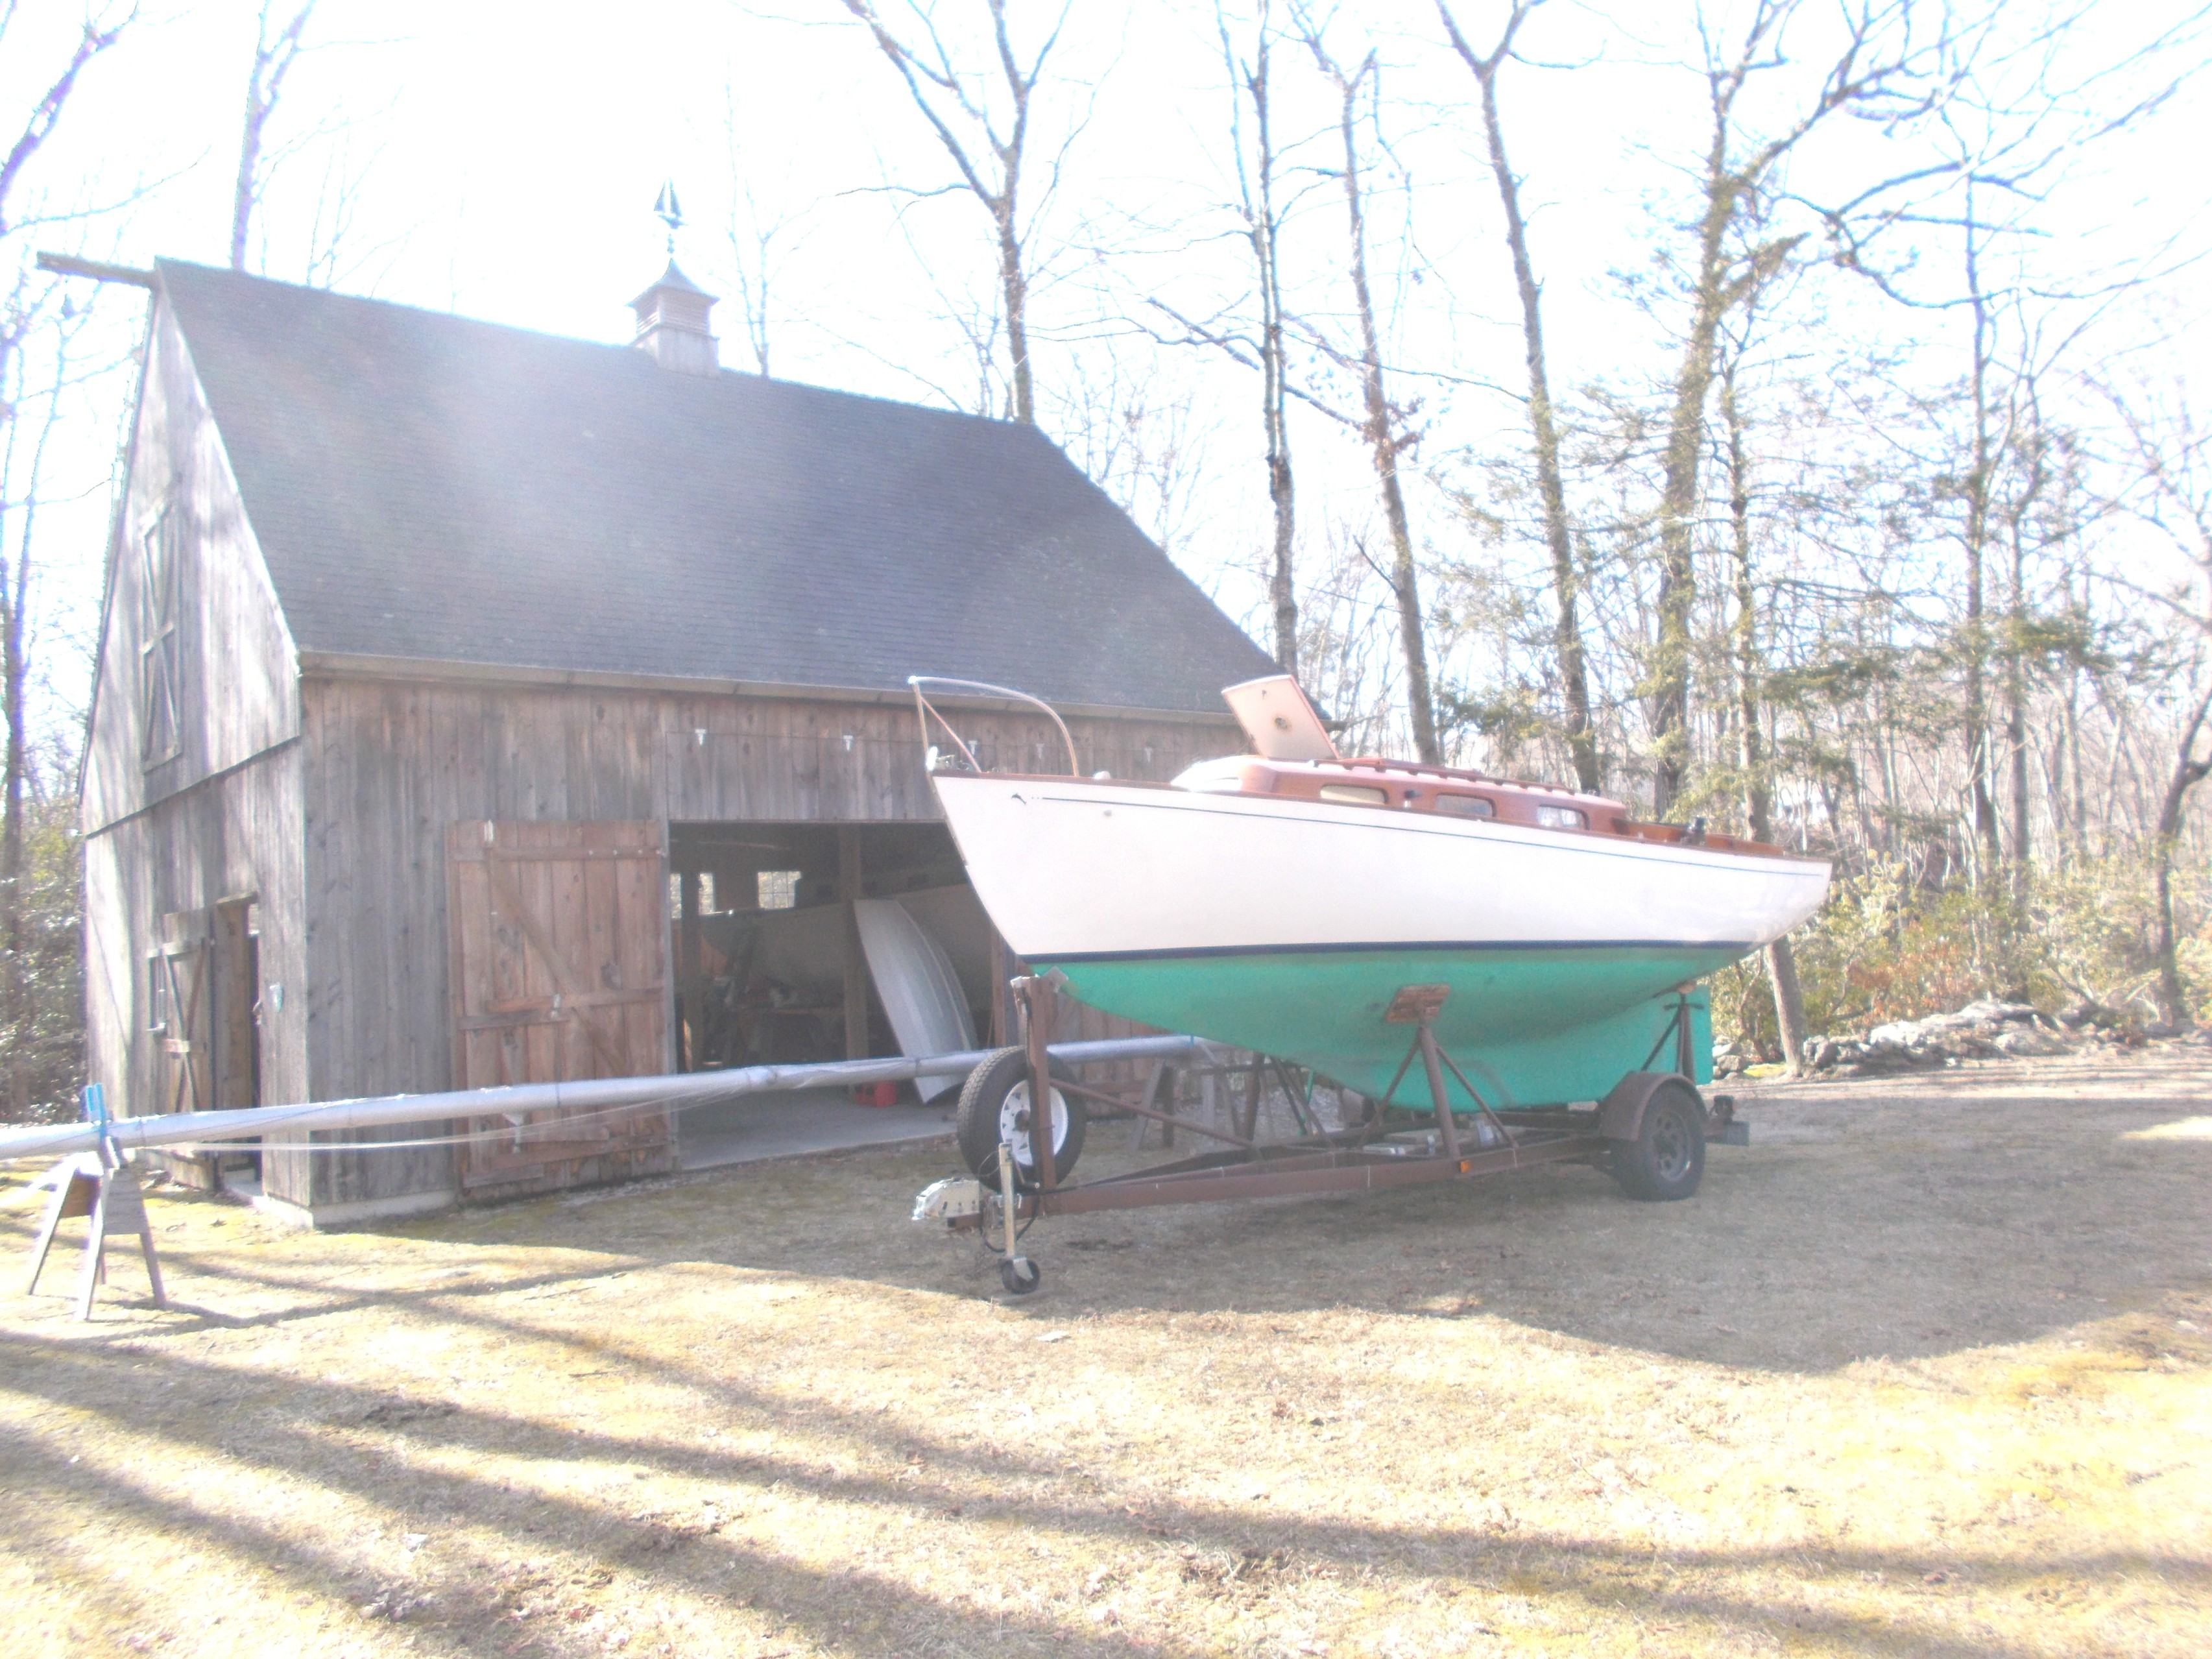
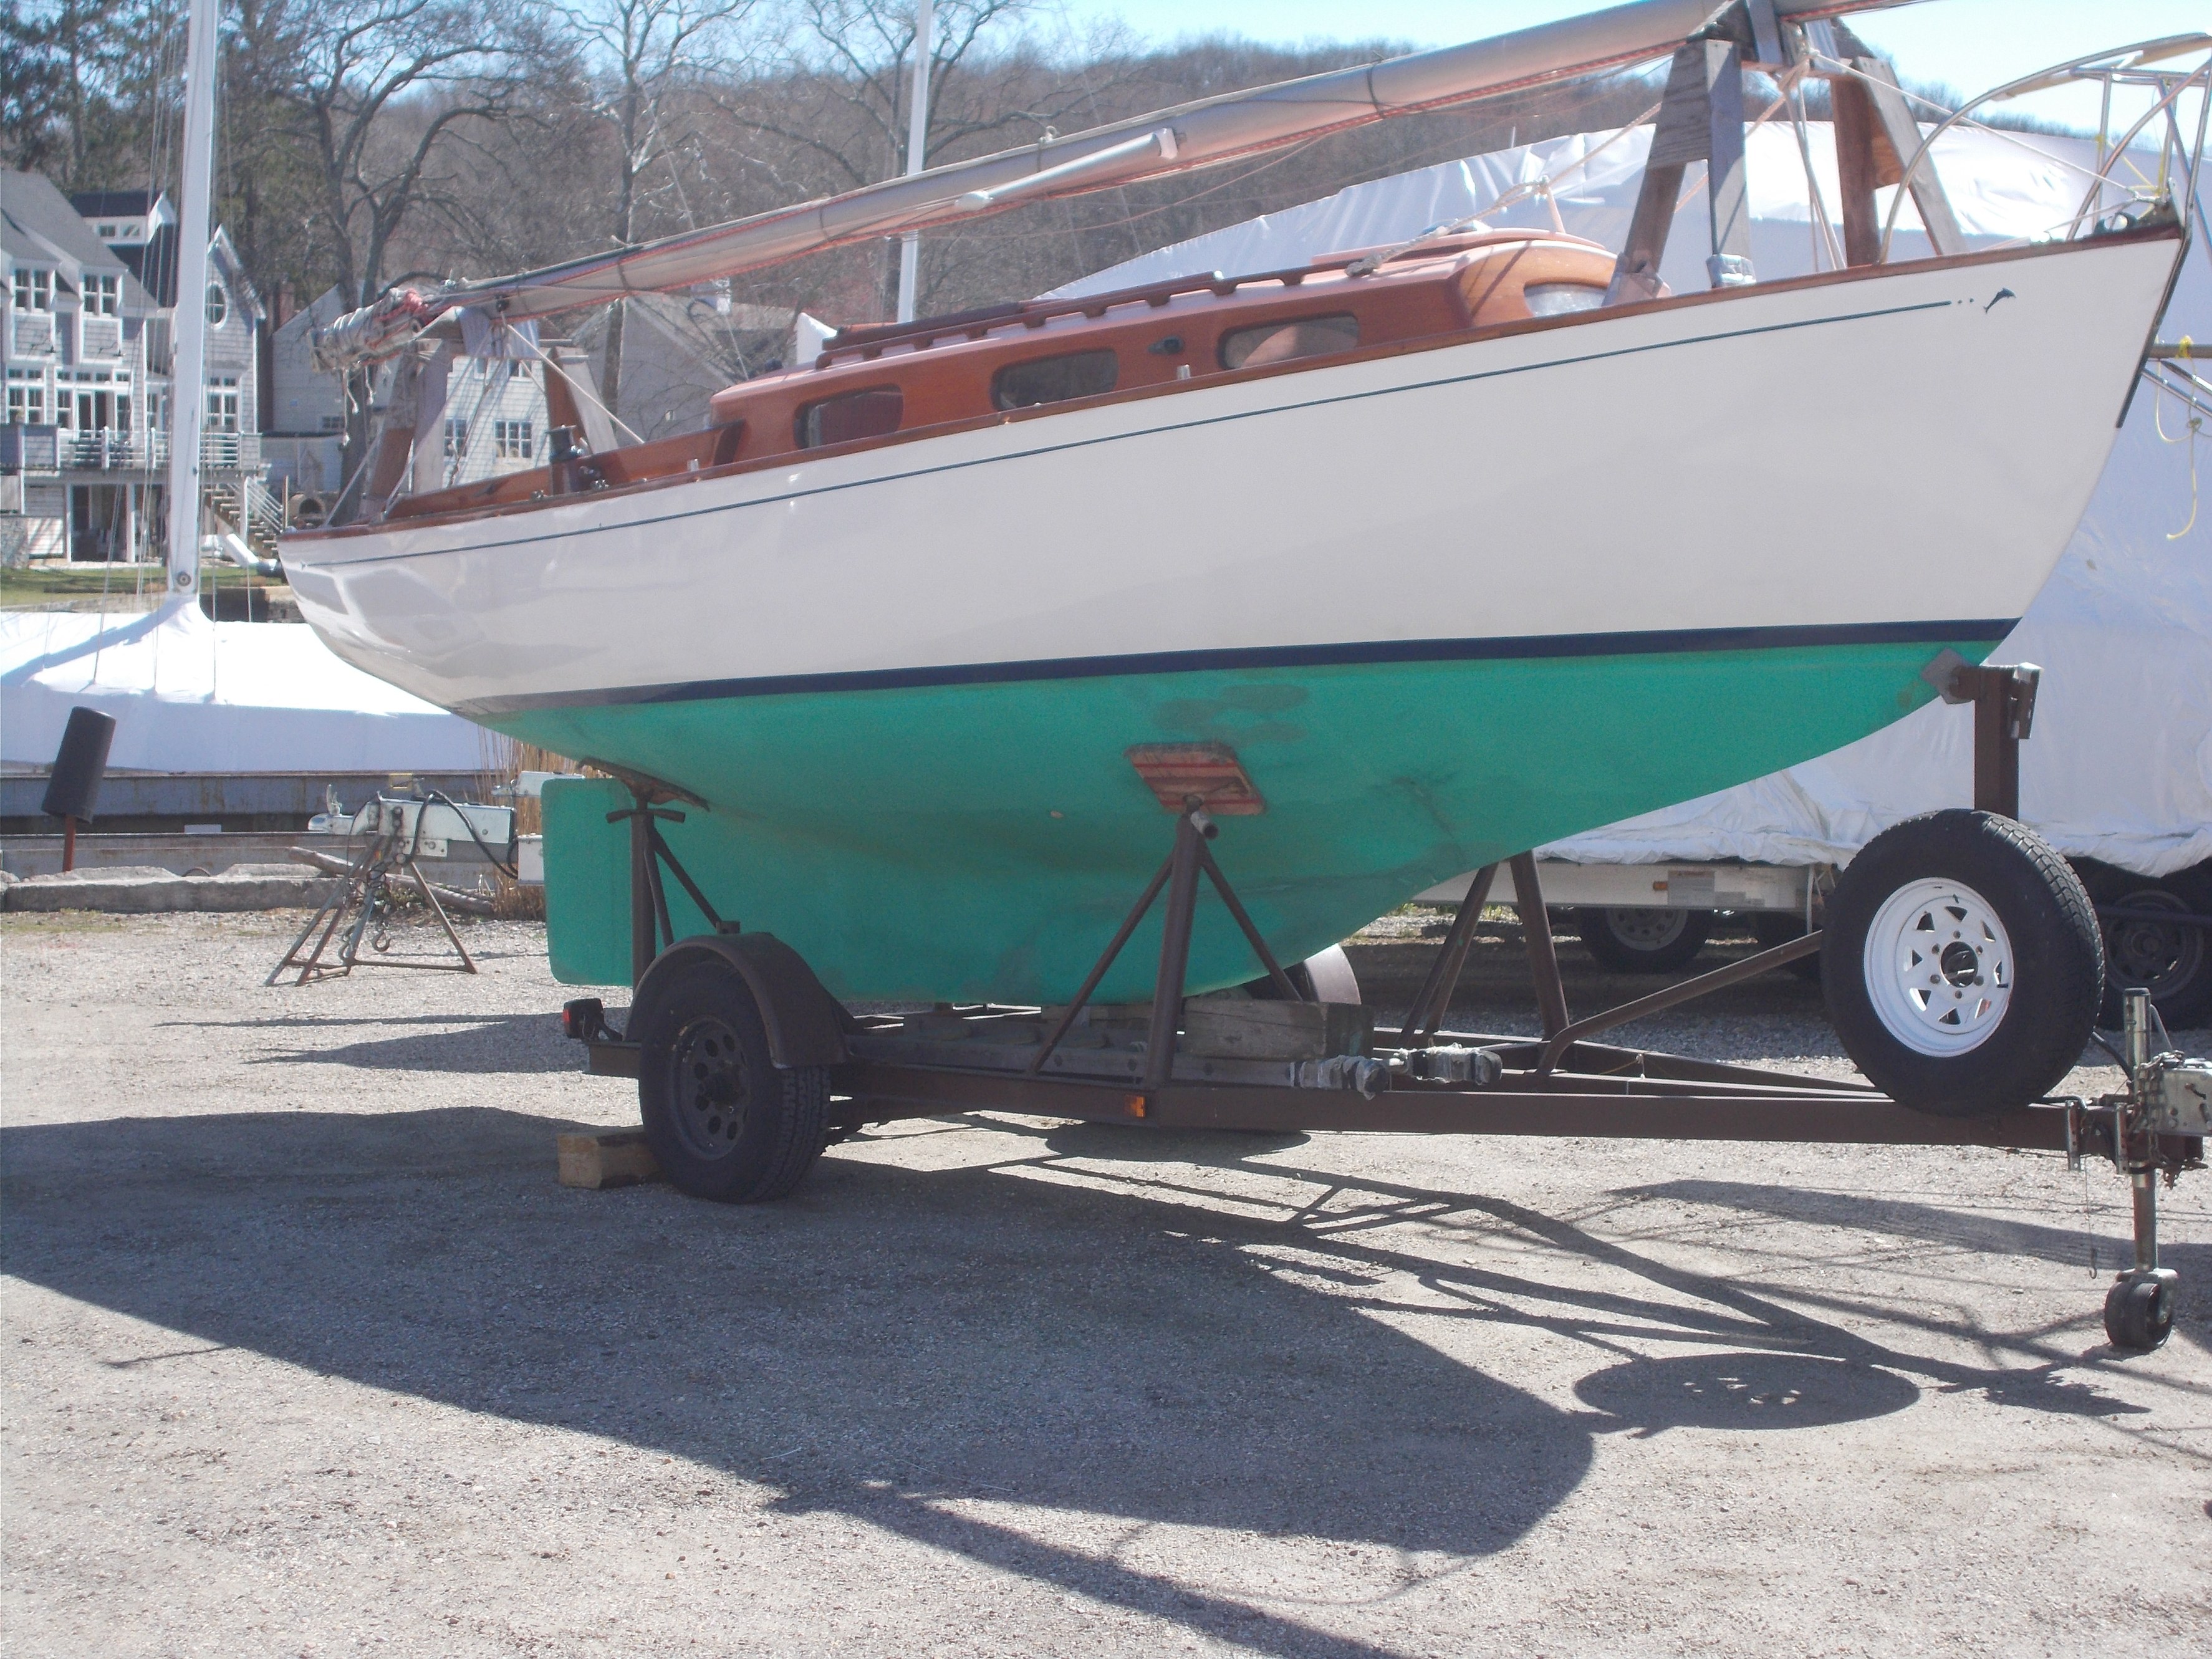
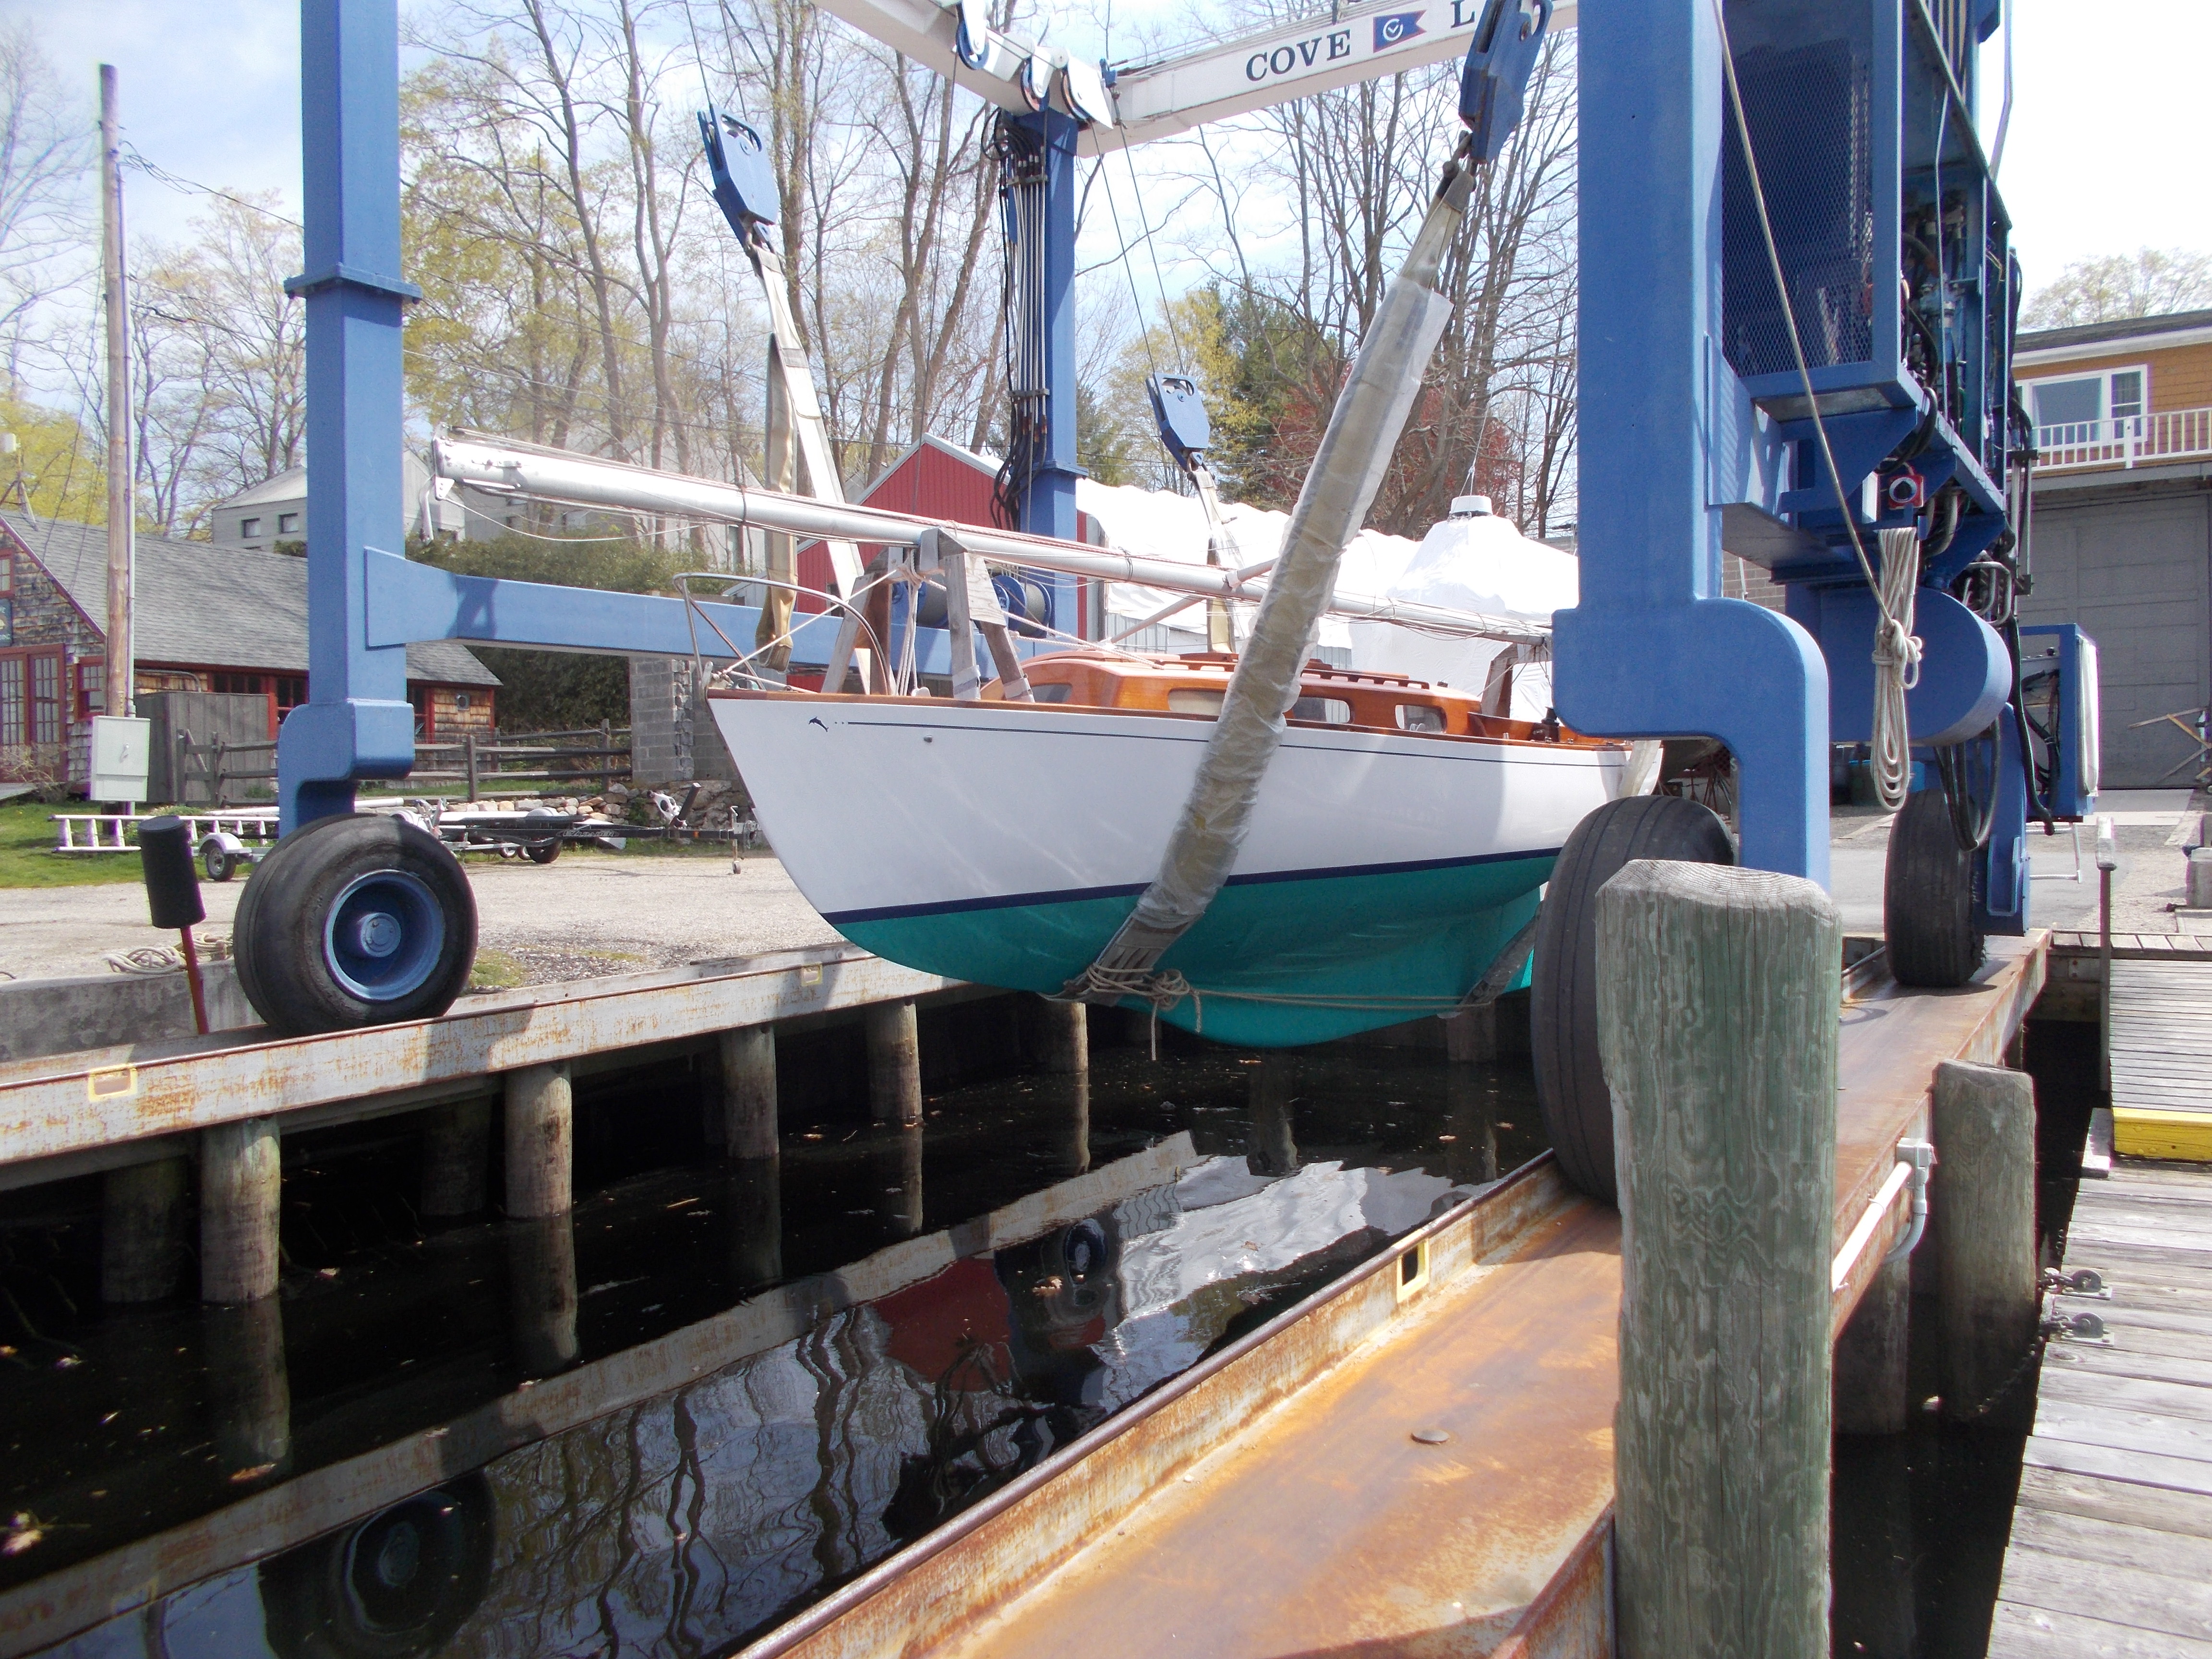
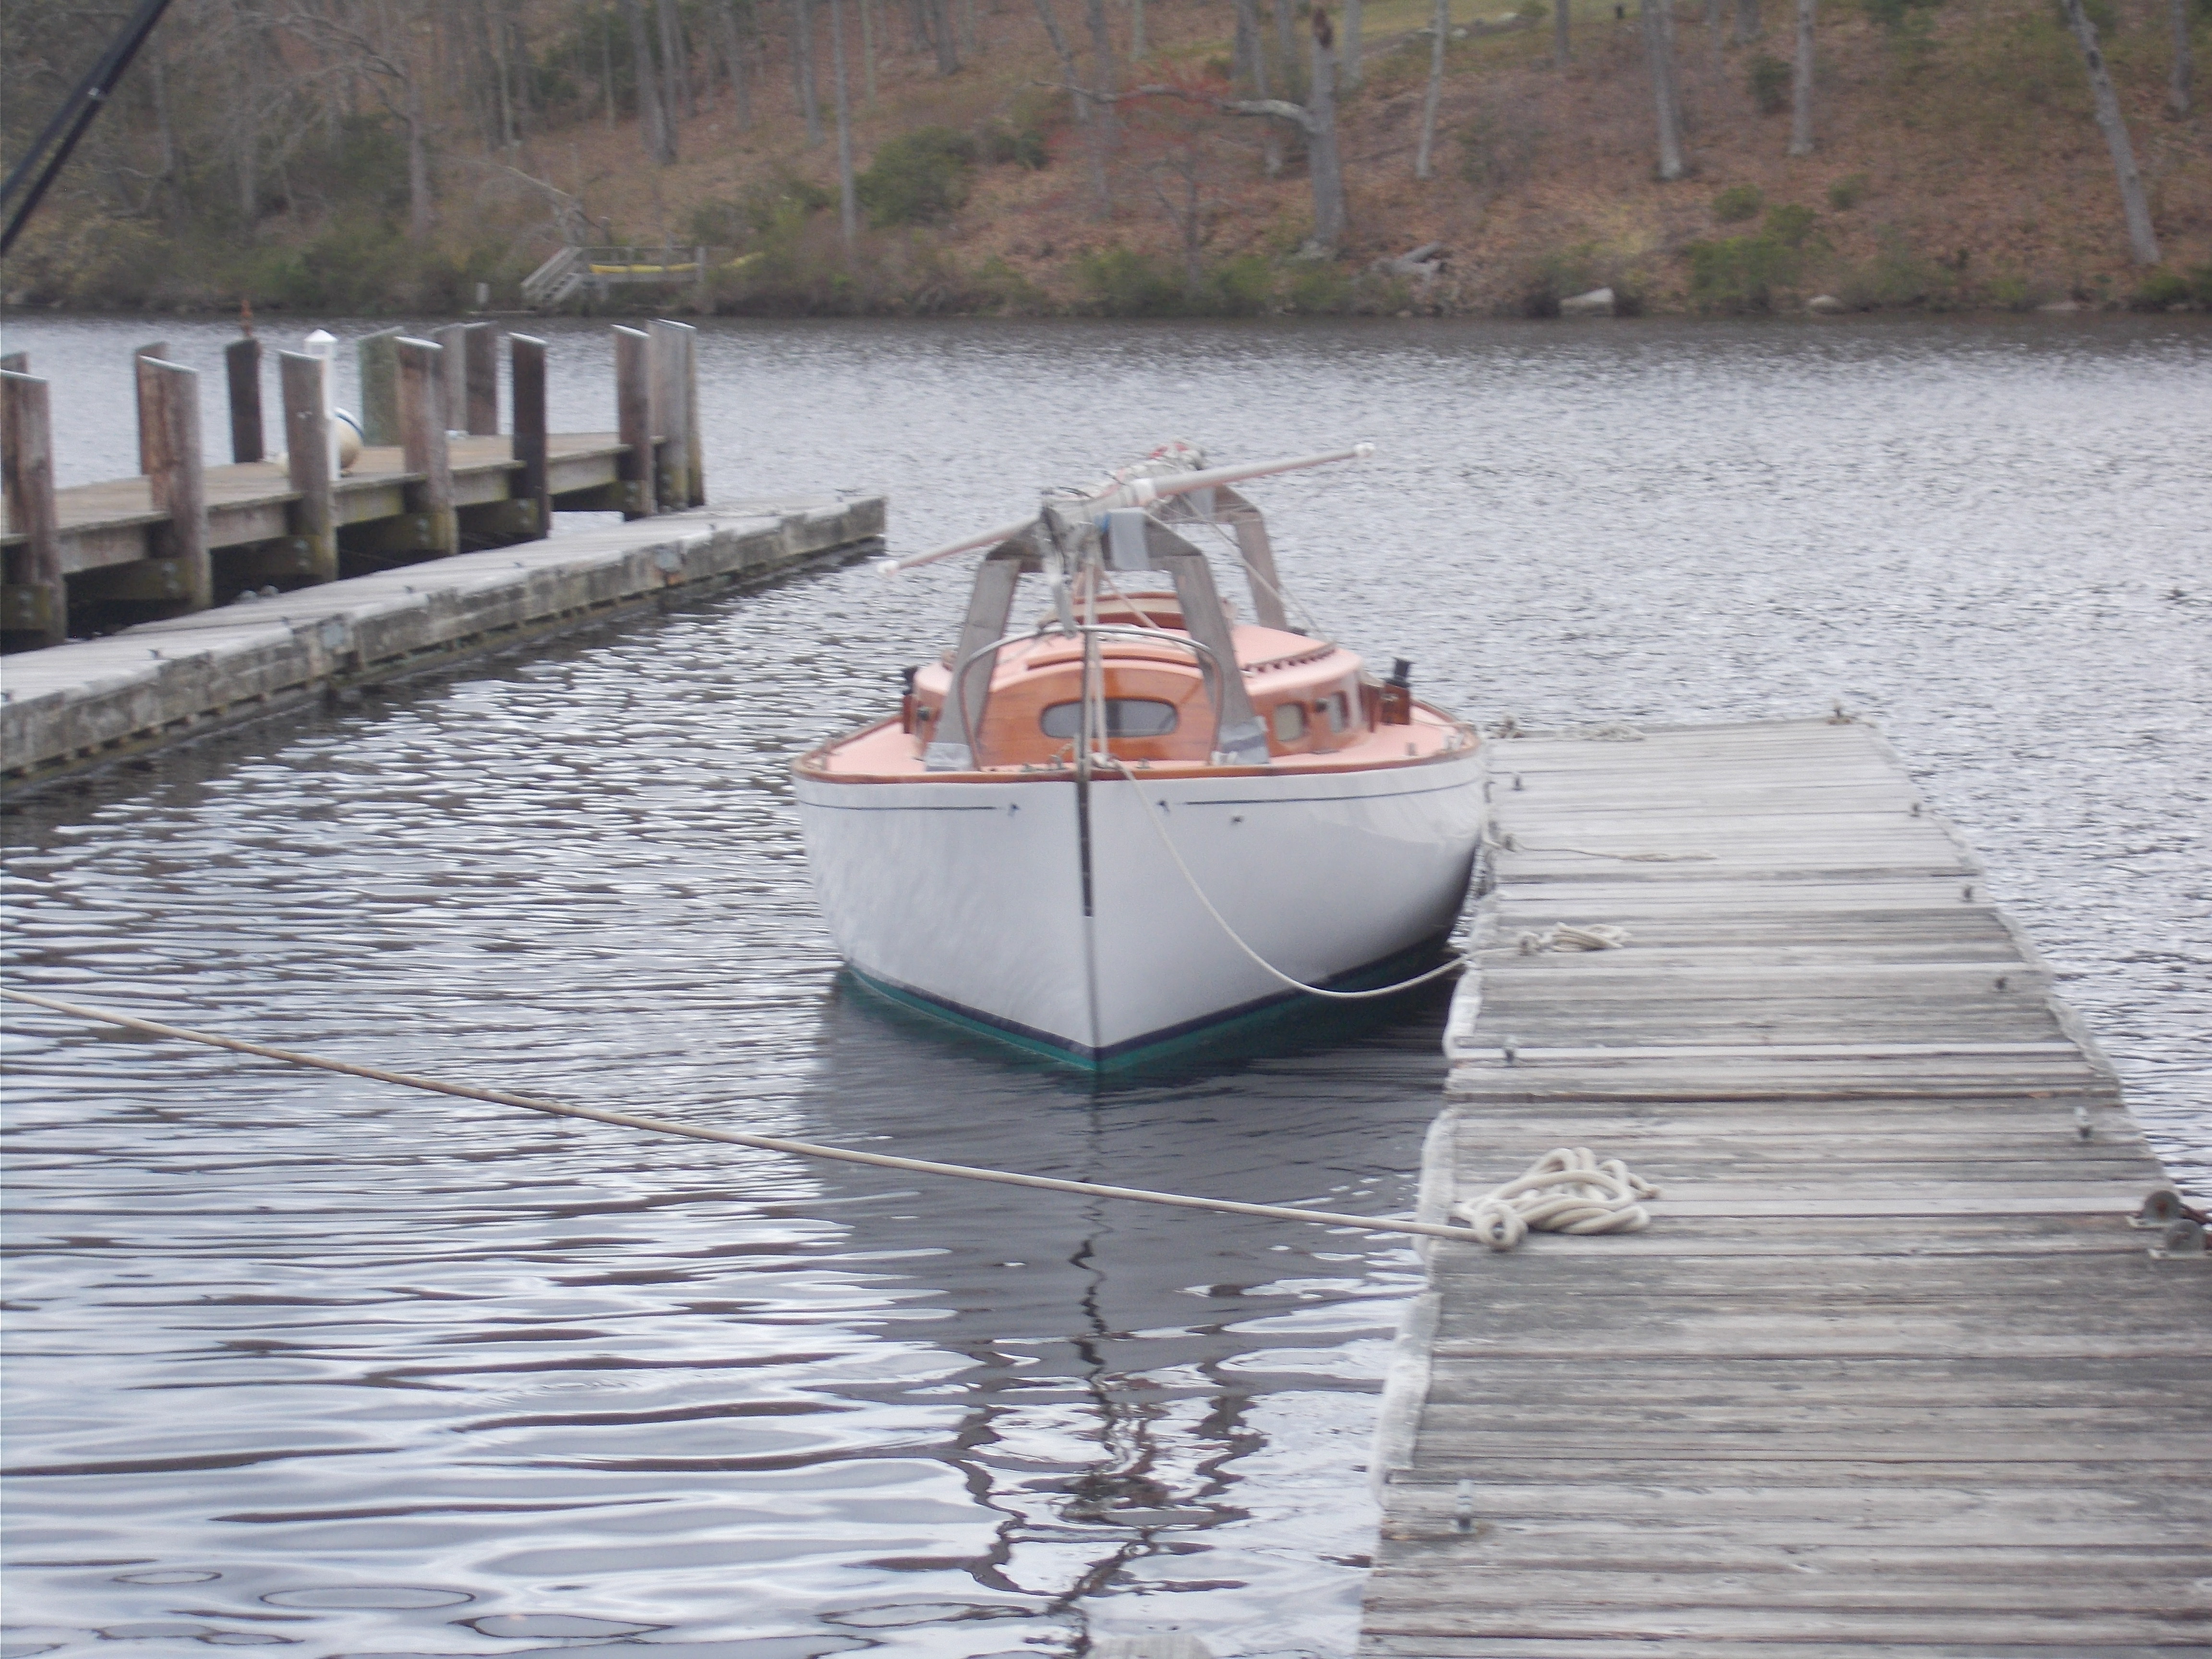
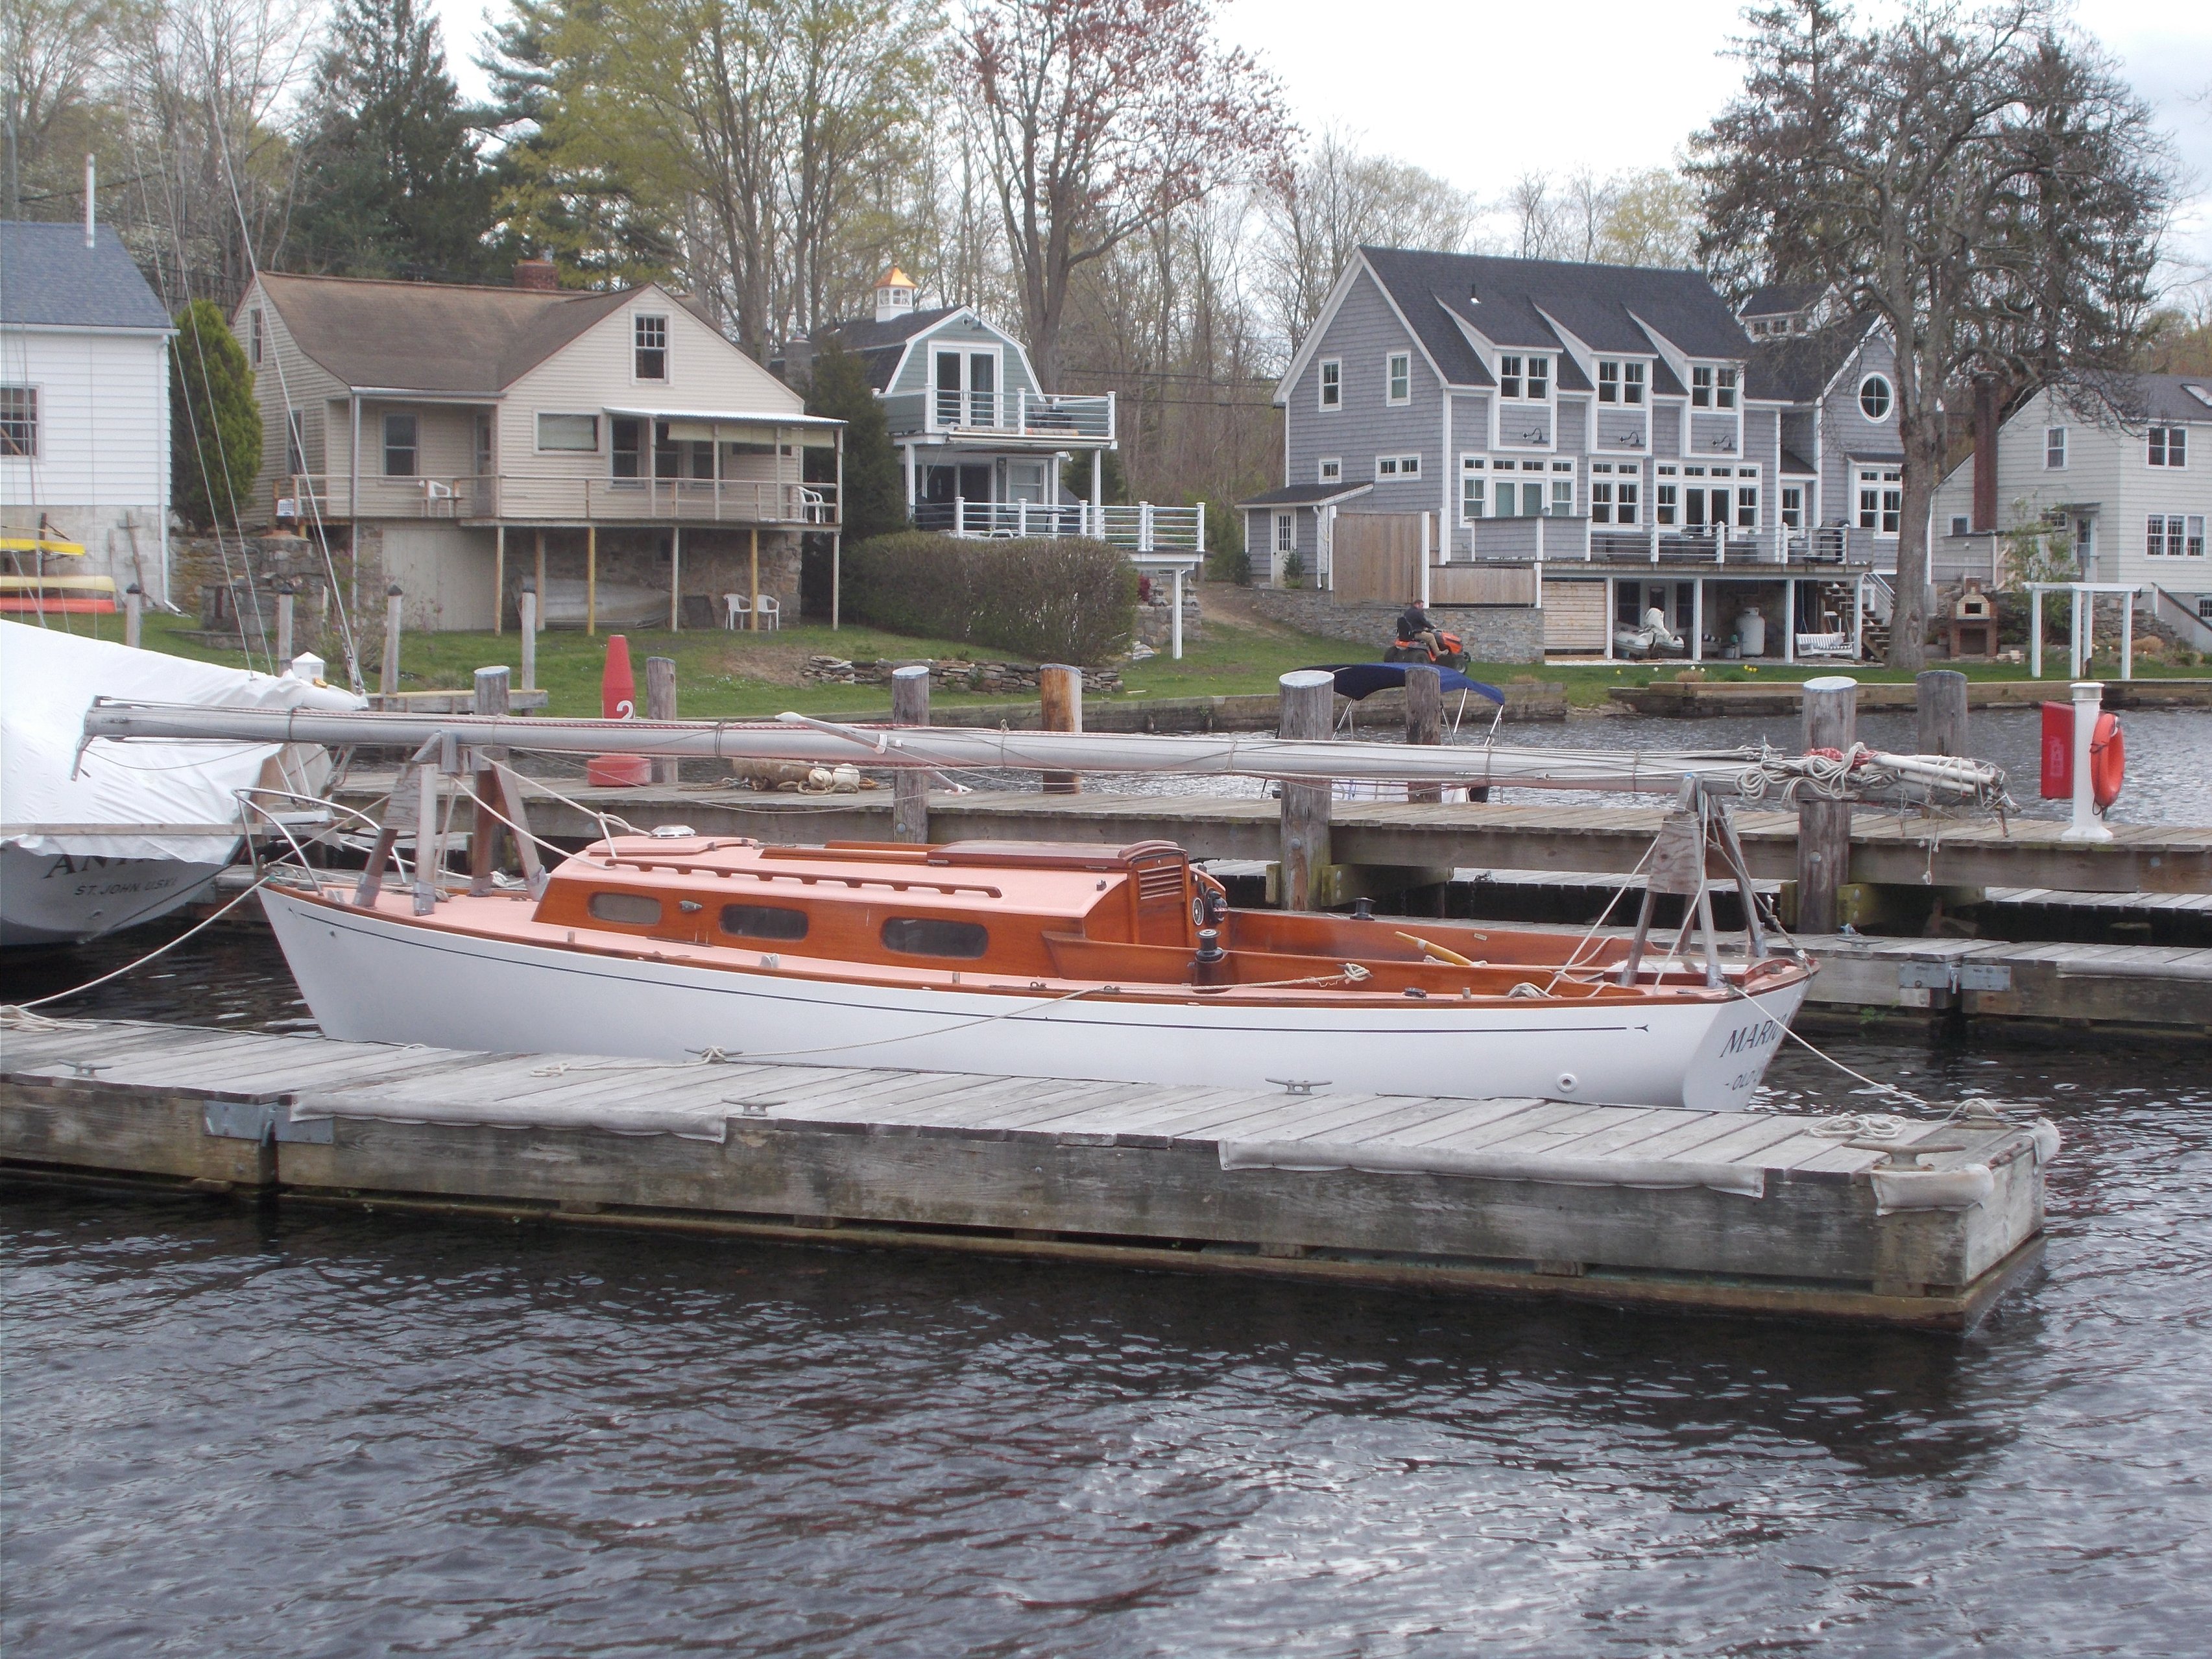
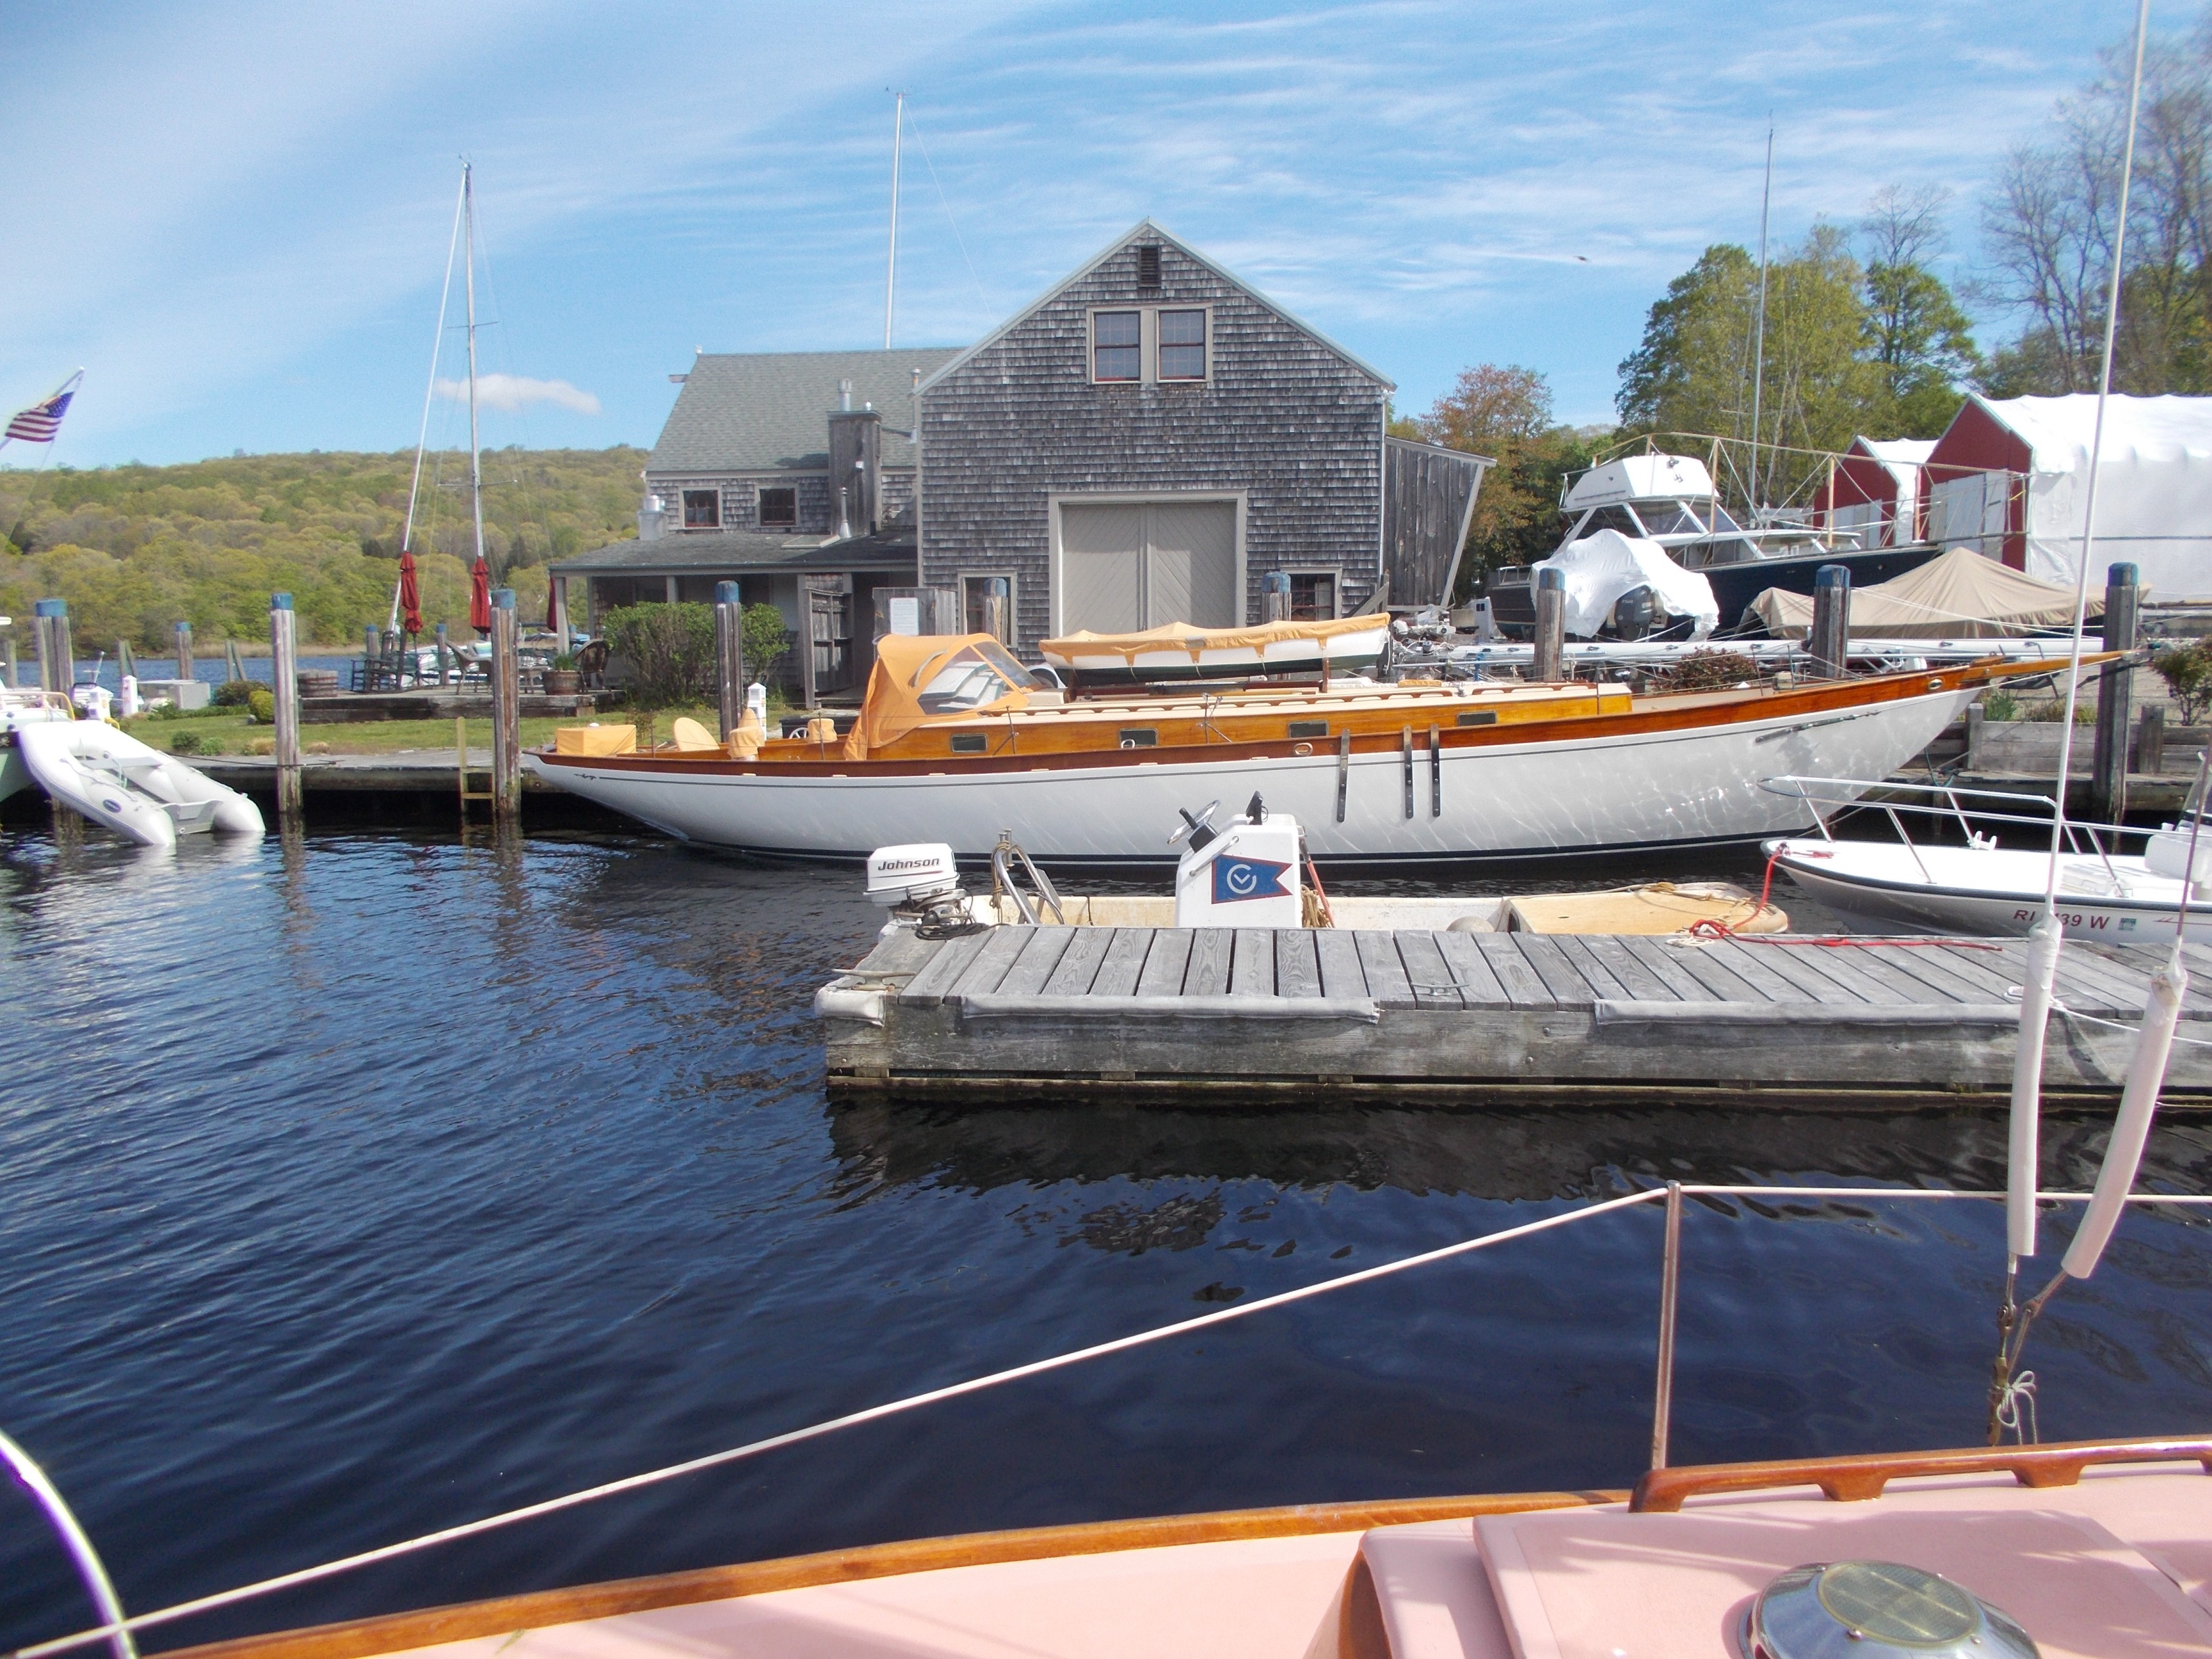
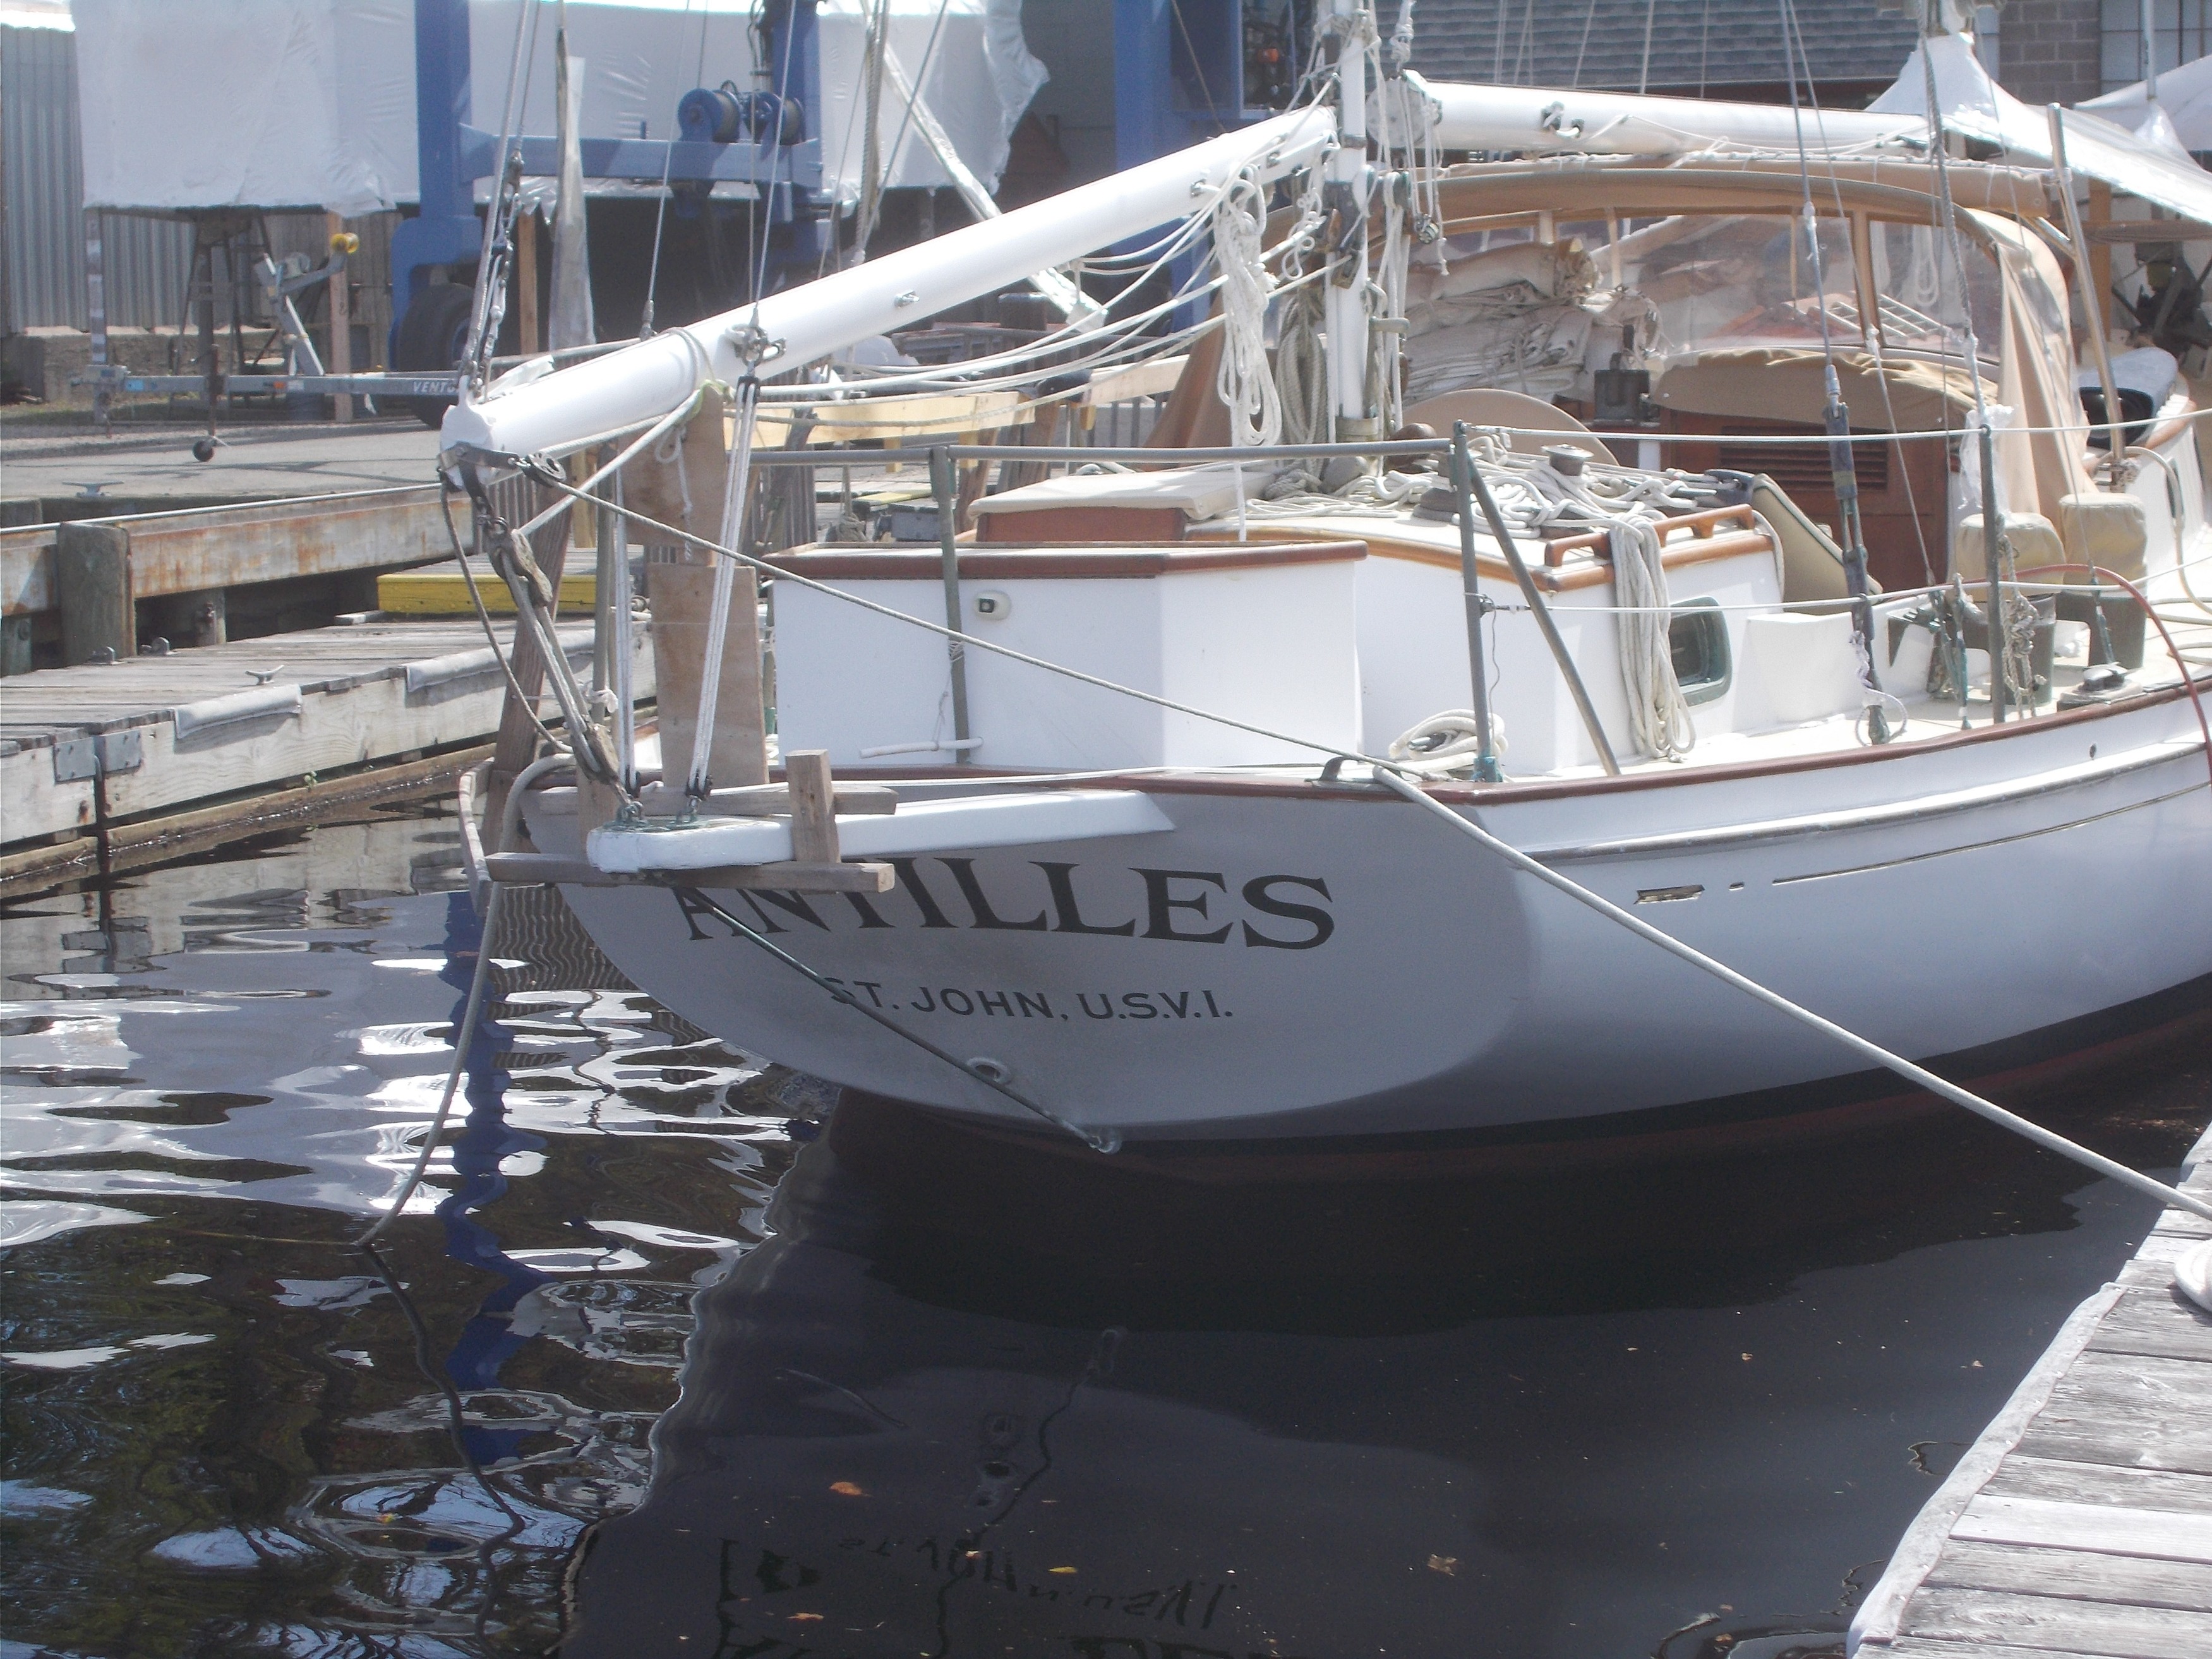


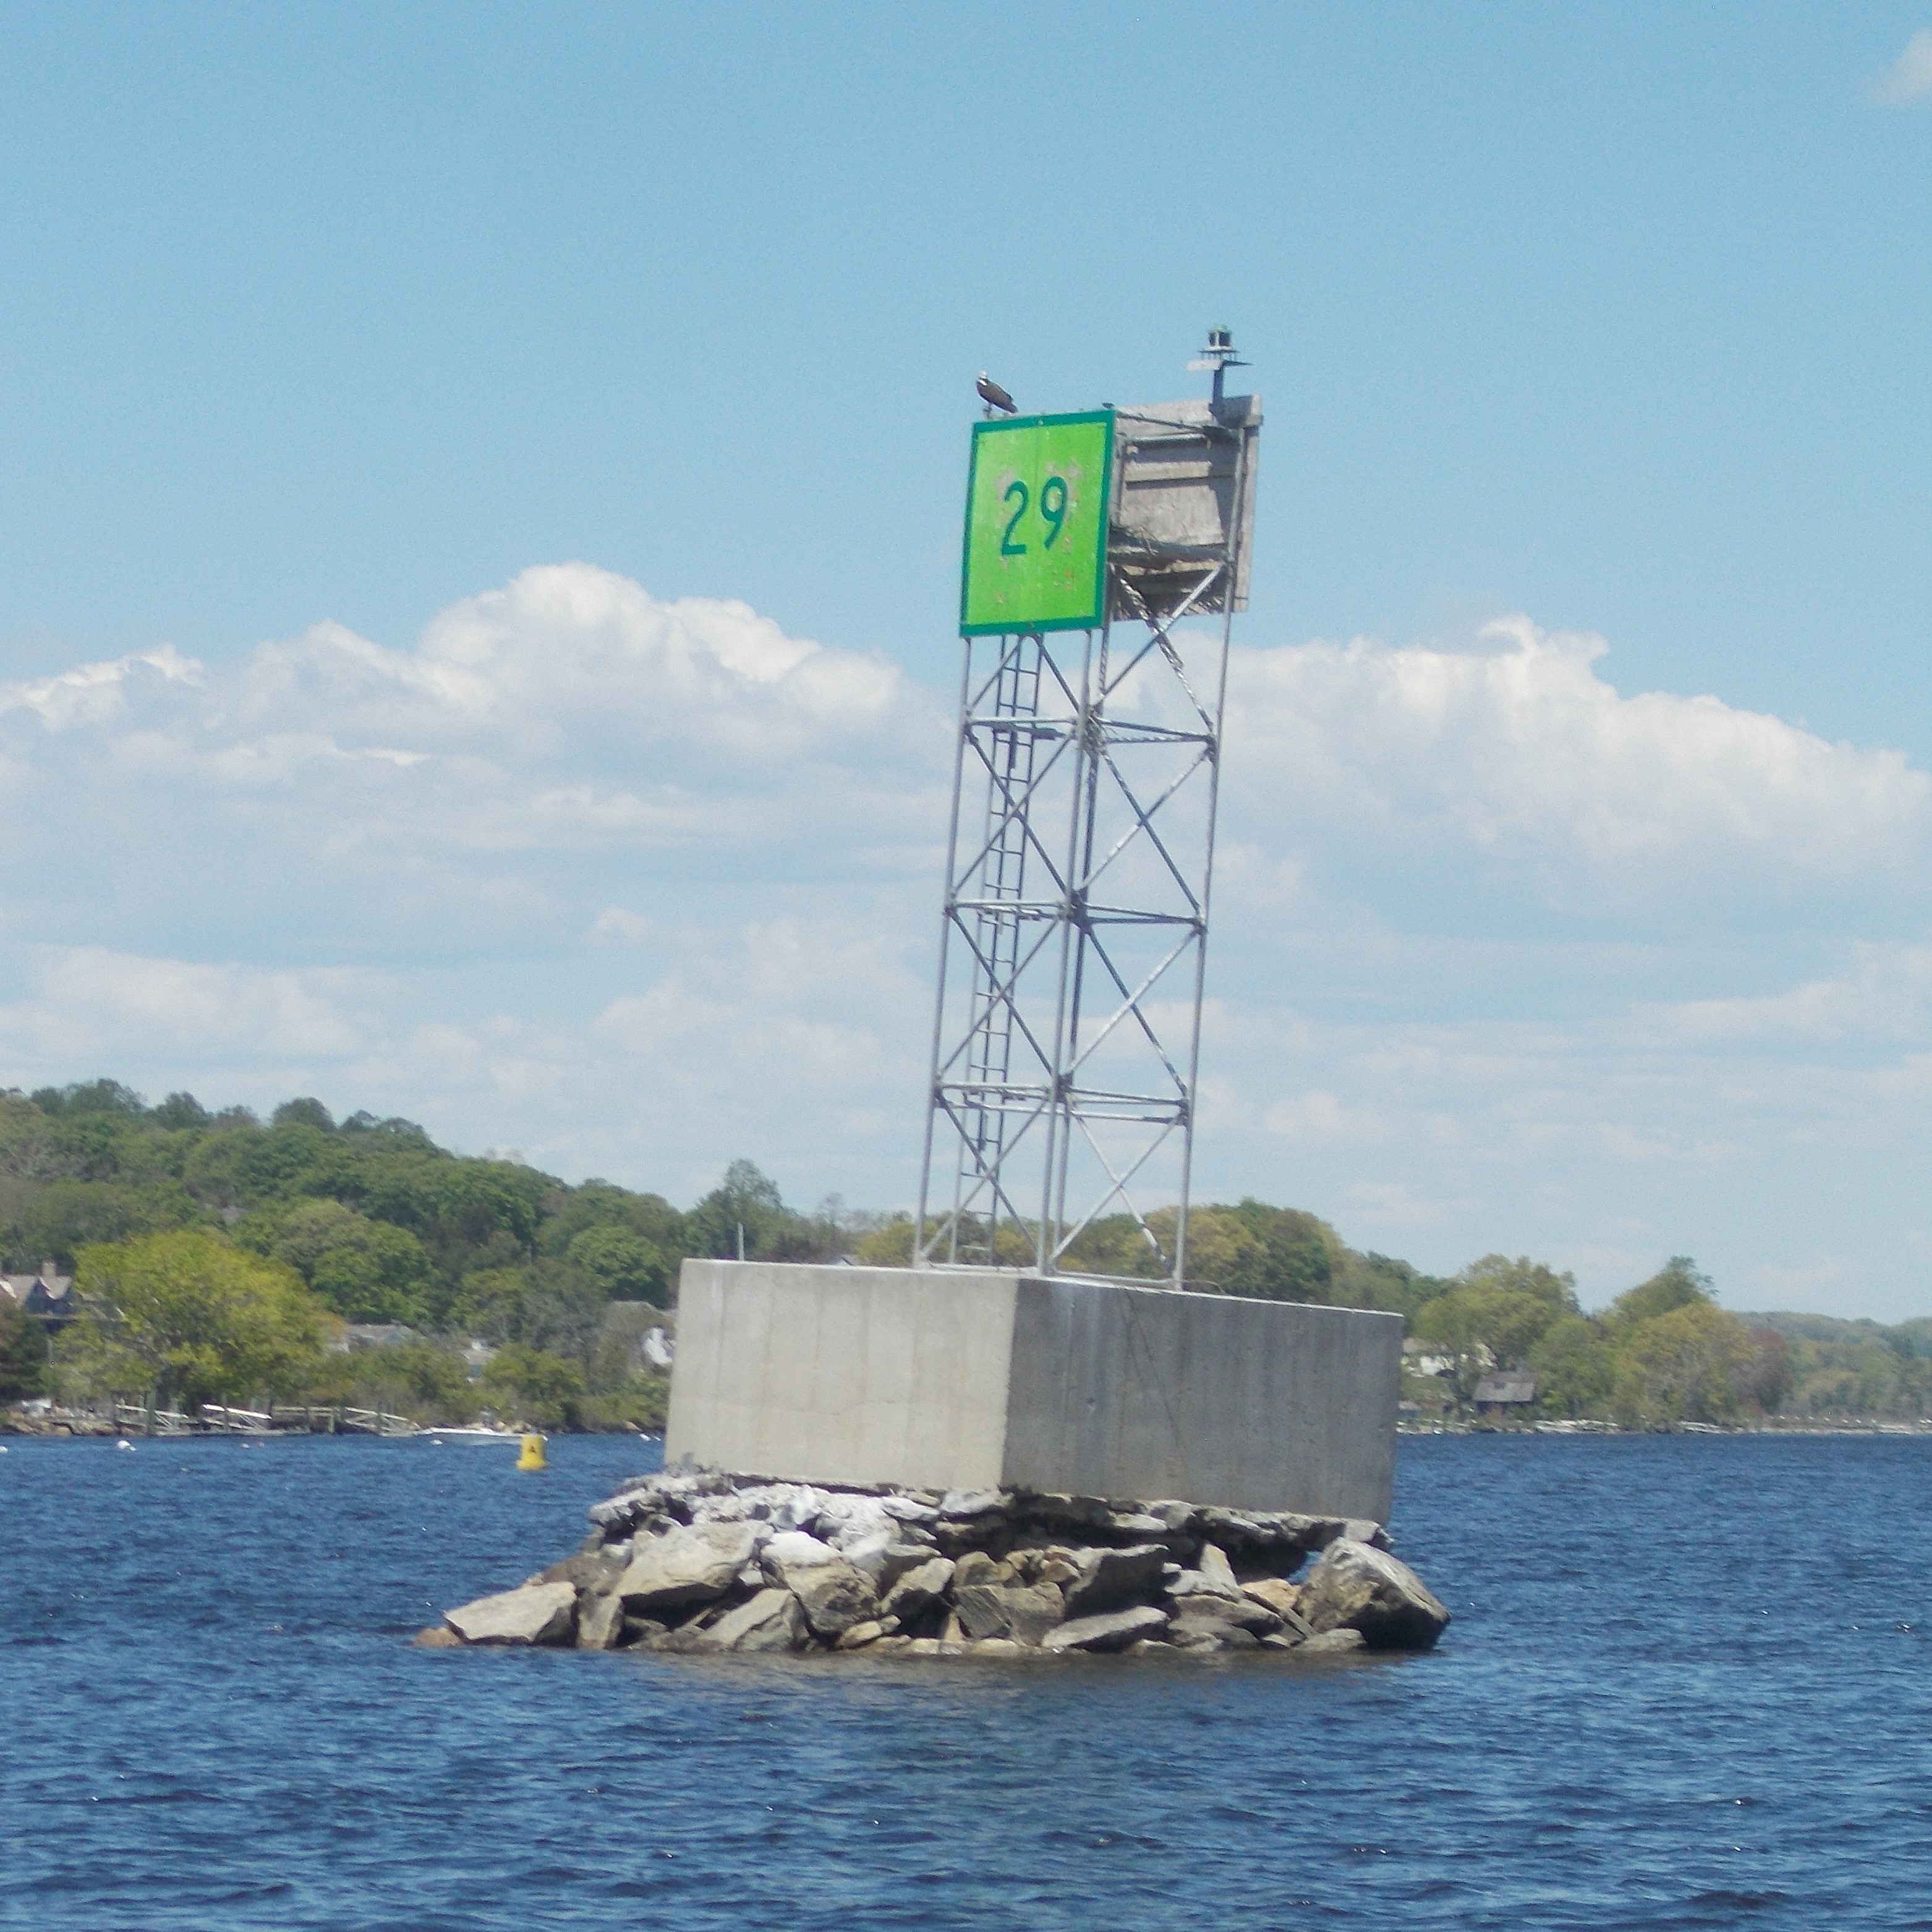

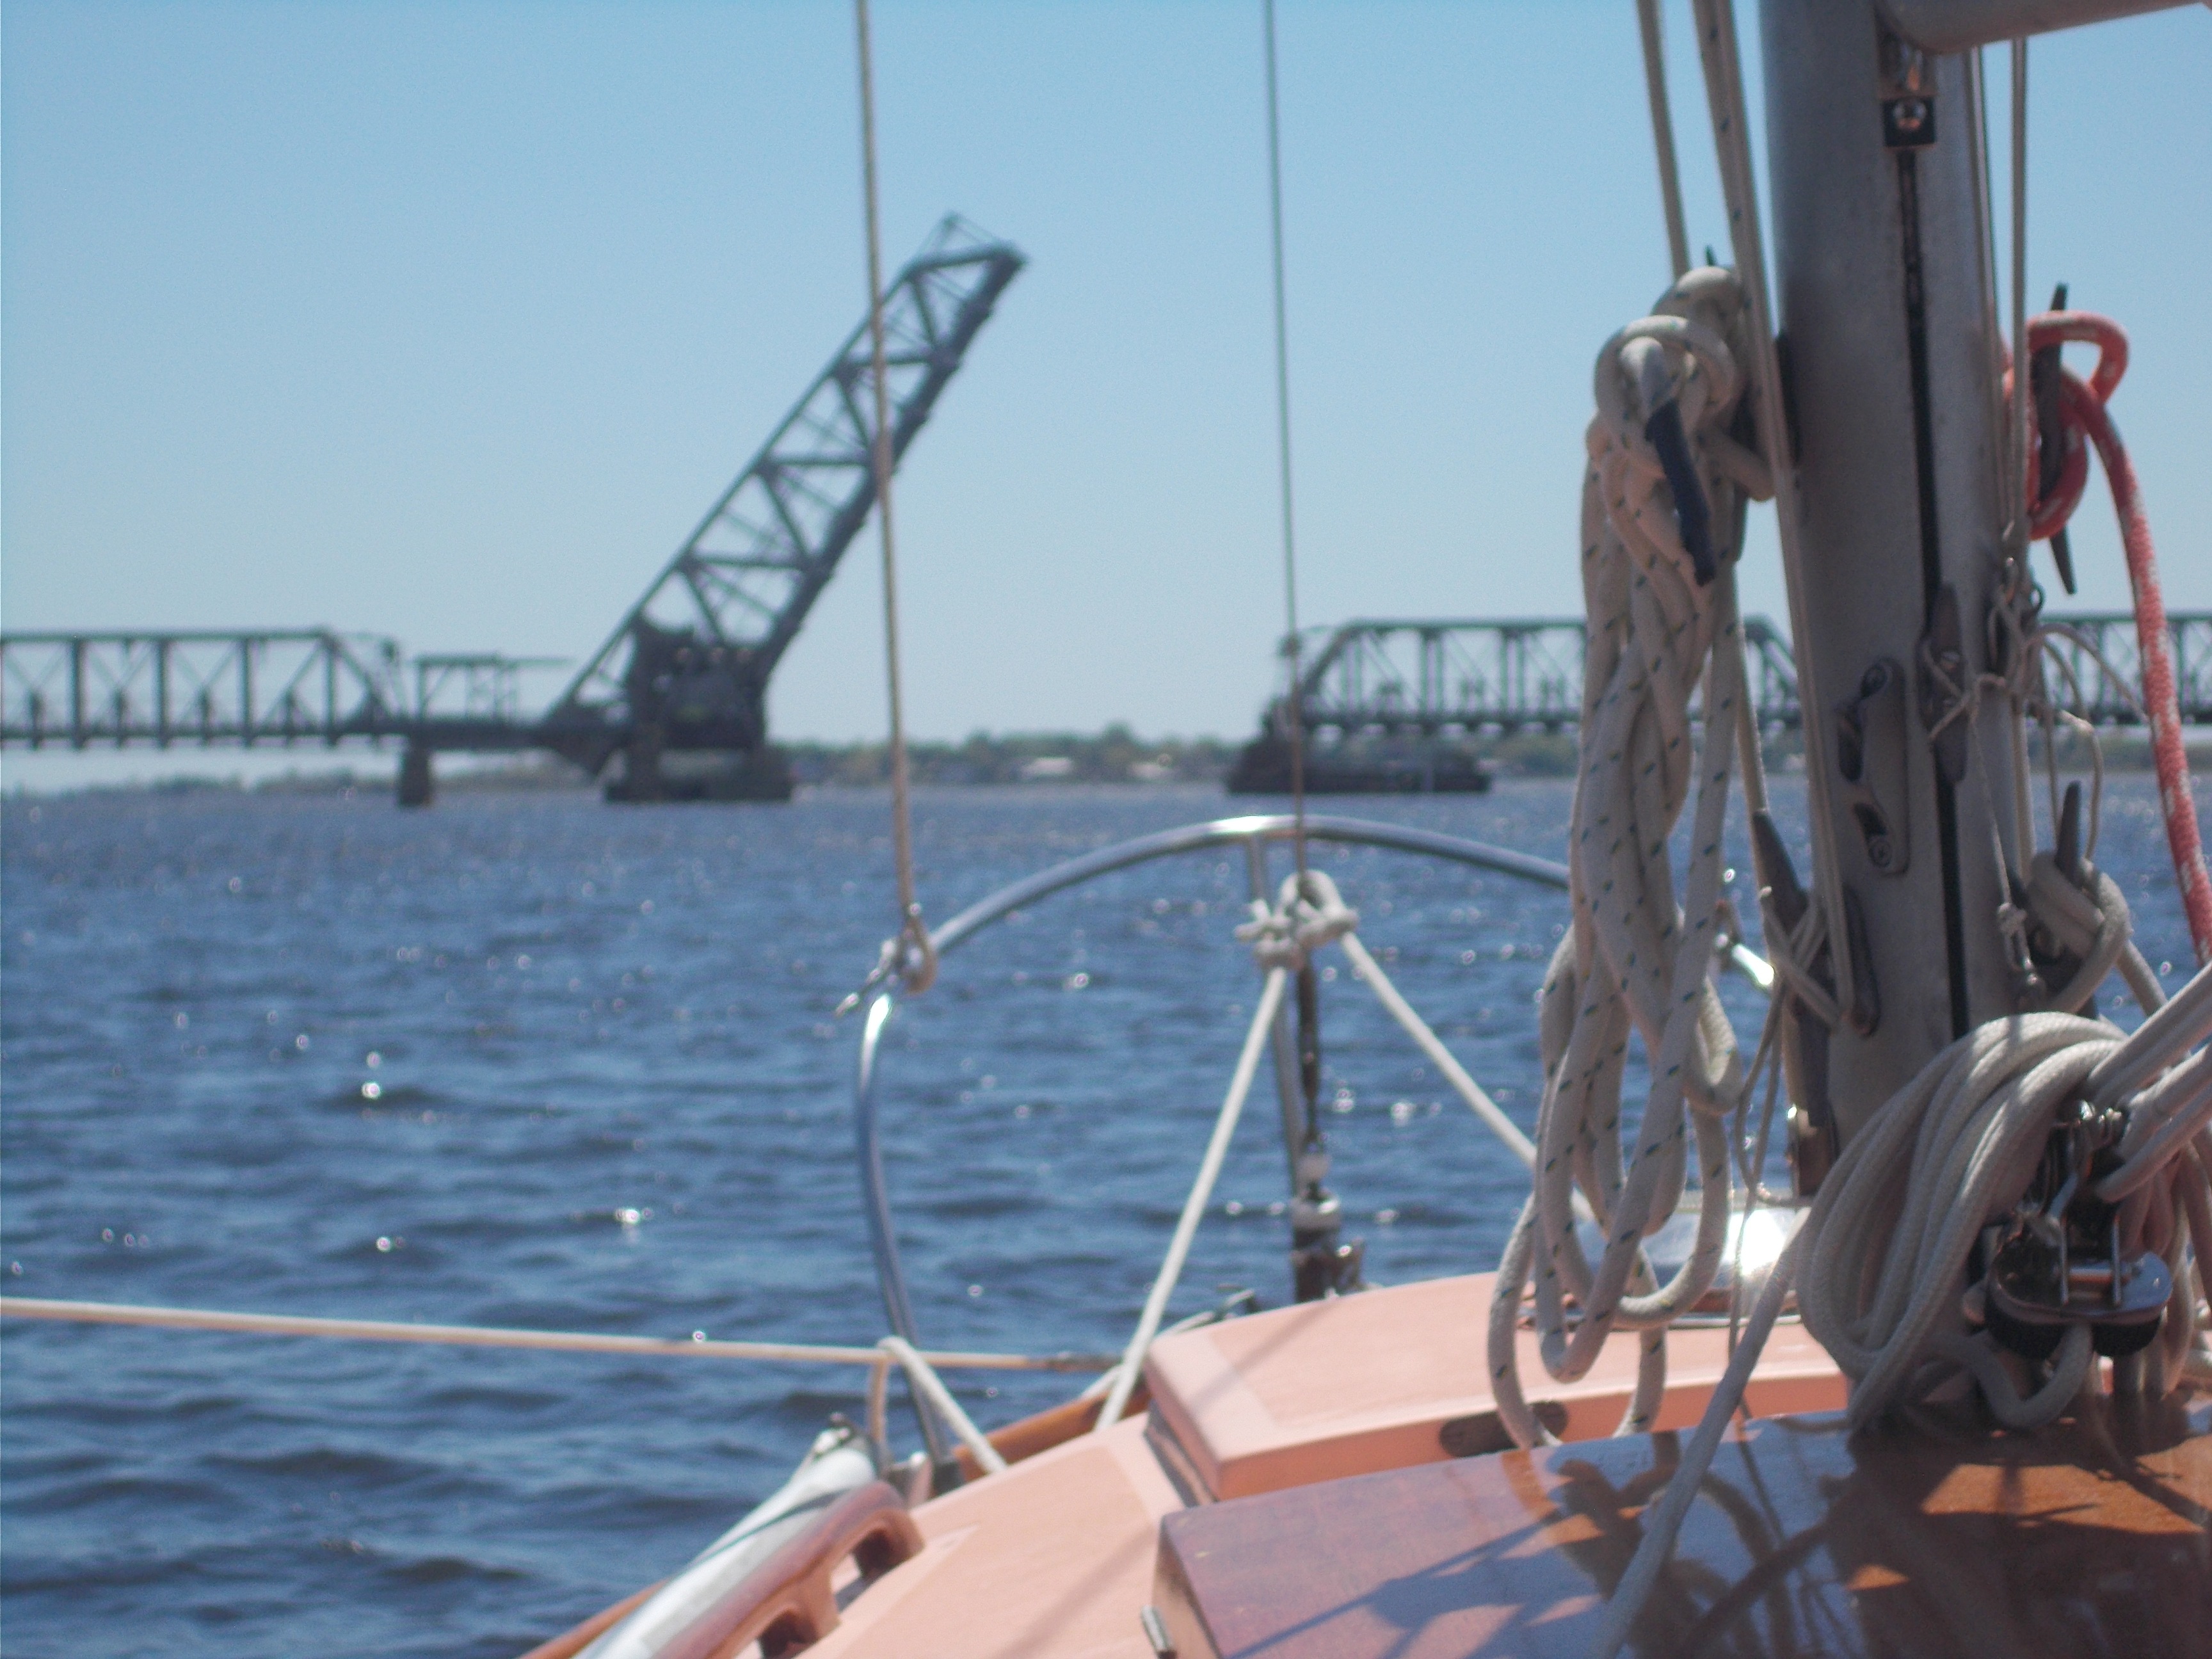

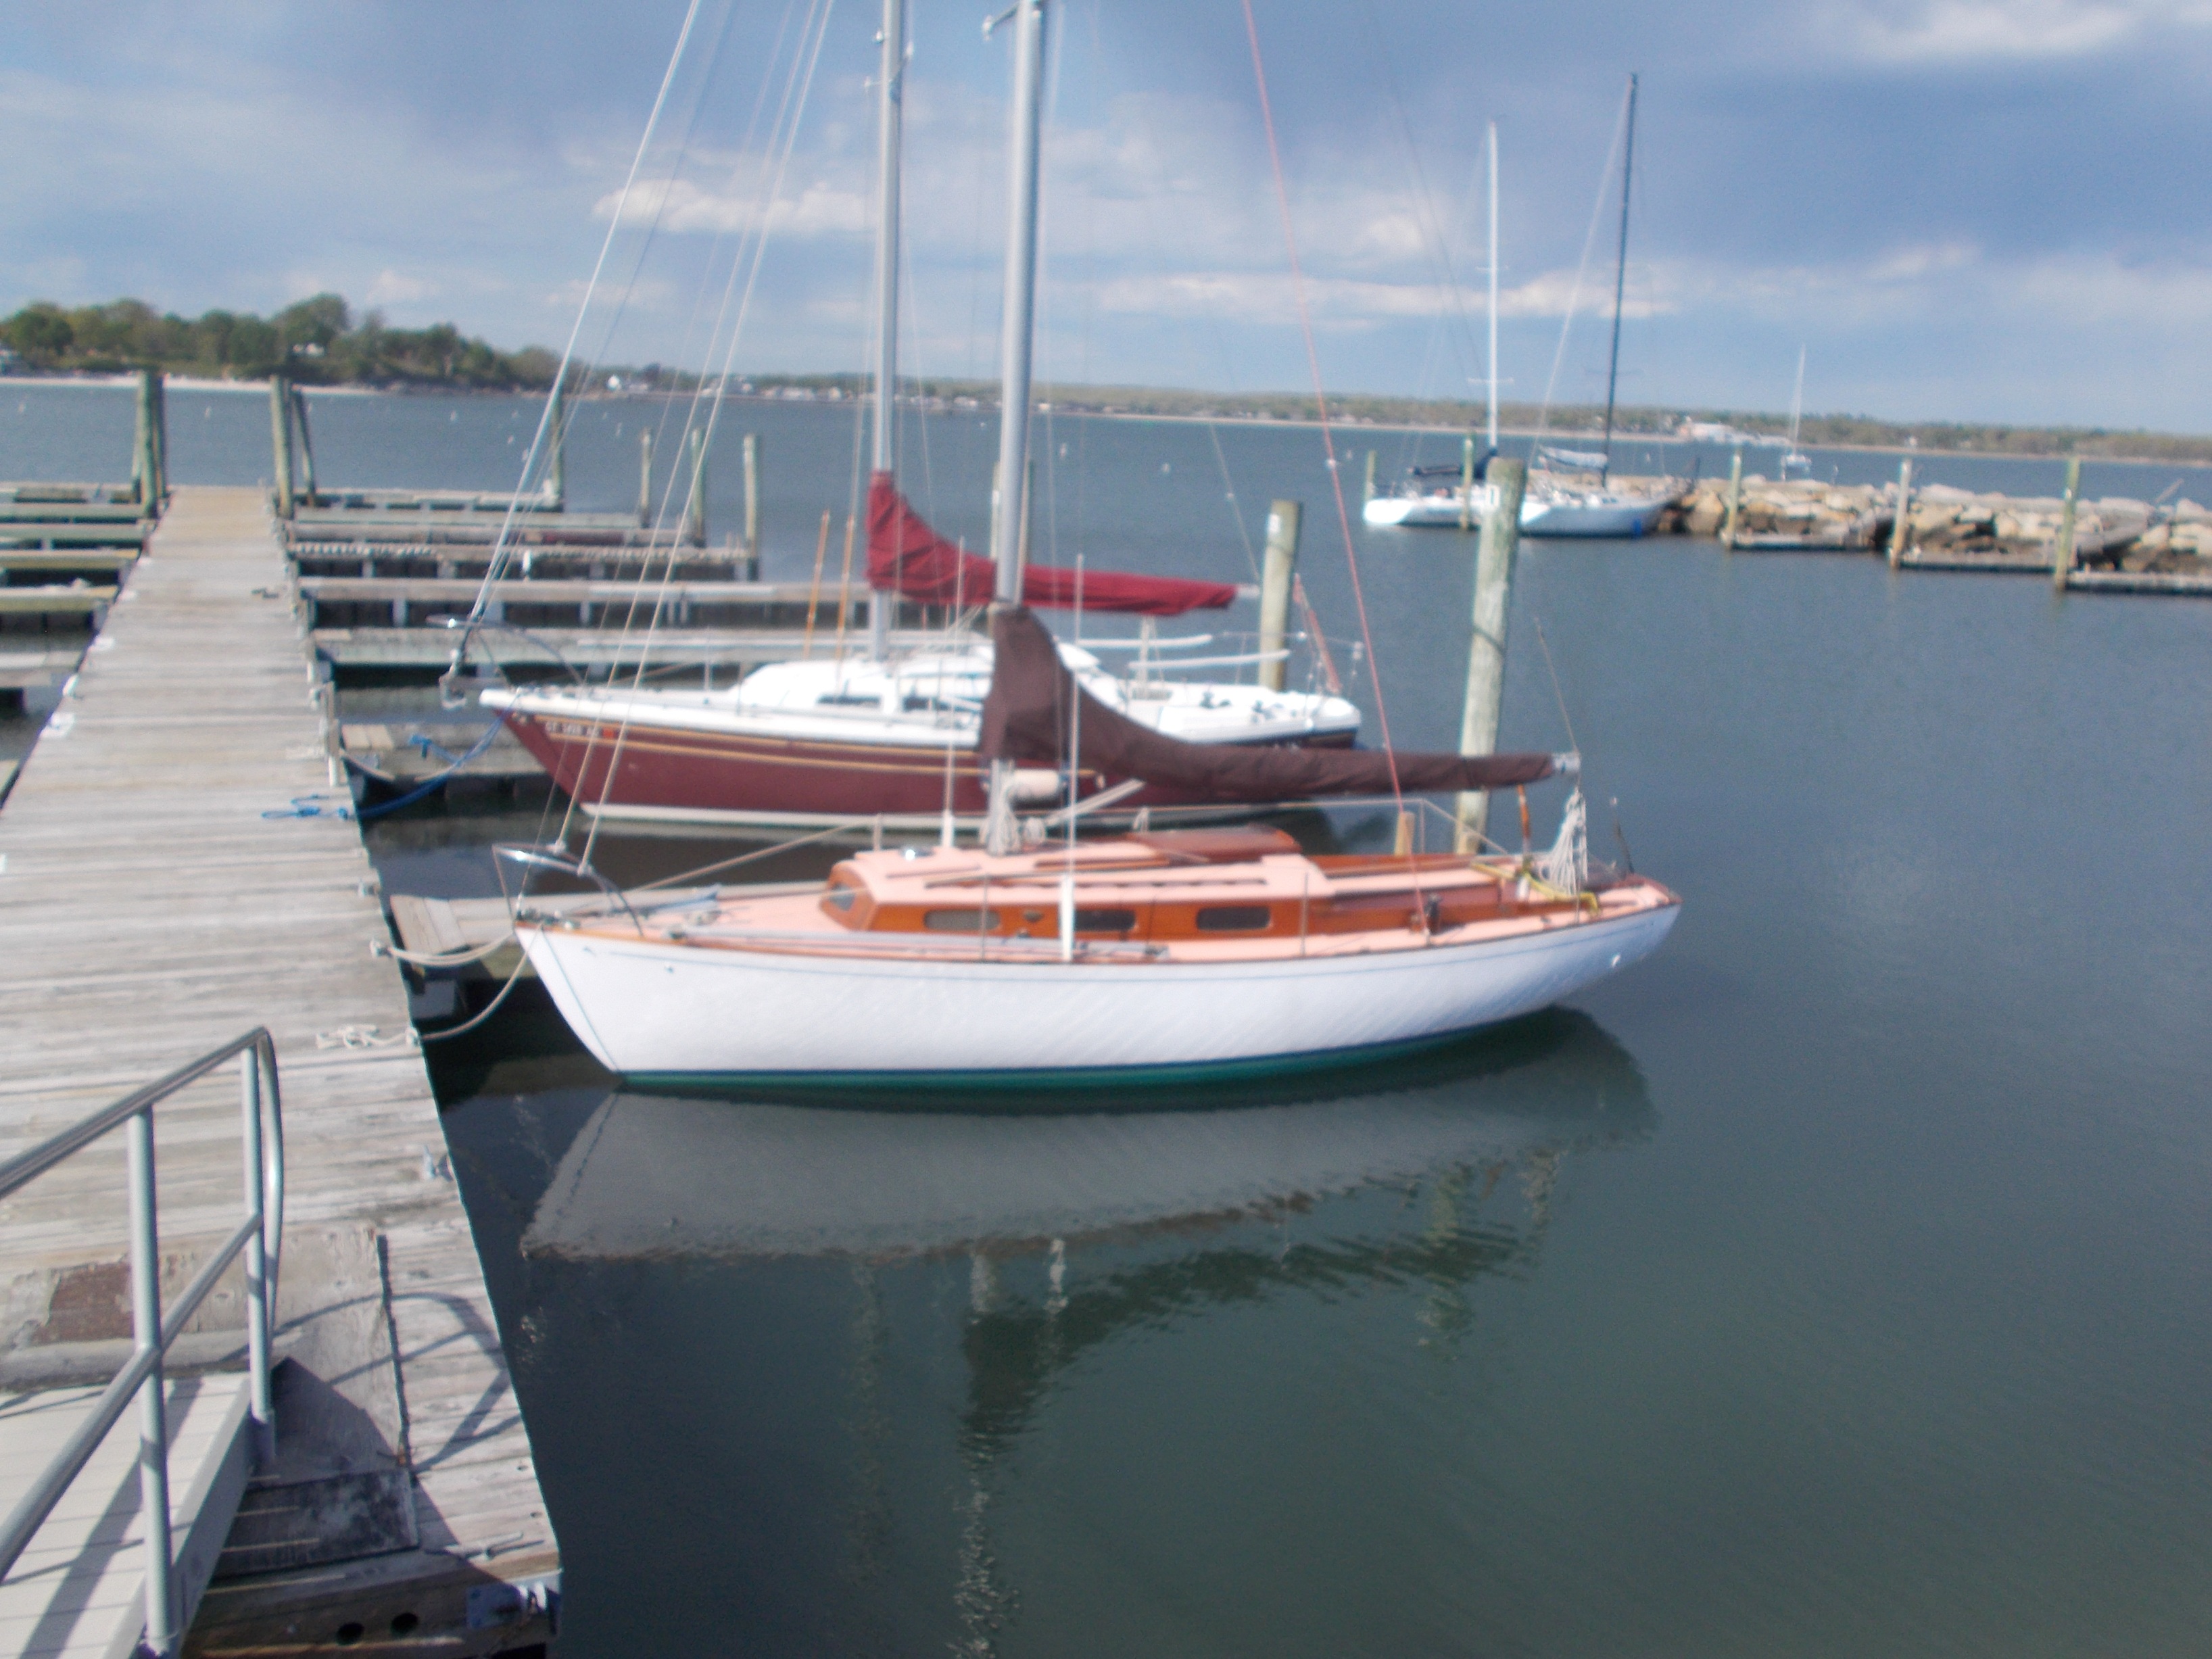
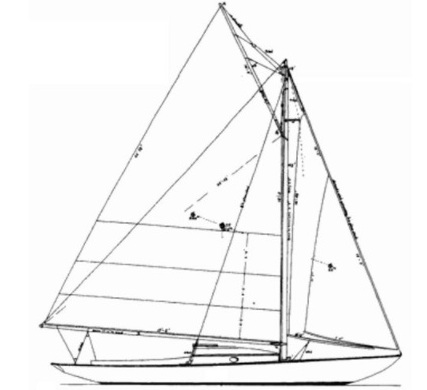

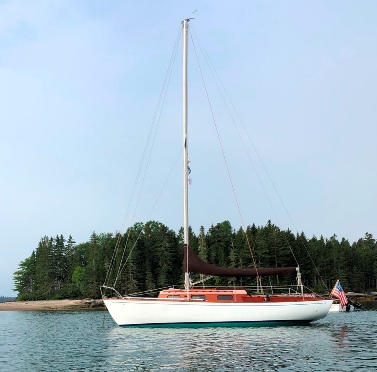
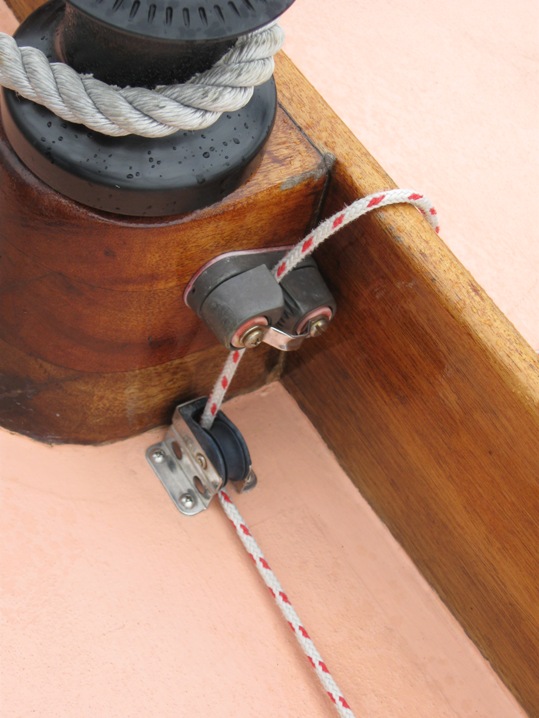
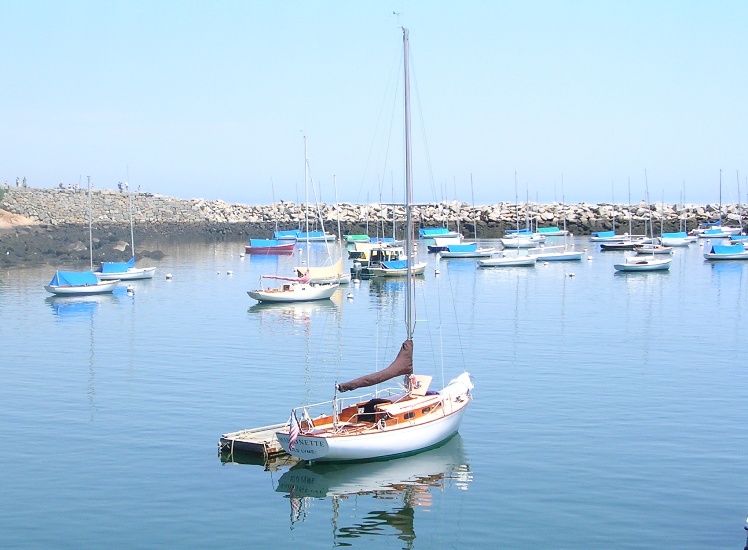
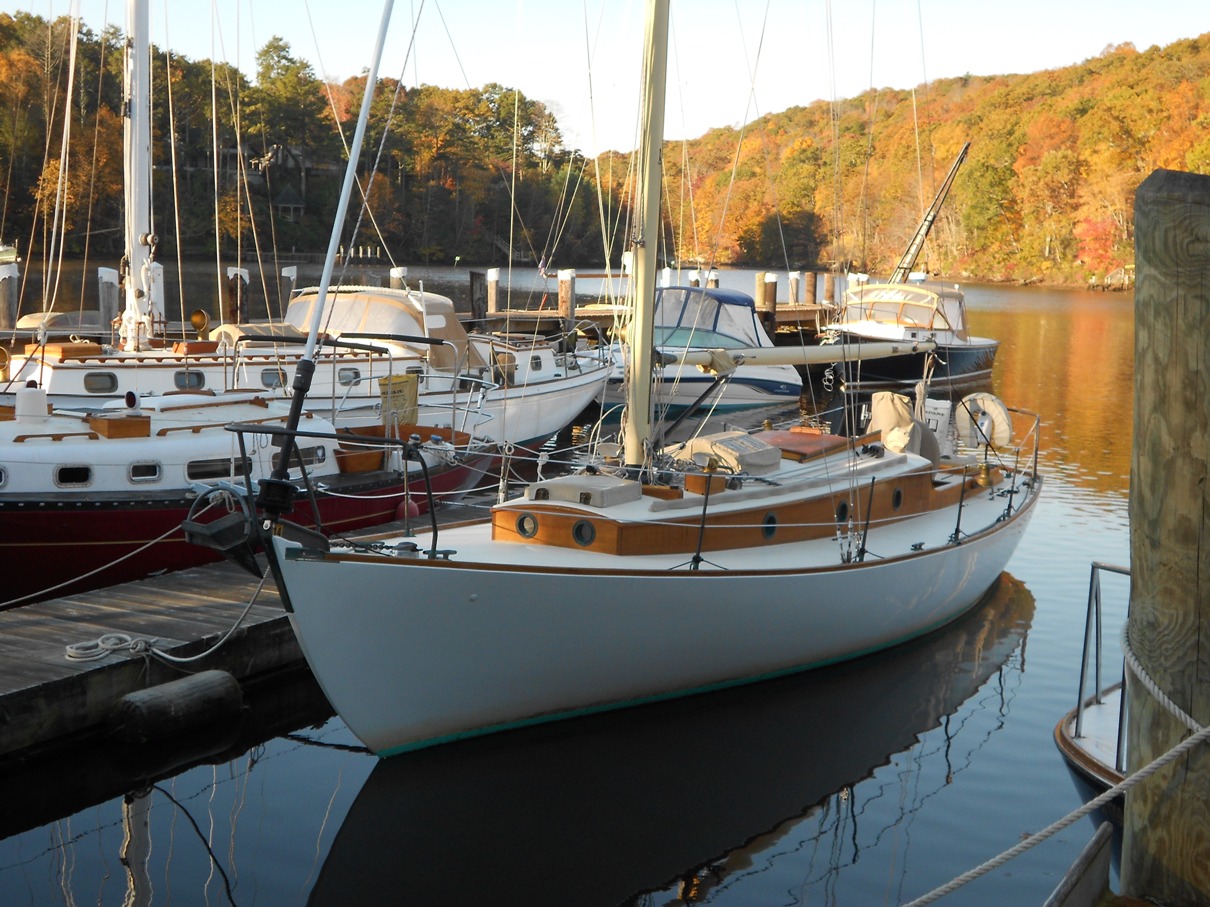
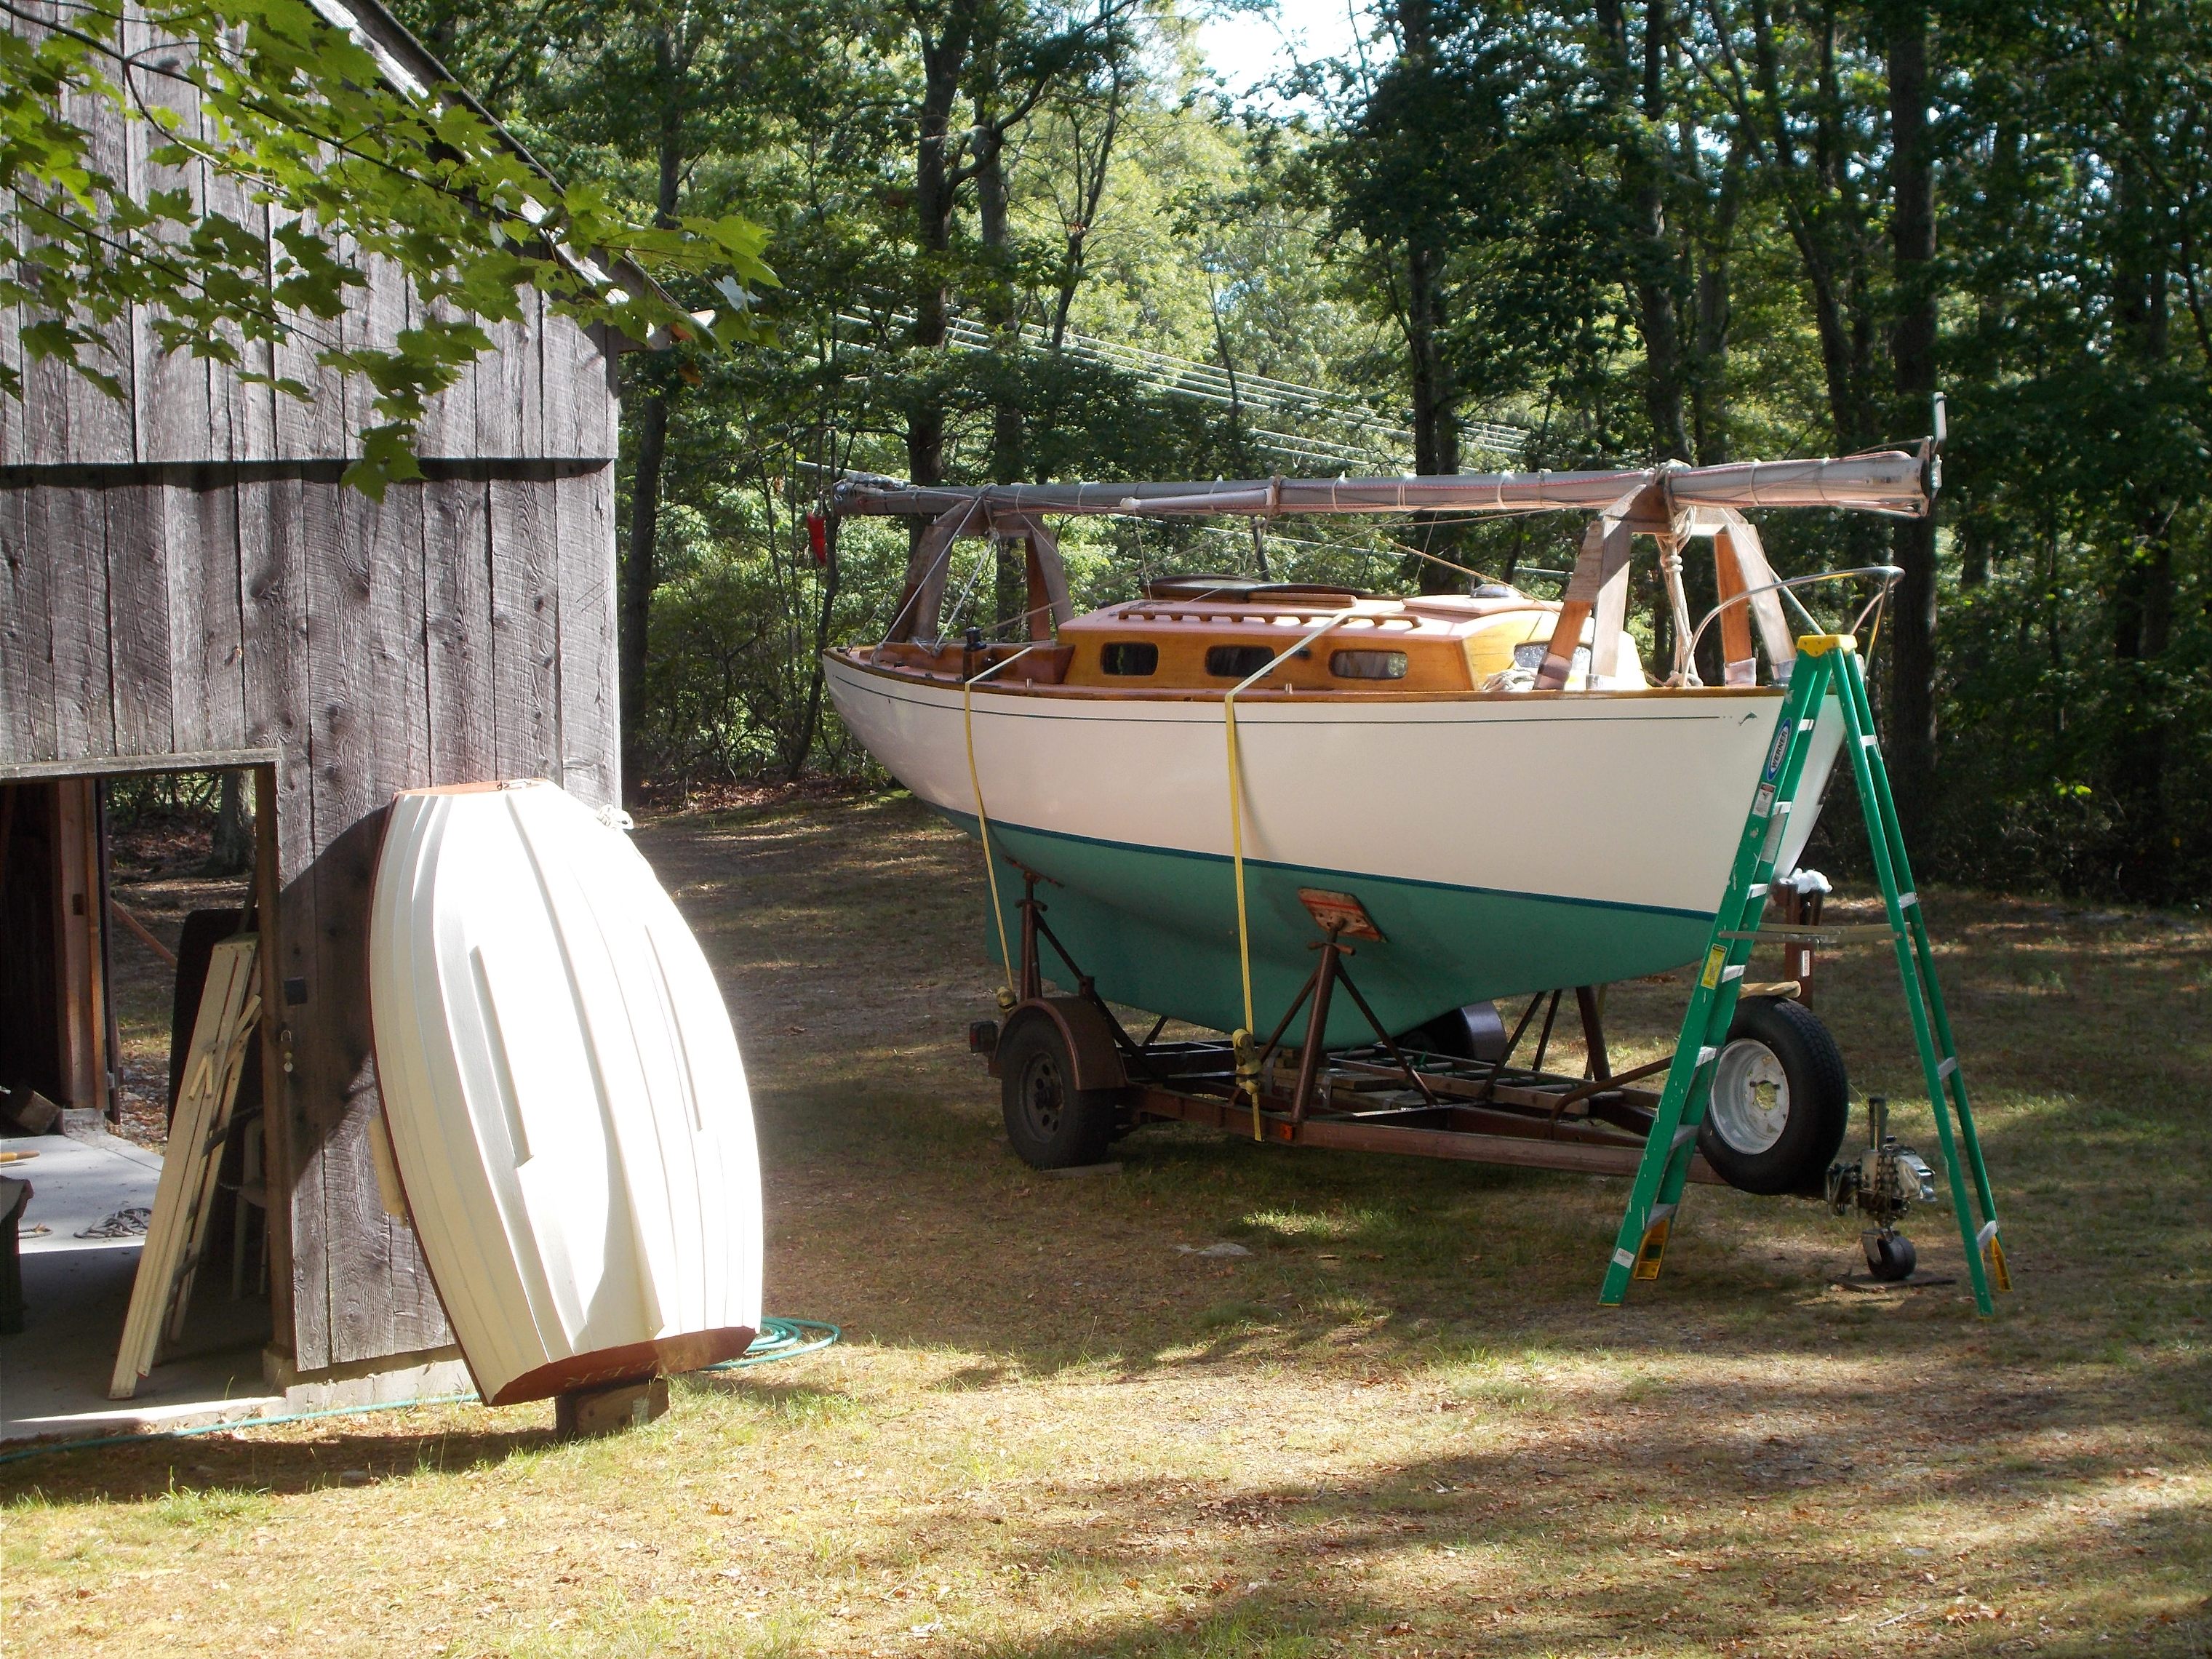
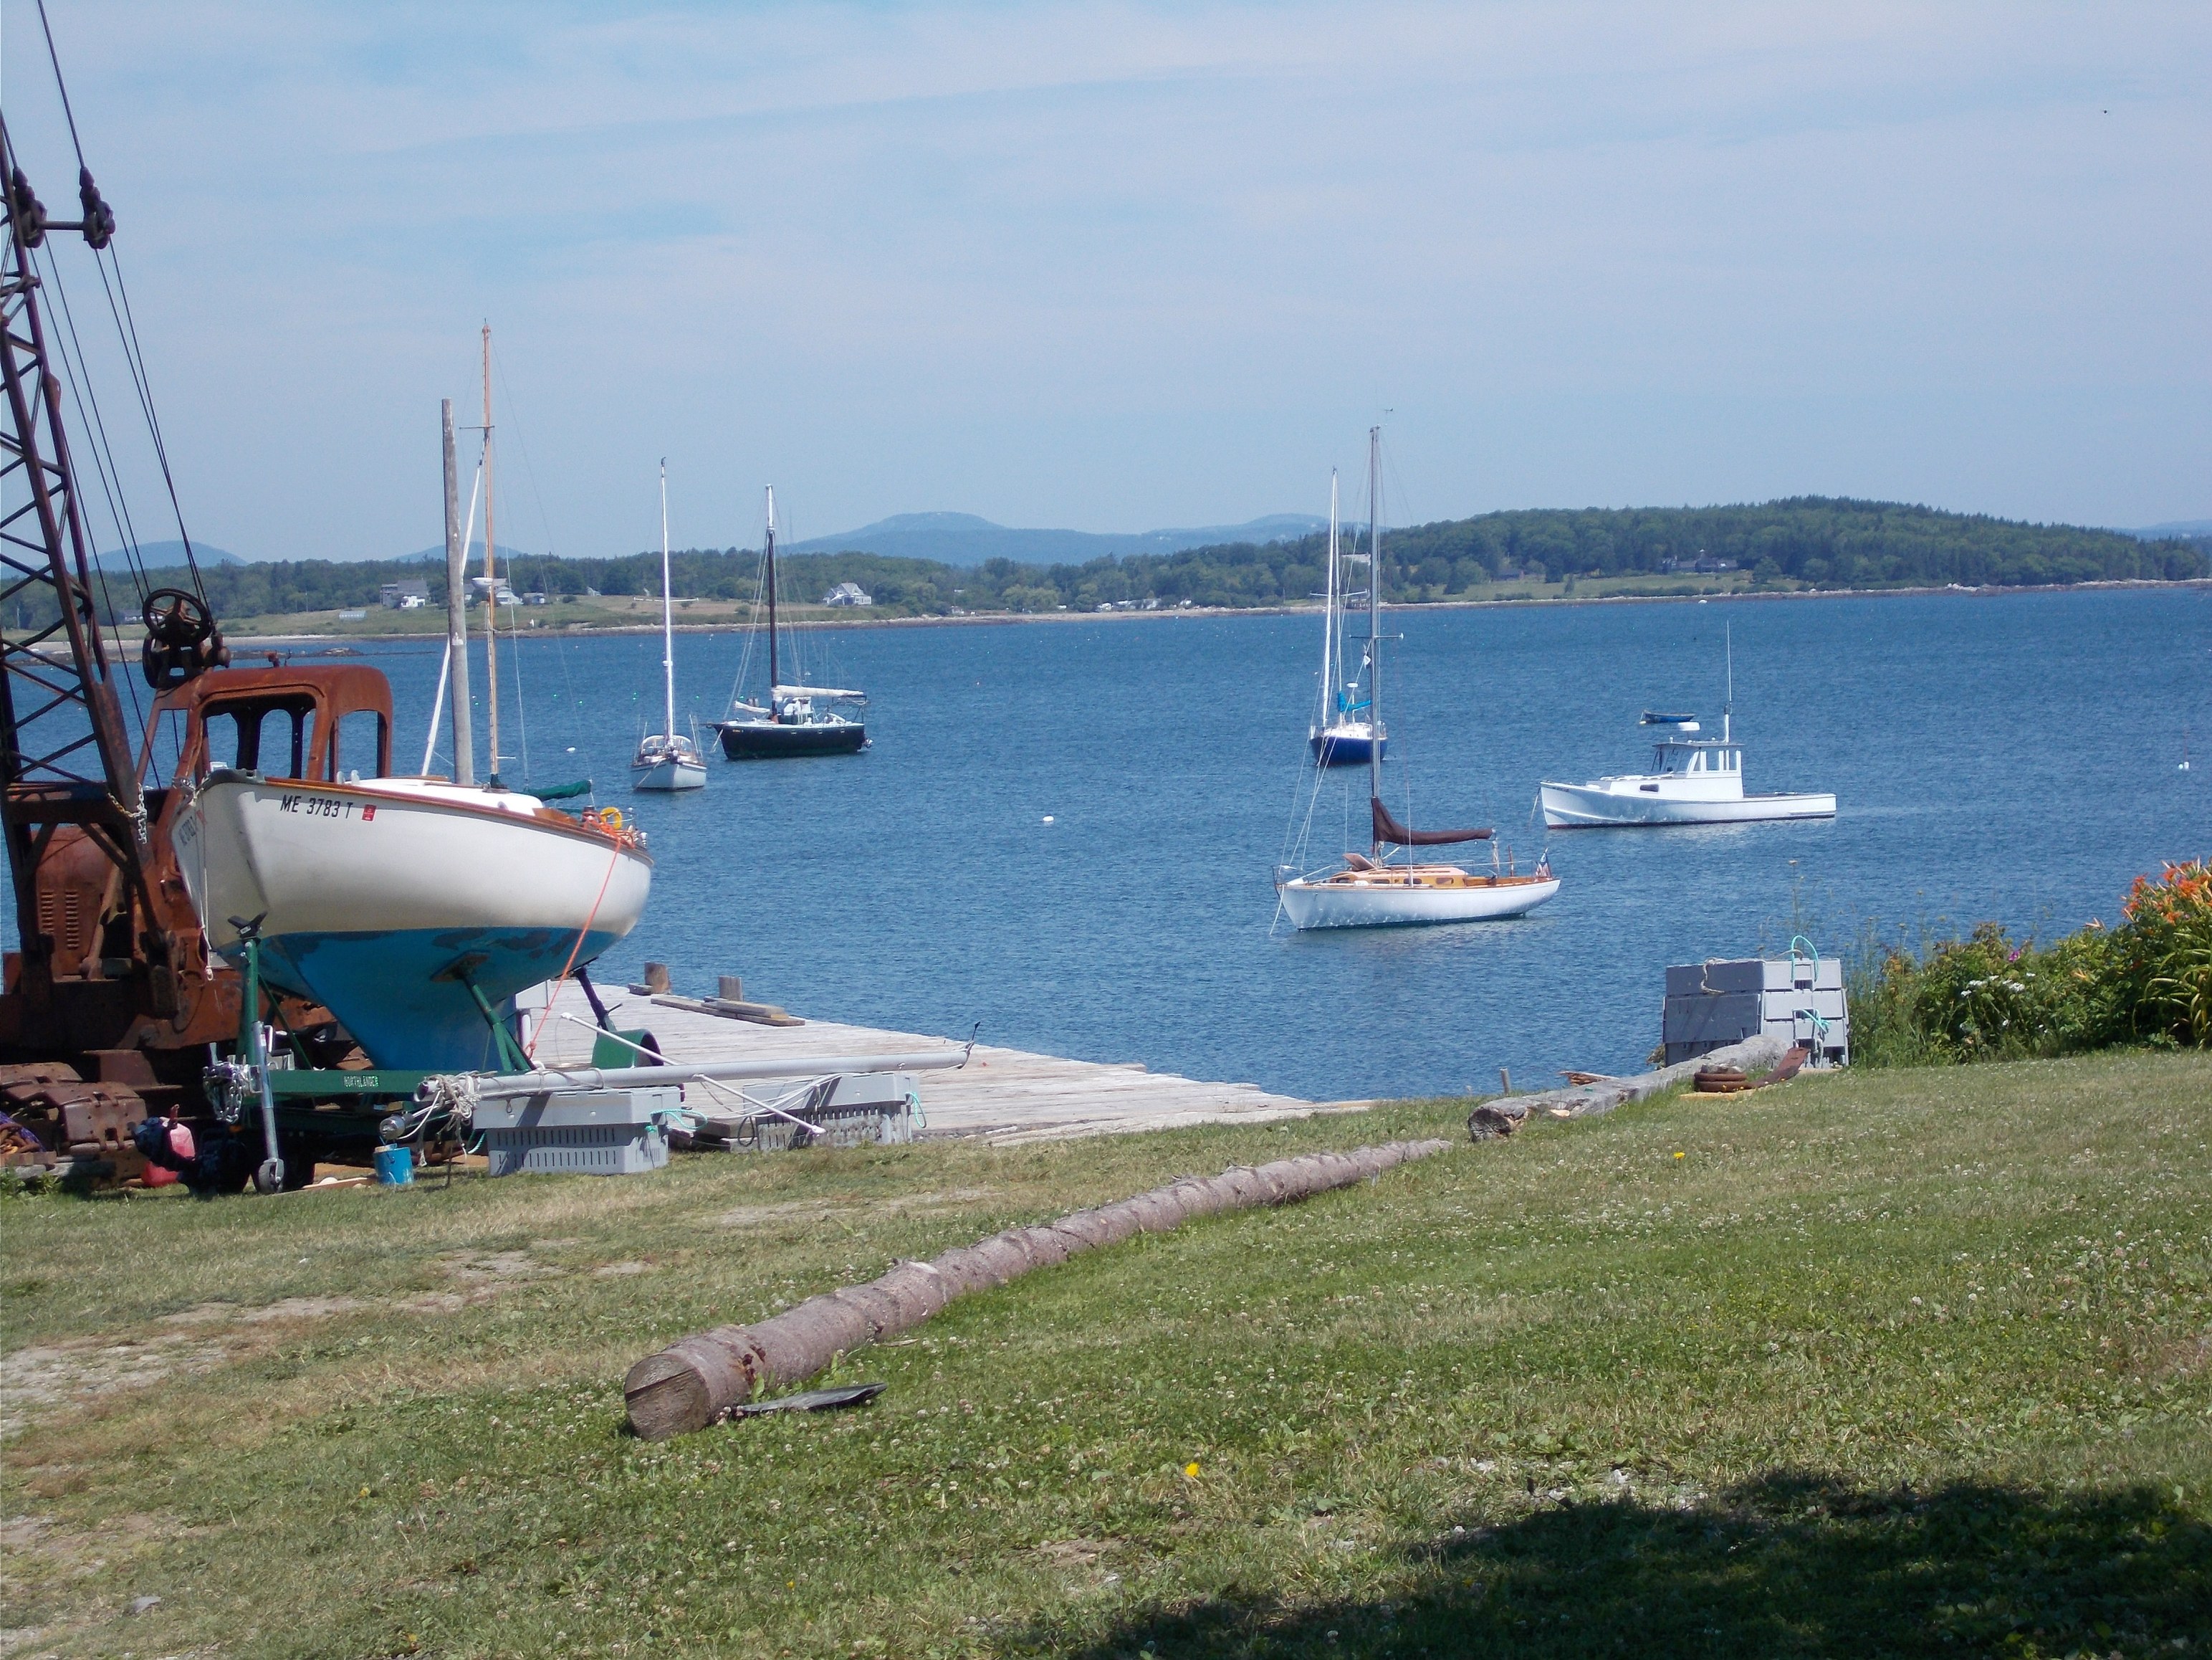
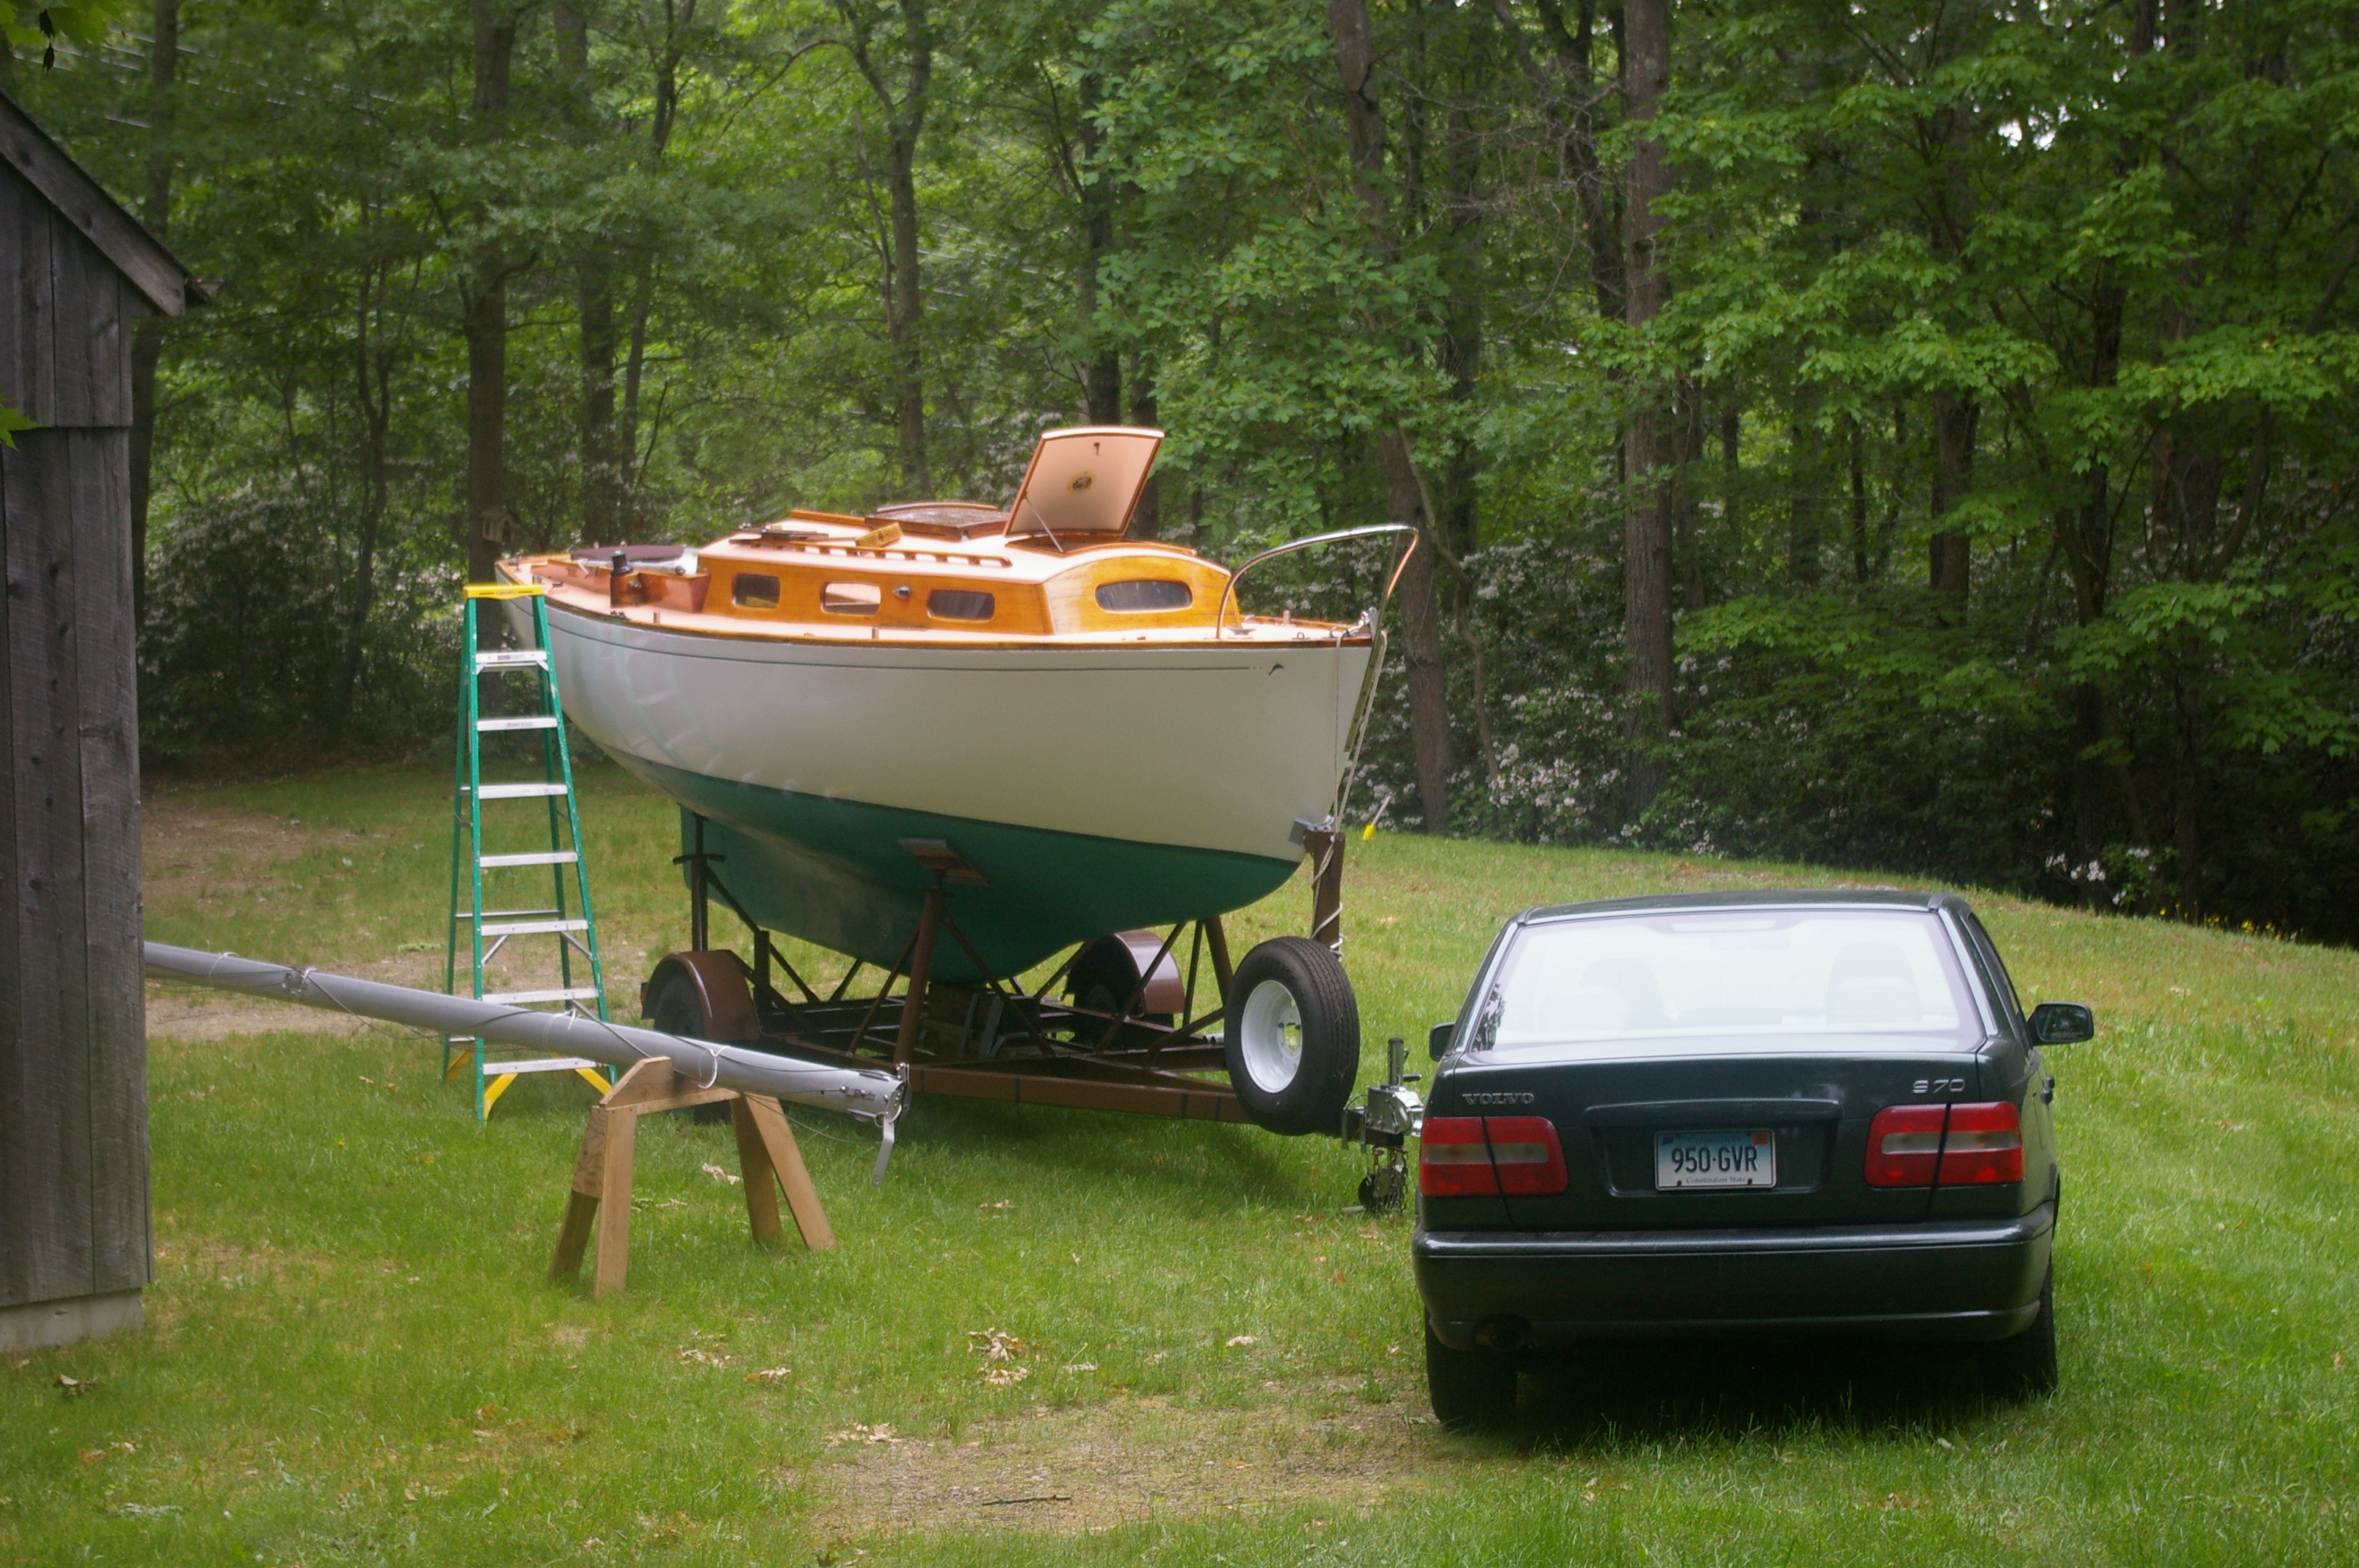
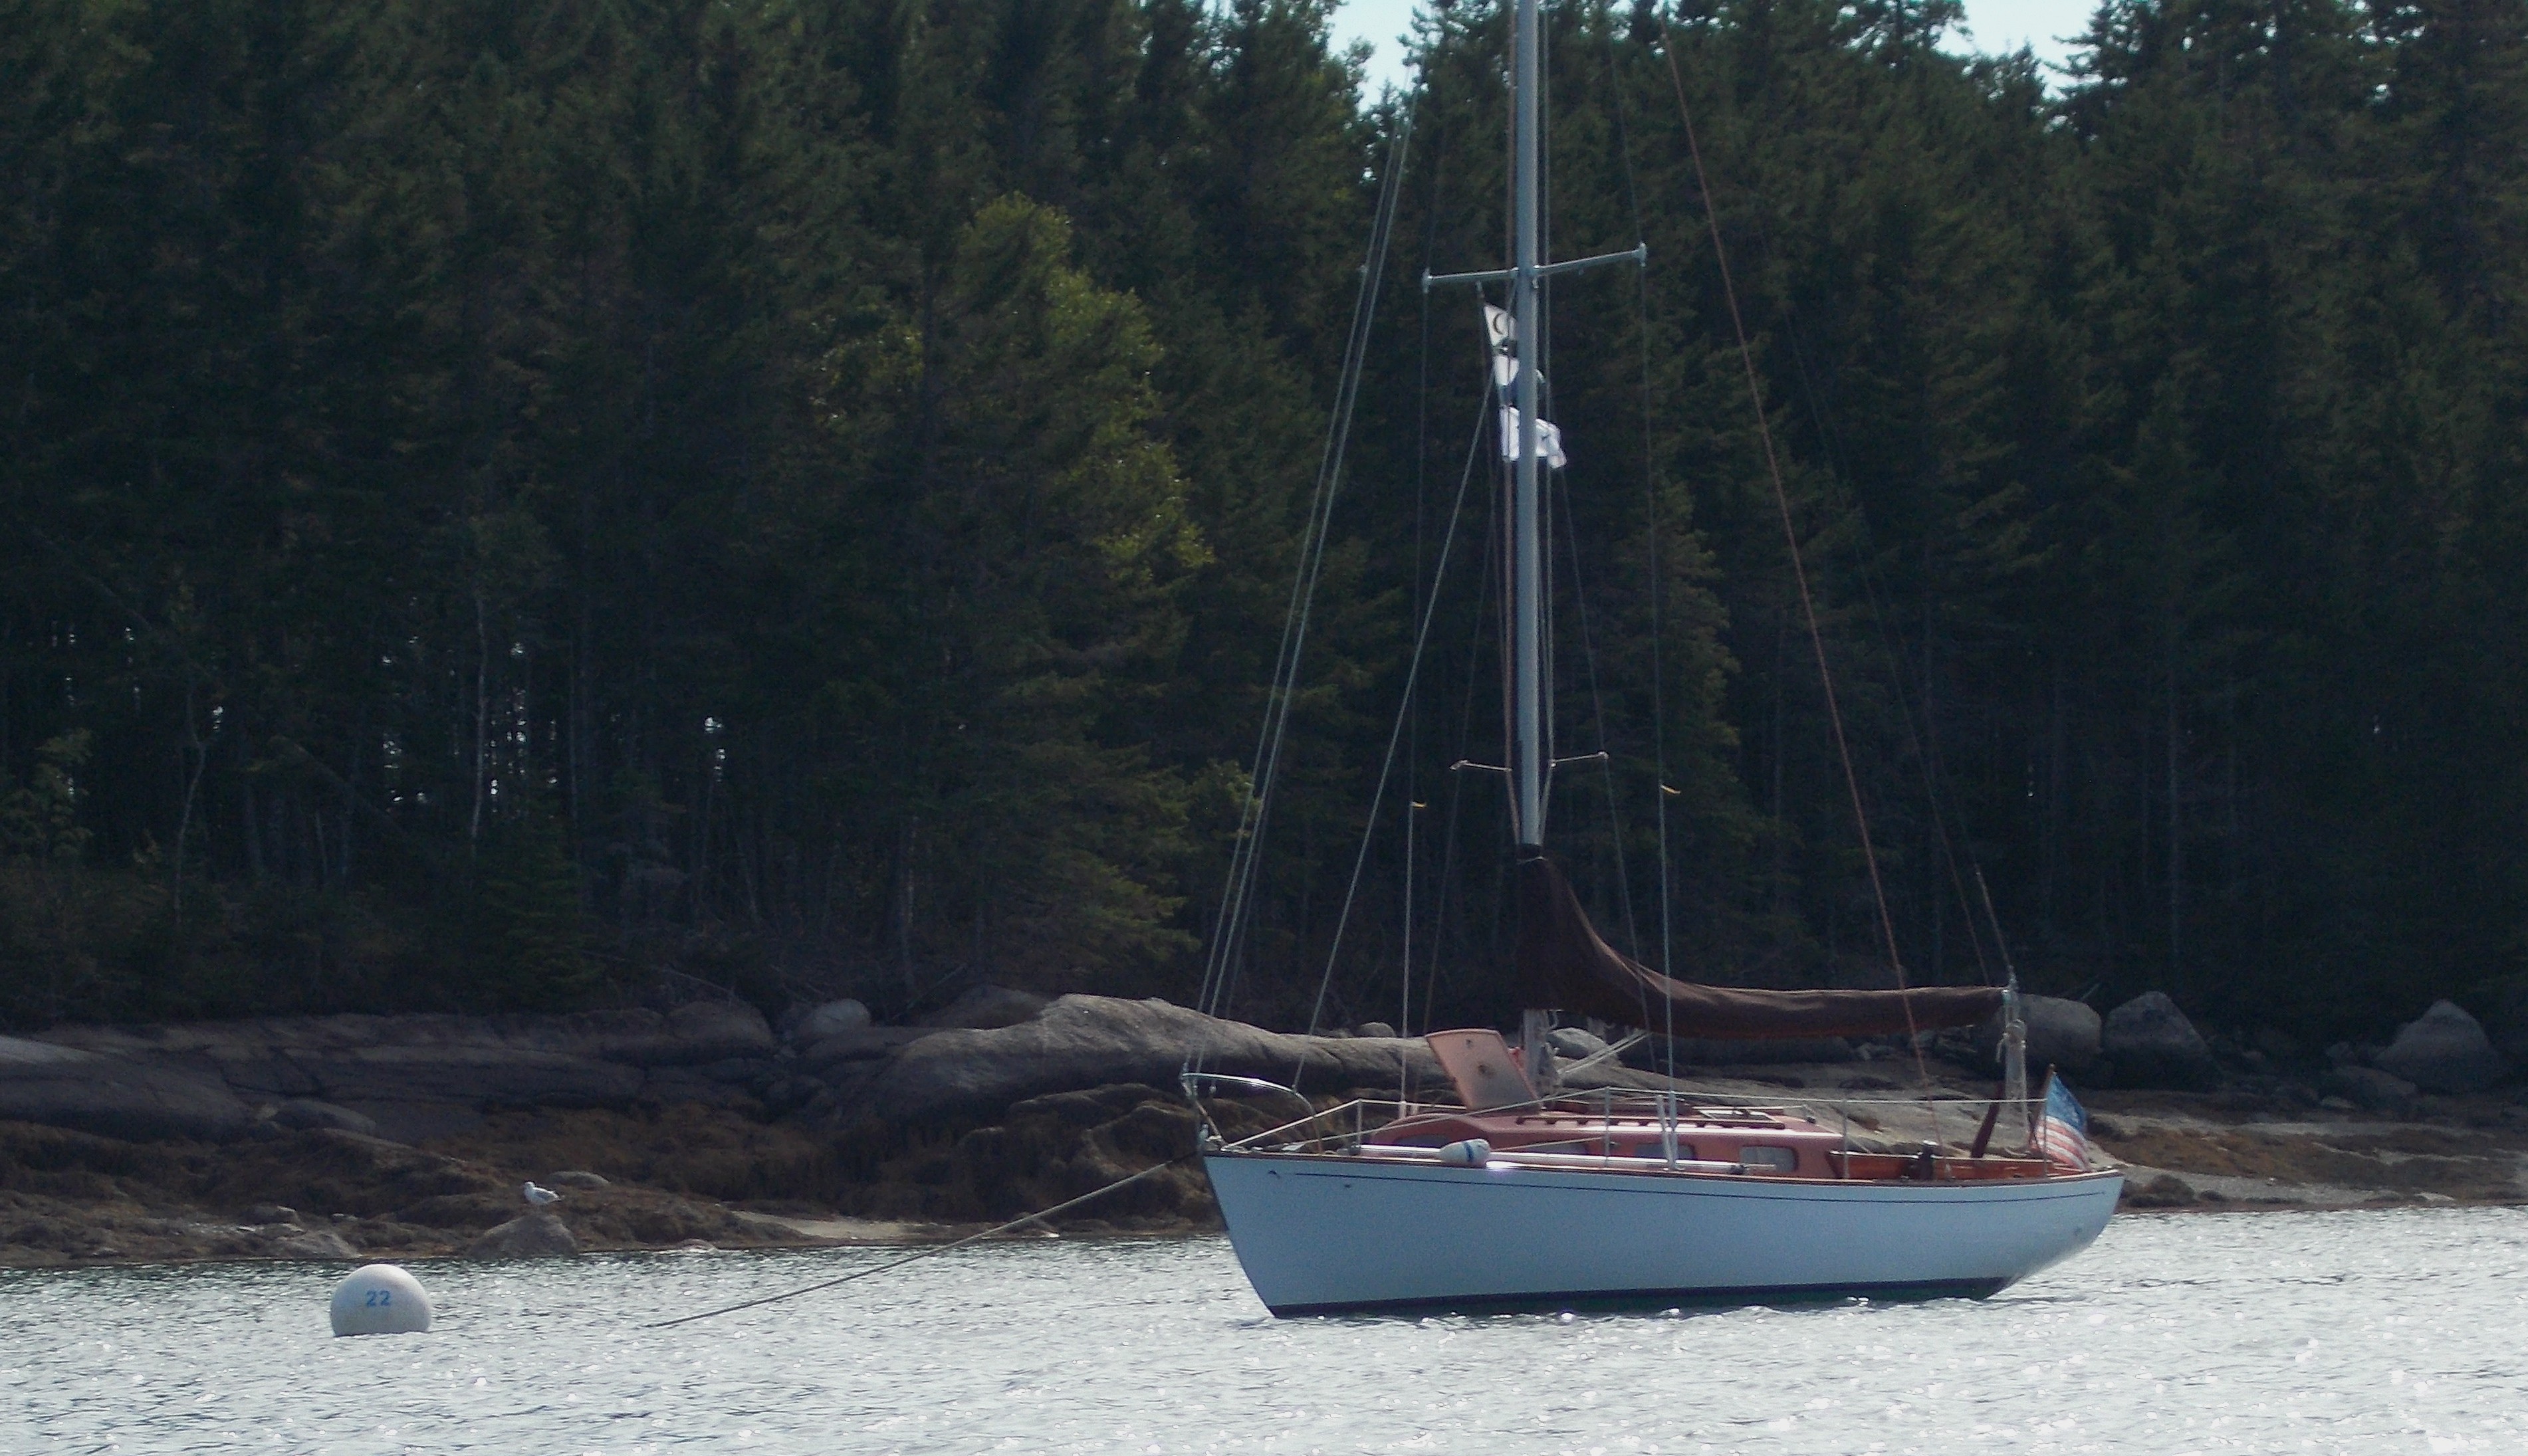
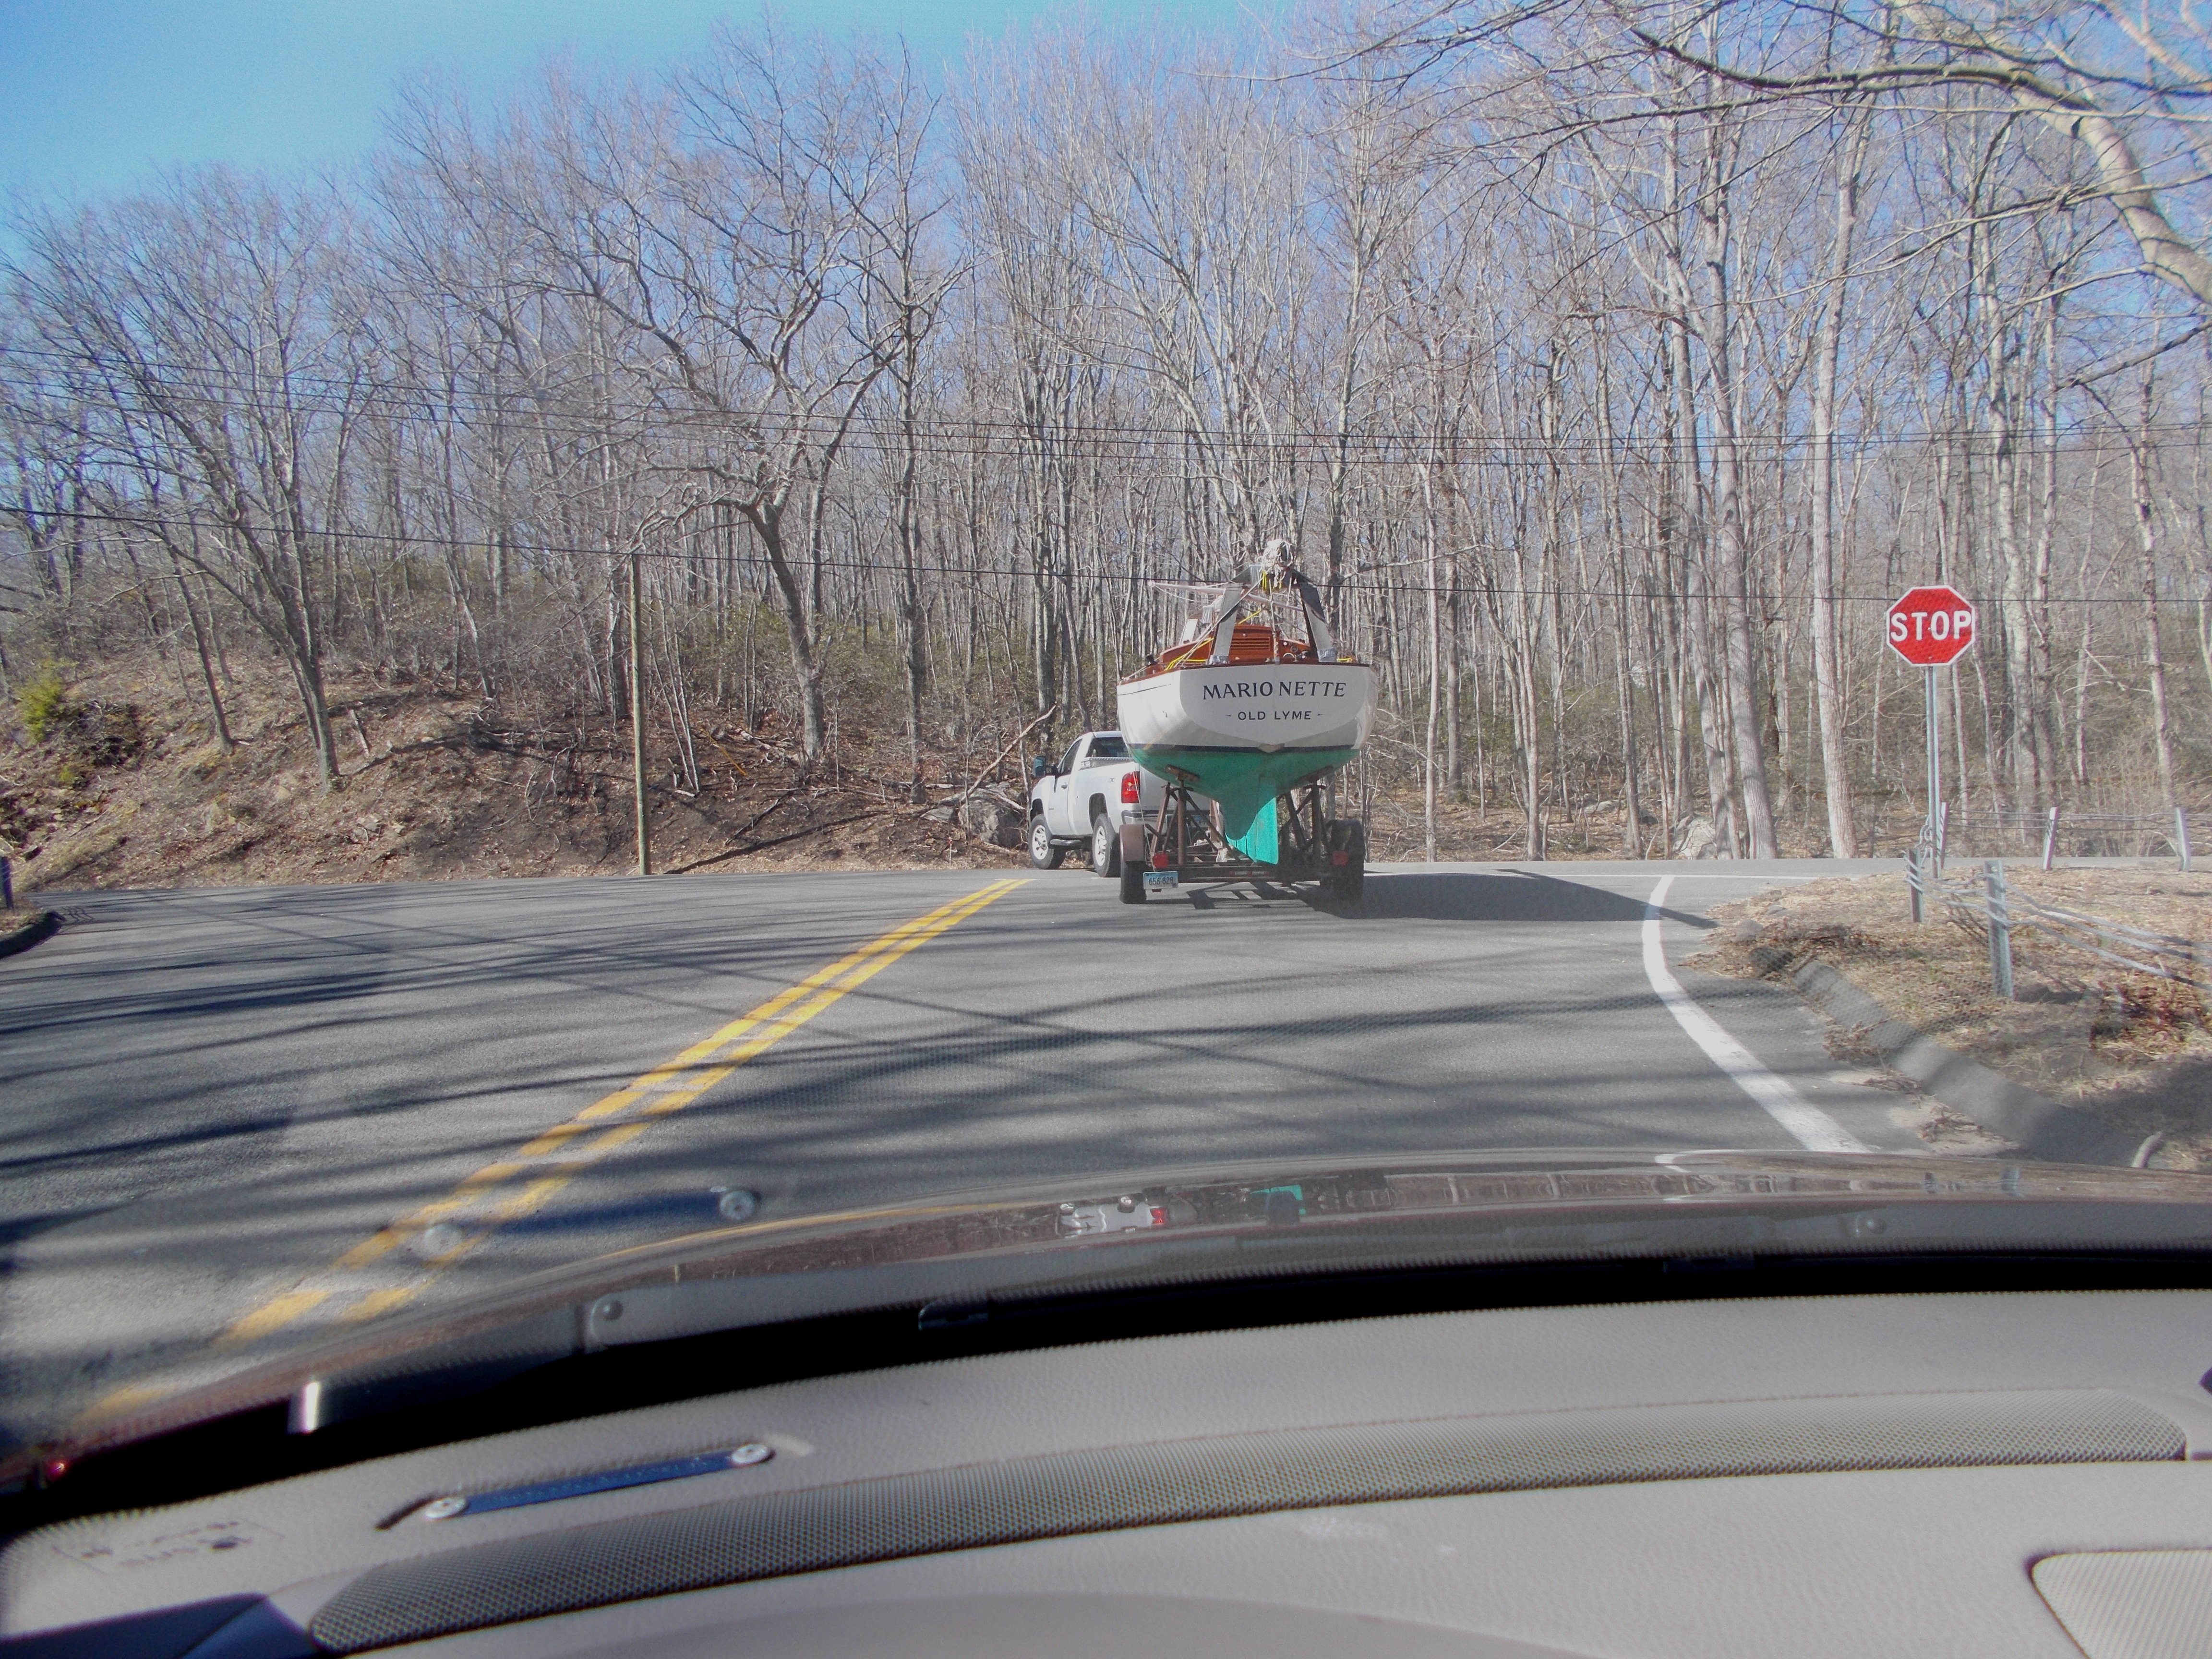