|
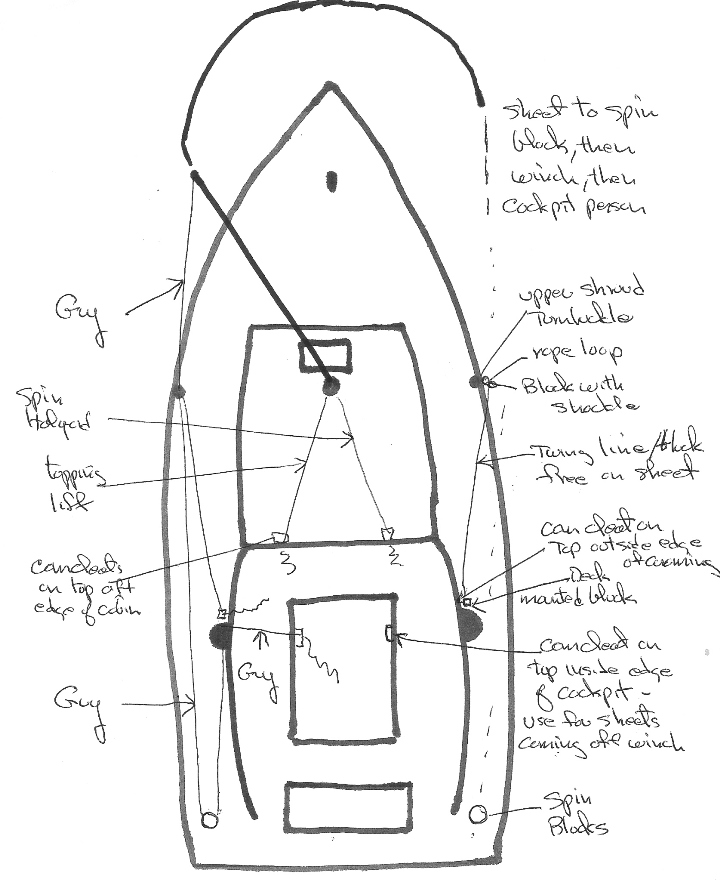
We'll start with this very rough sketch and an explanation of how the spinnaker running rigging is set up on Marionette. I’ll clean this up when I get a chance.
Click for a very large image
 |
The spinnaker pole is on the foredeck port side. It really should be on the starboard side because most times the pole is set while on starboard tack approaching the weather mark - having 200 lbs on the leeward side up forward trying to reach the pole to set it is probably not fast. Nothing's perfect.
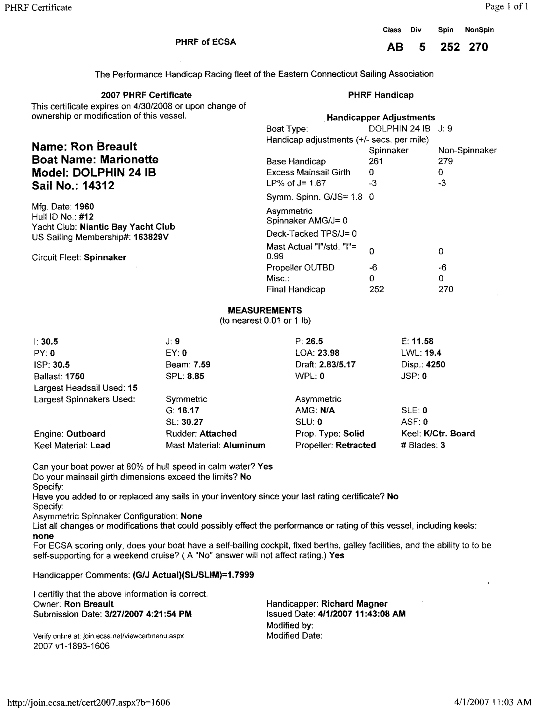
Marionette's spinnaker pole length (SPL) is 9.0 feet. This is measured when the pole is on the mast ring and is horizontal at a right angle out to starboard or port. The measurement then is from the athwartship centerline of the mast to the end of the fitting. This information is from the ECSA PHRF handicap certificate.
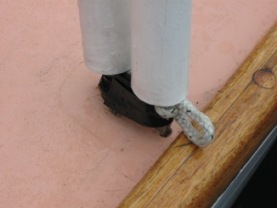
Marionette’s pole is actually 8.85 ft measured this way. It is a 2" OD aluminum tube with standard spinnaker pole end fittings. I have a 5’ 8” long T-Track that is screwed to the front of the mast that starts about 12'' from the bottom of the mast.
|
|
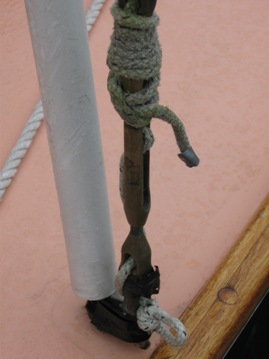 |
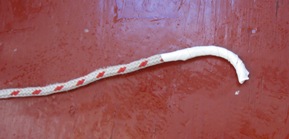
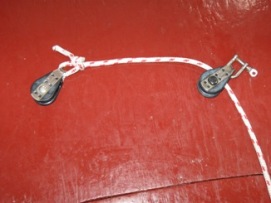
I use twing lines (also called tweakers,) for jibing and holding the pole down. This is the set up used on J -24's and other smaller racing one designs. I tie small rope loops through the bottom of the upper shroud turnbuckles. These loops have a 10” tail so I can adjust the loop distance from the turnbuckle – which I rarely do. The loops are snug to the turnbuckle and the tails are tucked up into the turnbuckle boots.
I shackle a small 1" Harken block to these loops and the twing line (1/4" non stretch) runs through this block. The twing line has another 1" Harken block tied to one end.
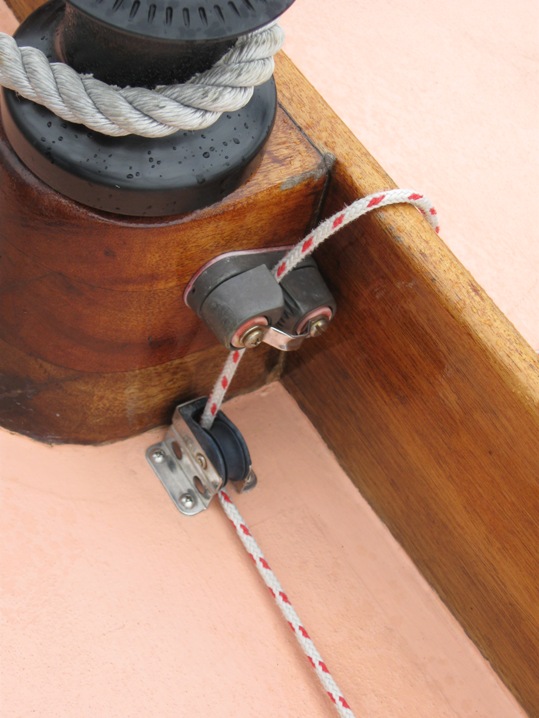
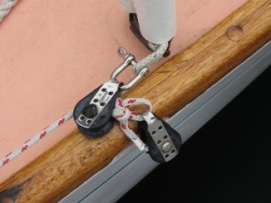
The other end runs back to a deck mounted turning block immediately in front of the winch base, then up to a cam cleat on the outside edge of the coaming. The bitter end just drapes over the combing (and lays in the mess of spinnaker sheets, jib sheets, tail of the centerboard control line, spinnaker and topping lift halyards. main sheet, traveller control line, and maybe a beer can or 2 - no wonder cruising class non spinnaker racing is so popular. On my Atlantic Class One Design, this line ran through a hole in the bottom of the coaming and then to a cam cleat inside. I did not want to put a hole in the Dolphin's combing.
The guy runs through its twing block and is snugged down to the rope loop block. This holds the pole down. The sheet twing line is free with the block just running on the sheet. When you jibe the cockpit person pulls in the sheet twing bringing the spinnaker clew within reach of the person who is standing in front of the mast. This person unclips the pole from the bale, clips it to the old sheet, passes the pole in front of his body while tripping the release line to the old guy, and clips the pole into the bale. The cockpit person, meanwhile has eased the old guy twing and tensions the new guy twing. The helmsperson, of course, is timing the jibe so that this all happens smoothly :-)
The set up is easy because the twing line, the sheet/guy running twing line block, and the loop block are all coiled together. Just shackle the loop block to the rope loop, lead the twing line back to the turning block in front of the winch base and up to the camcleat on the edge of the coaming, Snug the twing line, cam cleat it and run the sheet and guy through the twing block.
 |
A tip - tape a stiffish 2" piece of copper wire on the last 2" of the bitter end of your twing line. Then bend the wire into a 'C'" shape and you won't have any problems feeding it through the block at the base of the winch pad. |
|
A useful by product of this system is that the rope loops also serve as ‘padeyes’ to which we can move the mast end of the vang. When needed this holds the boom down and back – a vang preventer. |
We almost never use a pole foreguy – maybe if it is really blowing and we have the pole adjusted high. We have a simple system for this – we rope tie a block to the main foredeck cleat and run a line with a snap shackle through it. The snap shackle clips to the lower pole bridle and the line runs back to a cleat on the outside of the coaming.
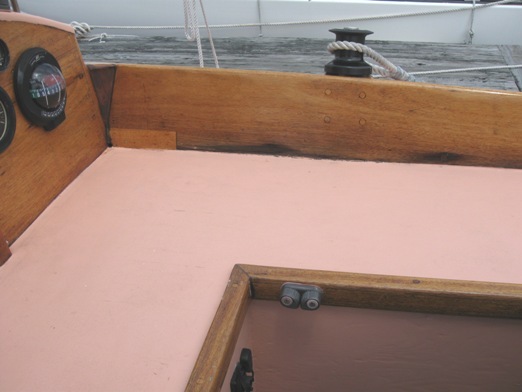
The spinnaker sheet and guy turning blocks are located at the back of the transom deck (see below). These are led back to the winches and then the guy is cam cleated, and the sheet goes directly from the winch to the Trimmer, unless the Trimmer is on a beer break - then the sheet goes directly to the camcleat on inside edge of the cockpit. These cam cleats are used for the jib sheets too - they work particularly well when single handing.
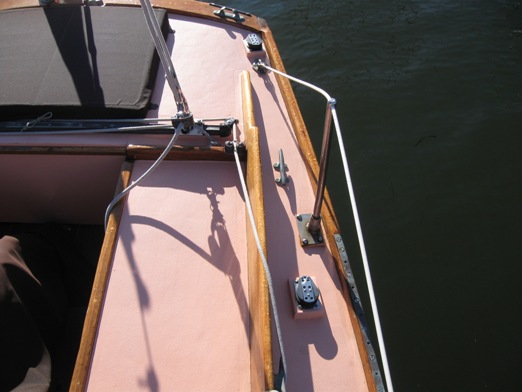
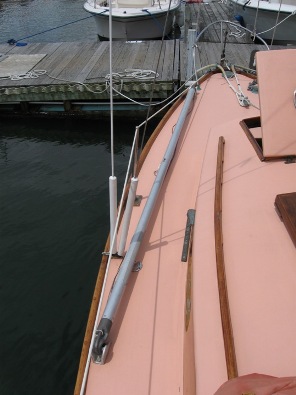
This photo shows the spinnaker turning block at the transom corner, and outside the combing the genoa turning block. These sheets lead from the block to the winch, just out of the picture. Also in the picture is the weather side endless traveller control line with its port side cam cleat - here used as an available line to center the tiller.
The spinnaker halyard is led back to a cam cleat on the aft end of the cabin top – starboard. The pole topping lift halyard is led back to an identical cam cleat set up on the port side. These cam cleats can be used for the main and jib halyards as well - although I rarely use them for this. (Those little bubbles you may see on the cabin top are rain drops - yes its raining - again).
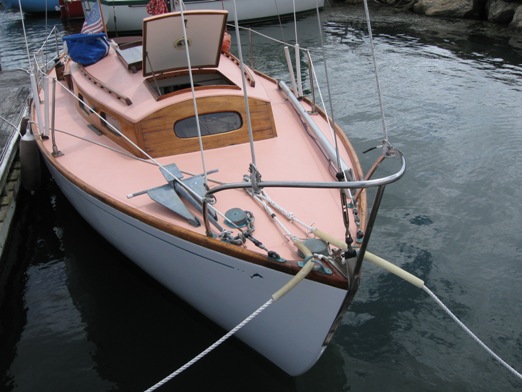
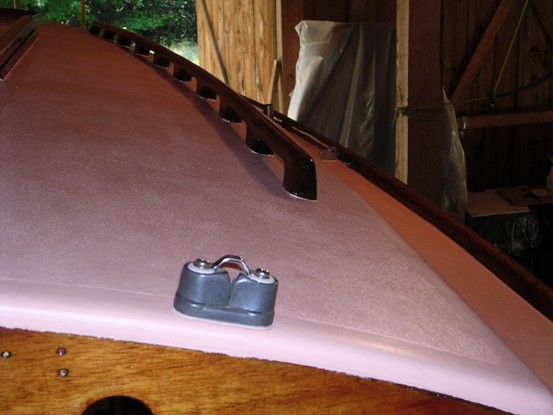
Anyway, this is the foredeck set up. When racing the anchor is below. The chain and rode should be taken out of the locker as well, and moved to a midships locker - we don't. The foredeck main cleat, obscured, is where we tie a block when we want a spinnaker pole foreguy. If you look carefully you can just make out the twing line loops tied to the the outboard upper shrouds.
Click here to go back to Marionette
*************
|


