|
There seems to be a lot of different approaches to our Dolphin centerboard winches. On this page we will try and collect info on centerboard winches, their repair, and related items like the centerboard line tube, from other owners. We'll start with Marionette's set up, a Marscot/O'Day, hull #12.
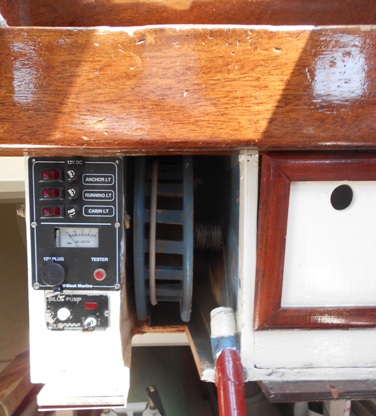
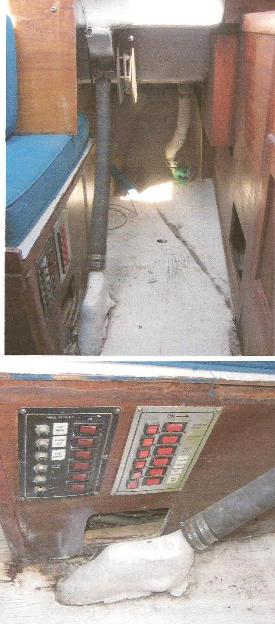
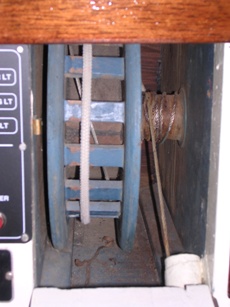
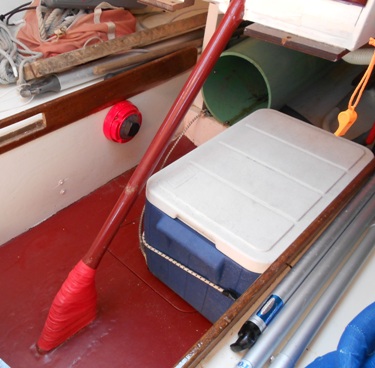
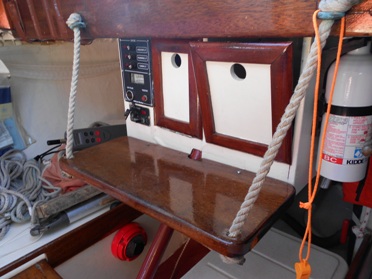
Marionette's centerboard winch is located in a locker system I built under the bridge deck. The center locker has the winch, the right locker contains track slides, blocks, winch handles, etc. The electrical panel has its locker access on the starboard side. You can see the hinges - it folds down for access to the wiring and has a shelf for fuse spares, bulbs and a couple of flashlights. The red tube contains the ss wire that runs down to the centerboard.

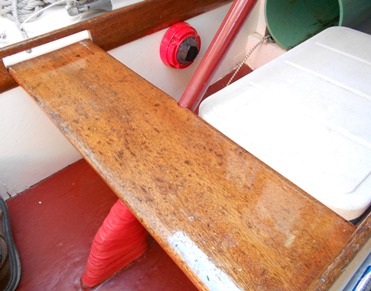
This photo also shows Marionette's 'unique' steps, her OB motor storage location and her icebox. (More? click here)
|
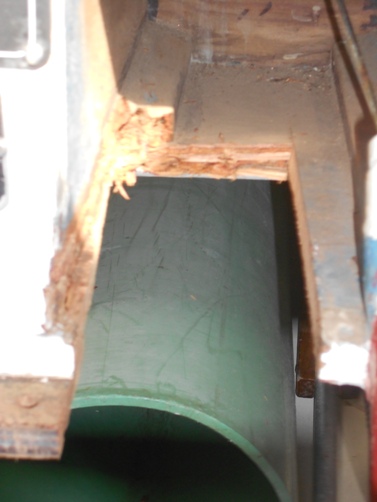
Marionette's pipe connects to a fitting just before it disappears below the sole. I have been told there is a 'guiding block' housed in the elongated section wrapped in red plastic tape that changes the angle of the wire as it enters the bilge/deadwood/keel. I have never seen it. |
|
The winch control line is rope and feeds out through the back of the locker into the cockpit to a camcleat mounted on the backside of the bridgedeck. There is a picture later on that shows this. I've thought a high strength synthetic braided line might be better than a stainless wire and shackle because of the corrosion potential between the board and the shackle - check out the long term corrosion we had on Passage's Bronze CB tang
http://www.dolphin24.org/technical_centerboards.html
Ok, that corrosion took 45+ years but still... Then synthetic line might be exposed to abrasion/cut risks that we can't see. Probably ss wire is overall better. |
Webmaster Note: I know you all really want to know what's with the red plastic tape? Ten years ago I noticed a drop of water oozing out of the fiberglass surrounding this section of the pipe. As I was in the middle of a cruise somewhere, far from epoxy repair kits (I now carry a small kit), I wiped it dry and tightly wrapped the area with black plastic tape. No drops. Ten years later, when repainting the interior I removed the tape, repainted, and decided that red plastic tape would be nice....Have never seen a leak since.
The Control Line
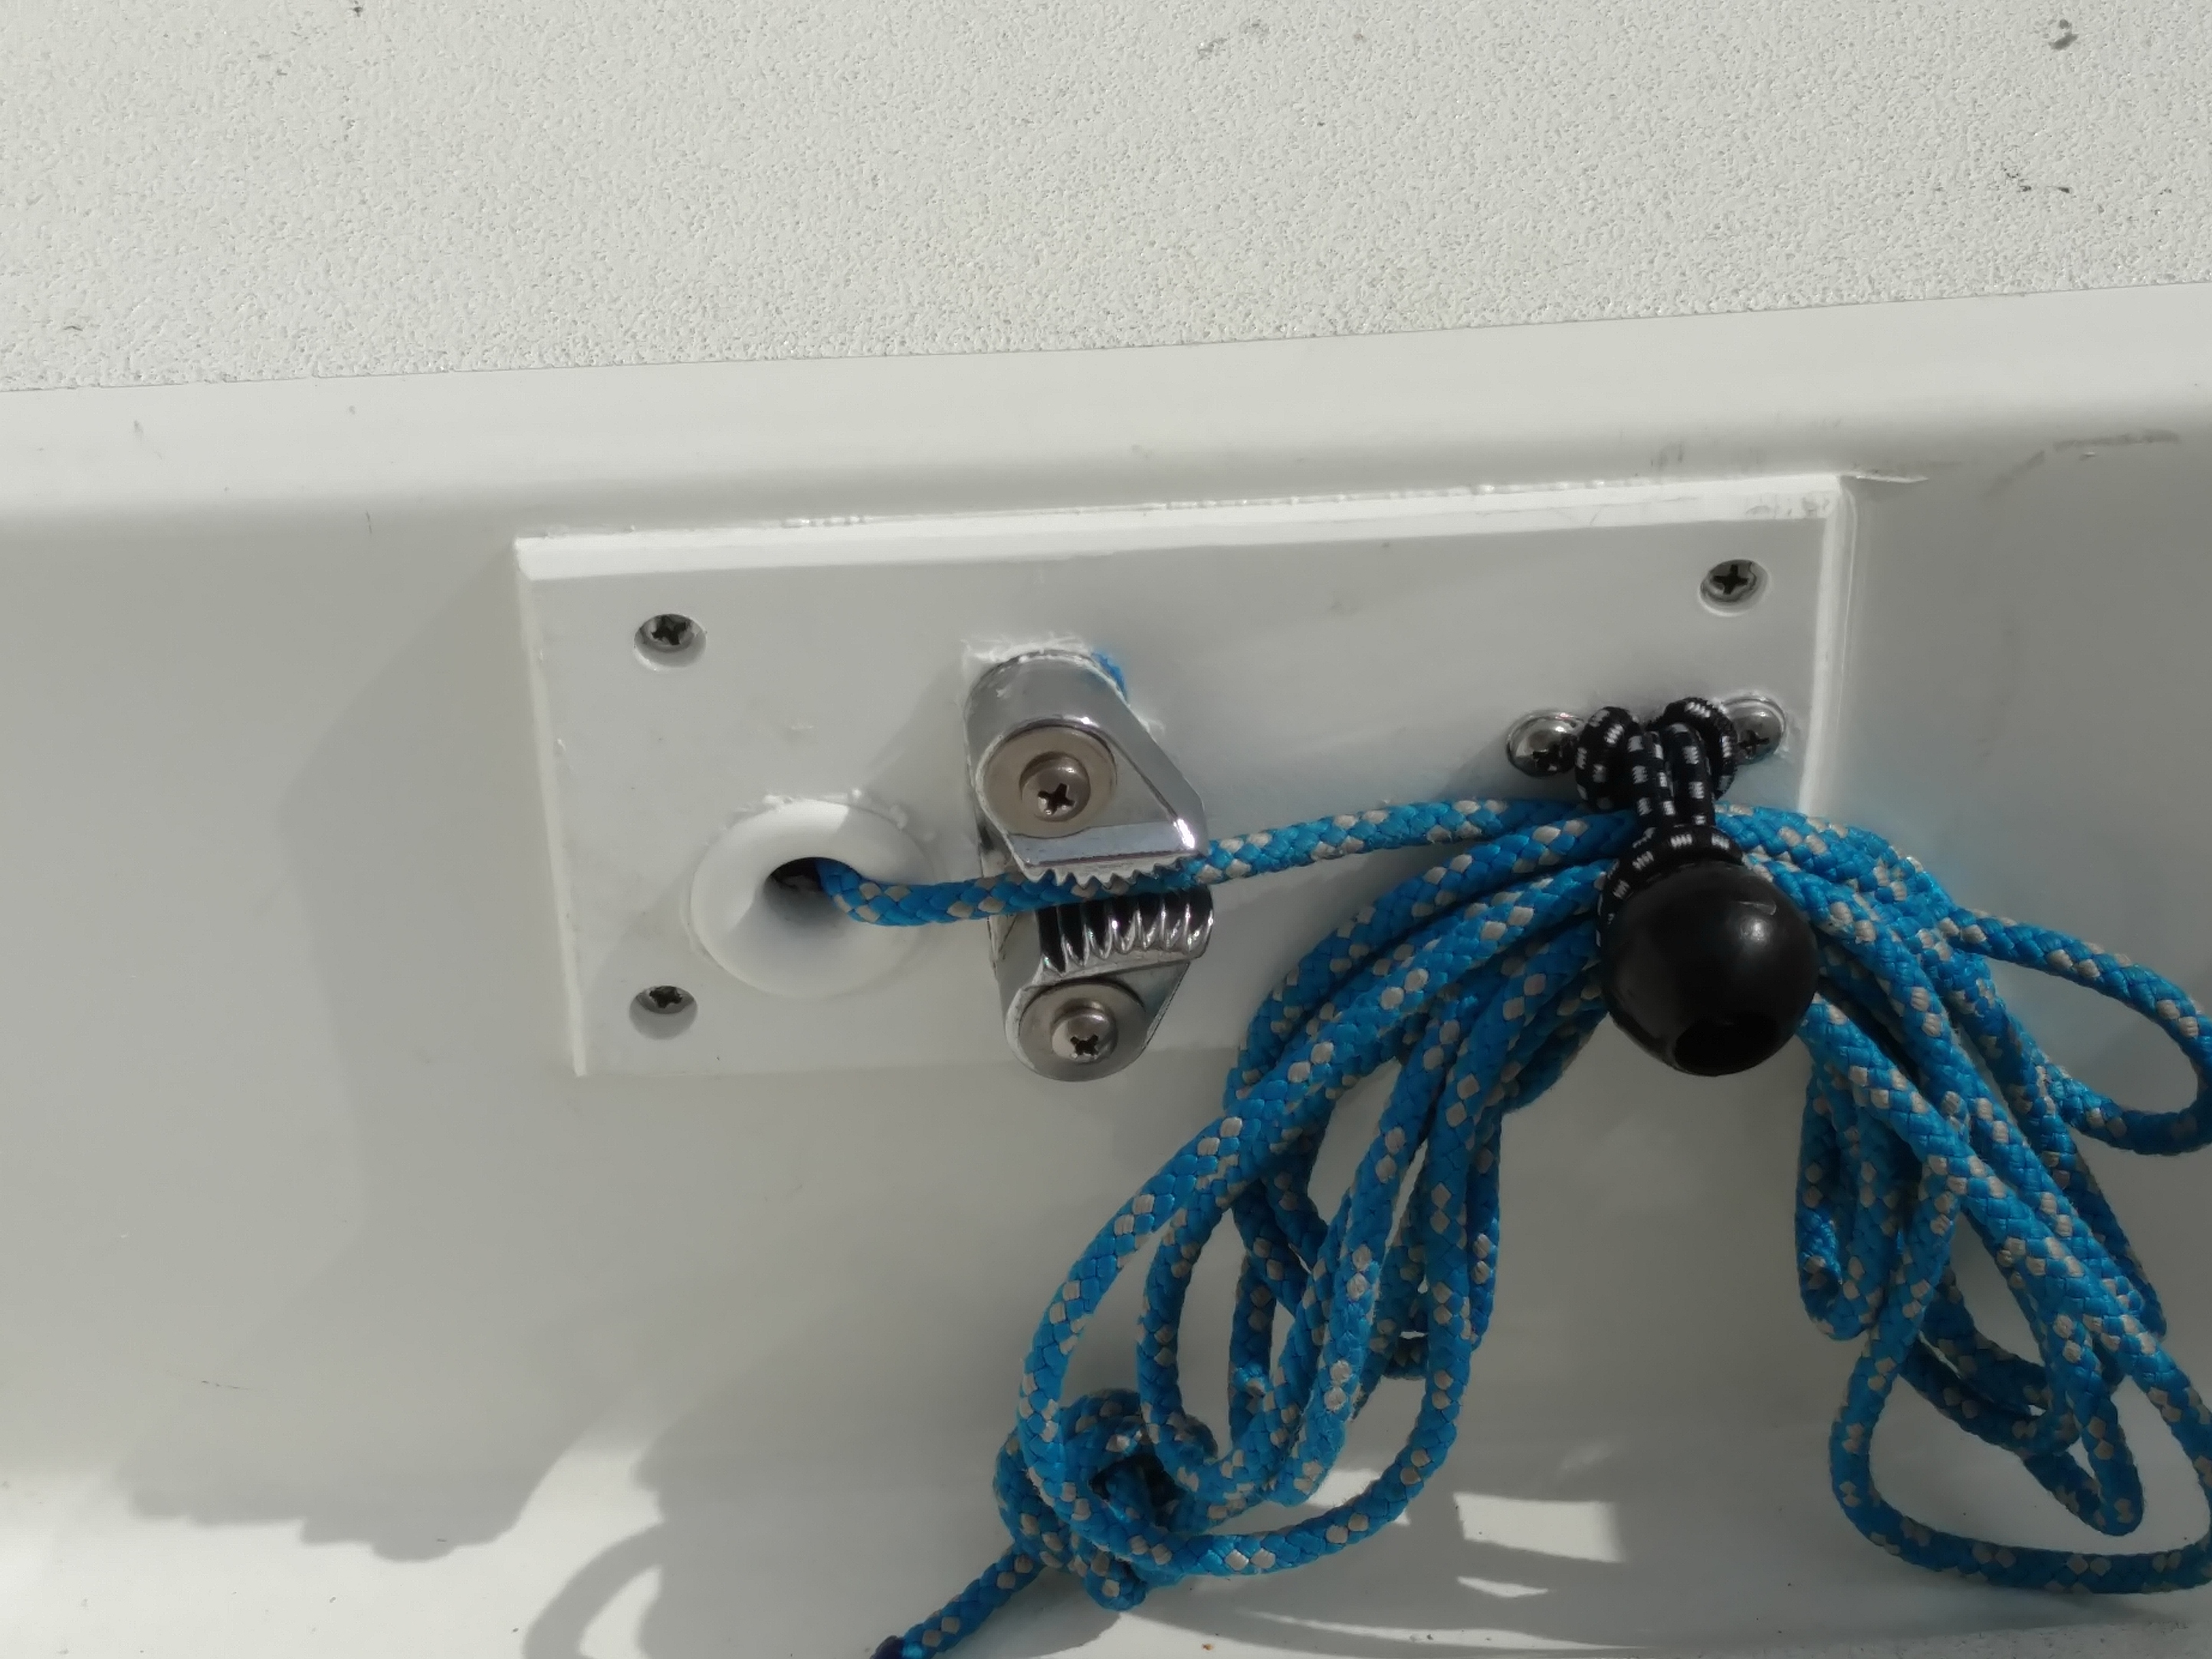
The control line passes out into the cockpit through the back of the bridgedeck. I am guessing there is about a 4/1 mechanical advantage with the winch.
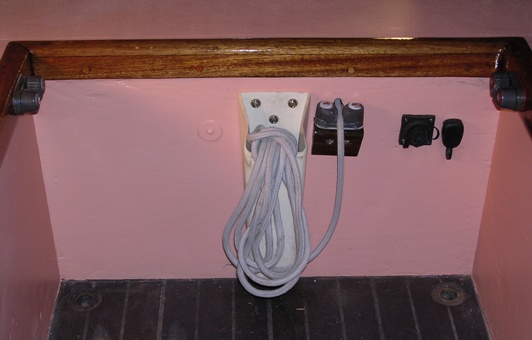
On Marionette the line passes over a Harken cam cleat mounted on a small wood plate. The loose end hangs as you see it, or sometimes over a winch handle located in the pocket. The receptacles are 1) square is for Otto's (AutoTiller) juice supply 2) oval is for Otto's remote control. Note the two cam cleats on the inside edge of the cockpit trim - these are for the jib sheets leading down off the winches - works well for single handing.
Webmaster Note: March 8, 2016. We have another, similar set up submitted by Bob Neches, Knockabout, Yankee #138.
|
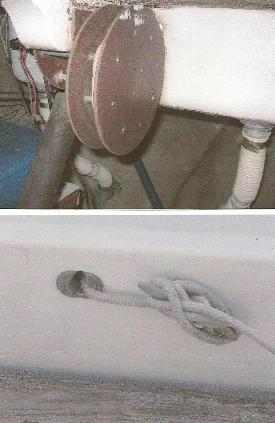
I was very proud of my clever and completely original arrangement for the centerboard line, until I realized this afternoon that Marionnette did almost the same thing long before. :-)
Bob
Click here for a larger image; click the return arrow on your browser to get back here
Webmaster Note: Bob like's to 'play' his centerboard, but only on starboard tack :-)
|
*******************************************
July 7, 2013. We had an incident! A few days ago, after a pleasant couple of hours sailing around Niantic Bay on a Sunday morning with son and grandson in a light breeze, we came in and went to raise the centerboard. The control line came up - no pressure! A quick think - its high tide soon, there's enough water in the slip for board down now - but not at low tide! Let's see, have to get in and home for lunch, get back in time to find out what's wrong, somehow raise the board before low tide, and prepare a fix-it plan.
Despite some stress lunch went well and back to the boat by 2PM. Decision 1, move the boat to a temporary transient dock with deep water in case deliberations/actions take too long and we get caught by low water. An hour later it was clear something was wrong with the winch and it had to come out - except it didn't want to, and then there was the problem of the windings, and the fact that the board was still down!
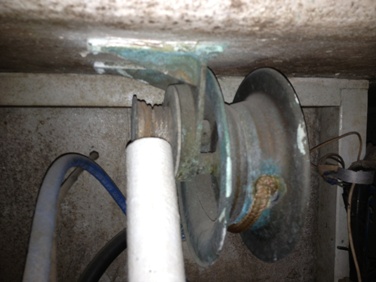
|
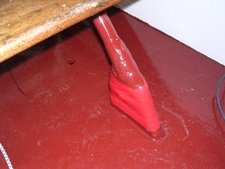
Here at left is a picture of the winch on its way out - as far as it will get without woodwork surgury.
Enter Dave - everyone knows a Dave, and if you are lucky, when you need him he is working on his boat nearby - my Dave was getting her ready (a cold molded Peterson 38) for the upcoming Marblehead - Halifax race.
Dave is to be consulted whenever things get beyond the range of the normal Dolphin 24 owner. An hour later we had the ss pennant unwound from the small drum section of the winch and fed through the outlet hole in the rear of the bridgedeck. Not quite a fair lead but good enough.
We hooked up the end to a small tackle tied to the starboard spinnaker block with the tail end of the tackle system around the starboard winch. Up that board came, with me watching from in the cabin, and Dave cranking.
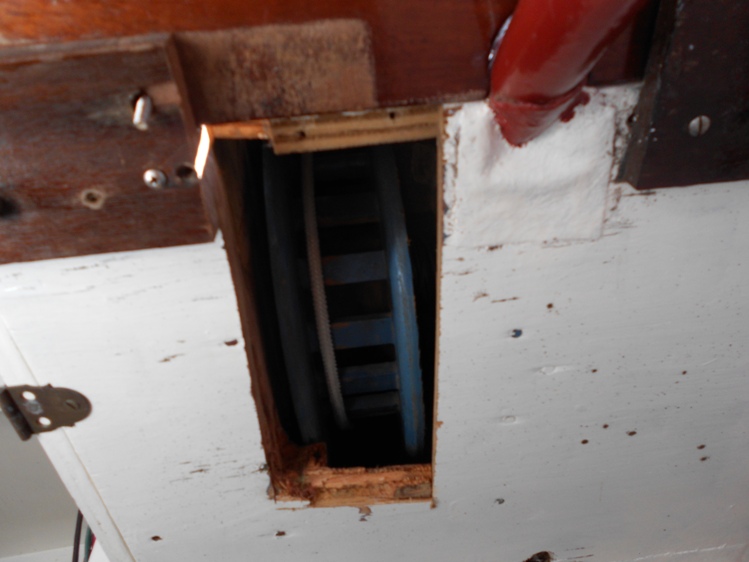
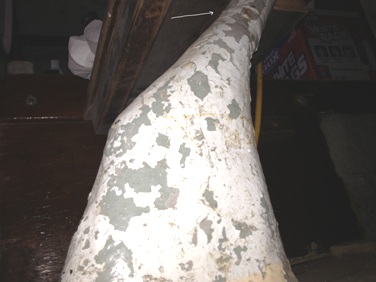
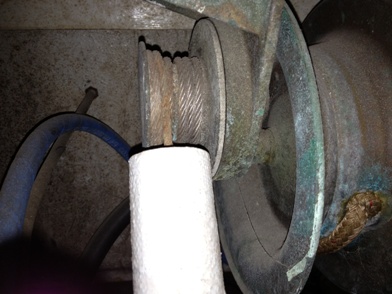
Again, I will be in touble with the webmaster for not having taken more photos of this operation. Jumping ahead, here is a close up of the small drum around which the ss pennant wound.
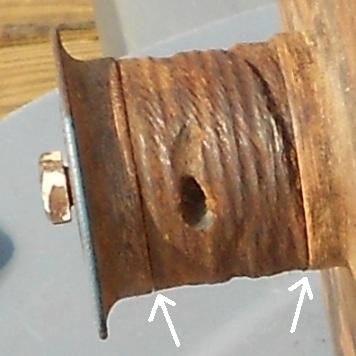
This is a basically a metal tube with a wood core. Notice the stress marks...The arrows point to joint lines, both of which had failed. The hole is where the pennant fed thru and was knotted.
Stress anyone??? More on this later.
|
We are slightly getting ahead of ourselves as the winch system had yet to be taken out of its locker. First, with the centerboard now in the up position it was safe to return to Marionette's regular slip as it would take several changes of the tide before this project was complete. Back in her slip would be a comfortable work environment.
Getting that winch out was ornery! But, chisels, small prybar and hammer prevail - not pretty, but out she came. Being able to get that top step out of the way was very helpful. For more pictures about this step, and what generally is in this area click here.
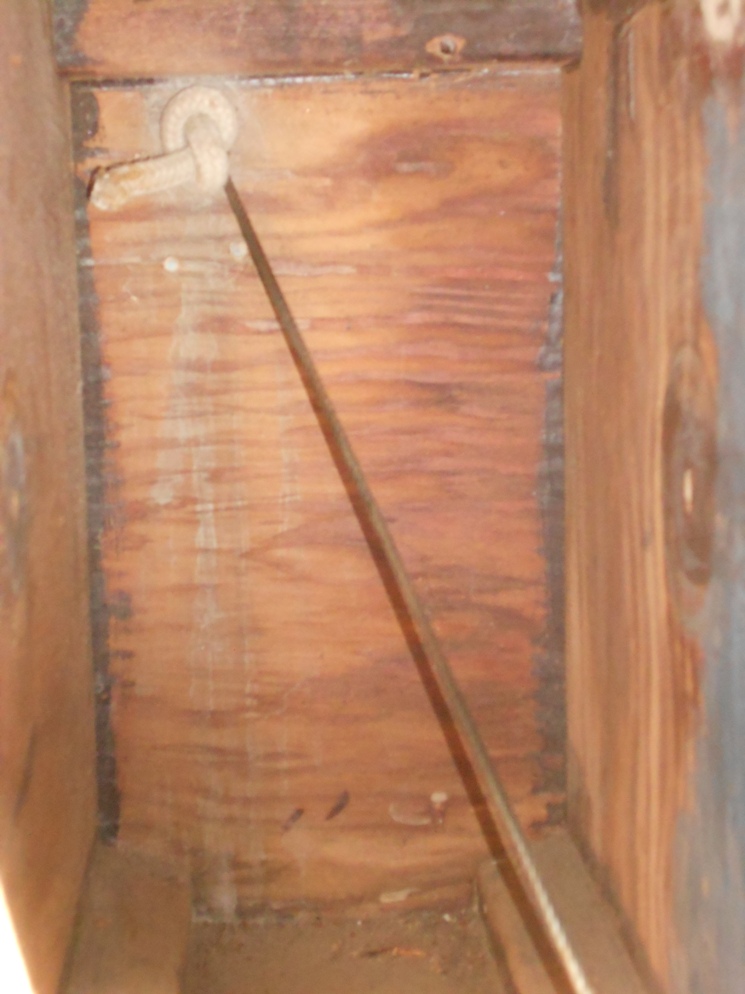
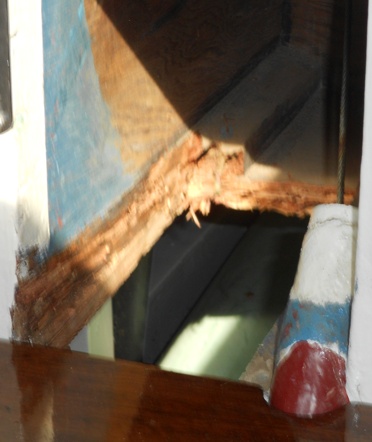
It should be noted here that the 'not quite fair lead' of the pennant from the tube to the bridgedeck outlet hole caused a small 'sawed' cut in top edge of the tube. The normal movement of the boat with that 110 lb board down caused a slight movement of the pennant. When it is on the drum the lead is fair but this gives some idea of what kinds of dynamic loads we are dealing with - especially over years...
You can see the ss centerboard pennant leading from the tube toward the back of the bridgedeck.
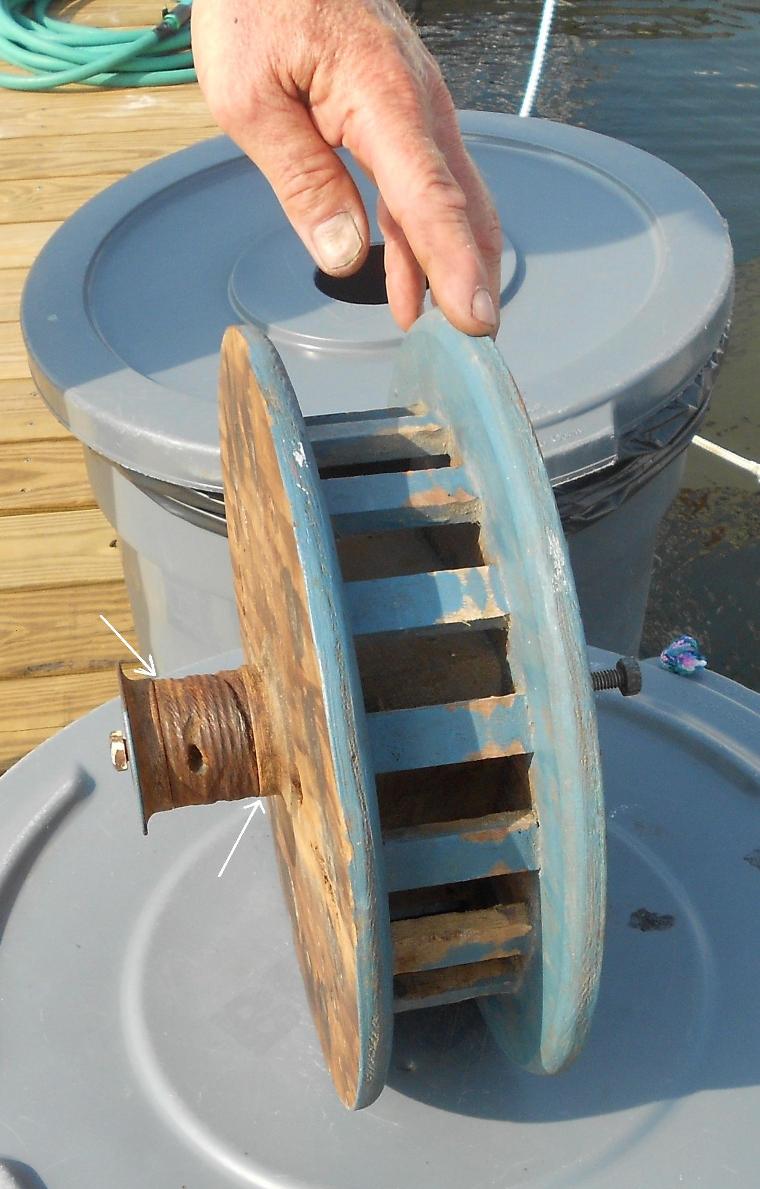
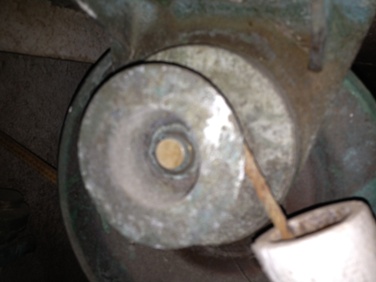
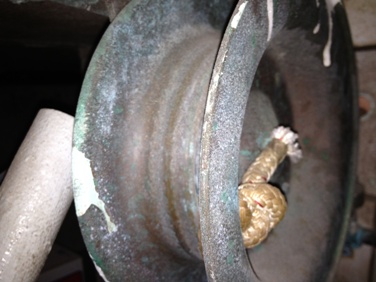
Here she is. The pieces are held together, in this picture, by the axle, a long headed bolt threaded on the end for a nut. There is also a flange on the right side of the wood drum (out of view) like the one on the left above. It also had separated from the wood drum. Click here for a larger view. The flange is a bearing surface for the winch system.
Dave's fine hand was already getting quite attached to this project. While I was having a small nightmare trying to think who, what, how I was going to deal with this, Dave 'insisted' on taking it home with him. The next morning it appeared on my cockpit seat - epoxied back together, and the metal drum was glass wrapped. He also inserted two long screws into the flange at left above, that extended through the wood core, and into the large control line wood drum., then polished the surfaces, etc. It is criminal not to have a picture of it before it went back in. It looked a lot like the above but nice....
|
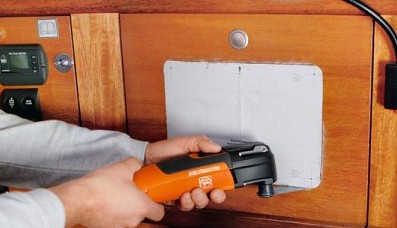
Cleaning up the hacking job I did getting the winch out was another job for which Dave provided some technical assistance.
Ever hear of a Fein Multimaster? This is a vibratory tool/saw that works like magic. Of course, Dave has one, and loaned it to me.
|
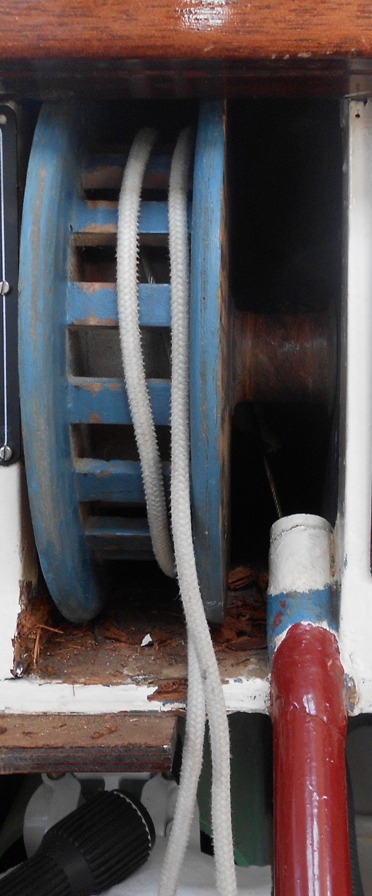
This is the cleaned out locker. The centerboard pennant still 'anchored' to the starboard spinnaker block, backed up with a pair of padded vice grips locking the wire on the other side of the bridgedeck. At this point figuring how the get the repaired winch back in the locker, properly wrapped with the control line and ss pennant became the challenge.
First thing was to take a good 1/2" line under the boat to snug the centerboard in the up position so I could release the pennant. Done - the ends were secured around the middle lifeline stanchion bases. You want this line as far aft around the centerboard trunk as you can get it. Too far forward and the weight of the board will 'lever' the line forward and down she will go.
The rest of this project went surprising easily - With some sanding on the wood inside panels of the locker I was able fit the winch back in, and line up the axle. Before that the intellectual winding challenges had to be addressed. I still get a small headache thinking about the winding and am unable/unwilling to explain exactly how I did it. Suffice to say that I waited for high tide for the moment of truth and was so confident of success I did not even move the boat to a deep water slip.
The dead end of the ss pennant now goes into the side of the large wood drum avoiding what is might be a structural issue with a hole thru the small pennant drum. There are already several wraps on the drum when the board is in the fully down position. I still have some touch up work to do on the locker door, and have decided to keep the bottom of the locker open, at least for now. See below
It will be prettier after a coat of paint....

Close up, if blurry - board is up! tightly wound
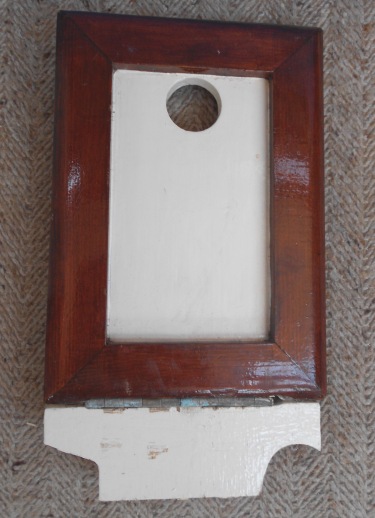
The opening will be temporarily (?) covered by a panel made up of the old locker door, and the cross piece to which it was hinged (at left)
|
|
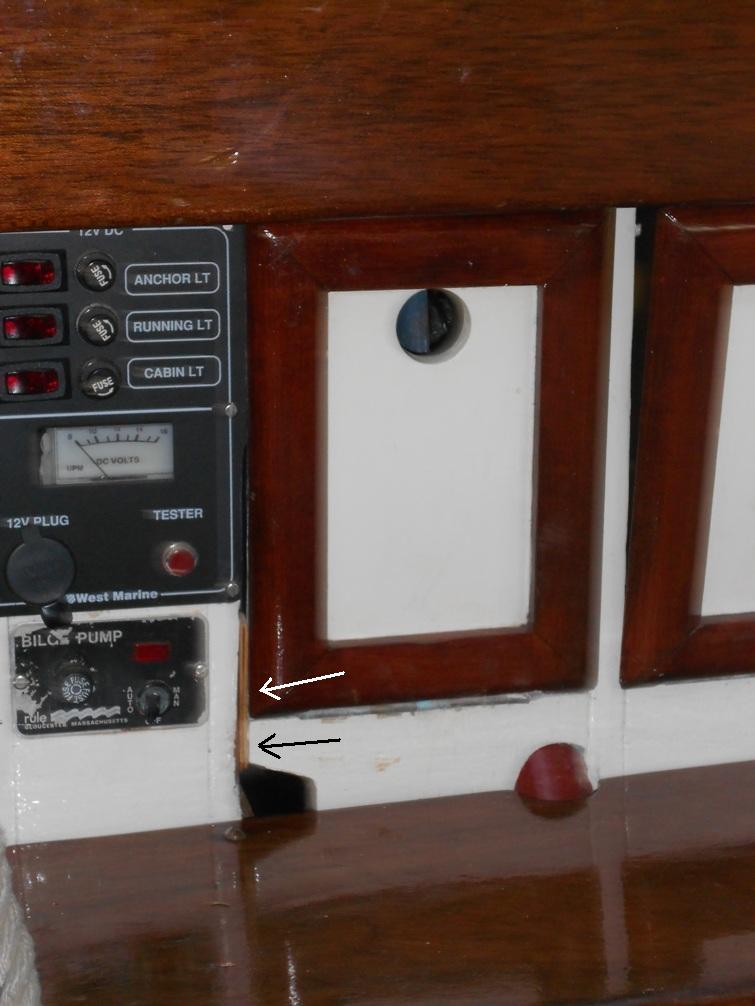
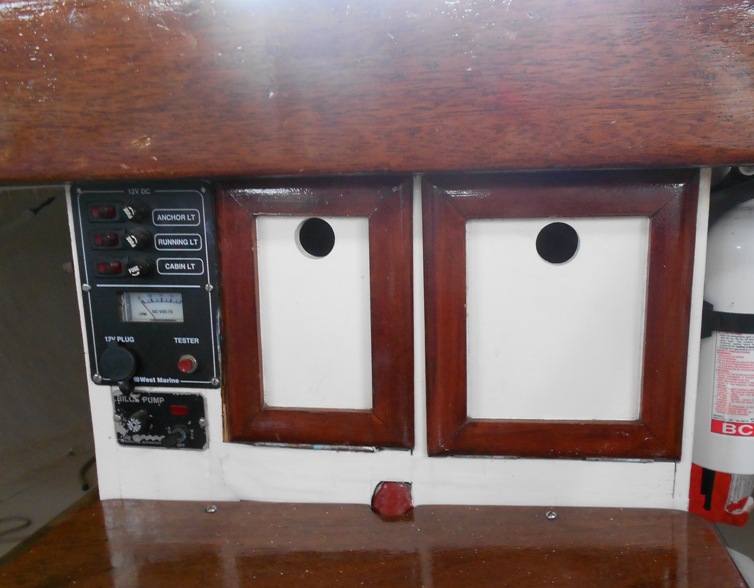
So, this is what she looks like tonight. There's that little press fit spacer (arrows) that fills a gap created when I had to make room to slide the winch in and out. That 'hole' below the black arrow was harder to fill and will have to wait for time to make a finished repair. But, the centerboard's been up and down several times and we are functional, and presentable - a mini cruise planned for early next week and we'll seee what happens. Thanks Dave!
July 13, 2013 - a better looking, temporary, cosmetic fix - a bit of white fiberglass adhesive tape...So far, centerboard's been up and down a few times - no problem.
Stay Tuned
ISeptember 8, 2013 Update. In the interest of supporting the following update on centerboard tubes here is Marionette's setup. She has a fiberglass tube which is glassed to the turning flange stub on the sole. As Marionette does not have a inboard, being able to easily remove the tube in case it is necessary to pull the motor is not an issue. The tube plays a minor structural role in supporting the companionway steps and is itself supported at the top by a cutout in the lip on the bottom of the locker housing the centerboard winch.
When I first got Marionette there was nothing under the bridgedeck except the centerboard winch. I built the lockers on either side (for more on what's under Marionette's bridge deck click here)
**************************
Passage's Centerboard Winch
There are centerboard winches, and there are centerboard winches. This is a centerboard winch. Mike Googh-Breault's Passage, Marscot'O'Day #10, currenly sits in your webmaster's barn patiently awaiting her restoration. When we pulled out her Palmer 27 inboard we had to cut the centerboard pennant tube, and we also decide to remove the winch. It was mounted on the top surface of the bridgedeck. We polished it and decided this winch deserves her own page, so after long admiring looks, click here to go to there.
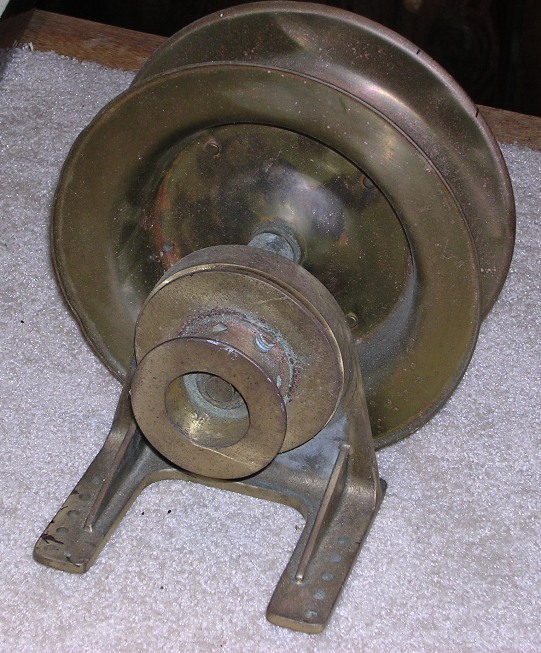
This winch is so beautiful I am speechless....
Of course this bronze beauty probably weighs 4 or 5 times Marionette's winch. Passage is all stripped out and, fortunately, I remembered it was in her parts area just waiting to be photographed.
*****************************
September 8, 2013 Update. The issue of what to do about the centerboard line tube when removing an inboard came up in a discussion about Jerry Slaughter's restoration of Rowdy, Marscot/O'Day #5. This happened for Passage years ago, pre website days. Passage had a 1/8" wall thickness fiberglass tube connected by an overlapping rubber tube taped to the tube stub exiting from the turning flange at the sole. It was simply was open ended at the top with the ss wire feeding to the most beautiful winch you ever saw (above) bolted to the top of the bridgedeck.
We slit the rubber tube and slide it off the fiberglass tube stub, with rubber tube attached.
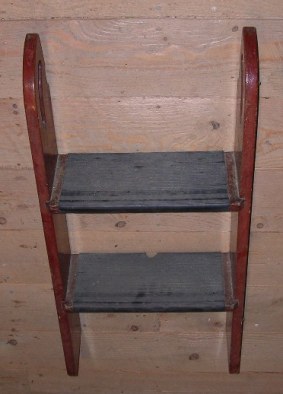 |
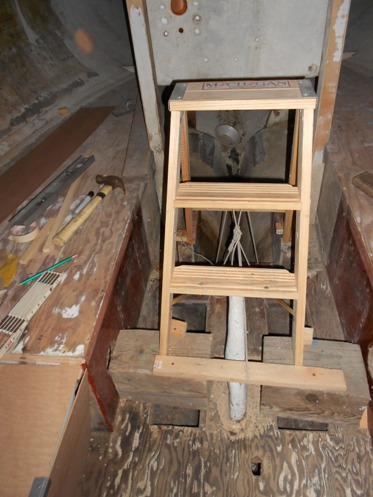
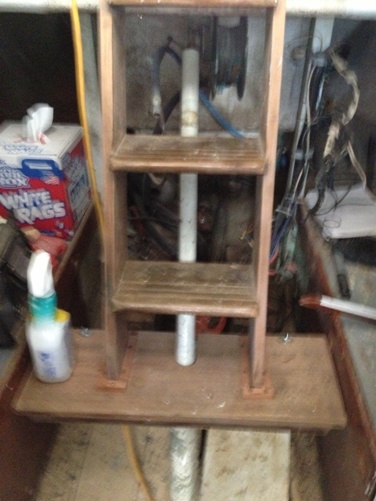
She is undergoing her own restoration with her companionway stairs (at left) removed, and temporarily replaced by a short wooden step ladder, below left.
Please excuse her appearance...
|
|

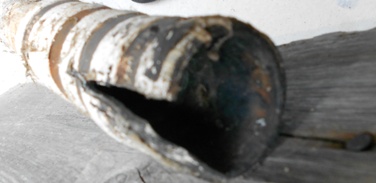
The tube
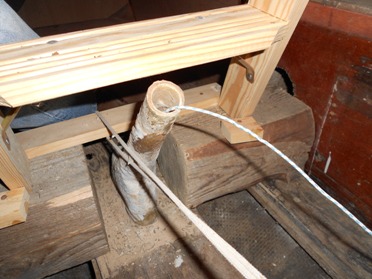
The stub with messenger line for ss wire
|
|
The rubber tube we slit. It was a tight fit. That's electrical tape around the rubber tube. My guess is that it did not leak
|
***************************
November 30, 2008. David Baumer is restoring Aeyla Makaira, Yankee #81 and sent in the the following pictures and comments of her centerboard winch (edited).
When I purchased Yankee Dolphin # 81 in June of 2008 I knew that both the centerboard and winch were both a concern. The board was stuck in the trunk and the fastenings that hold the winch together had oxidized and needed replacement. The board was hung with this awful green oxidization stained braded line.
At present, I am just planning a course of action to make both centerboard and winch new again. I want to both contribute and fish for technical information from people who may have worked this stuff out.
The centerboard winch is very much like the one that was on my Dad’s 1972 O-Day Mariner. We had that boat many years. I never had a single concern about the winch, its design, materials, how it came apart, or went together. It always worked flawlessly.
I took these photographs to document the condition of 81's winch before I bought the boat, or shortly after I got her home. I have added some observations, comments, and questions to go with the pictures.
Ayla Makaira’s Centerboard Winch
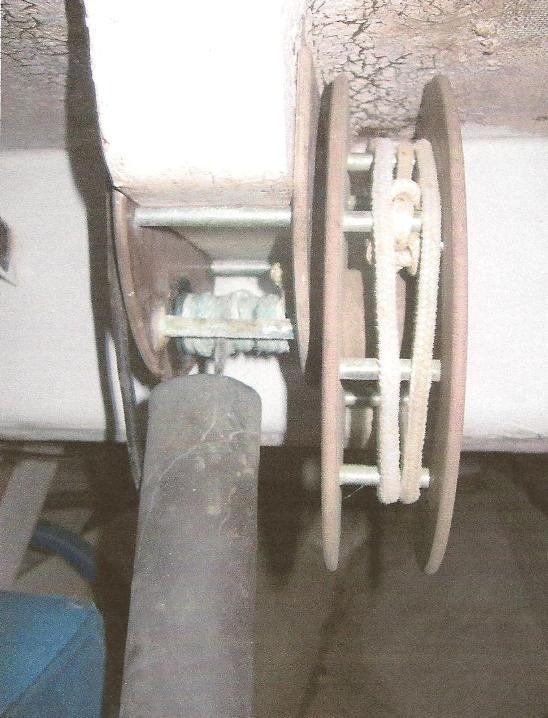
The winch hangs from a wood bracket that is fiberglassed to the bottom side of the bridge deck. The winch itself consist of a big spool (6“diameter) and a small spool (3/4” diameter) that turn on the same shaft. A line runs into the cockpit from the big spool. Another line runs from the small spool to the centerboard. I can only assume the centerboard should be hung with braided stainless wire not this tainted green line.
Mechanical advantage is acquired by turning the big spool by pulling line wrapped around it into the cockpit (up comes the board). Gravity pulls the board down wrapping the line back around the big spool (I wish gravity worked on my board - it’s bent and stuck in the trunk)
 |
From the small spool of the winch a wire leads through a piece of hard wall exhaust hose to a watertight fiberglass bracket that I assume holds a sheave. The bracket changes the lead of the wire to the proper angle to raise and lower the board. The exhaust hose is fastened to the fiberglass bracket with two stainless hose clamps. This creates a waterproof housing for the centerboard lift wire well above the boat’s waterline.
Webmaster Note: The CB tube is actually centered on the bridgedeck. It appears offset as the dinette extends almost to the centerline of the boat.
Look at the rot in the plywood sole, after dinette seat, and awkward location of circuit breaker panels (the companion way steps land in front of them). Is the sheave or what changes the lead of the centerboard wire prone to deterioration from stray electrical currents and fresh water soakings? I wonder, what is really inside that bracket? We all do...
|
 |
The winch is fastened to the wooden bracket with bronze screws. Note the green powdery look to the fastenings that hold the winch together. It does not make me too confident that the winch will stay together with out refastening.
The whitish/green corrosion product is a mystery that I will solve when I get in there remove the winch from the boat.
A big plastic washer around the shaft separates the bracket with the small spool from the big spool on the port side. On the starboard side of the winch there is what I will call a plastic button bushing that holds the shaft.The big spool is constructed with a 2" diameter cylindrical core made of the same composite material as the majority of the bracket.
I wish I could remember what that stuff was called in the late 1960s and 1970s. (Formica, melamite - melamine impregnated paper)
|
 |
The six inch spool is created by what appears to be stainless steel or chrome plated brass spacer tubes with through rivets fastening the sides of the spool together. If they turn out to be chrome plated brass tubes that may be the source of the greenish white oxidation product? At first, I assumed that the winch was held together with long aluminum rivets that ran through aluminum spacer tubing. I guess I will find out when I pull it apart. Does any thing related to the centerboard require lubrication? If so, what will I use?
Note: Marionette used waterproof grease on the bearing surfaces of the axle pins - 12 years ago, and then again 2 years ago, nothing in between. Probably regular grease would be fine. No problems
The plastic bushings are worn out and I am researching suitable replacements. RWO Screw Down Bushings are similar and available from Annapolis Performance Sailing (R3112, aperture 3/8”)
|
******************************
September 10, 2013. Jerry Slaughter, Rowdy, Marscot/O'Day #5, has been contemplating issues with this system including getting his inboard in and out of the boat. He sent in some comments and pictures of his centerboard winch, line tube and companionway stairs
Hi Ron,
I took some pictures of Rowdy's centerboard(CB) fixtures and one of the cabin ladder, as you requested. I modified the ladder a little by making it a little more upright thereby moving the landing platform a little more aft. You can see that I cut a slot in the platform to accommodate the CB cable tube. I'm not done messing around in this area so some things might be changed. Today was the first time I have really looked at the CB setup and I was happy to see the bronze winch but I also saw a rusty CB cable I'll have to address at some point in time.
I might be able to get my motor in if I cut the cable tube about 10 to 12 inches off the cabin sole and move the cable out of the way. Although I don't know how high the water gets in that tube I would imagine it should be water tight for most of it's length. You got any thoughts about that? The photos are not great but I hope you can see what you want.
Regards, Jerry
|
|
|
|
Above photo is the centerboard control line 'turning' flange that sits on the sole and that houses the CB line tube
Right is Rowdy's modified companionway ladder
|
|
****************************
|


