|
October 15, 2013. Installation instructions usually come along with depth sounders. Before buying, and/or installing type, "depth sounder installation" into your search engine and do some reading. Alan Mountford (Blue Gum, Falcon 24) has had experience in this area and offers the following (minor edits), We hope others will contribute comments and their experience.
Hello Ron,
Have been doing some reading on your site and noticed that the new owners of Summer Wine had a question about echo sounders, since he doesn't want to put a hole in the hull for it he could do what I did on my first keel yacht that I built..
I got a short piece of PVC downpipe about 6inches diameter and with one end cut square trimmed the other end to fit the hull shape a few inches forward of the bulkhead and up from the keel line slightly so that the tube sits vertically. I then sanded the outside of the tube and laminated a couple of layers of chopped strand mat and polyester resin to the outside.
I trimed off the excess glass once the resin had gelled sufficiently with a sharp Stanley knife. I then sat the tube square end down on a waxed flat table. I cut enough rings of chopped strand mat to make up a finished thickness of about 1/8th inch and sat them on the table over the glassed PVC tube one at a time and wet them out with resin to form a flange with a finished width of about 3/4 inch wide.
Once fully cured I took it off the table and trimmed off the outer edge of the flange so it is round and then I cut discs of chopped strand mat same diameter as the outside diameter of the flange and laminated them on the waxed table to form a lid for it. I glassed the glassed PVC tube into the hull with more chopped strand mat.
The echo sounder transducer was mounted to the centre of the underside of the lid and the lid bolted to the flange with a gasket of neoprene rubber about 1/16th thick with about 12 evenly spaced 3/16 whitworth metal thread screws. Before bolting in place I filled the tube with water with some copper sulphate added (to stop any algal growth).
Before fibreglassing or epoxy gluing anything to existing fibreglass - the area must be sanded to remove the shiny surface. A 120 grit orbital or random orbital sander does a good job. The job would likely in time delaminate if you don't.
The glass hull does not interfere with the transmission of the echo sounder signal but make sure there are no bubbles in the fibreglass laminate where you mount the tube. This method worked perfectly for me.
Regards,
Alan
We followed up with a couple of questions: Is the Falcon 24 hull is solid glass? How do you find out if there is a bubble in the hull laminate where one plans to locate the depth sounder? Alan replied (edited):
Yes - all S&S 24's and Falcons have solid GRP hulls. Only the horizontal/near horizontal parts of the deck are cored. The vertical/near vertical parts are solid glass. Many GRP (glass reinforced plastic) boats use the inside echo sounder tranducer system I described above (including our Dolphin 24s)
To see if there are any bubbles in the hull laminate shine a bright light on the outside of the hull in the area where you want to check, then look on the inside. Best if there is little or no background light on the inside. Any bubbles in the laminate will be seen. It is unlikely that there will be bubbles if the hull has been moulded properly.
If the bottom has antifouling paint it would need to be removed in that area to check for bubbles in the glass. Gelcoat is OK. Easiest and safest way I have found to remove antifouling paint is to use a product such as "Biostrip" - a stripper that uses biological agents to do the stripping and not harsh chemicals which can affect the fibreglass. It is non toxic and is cleaned up with water. That is what I used on Blue Gum before I painted the underwater area with Copper/epoxy. Bottom painting does not affect the depth sounder's function.
If the boat is in the water you can fit the transducer temporarily into a plastic bag of water and sit it against the inside of the hull . Wet the bag outside to ensure there are no bubbles under the bag where it touches the hull. If ithe sounder works OK then that location will be good. The tube the transducer is mounted in can be filled with liquids such as water or vegetable oil. The type of liquid is not important as long as it doesn't affect the fibreglass.
Neither of the above two should cause any problems. Any further questions just please ask.
Alan
ps A further thought - it is better to mount the transducer in the forward part of the hull so you have a smooth flow of water over the area. Having them aft, the readings can be affected by turbulence. The signal from the transducer is cone shaped and the transducer needs to be mounted so that the cone is clear of any obstructions such as the keel. Another reason for mounting forward is that it gives you a few feet earlier warning of shallow water than when mounted aft
******************************
October 28, 2013. As luck would have it your webmaster's Marionette, Marscot/O'Day #12 is having depth sounder problems prompting still more questions for Alan.

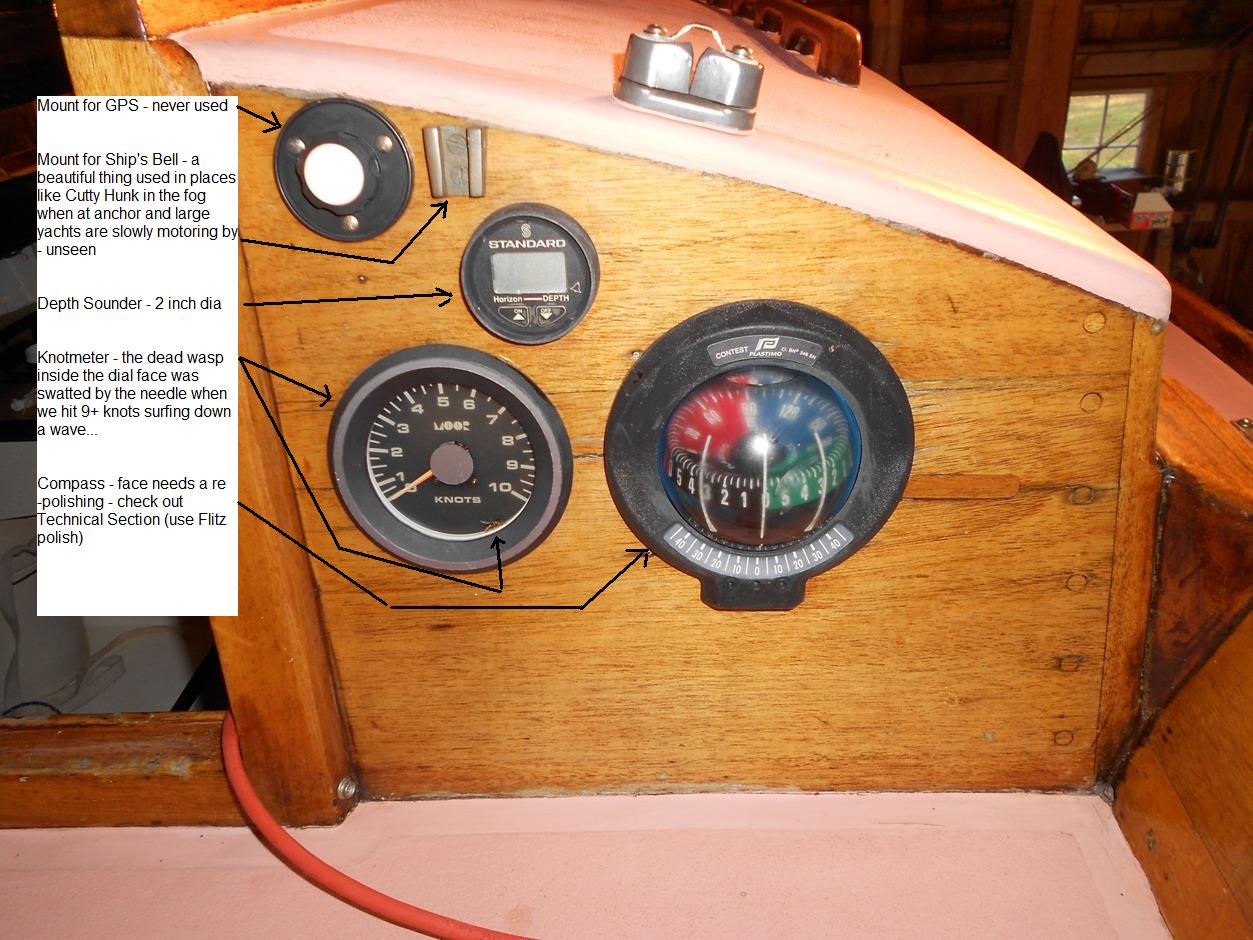
The instrument bulkhead - click for a larger view, click the back arrow on your browser to get back here
|
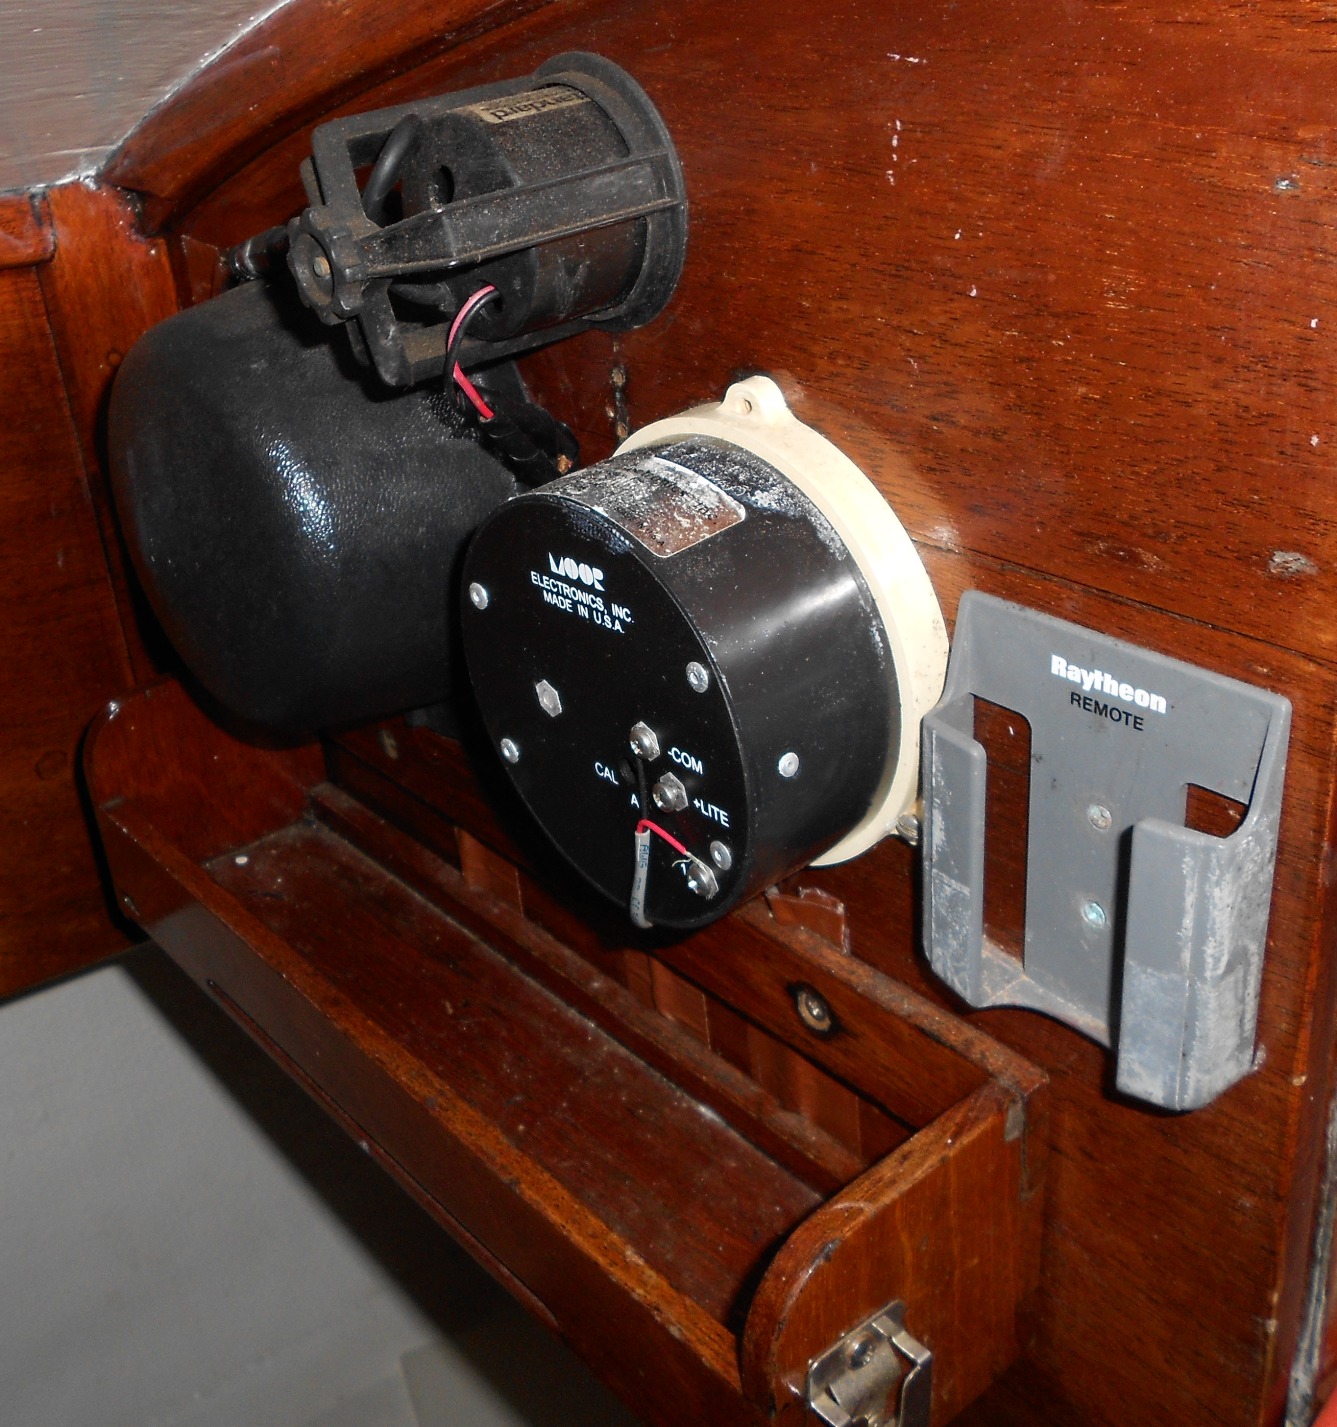
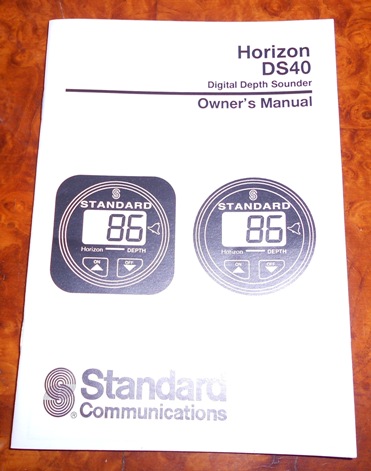
My own depth sounder on Marionette is a Standard Horizon DS 40, 200 kHz, 2 inch diameter mount hole, installed maybe 18 years ago seems to be acting up - giving partial/erratic readouts on the face indicator.
The transducer/sender unit is mounted in an epoxy bed on the hull and located in the starboard qtrberth locker - probably not ideal location.
I am hoping that the sender unit is ok and all I need to do is replace the receiver/readout unit. Does that sound reasonable? Or is a total removal and/or relocation of the sender unit ahead of me?
Click on the picture for a larger view - the back of the readout unit is the top instrument - above and between the back of the compass and the back of the knotmeter
Webmaster Note: This area needs some cosmetic attention....
|
Alan responds
It may be possible to use the old transducer with a new head unit. However the new head unit will have to be the same frequency as the old transducer. Different makes may have different frequencies.Some of the modern units have two frequencies. Also the coax cable needs to have the same number of wires in it.
I read that the older units had just two - the centre "hot" wire and the sheilding cable was the return.Some of the newer ones have 3 - the "hot" wire, the return wire and the shielding cable. Also the fitting on the end of the coax cable that goes on the back of the head unit has to be the same. With such an old sounder it may not be possible to match everything up and you may need to replace everything.
Electronic technologhy moves so fast these days that models become obsolete in a short time. How difficult will it be to get into the space and cut the old transducer out and grind/sand the area smooth again?
Getting a complete new unit might be the better way to go in the long run as then you know you are not going to have any compatibility problems between head unit and transducer.
I think that would be my preference.
Regards,
Alan
An email to Standard Horizon's Tech Service Dept was answered with the following announcement
We have been out of the instrument market for about 7-8 years. We don’t have the parts necessary to repair them any longer. You can contact Moor Electronics to see if they offer a replacement instrument. (800)876-4971). They were manufacturing products that were similar to ours.
A call to Moor was helpful as their technical service person advised that they had had success replacing the head units of older 200 Khz Horizon depth Sounders - however - they no longer made a unit to fit a 2" diameter hole. A 4" hole is required for their smallest unit. A quick look at the above picture will remind the reader of how much room there is (not) on the bulkhead.
 |
What to do?
Hey, here's an idea - How about reading the Owner's Manual? Sure enough on page 20 there is a trouble shooting chart with the following!!
Erratic Readings? - Check transducer for growth or (bottom surface) for multiple coats of paint
I just started getting 'erratic readings' this Spring, having just liberally applied still another coat of bottom paint. I remember thinking the paint looked pretty good but another coat of the ablative paint I use couldn't hurt....
So, the now plan is to sand down the area of the bottom immediately below the transducer, which probably has been seriously overpainted over the years, give it only a couple of new coats, launch next spring and see what happens.
Besides having a rationale for this based upon the manual, and the recognition of probable over painting, this solution has the benefit of procrastination, and at least temporary $$$ avoidance - both good things
Stay tuned
|
*********************************
Heres an interesting link for those interested in this subject
http://www.pbase.com/mainecruising/new_depth_old_transducer_ducer
|