|
This article is about the covers we have to protect our boats from the sun and the rain. Hopefully, we will get other contributions. We already have a page up on dodgers and tent flys - click to go there
We'll start with Ron Breault's covers for his Marscot'O'Day #12, Marionette
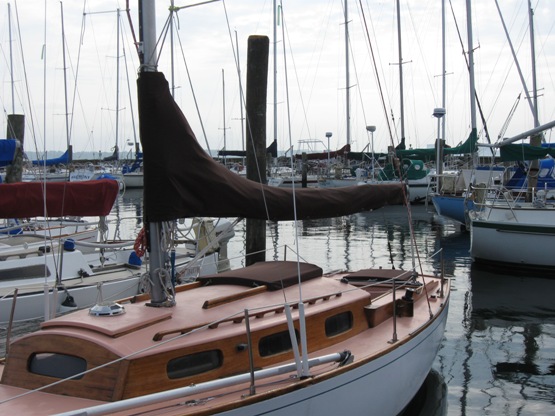
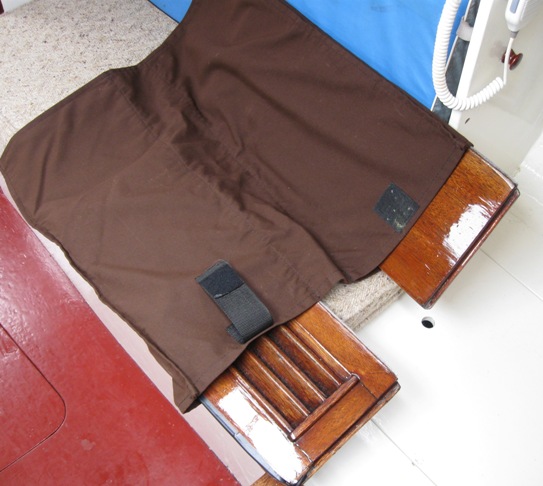
This 12' 6" long mainsail cover ($162), main hatch/companionway cover ($125) and lazerette cover ($65) , along with an 11' x 8' 7" tent fly ($155), tiller cover ($25) and a washboard bag ($65) were all made of brown 'Sunbrella" material, and bought in June, 1998 from the Canvas Group in Old Saybrook, CT. Quality and fits were, and still are, excellent. I paid $632 including tax for everything. Today, figure maybe $1500+?.
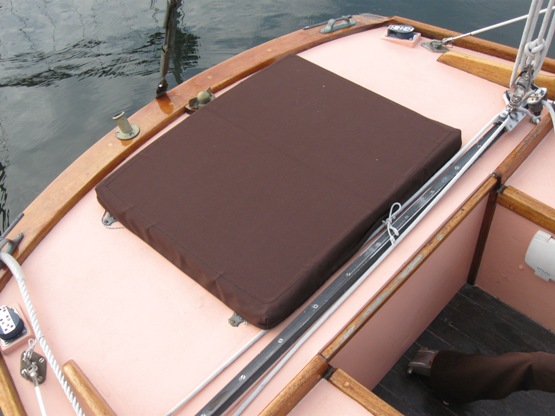
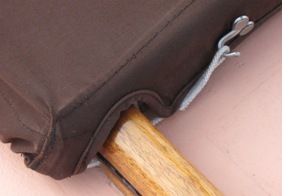
This lazarette cover has a simple but effective design. There is a shock cord all around the lower sides of the cover - in a sewn tube with open corners. When you pull the two ends together in the middle the cord slips under the corners of the hatch. I tie the ends together enclosing the traveller control line so if somehow it gets loose, the cover is attached to the boat. Has never happened.
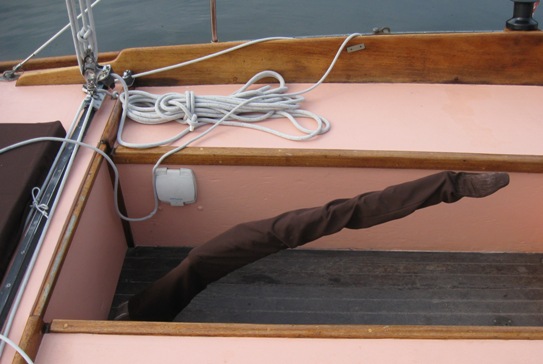
This tiller sleeve cover is loose fitting because inside that cover is a tiller extension, and also an Autohelm bracket. There is a drawstring at the bottom of the sleeve that I never adjust but once in a while gets caught on the tiller casting bolts. The discolored tip is where I loop tie the 'endless' adjustable traveller line (The line is weather side adjustable) seen draped over the port side combing - after running it through both cleats on the outside of both combings. This keeps the tiller centered. The white cover on the port side of the cockpit wall is for the manual bilge pump.
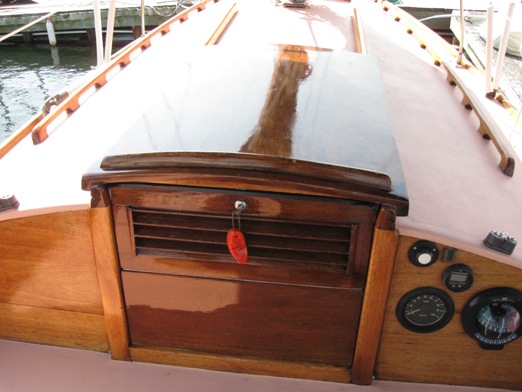
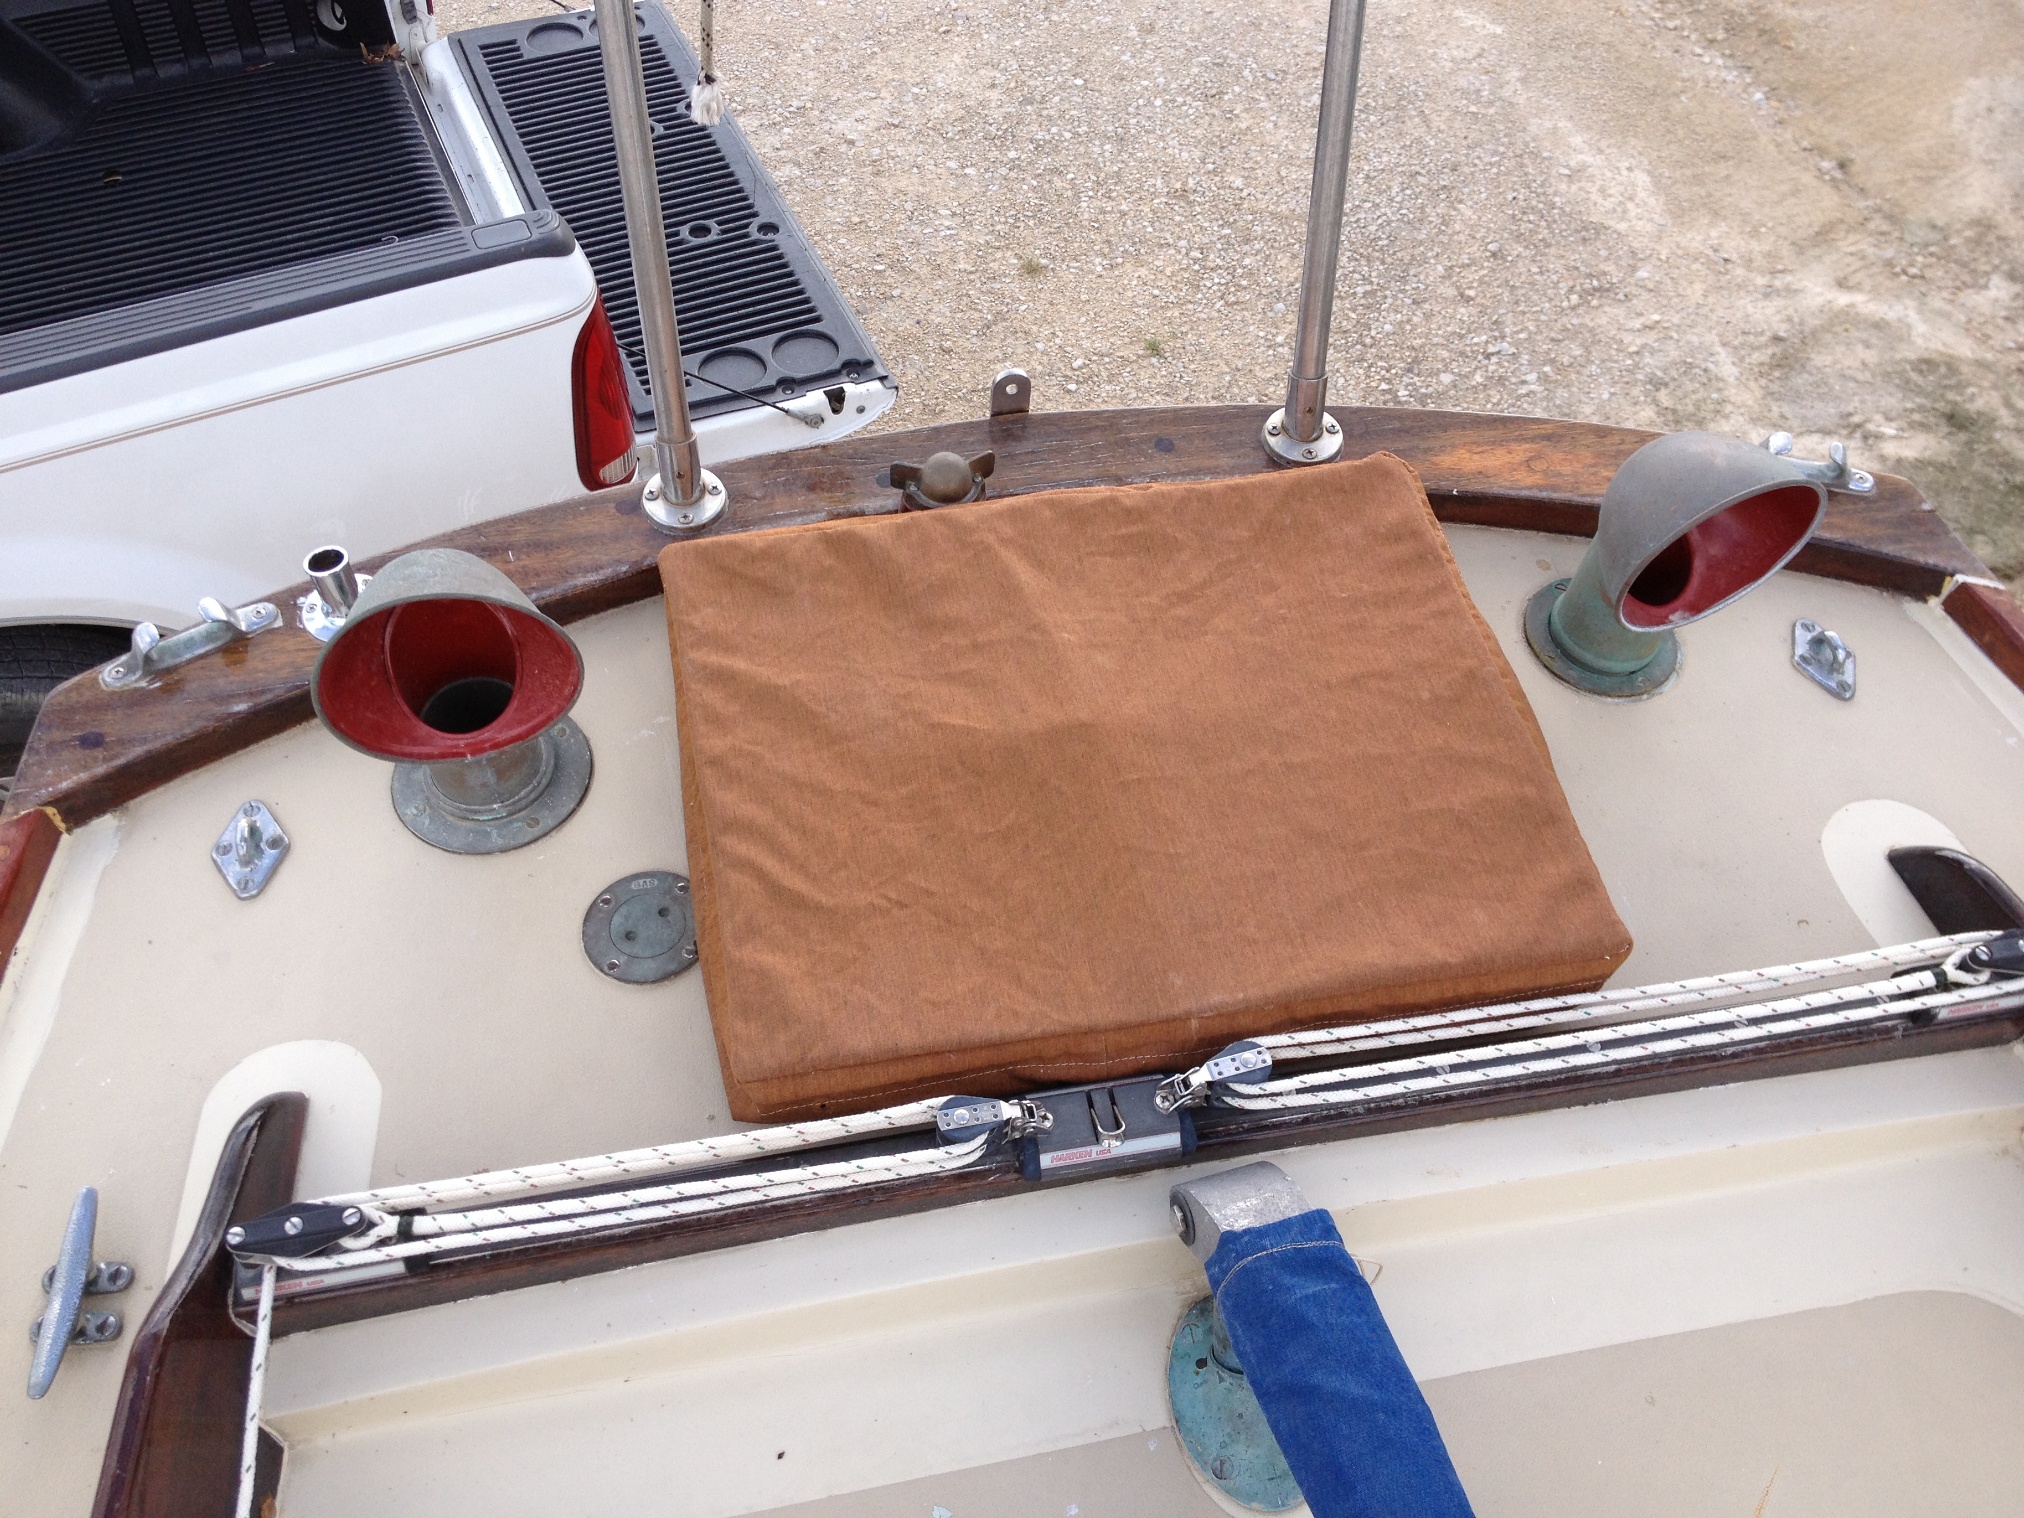
We are trying to protect this mirror like varnish job
|
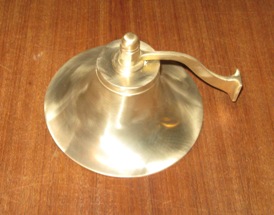
As I knew you would ask - above clockwise from upper left - the holder knob for the GPS, the bronze bracket for my beautiful brass fog bell, depth sounder, the cleat for spinnaker halyard (or jib halyard - rarely used for this purpose), compass, the knotmeter. |
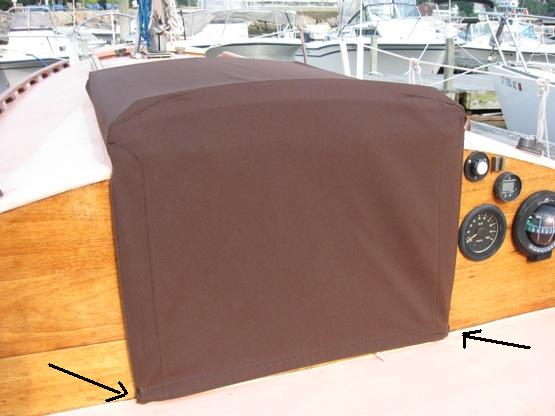
 This is where the fun starts. The main hatch cover is an ingenious design (I take no credit here) The back flap is held down by 2 snaps indicated by the arrows. Forward, it is held down by a loop that passes through the water drain hole in the main hatch rails. The system is tensioned by the cord which runs through a tube sewn in the bottom edges of the cover and slips over the leading edge of the hatch rails. The hook attachment at the forward end can fasten over the top of hatch rail instead of through the drain hole, making it possible to slide the hatch with the cover in place. In this setup the flap that covers the aft end of the companionway is slid under the hatch cover. This is where the fun starts. The main hatch cover is an ingenious design (I take no credit here) The back flap is held down by 2 snaps indicated by the arrows. Forward, it is held down by a loop that passes through the water drain hole in the main hatch rails. The system is tensioned by the cord which runs through a tube sewn in the bottom edges of the cover and slips over the leading edge of the hatch rails. The hook attachment at the forward end can fasten over the top of hatch rail instead of through the drain hole, making it possible to slide the hatch with the cover in place. In this setup the flap that covers the aft end of the companionway is slid under the hatch cover.
The cover is very effective at protecting the top of the varnished hatch cover and varnished wash boards - but, is also effective at blocking air flow through the cabin being pulled by the solar powered vent in the front hatch. Also, when cruising, the top washboard has nice wood louvers (see below) that nicely let air in, but also sometimes allows an annoying bit of of rain water on the the top step inside - right near the electrical panel. For years I have felt guilty about leaving Marionette without enough air. This spring and summer in New England we have had so many heavy rainy days. Something had to be done.
There are several scenarios to be accomodated 1) ventilation and security (washboards in and locked) without rain water entry at a mooring, not usually a problem because the breeze keeps the bow into the wind, 2) ventilation and security without rain water entry at a slip, sometimes a problem because the breeze can blow the rain directly against the washboards 3) both the above when security is not an issue (no washboards in place, and no one aboard to watch over things). Then, one day it came to me! A flap extender!!
|
|
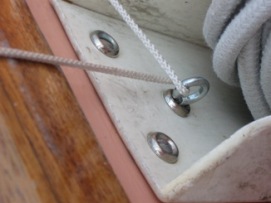
single cord to eye screw |
eye screw inside cb winch line holder |
|
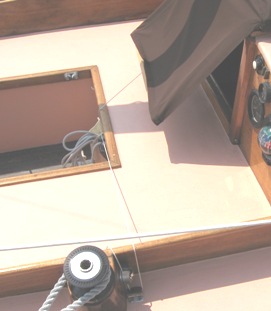
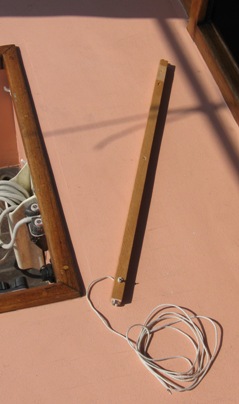
This is Marionette's flap extender - a 1" square wood spacer with screw in female snap fittings at either end to duplicate the fittings on edge of the companionway, 3 holes (one near each end, one in the middle) and a piece of strong cord. The cord has a knot in one end, runs to and through the center hole and then to a little screw eye at the top of the winch holder on the back of the bridgedeck, and then over the combing through the twing line block and cam cleat - just a convenient existing fitting to tie off. Optionally, it could through the center hole to the end of the tiller raising the flap a bit higher. Maybe shock cord would be better? Why 3 holes? Good question, 2 cords, one to each side to stabilize the flap for longer term situations - but so far seems to work ok with just one cord led to the center. And, the one cord system allows the cord to be led back and secured inside the cabin in rainy conditions
With both washboads in place air can get in through the upper washboard's louvers - a secure system. With just the bottom board no bouncing rain drops can get in and the space above is totally open.
A dodger would pretty much eliminate the need for all this....
|

Air
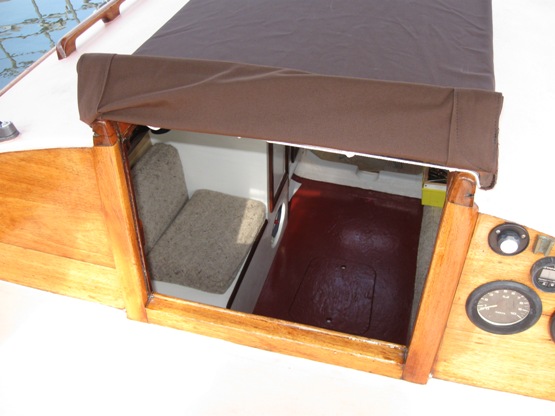
This is the flap rolled up, and the hatch can slide back
Washboards
|
Speaking of washboards, these are not simply thrown below to get scratched. We have a protective sock into which they will fit. The socks fold together and the velcro tab keeps them locked together.
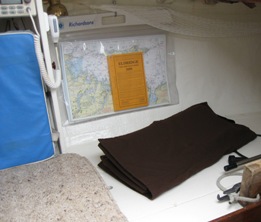
This picture is of the stbd quarterberth and also showing Marionette's chart storage system. We use Richardson waterproof charts because they are smaller than Maptech's Chart Kit and their zip lock plastic folder which can hold 3 of their chart books plus Eldridge Tide Tables, and the plotting tools. It hangs from a threaded hook that threads on to one of the toe rail bolts. I actually like Map Tech's Chart Kit larger format but we are dealing with Dolphins here...
Note: When single handing the Q-berth cushions are left home.
|
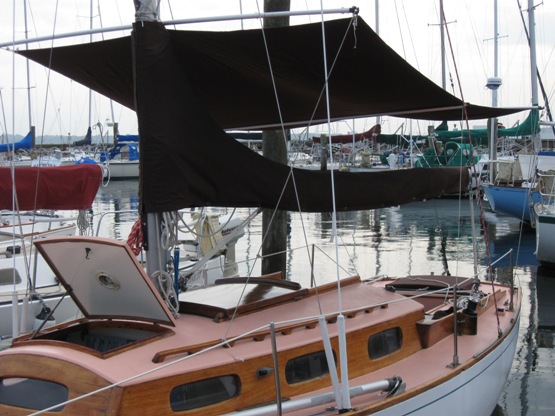
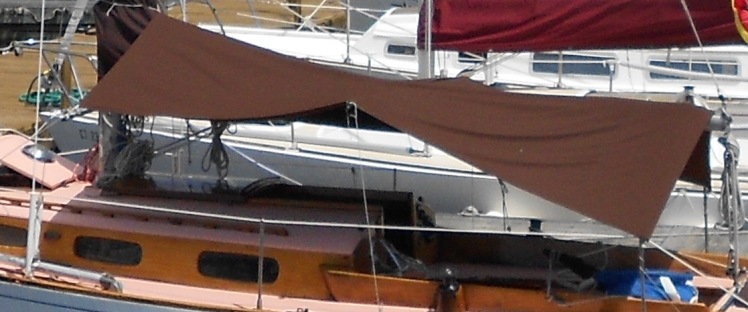
The above fly is the last of Marionette's 'covers'. Very important as we don't have a dodger. This works well as a sun shade. When it rains we can move the 3 extendable poles to below the boom creating a tent with the boom as a ridgepole. Works pretty well. Because the boom is in a mast track we can raise or lower the boom some - more headroom, or more protection in real heavy wind and rain. Will try to get a picture in that mode. For more on dodgers, biminis and tent flys click here.
July 16, 2013. This 'fly' has several iterations - one of which is both a rain and stormy weather version, as well as a sunny version. The fore and aft poles are removed and the corners are tied down to let rain water drain off. It also works as a sun shade when stronger winds or thunderstorms are possible. If it gets really bad remove the centerpole, tie down the middle lines and you have a snug tent protecting the cockpit and main hatch.
*********************
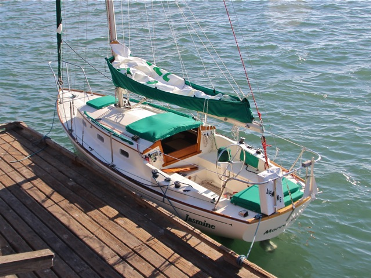
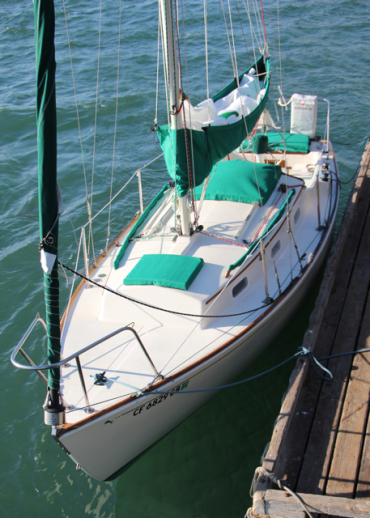
October 19, 2011. Jim Robinson, Jasmine, Pacific Dolphin #273 sent in a couple of pictures of his covers, in particular, his mainsail cradle cover. Besides the hatches note also his hand rail, binnacle and cockpit coaming locker(s).
|
|
The cradle sail cover is pretty sweet |
It has a full overlap zipper on top so the main is essentially "stowed away" when you lower it
|
*****************************
August 3, 2012. Here is Mike Paredes' and Nancy Law's Cove Dweller, Yankee #111 and her covers
*************************
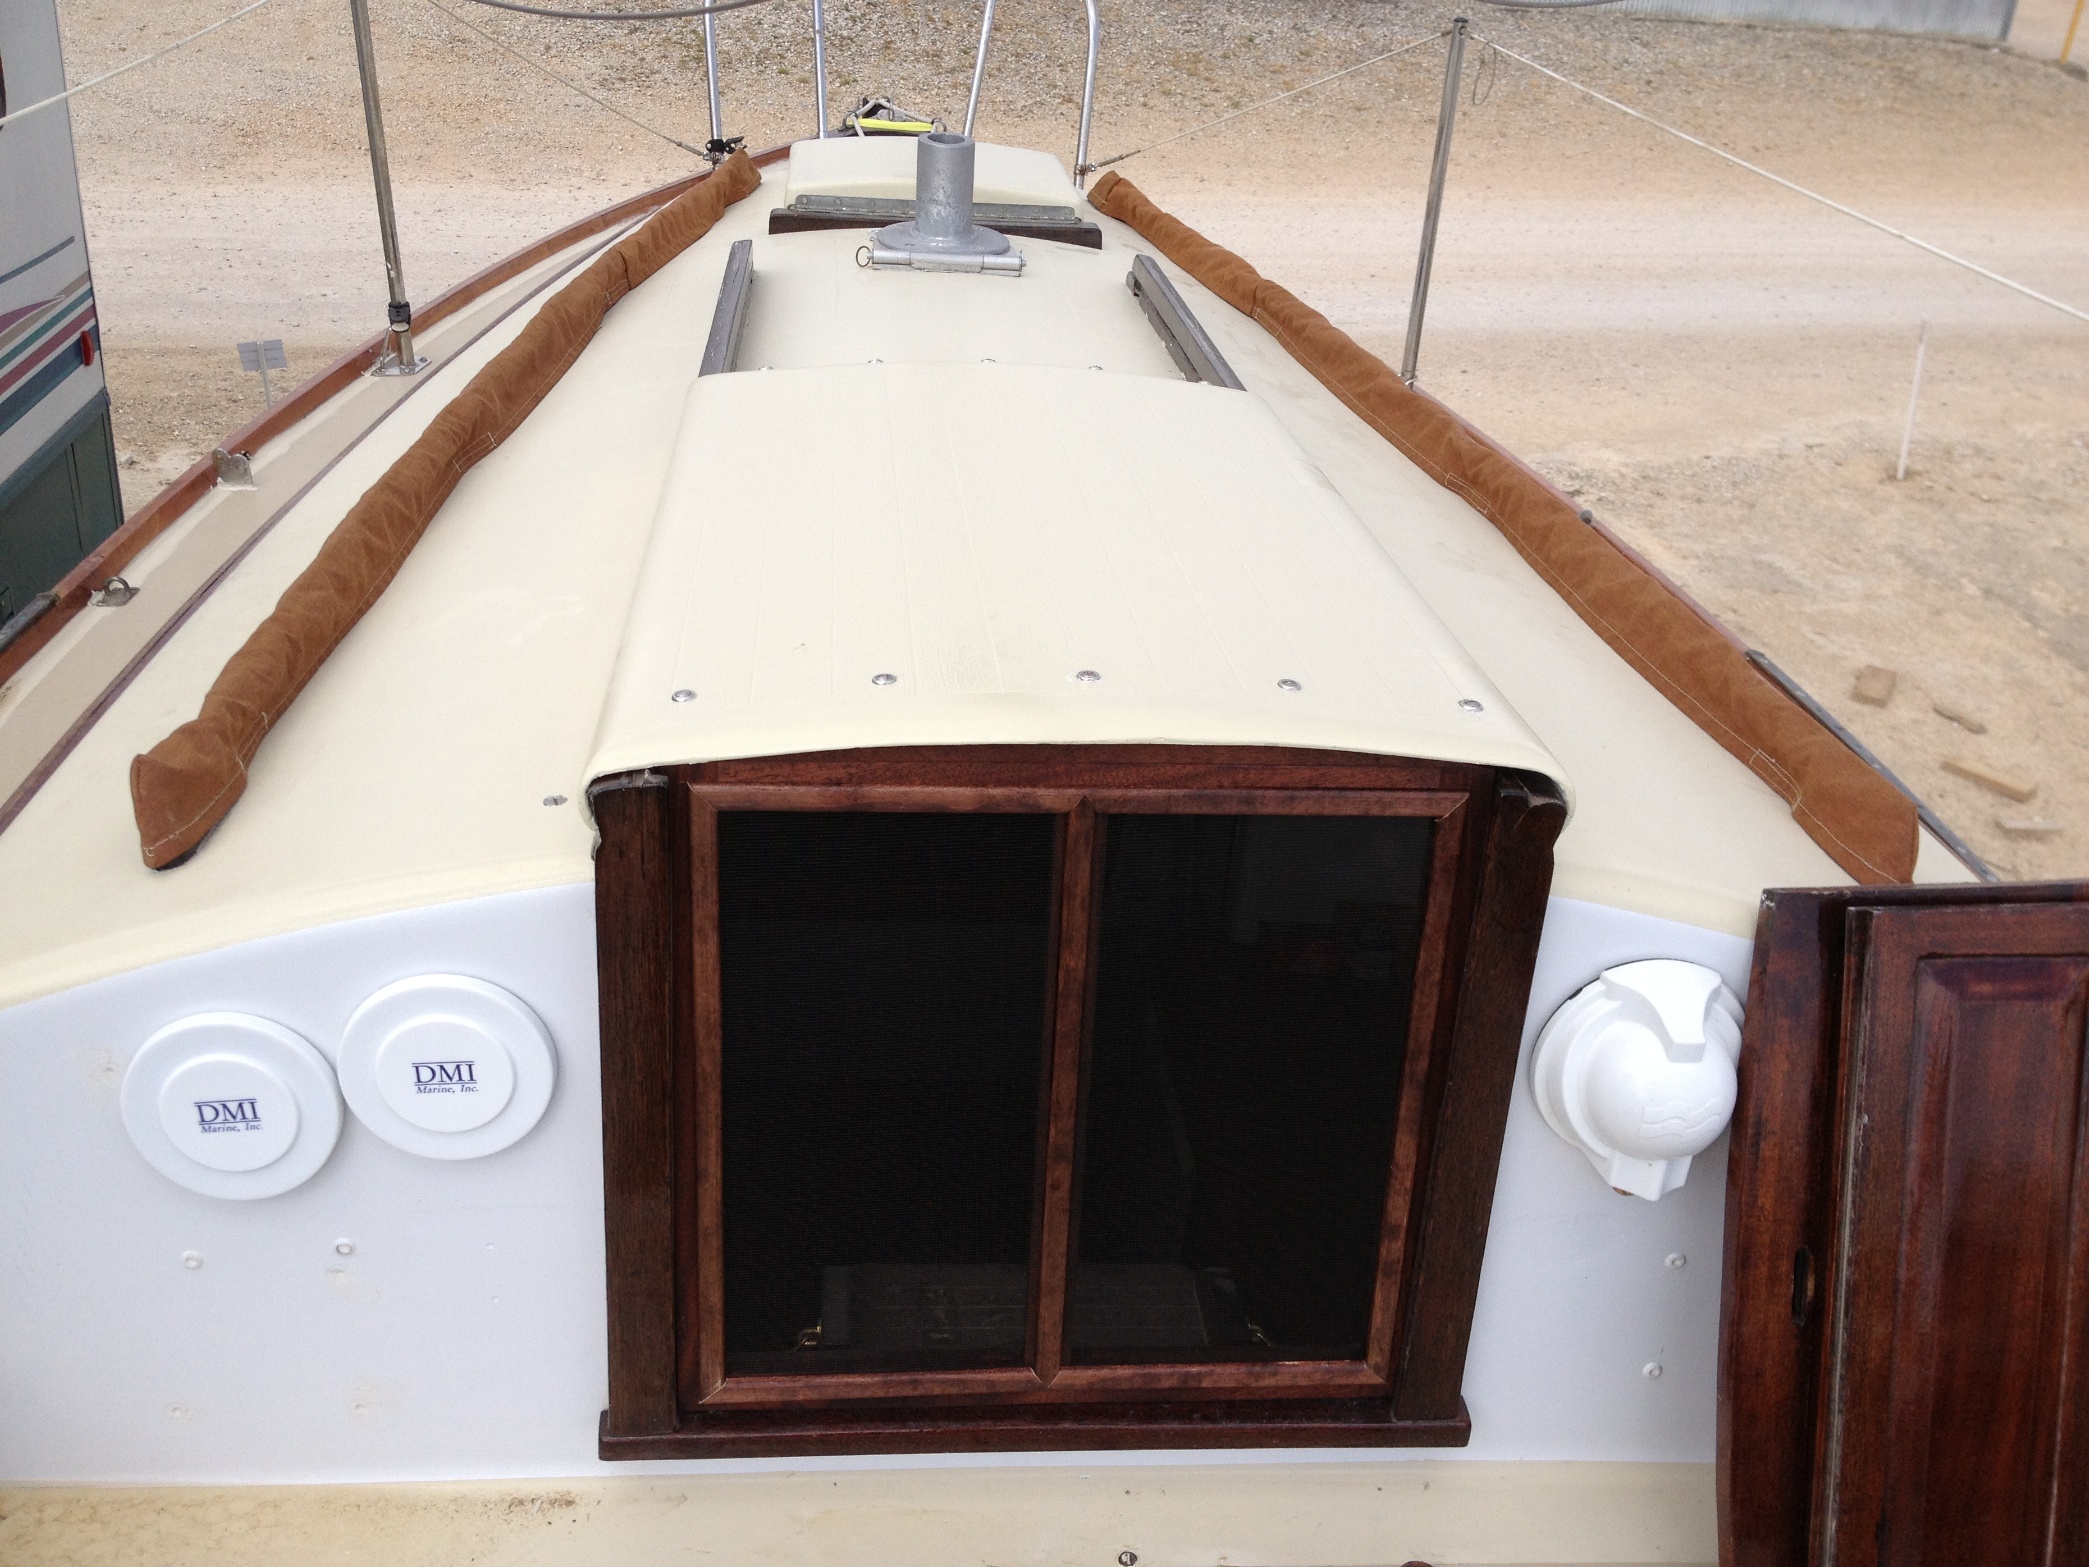
September 7, 2014. The following from Jerry Slaughter and his ROWDY, Marscot/O'Day #5
Hi Ron
I have enjoyed reading the continuing adventures of Marionette in Maine. I've sailed in those waters and your tales bring back many good memories, thanks.
Since I've moved Rowdy outside, I've worried about the sun beating down on my brightwork. I had some old hatch and handrail covers from my prior boat and decided to have them modified for Rowdy. I'll probably just bite the bullet on the toe rails and coamings, we will see. The theory here is we lose about one coat of varnish every 6 months due to the intense Texas sun, so two coats per year, that should keep me busy.
I've built a screen for Rowdy's main hatch. In the past I have used bronze screen material but decided on the grey fiberglass screen for this project. The forward hatch is presenting some design challenges with all the curved surfaces so that screen is still in the future. I'll attach a few pictures for your review.
Jerry
Click on above pictures for larger views
*****************************************
|
|