|
May 13 , 2010. This will be of more interest to those of you with wood cockpits like Marionette's, Marscot/O'Day #12, but even fiberglass cockpit seats have drains - when they leak its probably just a question of reseating the little drain pipe with some new caulking and you're done. This problem gets more involved anytime there is wood in the picture.
The first clue that there was a problem was year or more ago. I noticed a drop or 2 of water gathering on the inside bottom edge of the aft portside wall of the cabin - not near the where the drain is. A look underneath showed that the aft wall of the cabin is screwed and glued to the main beam that crosses the boat and which supports not only the aft part of the cabin but the front edge of the bridge deck. It seemed that the water was coming from a tiny gap/seam between these 2 pieces - which led me to think that there was some kind of leak outside on the top of the bridgedeck/seat. But outside it looked ok, so I just worried about it, and did nothing.
Starboard side seat drain. That square piece in the forward edge of the coaming? A few years ago I replaced a soft spot in the coaming - adds character...
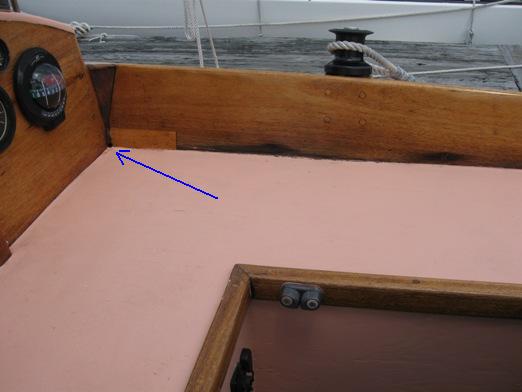
This past season, the leak seemed to get worset It was coming from the same seam/gap but now also right at the 'knuckle where the cabin walls come together at the lower port side and join with the seat and combing. Through that knuckle is where the that little drain pipe comes out. Here are pictures of the starboard side drain pipe system.
Starboard seat drain 'system' - port side identical.
|
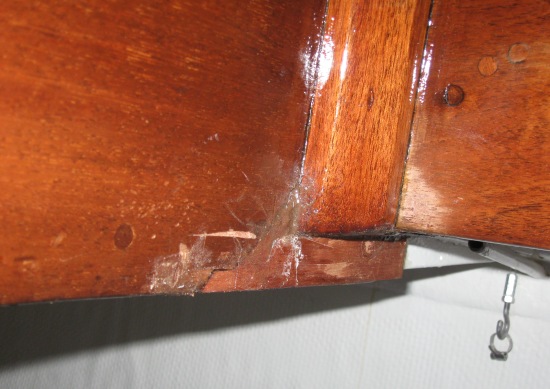
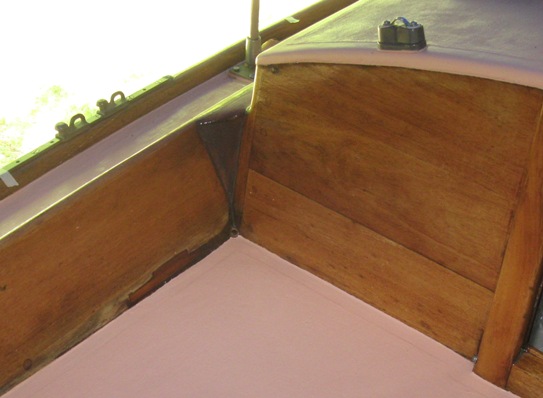
This is an interesting corner. I call it a hanging knuckle. Its one of the most complicated parts of the boat. This picture is the starboard side corner - in the center is a corner molding.
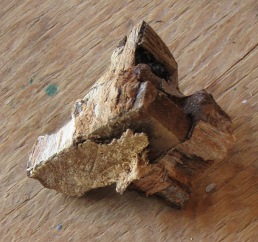
So I probed around with an ice pick in and around the port side knuckle in the area outlined. The varnish was nice and shining and stiff but underneath it was all soft! I exchanged my ice pick for a thin router bit on the end of a Dremel tool and, not long after, out came this chunk below.
|
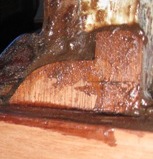
The knuckle, pretty... |
The chunk, pretty ugly |
Now what. The 1/2" OD stainless steel drain pipe came out nicely. A little probing on the outside indicated a very little rot, except that there was a 'cavity' under the paint about the size of a quarter. And with the ice pick poking in through the drain hole I found/felt larger irregularly shaped cavities branching out around where the drain pipe was! These cavities basically surrounded the 'knucke'.
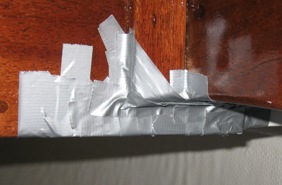
It seemed like what we needed was a dam at the bottom, some tiny bits of mahagony to use as fillers, a West System syringe and nice syrupy epoxy. We would insert all this stuff through the hole outside which ideally would flow all around, the epoxy encapsulating the bits of mahagony and eventually fill the cavities. Using chisels and the Dremel router I squared off where the soft wood was in the cabin, cutting out all the soft wood I could reach. As it happened I had some 3/4" mahagony board ends and scraps which I cut and shaped to press fit into the the dam hole :-), and then duct taped the gaps. Not pretty but this is what it looked like.
|
|
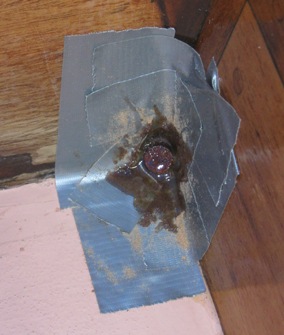
Wonderful stuff - duct tape |
Finished with a 5/8" dia tapered plug |
Above right is the 'fill hole' outside on the seat with the plug in place. The cavity inside was pretty large - it took a nearly a handful of tiny pieces of mahagony and a maybe 4 ounces of epoxy to fill it. I carefully chiseled the plug until it was fair to its adjacent surfaces. As I chiseled I noticed the painted edge of the seat lifting - there was another void under the paint! I drilled a 3/8" hole through the paint, mixed up some epoxy with mahagony wood sawdust and using an ice cream stick, filled that cavity as well.
 |
Tape's off! Above you can see the shape of the front part of the dam - its 3/4" wide, about 4 1/2" long and about 2 1/2" high. The second piece at left is smaller but extents up higher behind the corner molding. This is on the backside, harder to tape up the gaps tightly so more resin oozed out but no one (except you guys) will see this and later it will be chisled square and painted white. |
Another look - still, not bad!
 |
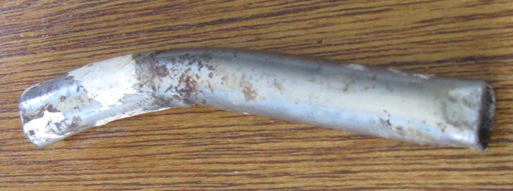
Now for the drain pipe. I did straighten the old ss tube but it was deformed on the ends some and it was very stiff. Bending it after it was inserted in the new hole I was going to drill might be hard as just a short section would be protruding on the inside. Maybe when it was originally installed it was longer, then bent, then cut off?
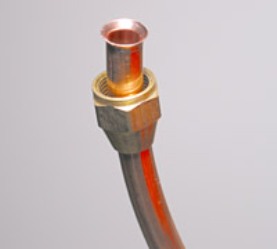
It seemed to me that a 1/2" OD 'flexible' copper tubing, flared on one end might work. A friend had a piece of refrigeration tubing in his garage with a fitting. We cut 6" off of the tubing, slipped the fitting off and it looked just right.
|
|
 |
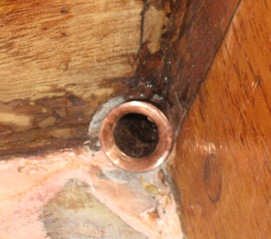
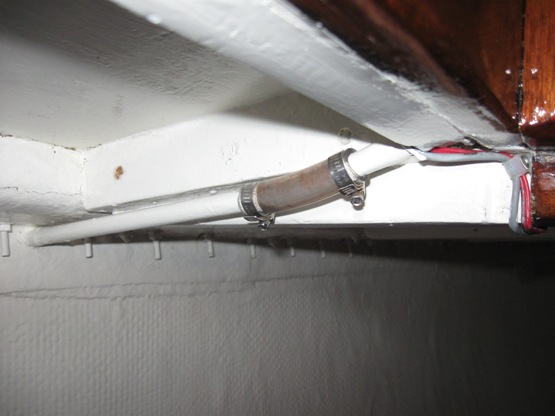
I chiseled the plug even with the surrounding surfaces and drilled the new 1/2" hole, a bit larger. I used a syringe to drip some epoxy in the gaps. I also chamfered the opening a little bit more than necessary so I could press and keep some mahagony colored caulking in the gap under the flare. In the picture at left above the tube is not yet set. At the other end I put a 3/8" drill bit in the tube and bent the tube up so it was more or less in line with the tube coming from the hull picture above right. The flexible clear plastic tubing, held in place by 2 hose clamps, will take up any misalignment. I will use a 3rd hose clamp tightened up against the wood where the tube exits the knuckle to help hold the tube in place.
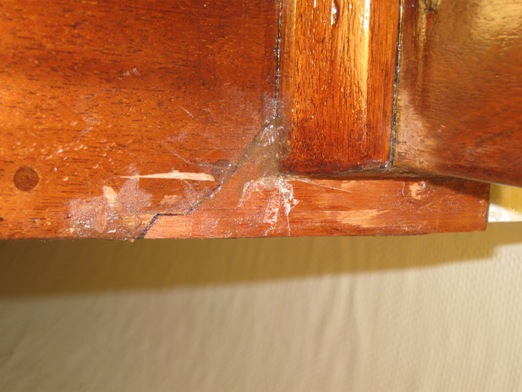
Ok, its done. Here's a couple of pictures.
|
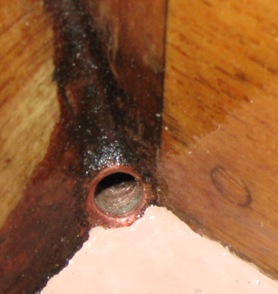 |
Inside |
Outside |
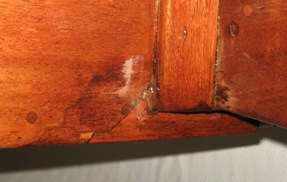
I hate these close ups - at 50 yrs old Marionette is entitled to have a few wrinkles. At 10 feet she looks great - and hopefully won't leak.
A few years ago I had to make a coaming repair on this side as well - different wood colors add character...
********************************
November 5, 2011. She didn't leak....
|