|
February 7, 2022. Garrett posted his portlight replacement project on the Dolphin24 Facebook page, February 5, 2022 (https://www.facebook.com/groups/dolphin24sailboats).
He sent in the following for our Technical Section - Portlights Repairing and Replacement - This is an alphabetically organized section Click this link and scroll down http://dolphin24.org/technicalindex.html
Ron,
Attached is a writeup on the new portlight install. It is a lot of info with not many photos. I am going to try to take more photos on future projects. Hopefully this write up will prove useful for someone. Thanks
Garrett!

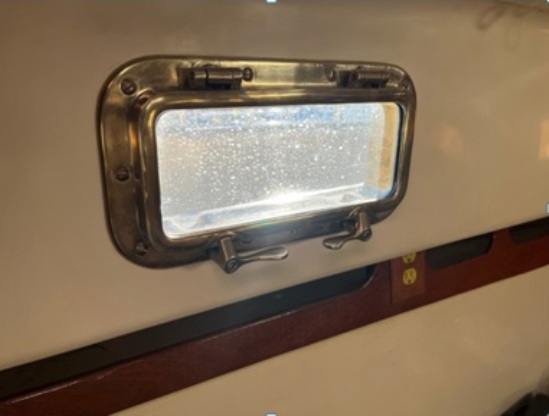
- Original ports were a white plastic with acrylic lenses and a plastic interior trim ring.
- Acrylic was yellowed badly and crazing, no way to see out.
- I found there was no "core" on the cabin sides. At first I thought maybe the cabin side core had rotted away but this was not the case as it was consistent and there was no evidence of past coring. Also there was wiring ran through the space. It appeared the coring of the deck and cabin top was isolated from this space with fiberglass.
- The cabin side hull was roughly 1/4" thick with a 1/8"-1/2" space (varied) and then a 1/8" hull liner on the interior. At first I considered filling the void with epoxy around each port. Instead I filled it with 4200 and used the exterior trim ring to "clamp" the hull and liner together.
Removal of Original Ports
- I removed the interior trim ring that was held on with screws into the plastic frame.
- Two ports were installed with what I believe was 5200 the other four with some sort of yellow epoxy that was somewhat soft.
- Using a heat gun a scraper and a chisel I was able to pry them out.
- Cleaned everything up with 40 grit sand paper and a dremel(wire wheel and grind wheel attachments).
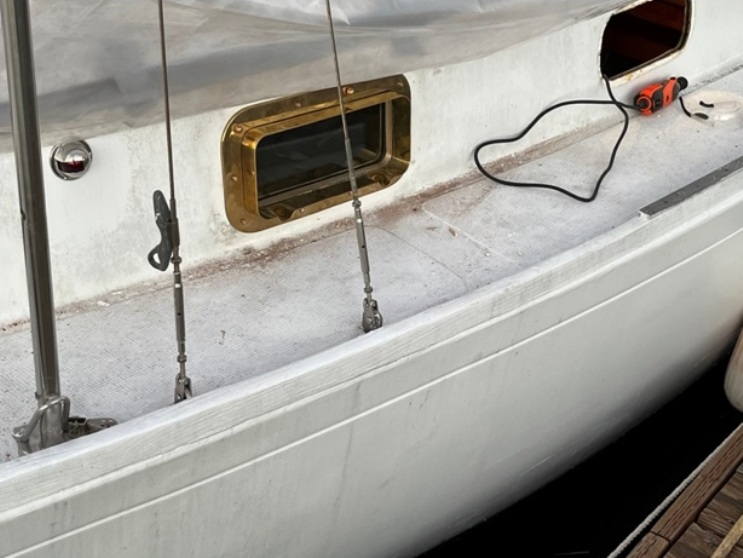
- The ports I have are an older New Found Metals model(mid 90s). They use ten 1/4" fasteners each. I ordered 1/4"-20 oval head bolts and acorn nuts from Fairwinds fasteners. Opted for oval head over flat head for the aesthetics.
- First I needed to cut the existing port opening larger as the new ports were slightly taller than the original. I cut roughly 1/2" on the top of the existing hole using a jig saw. Width of the new ports worked with the original width.
- Dry fit the ports and cut all bolts to the proper length. Due to expected varying hull thickness I ordered the bolts long. I ordered them as 1 1/2", probably would have been fine with 1"
- After extensive prep with 150 grit sand paper and acetone I wet set the ports. Used an entire tube of 4200 for each port.
- Sealed around the opening and filled the space between liner and hull with 4200
- Applied sealant on the interior port and pushed it through the opening
- Then applied sealant on the exterior trim ring and pushed into place
- Tightened all fasteners. The hull and liner came together nicely and I liked the way the sealant was squeezed by the clamping action.
- I waited until the 4200 dried before clean up. This worked well with acetone and a chisel although it was very time consuming.
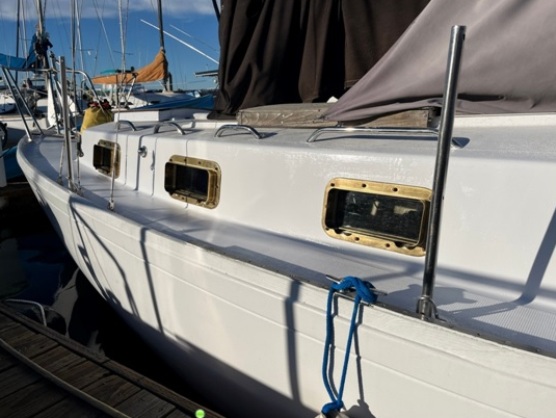
- All new paint on the cabin sides after sanding and prep
Notes
- Front two ports were limited in space due to the forward bulkhead. Luckily by removing the interior dogs and port glass I was able to install the frames and then install the dogs and glass. The front two ports only open slightly due to bulkhead.
- I considered installing a forward facing port but felt the angle may cause an issue with water collecting in the port spigot and leaking or dripping when opened.
I plan on having interior covers for the ports sewed.
Stay tuned (click here to go to #262's home page)
|


