|
November 7, 2013. We have been working on this awhile, and now, we're ready to introduce Blue Gum's dinghy. Over the past 12 years or so Alan Mountford has been restoring Blue Gum, his Falcon 24, launching her a few weeks ago in Queensland, Australia (click here to go to her page - a trip worth taking) and turned his attention to her dinghy. Her introduction is covered in the exchange of several emails between your webmaster and Alan - they tell the story.
We'll reserve this space below for a fully finished photo - in the meantime this will more than do.
Click on the picture for a larger view
IThe exchange of emails started just over a month ago with an ending comment from Alan on his email announcing the launch of Blue Gum
Now I have to finish building a plywood dinghy. The rubber ducky I have is a pain in the proverbial to row I found out as we came back from the mooring. I much prefer a rigid dinghy and the design of the one I am building is one I have had before.
Regards
Alan
*************************************
Hi Alan
I forgot to mention 'TEER, Marionette's dinghy. Have you seen her? http://www.dolphin24.org/teer.html. Your dinghy project needs some international exposure - and pictures
Ron
********************************************
Good Morning Ron,
Thanks for your e-mails. I had a look at the link for your "Teer". You certainly have done a beautiful job of her. When I built my first keel yacht I needed a dinghy so I decided to build one same as I had seen at the Auckland Boat Show. The designer built one there during the duration of the show. It was what he called stitch and tape construction. It looked very simple, quick to construct and nice and light.
So I went to see the designer and bought the plans and construction manual. The plans consisted of full size paper patterns of the components and a diagram of how to lay them out on the plywood sheet. The components were cut out and joined where necessary and then the bottom panels and side panels are laced together using builders line (polyester line about 1/16th diameter). The seams were then taped inside and out with one layer of 2 inch wide synthetic tape the designer supplied. (Synthetic tape - probably polyester - is better than glass tape as it will not split like glass tape can) The whole dinghy is built from just two sheets of 4mm plywood with a small amount of wood framing.
I towed this dinghy for thousands of miles around the Auckland area and northern coast of NZ. On only one occasion did I ever have a problem with it and that was when I beat around the end of an island in Auckland and onto a beam reach in 40 gusting 50 knots of wind. The dinghy flipped upside down on the crest of a wave. Seas there were running up to 6 feet high. It was quite a job to right it again due to suction - but managed eventually roll it back upright and tow it close to the stern until I got into shelter about a mile further on.
When I came back here to live I decided to build a sailing version of this dinghy in fibreglass with a balanced lug sail rig. As the original design appeared too full in the stern I modified it and reduced the transom width by 4 inches. However this dinghy turned out to be quite heavy so my decision to go back to plywood which is much lighter. The tucked in stern looks a lot better so have stuck with that again this time too. Will take some construction photos for you
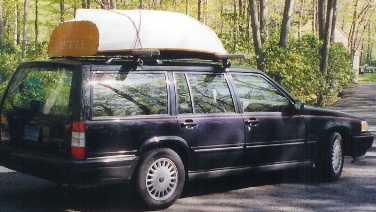
I will transport the dinghy on roofracks on my car. This website I came across several years ago shows an easy way to load the dinghy onto the roof racks and will copy this design for my dinghy http://www.pbase.com/onceagain/cartopper
Regards
Al
**************************************
Alan
Thanks - when you send in some photos of the dinghy I'll consolidate this and get it up in our Technical/Dinghy section.
re the dinghy loading on roof rack - my dinghy weighs only 42 lbs (19kg), which helps - I used to just manhandle it up on the roof rack. In recent years I sometimes I use a couple of 2"x4"x8' boards and tilt them against the edge of the rack about 3' apart - no cross ties. Then I carry the dinghy over to the car and tip the dinghy against the boards, and push up, sliding the dinghy up. Once the gunnels are over the rack and at the end of the boards I continue pushing it and the gunnels drop off the boards and on the rack. Then I slide the dinghy across the rack. It isn't always pretty but....
The system website link you sent reminds me of my rudimentary rack 'system' but also the system I've used to get the dinghy up in the barn for winter storage (above right)
Ron
***************************
Hi Ron -
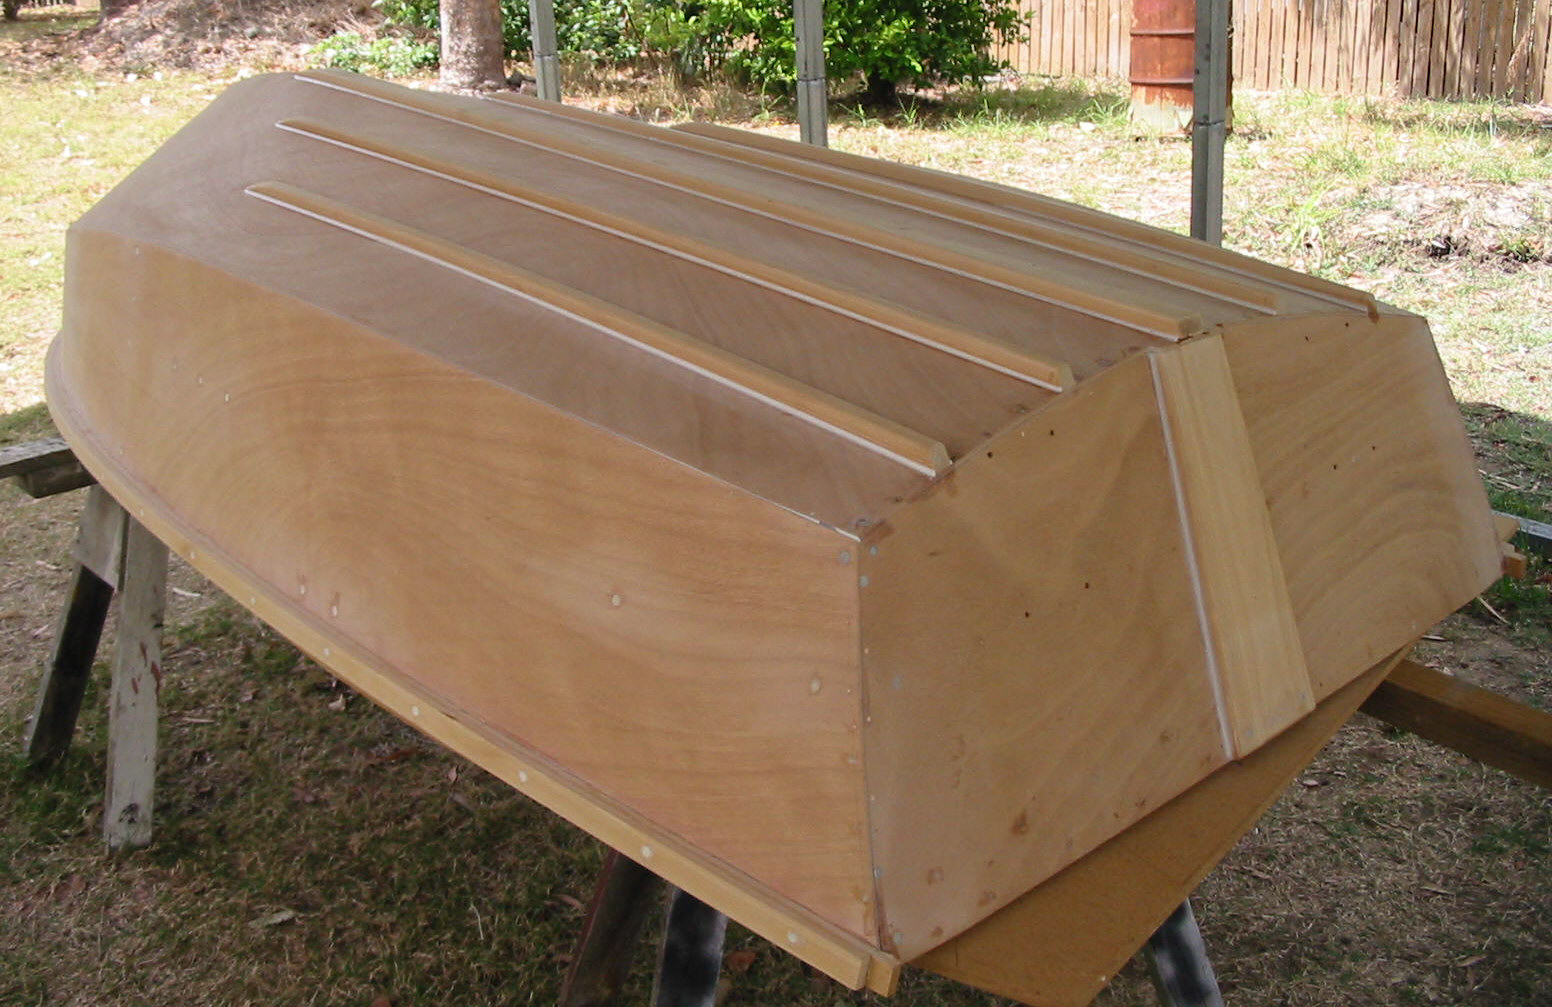
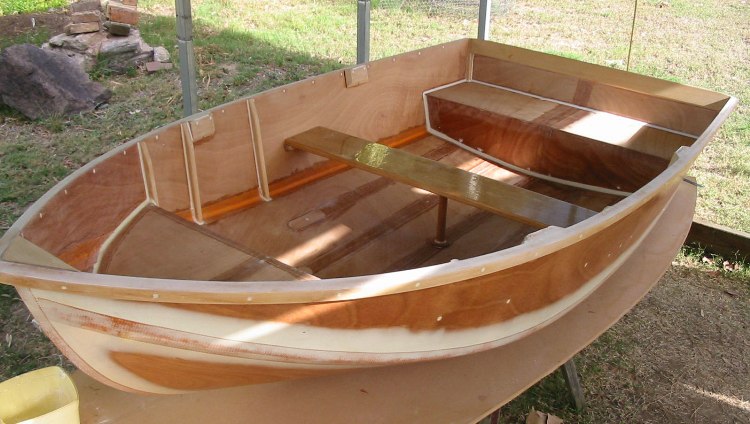
This is where I am up to with the dinghy construction. I admit it is not as pretty as "Teer" - but a very practical design anyway. It is modified from a plan by NZ boat and kayak designer Ron Augustin. I modified it by tucking the stern in 4 inches. Used to look as if it was sitting bow down with such a full stern.
|

Click on the images for a large scale view - click the return arow on your browser to get back here
|
The original dinghy I built to the original plans towed and rowed extremely well. It was up planing if I was doing more than about 4.5 knots. I towed it for over 4000 nautical miles around the Hauraki Gulf and Northland coast of NZ before selling it with my yacht at the time. The sides, bottom, stern, seat tops and fronts were all cut out of two sheets of 4 mm - 8' x 4' foot Gaboon plywood after marking out with full size paper patterns.
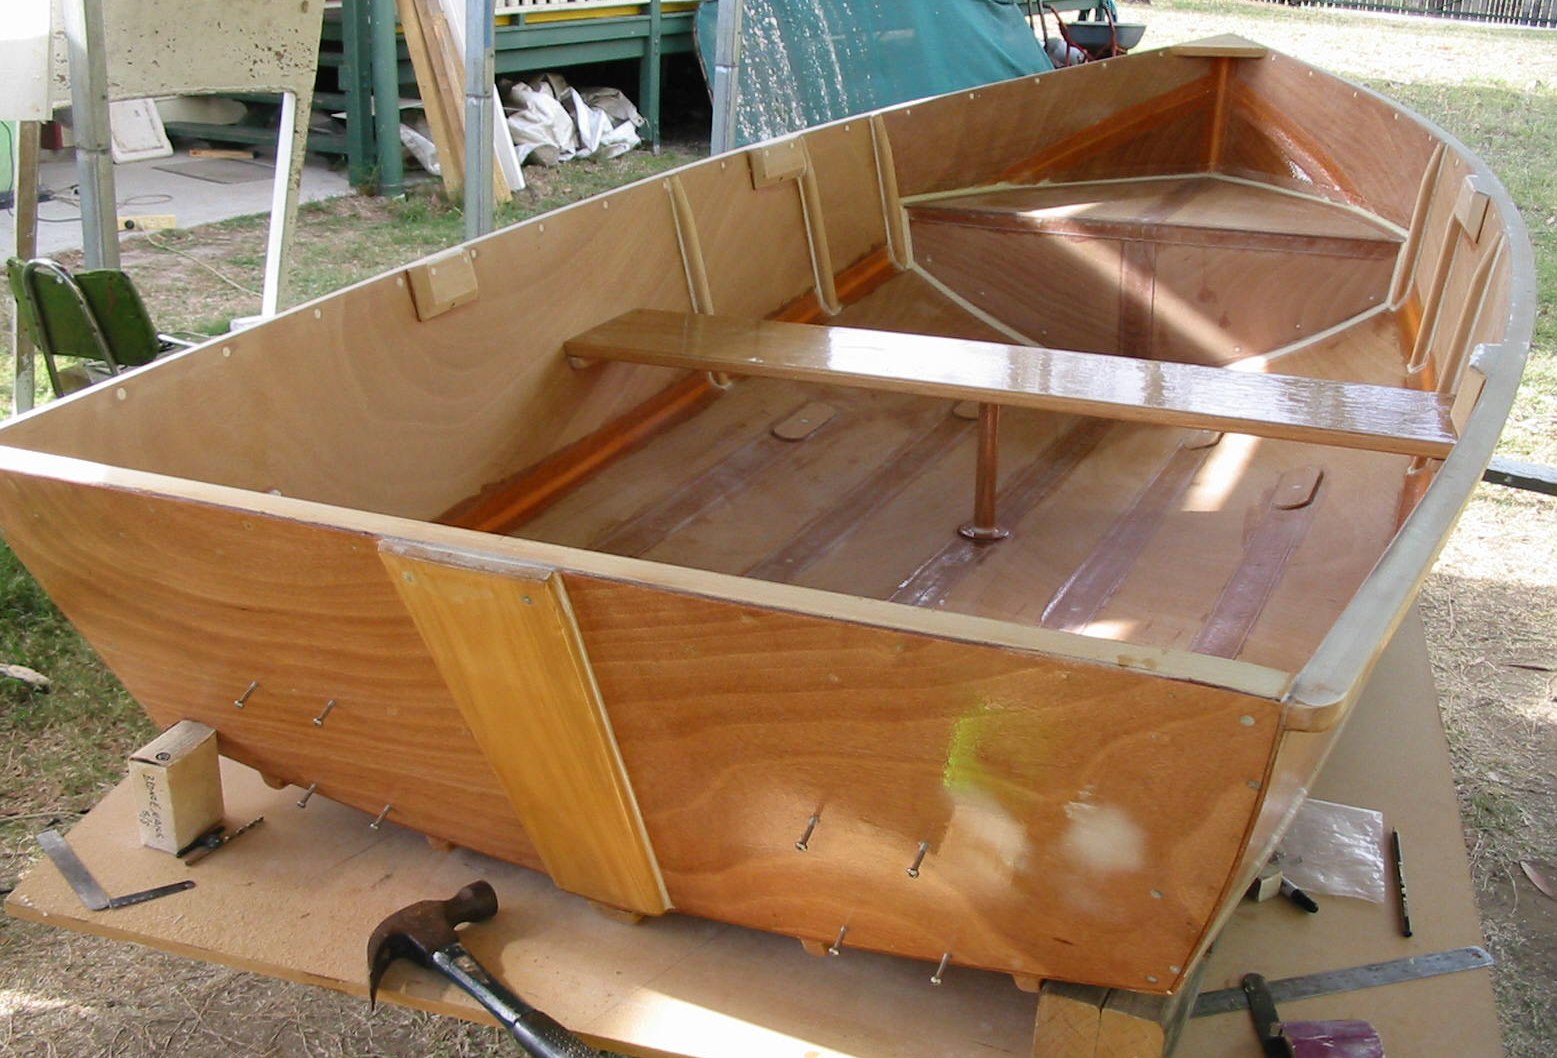
There is some wood framing fitted to the stern plywood piece and the bottoms and sides are laced together using builders line. The inside joint is then filleted with epoxy filler and faired off. I used polypropylene tape used for binding the edges of horse rugs to tape the side / bottom joints - one layer inside - one outside. The tape is woven the same way as seat belt webbing. The inside seam is taped first and wet out with epoxy resin.
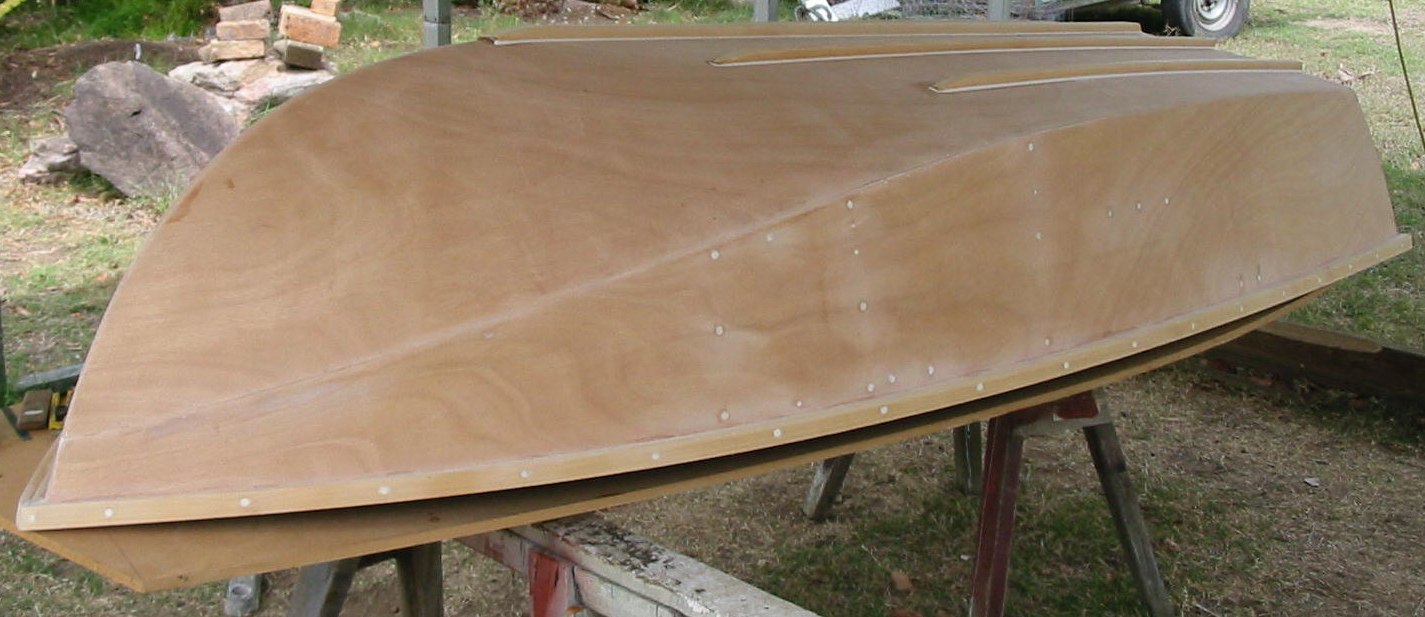
Once cured the dinghy is turned over and the builders line is cut off and the corner rounded over. Then the outside layer of tape is applied and wet out with epoxy resin. This makes a much stronger joint than using 6 oz glass tape as is commonly used In fact I made a sample piece first and then did a test to destruction. The plywood between the two layers of tape shattered but the tape didn't split or peel off the plywood. This means the joint is stronger than the plywood.
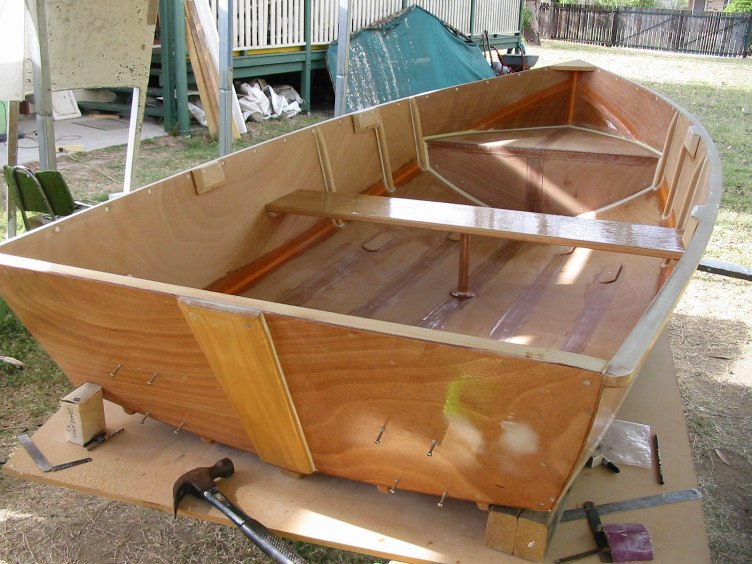
Some stitch and tape dinghys use copper wire to hold the pieces together but I find the builders line quicker and easier. Lacing holes are spaced between 2 and 3 inches apart and then the line goes up through the bottom hole, through the side hole then under the line from the previous hole then along to the next bottom hole, through the side hole then under the line from the previous hole and so on. After lacing go back and work the line tight to hold the two plywood edges together. I faired off the tape on the outside with epoxy filler as you can see in the photos but left it as is on the inside.
Click on the images for a large scale view - click the return arow on your browser to get back here
I need to epoxy coat the inside 2 coats, put a second coat on the outside - then sand it and paint it. Acciording to the plans the finished dinghy is supposed to weigh about 23 kilograms. It is light enought to carry easily with one hand under the centre seat.
So, getting close to finishing.
Regards
Alan
ps One point I forgot to mention is that those vertical strips of wood on the sides of the dinghy were put there because I was sold bad plywood. They shouldn't normally be there. Worst plywood I have ever used!! I didn't know till I got it home and started cutting it up - but the sheets had internal stresses so it bowed and bent after I cut it. Without those strips one side had a 5/16th inch hollow in it due to these internal stresses. However, despite that the hull has turned out reasonably fair.
I haven't got a name for the dinghy yet- but have thought of just calling it "Blue Gum's Dink"
**************************
November 8, 2013 About the plywood - 'TEER was lapstrake built with 1/4", 5 ply Brunzeel Okume plywood. This plywood is also known as Gaboon plywood. The number of plys is important - more is better as the wood takes compound bending stresses better. I cut some of 'TEERs strakes using a cheap 3 ply material just to get patterns and, besides the plys having lots of voids, it was very difficult to bend to the shape needed. The Brunzeel plywood was perfect and bent to the form needed without problems. Looks like Alan just got a bad lot, or maybe mislabelled product. Here is a good website article by the North American distributer that explains the Gaboon Brunzeel material http://www.mcilvain.com/bruynzeel-marine-grade-plywood/. To read about 'TEER's construction click here
The exchange continues, with interesting commentary on towing. We are getting into the minutia here so be forewarned.
|
'TEER, while tracking fine, tows like a 'lead brick' - this measured by the affect on Marionette's boat speed towing vs not towing - its about 1/2 knot slower towing with the outboard at full throttle - that's 4.7 knots vs 4.2 knots in flat water using Marionette's 4hp short shaft motor. Marionette is about 1/2 knot faster with its 4 hp long shaft motor but has not been tested in towing 'TEER mode.
As this picture shows 'TEER throws off a bigger stern wake than Marionette does - Marionette's is negligible. This picture is 6AM, flat calm, motoring, leaving Blue Hill, Maine dodging lobster pot buoys. Her designed towing eye is low, about 2" above the bottom of the front transom. A bridle was set up to test height effect. Strangely, she rows and handles beautifully - maybe she needs 200 lbs of ballast when being towed?
|
This was communicated to Alan and our exchange follows:
Hi Alan
I updated the dink's page and added a comment about the plywood. Our boats have different construction methods so I imagine the bending stresses are different. How many plys are in the wood you used?
I think the boat looks really good. I wondered about the vertical strips but did not think the appearance was bad. I am jealous of planing at 4.5 knots - mine seems to tow like a lead brick - not sure why. I have played with the towing bridle location. Maybe I am just below her planing speed?
Ron
ps One reason I chose this design, besides being pretty, was that she was light enough for me to put up on the foredeck and not have to tow her - she's never been there....
***************************
Good Morning Ron,
Yes - I think I just happened to get a bad batch of Gaboon plywood. It had been stored correctly - ie flat on a rack so that wasn't the problem. It is 3 ply but I notice that the centre ply is more than twice as thick as the outer plys and that may be part of the problem. I have bought about 6 other sheets of 4mm Gaboon 3 ply in the past (from different outlets though) and it has been nice and stable. With the first dinghy I built to this design I didn't have any problem with fairness when the ply was bent and nor has any other design I built. You are right - more plys are better - but in that thickness 5 plys would not be common.
There is a vey simple reason as to why Teer - as you put it - tows like a lead brick. It is because it is a displacement hull shape - not a planing hull like mine. Have you ever held the back of a spoon into a stream of water from a tap? You find that the spoon gets sucked into the water flow. This effect is known as Bernoulli's principle. Teer's shape is similar to a spoon and the same thing happens - it gets sucked into the water at speed. Towing eye location won't really make much difference.
|
|
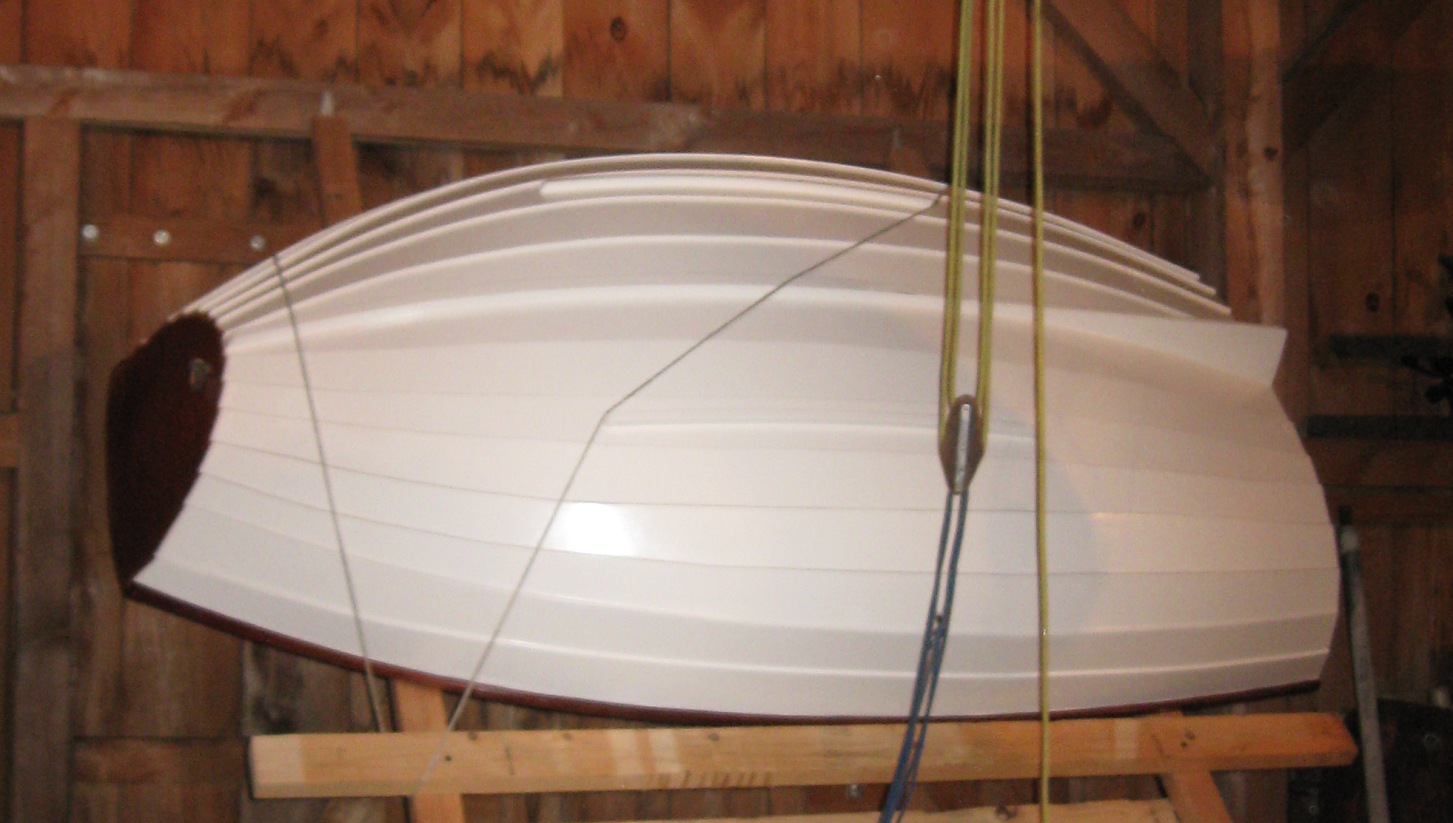
'TEER's hull shape |
Dink's hull shape |
Click on the above images for a larger view - click the return arrow on your browser to get back here
While your hull shape makes for a really pretty looking dinghy I feel it isn't the best design as a tender for the reason you have found. As a sailing dinghy it would probably be faster than mine in light airs though. The stern of a planing dinghy at sub planing speed, because of it's shape when heeled, creates a lot of turbulence when immersed whereas with Teer's design you don't get that same turbulent flow off the stern.
Hope that explains things for you.
Regards,
Alan
************************************************
June 26, 2014. Here is the finished dinghy. Now we need a picture with a sail. Alan's email below the photo excerpted.
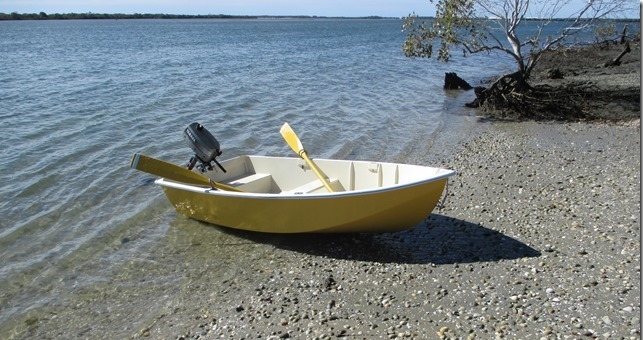
Hello Ron, Finally have got a photo of Blue Gum’s Dink while I was out sailing today. Alan
**********************************
|


.jpg)