|
Jerry Slaughter has got a major restoration project going on with ROWDY, his Marscot/O'Day Hull #5. This page deals with the galley and the bulkhead separating the galley from the portside quarterberth.
August 18, 2013. This was Jerry's first email on this project
Hi Ron,
I worked a little on Rowdy's galley today. I got some paint in the lockers, attached a Fawcett pump, and set up the rails for attachment when I get a long screw driver bit that can handle a small screw. I also put some fairing goo on the main bulkhead. I'll be working on that tomorrow.
I pulled off the lazerette hatch and trim to rework at home. Tomorrow will be fairing and painting and maybe taking apart the stove platform that is partially rotten (pessimistic) or partially good (optimistic) hmmm.
Jerry
**********************************
September 9, 2013. Jerry's insatiable when it comes to rotten wood..A couple of emails have been consolidated and minor edits
Hi Ron,
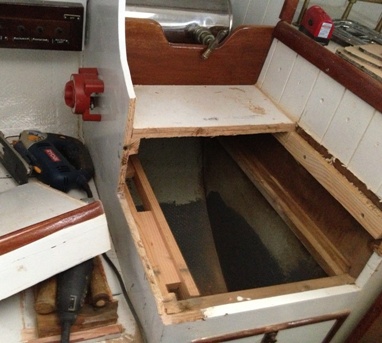
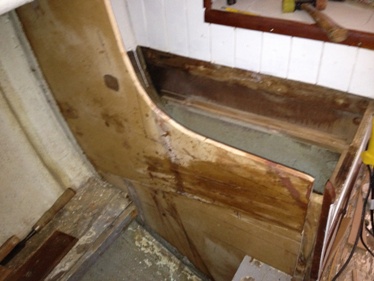
I've ripped out Rowdy's galley bulkhead, the one that separates the quarter berth from the galley stove platform, and the stove platform as well. I know other dolfinites have done this, and please ignore this dissertation if you wish, but I just happen to have my handy dandy photophone with me when the pieces came together.
|
The picture at left shows the flanges after the old bulkhead has been removed. Those flanges (white arrow) will be used to align the new bulkhead(BH) and will be tabbed to the new BH.
The stove platform next to the BH pulled out as well, leaving just a few rusty screws behind. I didn't rip out everything in the galley, some trim was left in place so I had to work around it.
The above shot shows the new BH dry fitted. It is messy looking because it was made up from 6 pieces of scrap and then used as a platform for a varnishing project. Sandpaper, primer and paint will make it look great after I glue it in.
|
I'll use the flanges to attach the new bulkhead as well as lining everything up. I cut some one inch strips of door skin to make a pattern of the bulkhead, hot gluing the strips to show the outline of the structure and then using the old bulkhead to trace any curves..
|
|
|
Upper left photo shows the 'strip' pattern I made overlayed on the new bulkhead.
The above photo shows the new bulkhead made from scrap pieces. Not too much to see here but you might be able to pick out the several pieces of scrap material I glued together. The size of the two main pieces was driven by what I thought I could force into the space allowable. Ain't epoxy grand!
The photo at left shot shows the pattern layered over the old bulkhead to show the extent of the rot in that piece. There was a little more to the bulkhead but it pretty much crumbled away when I took it out of the boat. As you can tell, there wasn't much bulkhead left so the whole dismantling process was reduced to simply pulling rotten wood out of the flanges attached to the hull.
|
The new bulkhead is made from 1/2 inch MDO (medium density overlay), that's the stuff they use for highway signs. It has a marine glue and smooth paintable surfaces. I made the piece in two parts to make it possible to insert the bulkhead around existing structure. Even with all the pattern making and scribing, I still had to cut here and trim there to make the darn thing fit, but fit it did.
The next step will be to glass the bulkhead to the flanges and glue the two main pieces together, fair the fillers and lay in the new stove platform, then move on to quarter berths. I'll also be working on an engine enclosure and trying to figure out how to get the engine in. Has anyone ever cut a hatch in the cockpit for engine access? I would appreciate any thoughts you might have. (Webmaster Note: Stay tuned - we are working on this)
My hope, in bringing some of this stuff to the site is to illustrate that almost anything on these old boats is doable. You probably remember the pictures you had of Rowdy's interior before I took her home, it was a mess inside but with a little spit and polish (paint and epoxy) she will sail again, that is if I don't slip and fall off the darn ladder.
Regards, Jerry
*****************************************
September 23, 2013. Galley report, continued.
Hi Ron,
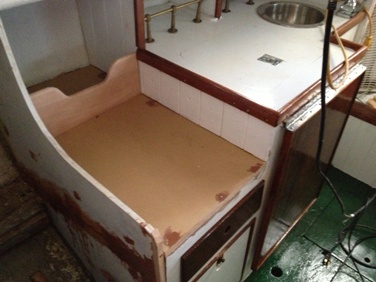
I finally got the galley put together. The bulkhead is attached and glassed to the hull, the drawer slides are in and working, the stove platform is attached and some trim has been added. I thought a locker behind the stove would be about right for the coffee pot, condiments and a couple of cups. Next will be a lot of fairing, primer and some paint and varnish.
Click on the images to get a larger view
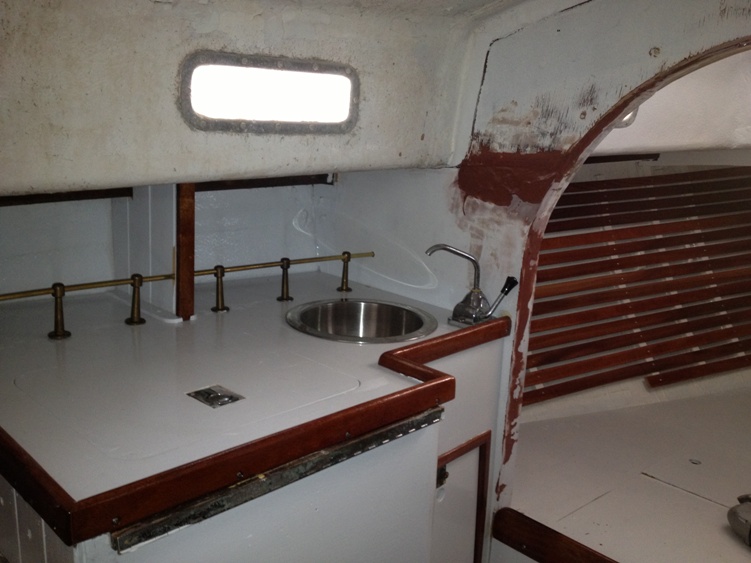
We missed it earlier but we're going to need some comments from Jerry on that pin railing in back of the sink and fridge top. Here they are!
Ron, those are bronze stanchions I salvaged off an old 1920's power yacht that was being broken up in Houston. They have been sitting in my "extra boat stuff" boxes for years waiting for the right application. I had them thru drilled and used a brass rod as the connector. Neat, aren't they. Jerry
|
|
The next big project will be the repair of the port side berth and some planning for the engine compartment and a battery locker. I finally painted the cabin sole dark green. I may change that but for now at least it is one color.
Regards, Jerry
September 24 ps - the tilt up table on the front of the ice box - I had to re-glue and patch some veneer on the table. I kept bouncing between replace and repair but settled on repair. I had to make two pieces of edge trim and then stripped, sanded and varnished the top side of the table and painted the underside white. It could use some more varnish but that will not happen until the dust settles.
Webmaster Note: To those who may have noticed that some of the stanchions in the pin rail appear 'tilted', Jerry advises they are not yet fastened. We'll be waching....
*********************************************
February 10, 2014. Its been a few months since we last updated this page but recently, stuff has been happening - here's the catch up and latest. On February 5 Jerry advised the following (emails excerpted and minor edits)
|
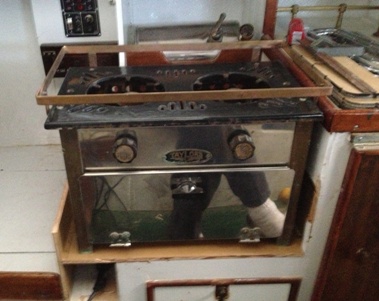
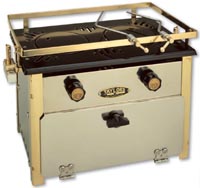
I've decided to make a major change to the stove platform. I've had a Taylor 029 stove sitting in my garage for years and I think it would do well in ROWDY. The thing I like about it is the small oven so you can make cookies or biscuits on a frosty foggy day at anchor.
Unfortunately it is 18" wide and the stove platform is 13". I'll build a cubby hole for it that will extend 5" +/- into the port side bunk space. My plans now are to use that bunk area for storage and the starboard side for sleeping, when necessary.
I'll let you know when I start chopping up the galley.
Jerry
Photo at left from http://www.blakes-lavac-taylors.co.uk/taylors_029.htm
|
Then, this happened
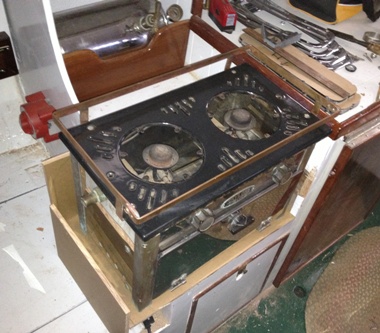
|
I took the saw to the stove platform and got the new platform roughed in. I still need some insulation to keep the heat under control and I think Bed Bath and Beyond may have what I need.
Since the stove took over the space previously holding a drawer, the drawer will have to be relocated, probably to the other side of the cabin.
|
************************************
February 24, 2014. We got the following update from Jerry (excerpted edited)
|
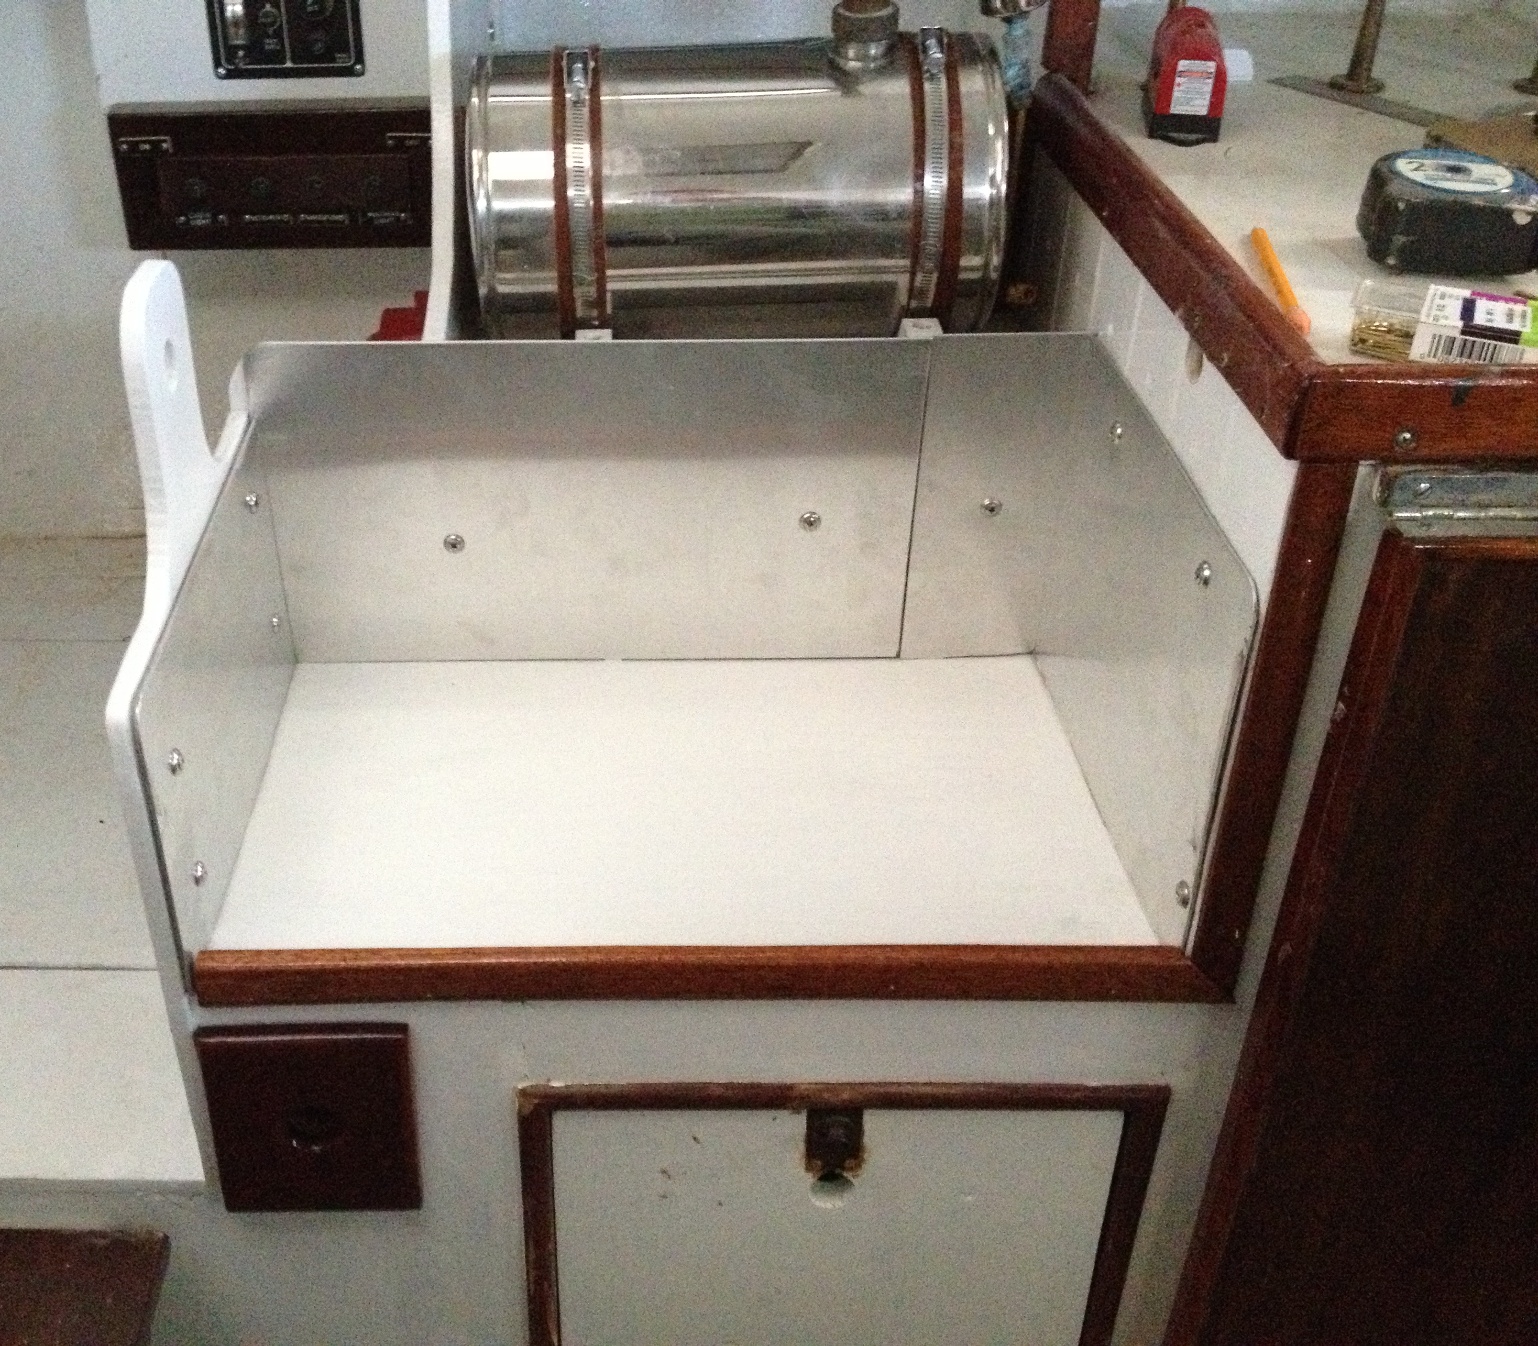
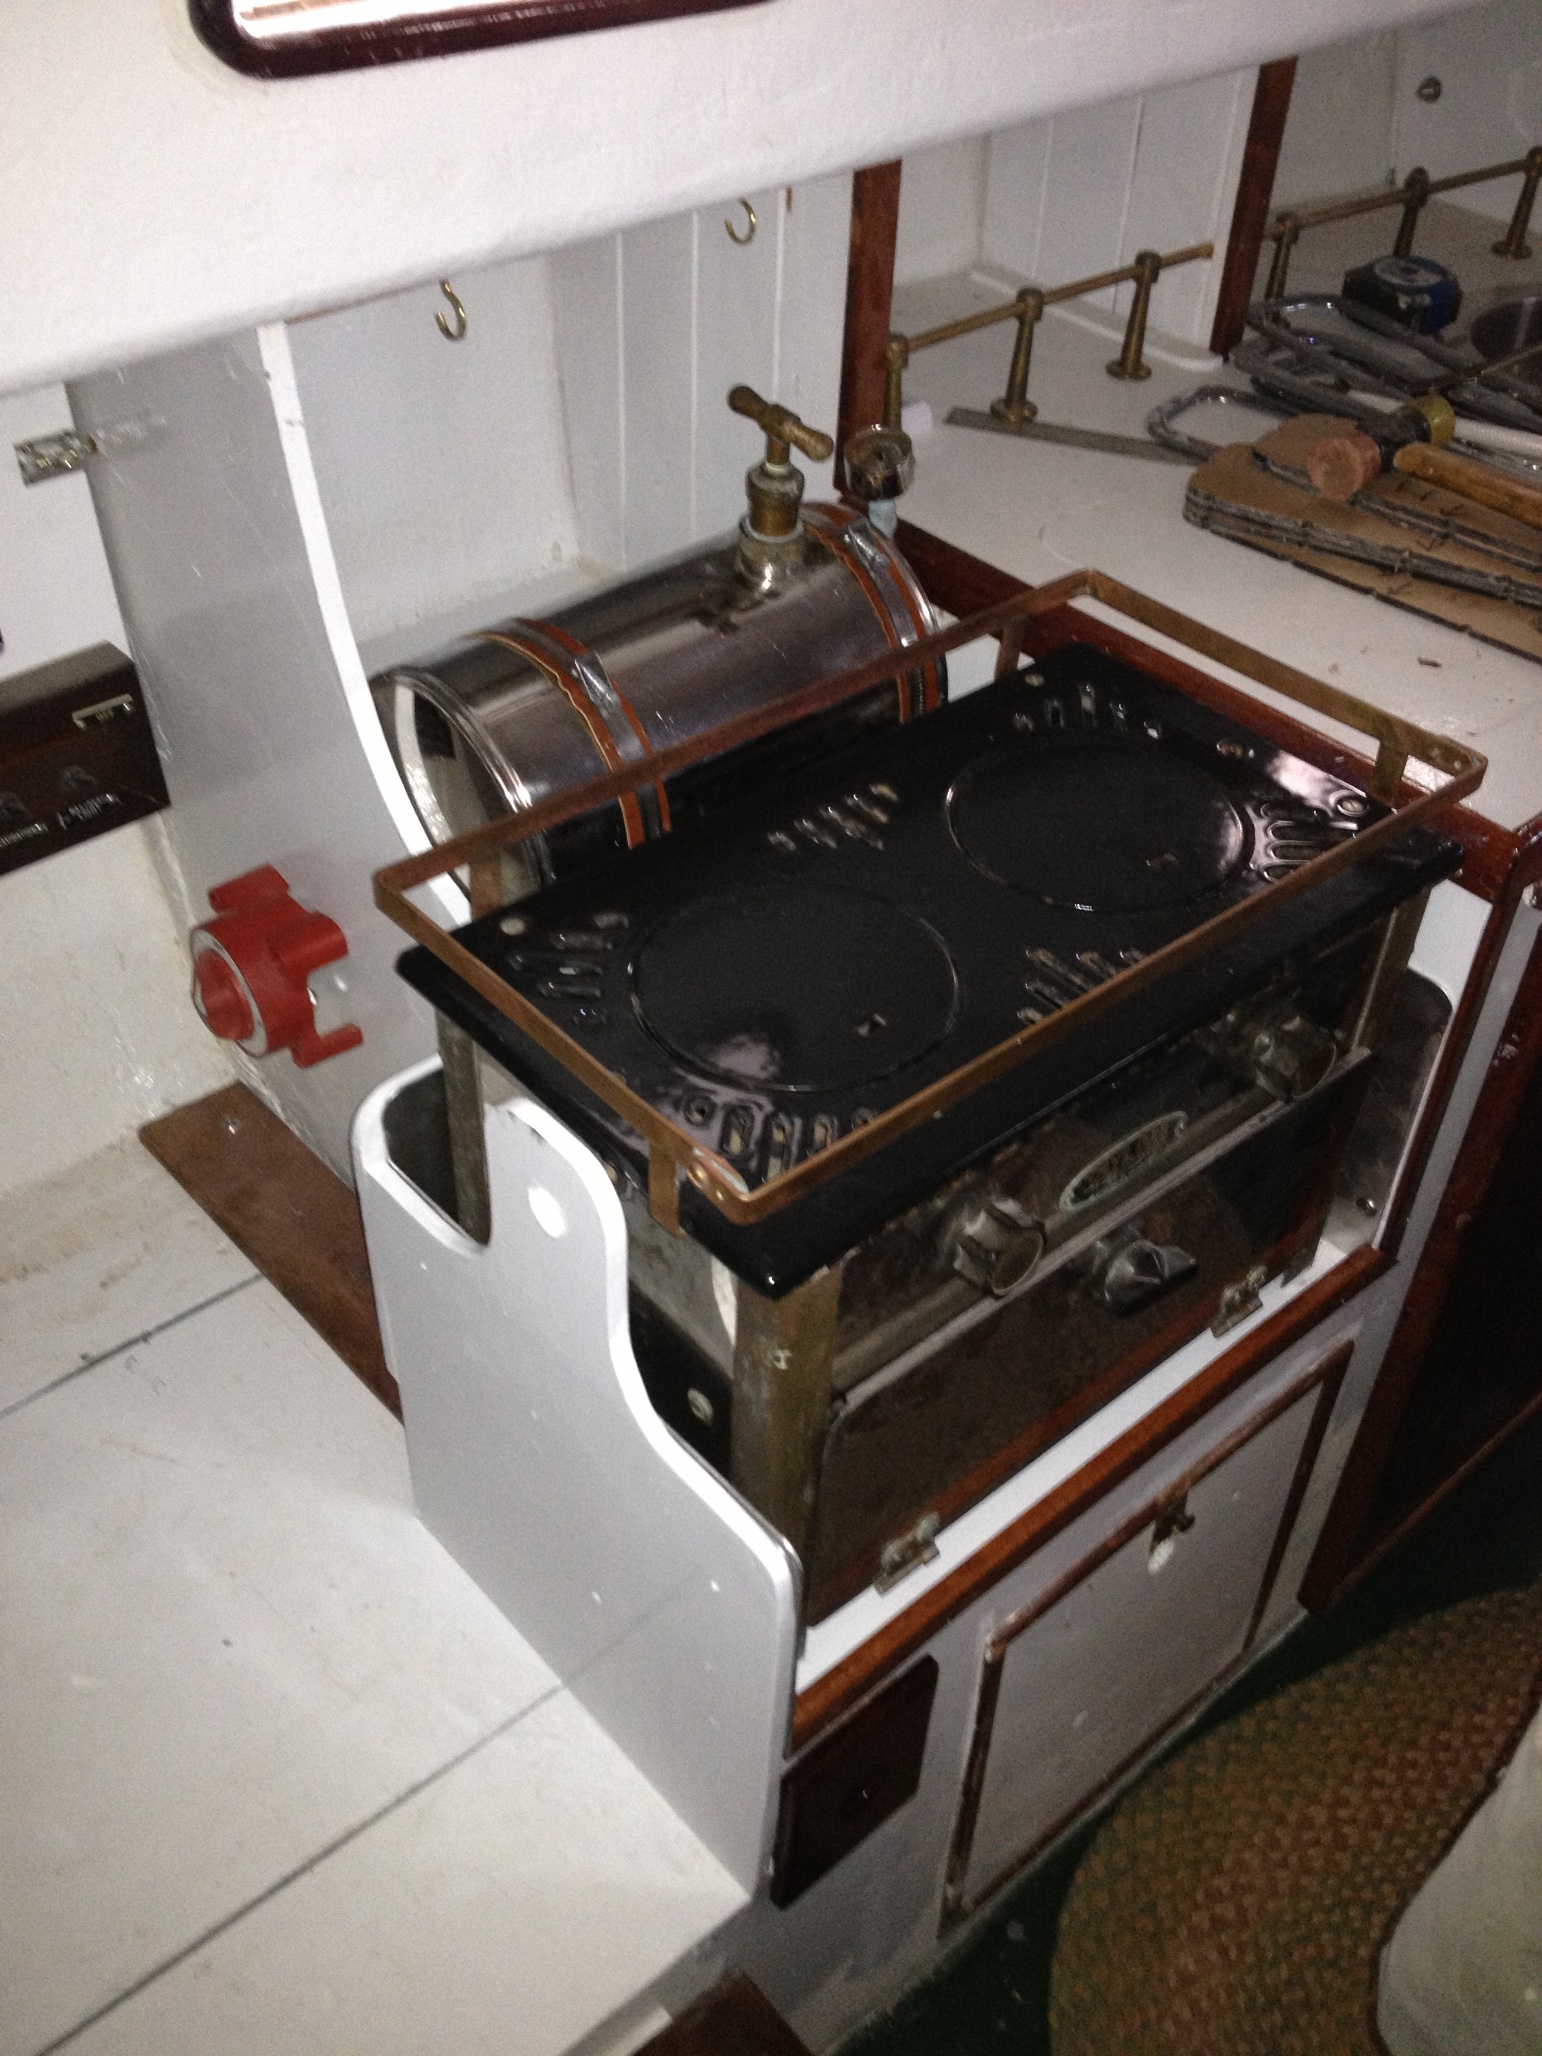
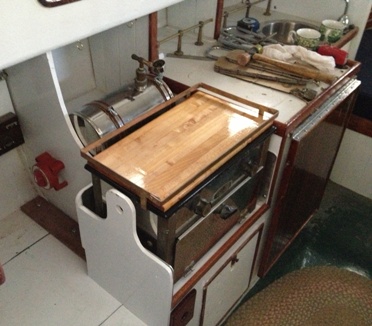
Hi Ron,
I finally got the new stove platform finished. I found some cookie sheets at Bed Bath and Beyond and cut them up to insulate the stove area. I also decided to put the fuel tank right behind the stove rather in the v berth or behind the stove in the coffee pot locker.
You may notice a small drawer just under the stove - upper left corner. That was a hole I needed to fill, not part of some grand scheme. The drawer will hold a lighter and other stovie stuff. The drawer that was there has been relocated across the cabin and placed next to the head. The locker that was there still is, you just have to pull the drawer open to access it.
Finally I made a small cutting board/serving board that fits on top of the stove. We will see how that holds up when some serious lime cutting takes place.
|
|
Click on the photos for a larger view
|
*****************************************
|