|
December 3, 2016. Paul Lugin sent in this report on Windswept (too)'s barn (minor edits). One gets the feeling Paul knows what he is doing.....
Hi Ron,
I've numbered the captions and they relate to the pictures which are in order. This may have too much detail, feel free to edit if so.
Thanks, Paul
This is the story of the building of Windswept's new boat barn. To start off I'd like to explain that the driving force behind the
design of this barn was economy. Economy of materials and economy of labor. The design is very simple (boring for sure) but will cut costs of materials needed; function over form if you will. The labor is free,I guess, because I'm retired and don't have to take off time from work or pay anyone else, but I have so many things that need doing around here that I seldom get bored with inactivity.
Also, I started this project on Oct 7th, just as the weather was getting below freezing at night and winter was threatening, so getting it done quickly was a goal. The concept of secure dry storage for Windswept won me over, no more tarps leaking or blowing off, no more shoveling snow off the deck or busting up ice dams on deck and no more worrying about the weather when working on the boat when at home.
Minimalism was the call of the day and I decided that the length of the barn would be 28ft, width 14ft, and height 10ft. After getting the boat and trailer inside the barn I think that it's size is large enough to function quite well, but I wouldn't want it any smaller. Here are some pictures to show the process.
1. This is one of the corner posts.
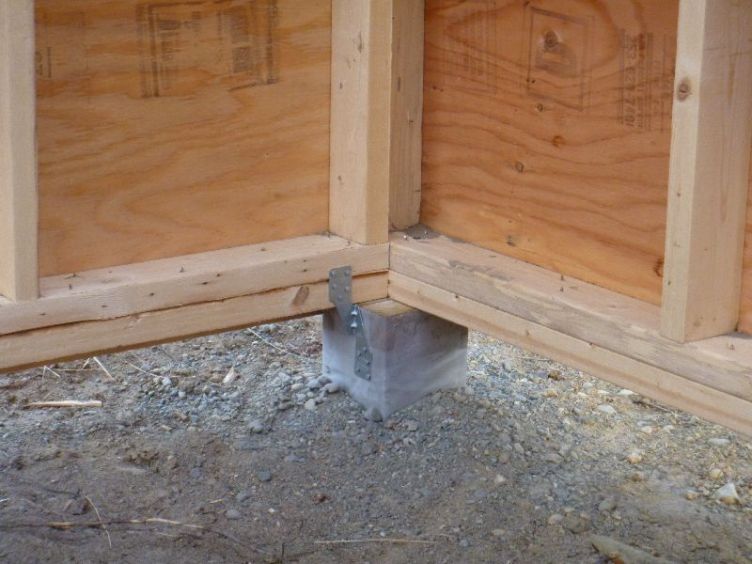
There are 9 posts in all. If it was earlier in the season I would have poured concrete posts but the freezing temperatures would threaten the poured concrete so I used ground contact pressure treated timbers for the posts. A full concrete foundation and concrete floor was ruled out because of cost and, of course, the cold temperatures.
The posts need to be deep enough to be below frozen ground, in this case only about 28" deep because of good gravel beyond that depth. The posts are wrapped in plastic and backfilled with compacted gravel. There is a metal connector attaching the post to the wall. More will be added to each post. The walls are now about 6" above ground but when 4" of gravel is added to create a floor, the distance will be about 2".
2. In this picture most of the trusses are up.

The walls can be seen with the sheathing attached. I used 2x4 studs on 2ft centers. Total wall height is 10ft. from top of posts. This is minimal framing but framing for shelves and blocking on all sheathing seams will add to the wall's strength. The extra course of plywood on the inside of the wall will also add strength.
3. Building the trusses
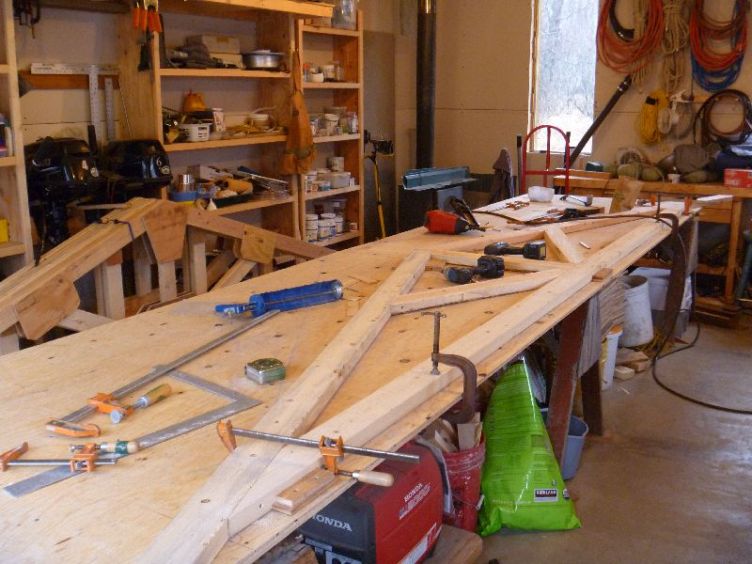
I built the trusses myself in order to save about $600 compared to factory built trusses. I probably wouldn't do it again as it was way more work than I thought, and quite tedious after you've glued and nailed a few together. Next time I would frame with rafters and ceiling joists instead of trusses. Note the red compressed air framing gun on the table. There were over 4,000 nails (yes, 4,000) shot into these trusses, along with 8 large tubes of construction adhesive. Hand nailing would be torture.
4. This shows the box beam I built integral to the walls.
It functions as a header which allows the walls to not sag between the 9 foundation posts. This beam is sheathed on both sides of the wall with 1/2" plywood which is very seriously nailed to the framing members. This design is somewhat different from some engineered box beams I've built in the past. I'm confident it will work. If not, it can be strengthened fairly simply, but will cost some more $.
5. This shot shows the 2ft high horizontal run of plywood at the base of the wall's exterior.
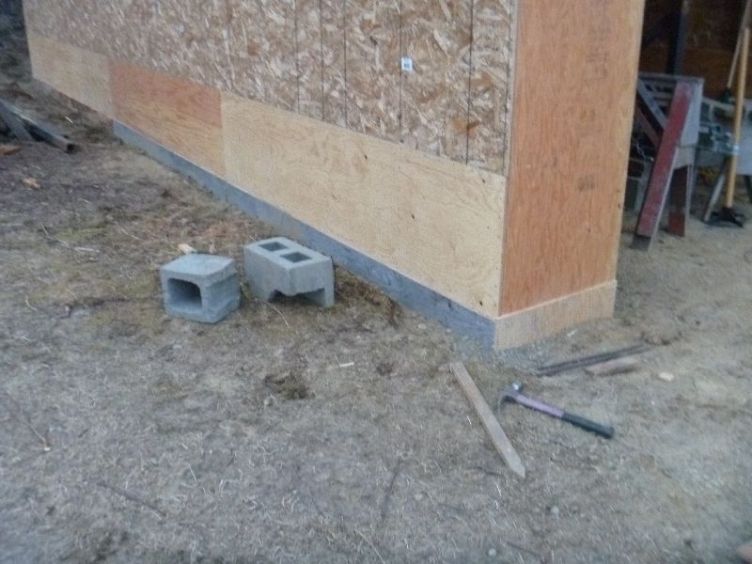
This again is the box beam which supports the walls between the posts. Also it shows temporary skirt boards which cover the opening between the bottom of the wall and the ground. I had to put these plywood strips in to prevent the wind from blowing in and sending dirt flying off the floor which will not get gravel until the gravel companies open in the spring. Once I get gravel in, I can install permanent skirt boards.
6. This picture shows the shelves which are supported by 2"x2" lumber nailed to the walls and 2"x2" legs hung down from the trusses.
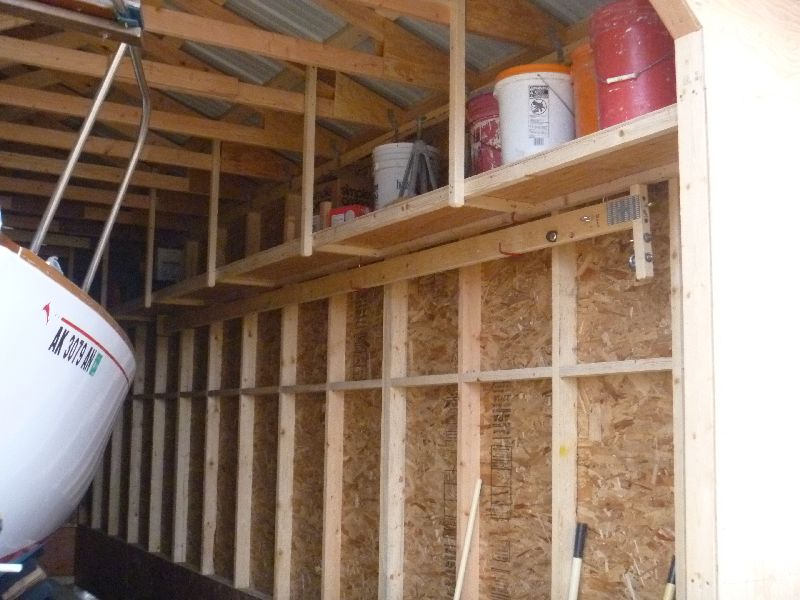
Again, this framing and the plywood shelves add stability to the wall. Below the shelf is hung the mast crane which I use to raise and lower the mast. Shown also are some of the 2x4's that are nailed across the top of the trusses to support the metal roofing. Also, horizontal 2x4 blocking between studs to allow complete nailing of all edges of the sheathing (plywood and osb, oriented strand board.
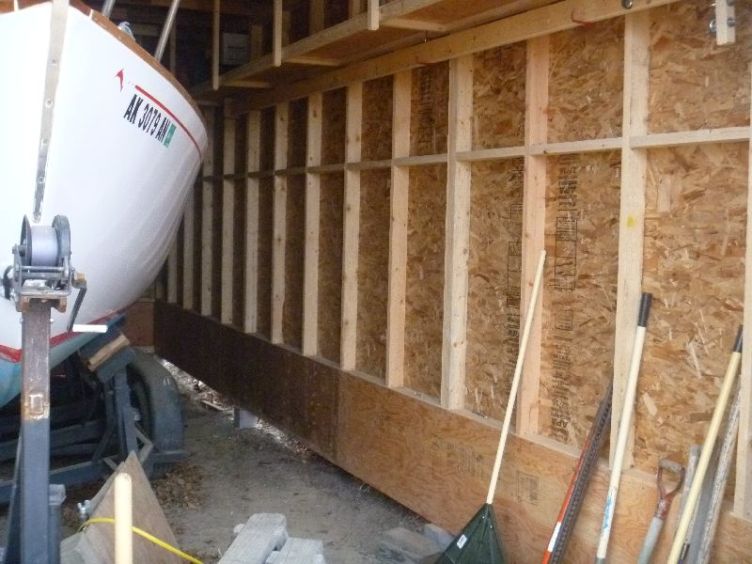
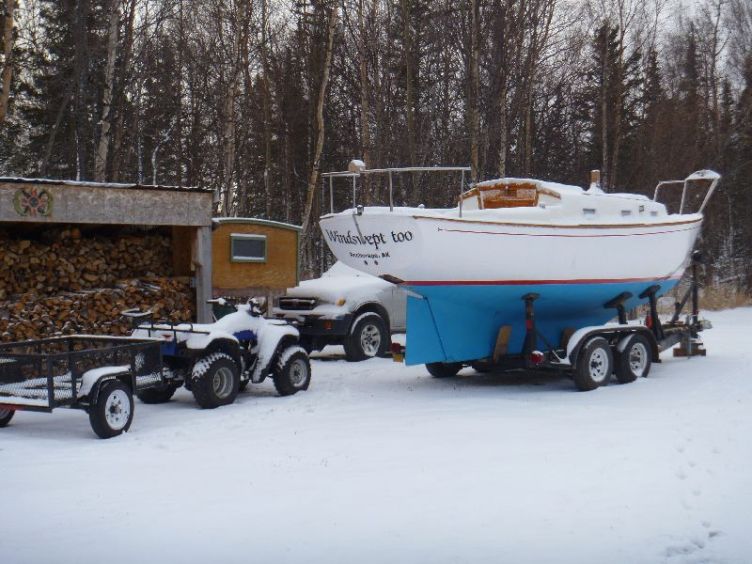
7. Boat finally in the barn.
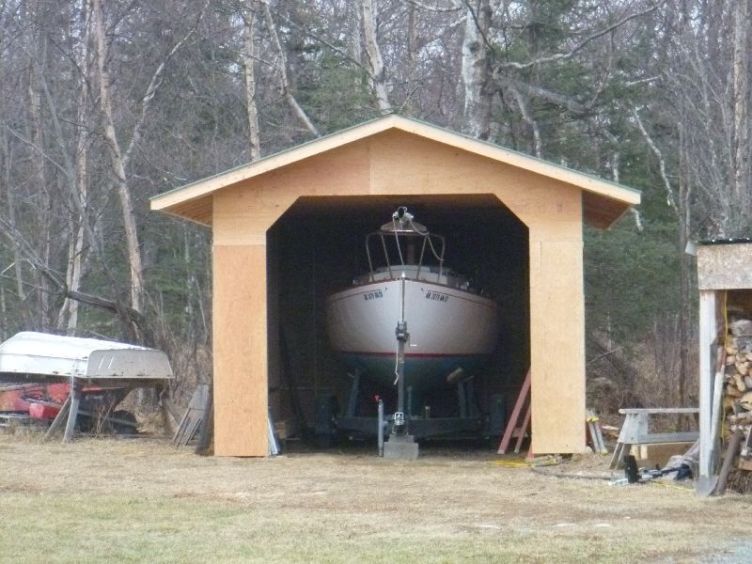
The mast is still on the boat in this picture - it was later hung under the overhang on the outside wall. Now I don't hit my head on it every time I walk out of the companionway.
Also, skirt boards not on in this picture. Still to come (hopefully)- doors, a few small windows and maybe someday, siding. Walls will get painted for now.
So far I have spent about $3,200. By the time the doors are made it will be somewhere around $3,500.
Postscript: I forgot to mention costs for clearing the building site. I rented a bulldozer to clear the building site of stumps and wild grass and brush. The site is next to our field which is cleared but I preferred to build into the woods so the building would be partially hidden. It is about 150 ft from the house and garage/shop and next to our woodshed and one of our greenhouses so is in the rustic/ functional area of the property.
I am choosing not to count the bulldozer rental/delivery fee of about $675.00 toward the barn itself. The actual clearing of the site took very little time, maybe a half hour. The majority of dozer time (about 3 hours) was used to remove 2 very large birch tree stumps next to the house and garage and a spruce tree stump, also to widen a short section of the driveway that was too narrow to plow snow effectively. Anyway, the point is that site preparation could add significantly to the cost, depending on the specific site
Stay Tuned
April 2, 2017. Here's the latest on Paul's barn project, only slightly delayed by a bit of snow (edited)
Hi Ron,
Where I live in Palmer, Alaska we did not get the record snowfall that Anchorage did this week. We received about 4 inches, being about 35 miles east of Anchorage. I did, however, have to plow our driveway, which did delay this barn door report.
After much thought I have decided to make the boat barn heat able. Along with this upgrade will come a concrete floor instead of the gravel floor I originally planned for. I hope to get the floor poured this spring and the building insulated by fall. The new plan is to heat it with a wood stove when working on the boat and to let it go cold when I am not
.jpg)
This picture shows the upper door during construction in the garage. It will be raised with a line and pulley system.
.jpg)
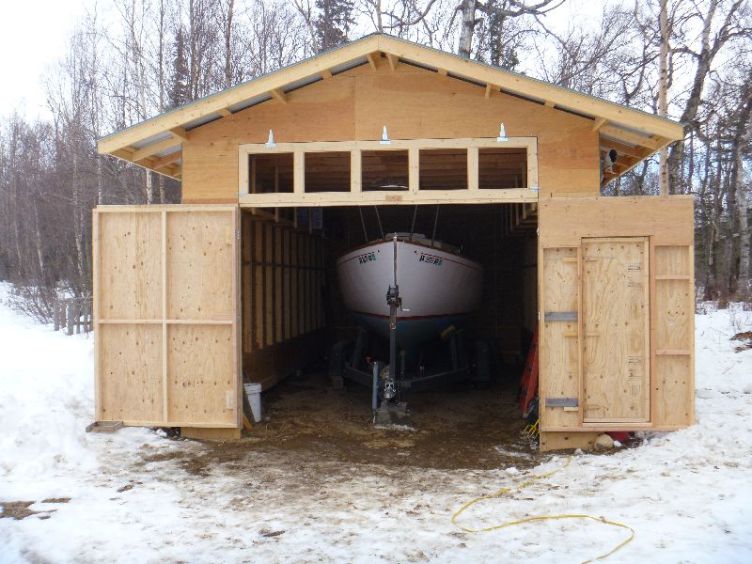
Picture #2 (above) shows the upper door installed. The glass will be installed soon.
.jpg)
Picture #3 (above) shows the framing for the left and right doors. The doors were framed in the garage and then attached to the rough opening with clamps and screws. This way I could insure that when sheathed the doors would fit nicely. Also, the doors were much easier to move and hang without the sheathing on them. The reason the doors are framed differently is because the door on the right has a smaller door framed into it. This will make entering and exiting the barn much easier.
.jpg)
Picture #4 shows the doors sheathed. I have to purchase or make some latches for the lower doors.
.jpg)
Picture #5 shows the smaller door open. Much less work to open and close than the large door.
I'll update as more work is completed. Thanks, Paul
Stay Tuned
May 6, 2017. Paul's latest update on planning, and shovelling......
Hi Ron,
A short update on Windswept's barn. I wasn't able to get any gravel when I got the barn roofed last fall as the gravel products
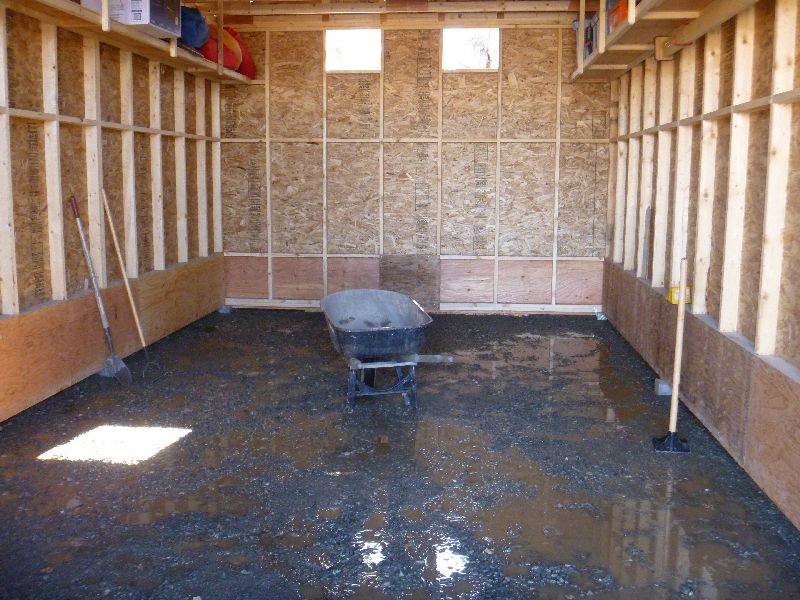
companies here were closed for the season. As spring broke here I thought it wise to get some gravel down for I expected things to get muddy as the ground thawed. I had 5 yards of gravel delivered, removed the boat from the barn and with shovel, wheelbarrow and rake added about 4" to the floor of the barn.
Click on the photos for a larger image
The plan was to get the boat back into the barn before the start of mud season. Too late- see picture above left. I awoke the next day to a flooded barn floor. I dug a hole behind the barn, installed a sump pump and pumped the water out. It took a few days for the floor to harden up again but I was now ready to move the boat back into the barn.
Too late- now the access lane between the driveway and barn was sufficiently unfrozen to be unusable. My long range plan was to eventually cut the organic layer off the top off the access lane and add gravel there, but I was hoping to save that job until fall.
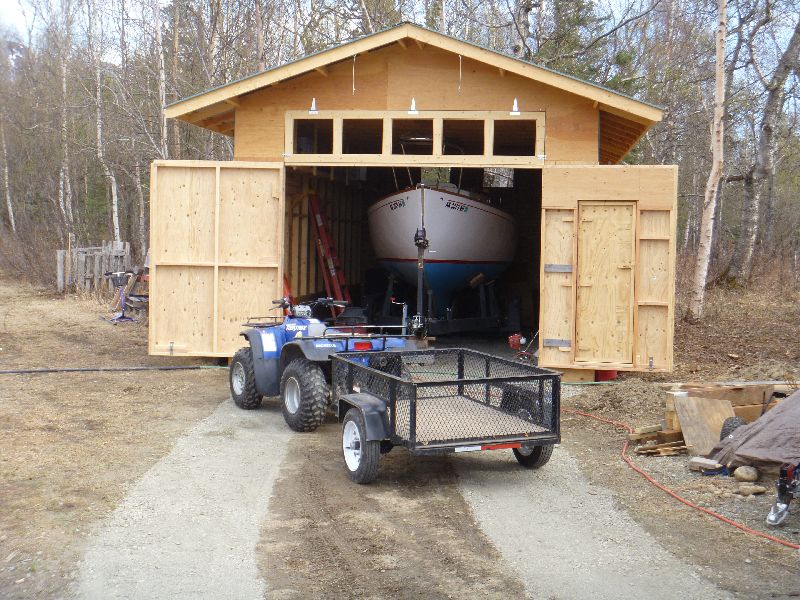
So, another load of gravel, another 2 days of digging wet dirt and hauling gravel, but another job completed and the boat finally in the barn again- see pic above right.
Now to work on the boat, let it rain.
Paul
P.S. I will probably wait till next year to pour concrete on the floor of the barn. I will wait to see if a permanent sump pump and proper drainage will prevent such a flood before capping the floor with a concrete slab.
***************************
May 19, 2017 We have the the following report from Paul on his boat lifting project in the barn. This was was the latest in a series of webmaster email exchanges with Paul on the subject of the "no travel lift" and Paul's Alaskan variation.
Hi Ron,
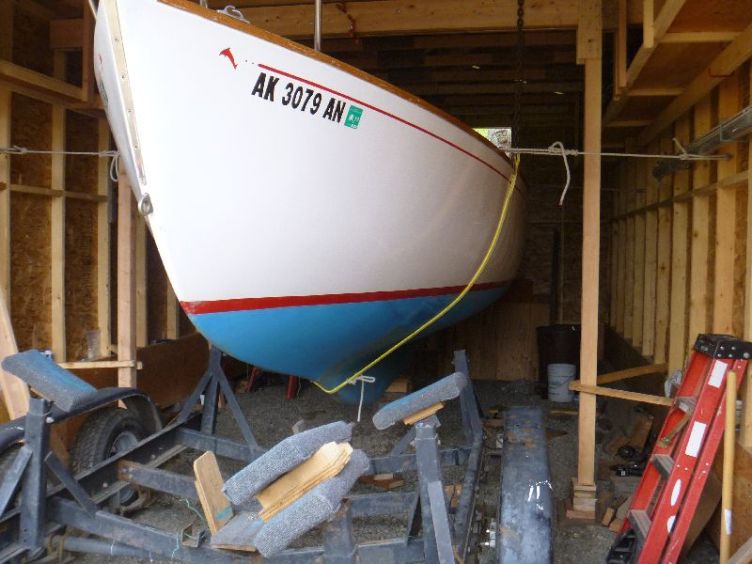
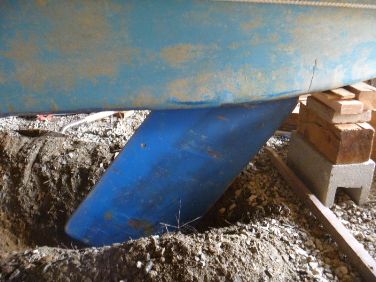
This is a mini update as I'm trying to get Windswept ready to splash. I was successful getting her off the trailer and once I removed all the small stones jammed between the centerboard and the enclosure, I finally got the board to come down. Very rewarding. I think the previous owner ran her aground on Big Lake in Alaska. He said he never lowered the board because the lake was very shallow. I'm very excited to have the board functional this summer.
I used a different method to raise the boat. Because I was in the barn I decided to run a separate beam under the trusses and supported by 4x4 fir posts. The beam was trapped between some framing I attached to the shelves and the trusses, this allowed me to raise and lower the beam with a 3rd post positioned on a jack. I had to move the post and jack from side to side to slowly raise both ends of the beam until the boat was clear of the trailer.
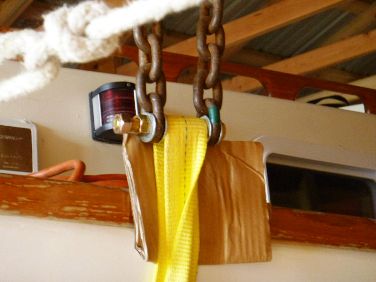
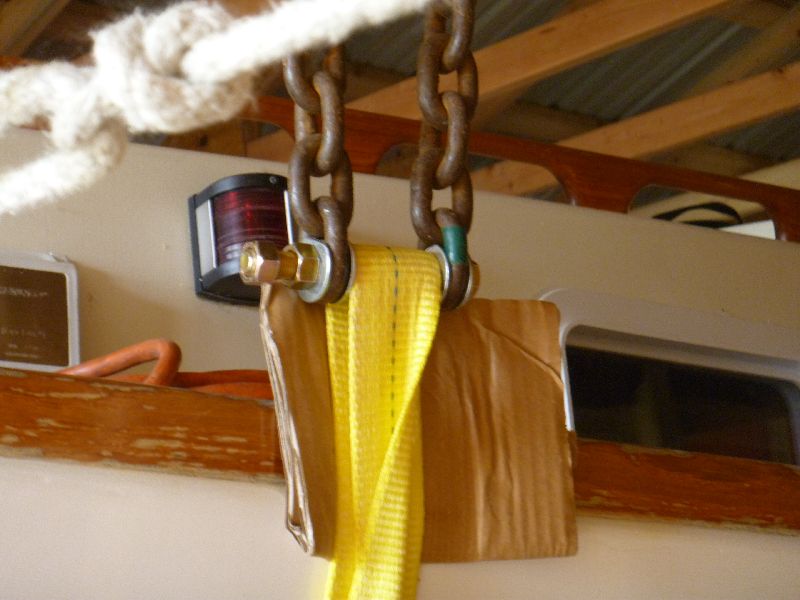
Next time I'll have a raising post and jack on both ends of the beam to make it easier but I ran out of posts today. There was no need to pump up the trailer with the boat on it. I would call it a real "no travel lift". I used a polyester strap with 12,800 lb rating but it sure looked skinny (only 2" wide ) when holding up that boat The strap stretched about 2" on each end when loaded. I used 7/16" chain tossed over the beam to support the strap. I ran grade 8, 1/2" bolts through each end of the chain to attach the straps to the chain. I ran 1/2" schedule 40 plastic conduit over the bolt, between the chain ends to keep the chain from collapsing onto the strap ends.
The beam was three 2x8" douglas fir boards 13' long. I used 7 or 8 bolts and some 3" heavy duty screws to attach the boards together to make the beam. I would have shot a bunch of 16d nails in it but I wasn't sure my system would work and wanted to be able to disassemble the thing if it was a failure.
I've sent a few pictures along to help explain the text.
Thanks, Ron, for all you do.
Paul


P.S. The scariest part , other than the strap parting, was the tendency of the strap to slide forward on the hull because of the bow curve. I ran a line from the strap to the outboard well and back to the strap on the other side of the boat. This line eventually stopped the strap from slipping but was strung pretty tight and was a constant worry to me. Next time I'd use a couple heavy duty ratchet straps to hold the lifting strap in place.
P.P.S. Note I cut off the rear poppets so they would clear the hull. My poppets aren't adjustable, tomorrow I'll weld some flanges to them and bolt them back on so they can be easily removed.
I thought this report would be short........
One last picture that shows the chain/ strap connection.
Click here for a larger image
|
|
P.P.P.S (minor edits) I did not chain the axles in the compressed position as you suggested because the axles aren't directly under the trailer framing members and I couldn't figure out a way to do it. It would have saved a lot of work as it took a lot of boat raising before the trailer stopped coming up also.
Definitely going to put a permanent hole in the floor for future centerboard work. I'll probably frame it out with pressure treated lumber and cover with 3/4" plywood.
I didn't use boat jack stands because I don't yet have any. The boat was very stable while in the straps and I put blocking under the keel to help support it. I also ran a line from the cockpit winches to the wall of the barn and from a forward stanchion base to the barn wall. I had researched boat careening and that gave me confidence in this working. By the time I actually climbed under the boat she had been hanging for a few hours so I felt ok about it.
One problem with me designing stuff like this is that I don't have an engineering background and go by how it looks and feels instead of crunching numbers, so there is always some degree of doubt about how strong it is. Also, when working with wood, you have to evaluate each board individually because every board is different and every knot and flaw in the grain or width of tree rings ect have an effect on the strength of the board.
One final note - I was really naive about the weight of the centerboard. I was lying with my head directly under it while using a flashlight to view into the centerboard compartment and using various tools to pull rocks out of the narrow space between board and enclosure. I was fortunate the board didn't fall on my face as it is MUCH heavier than I expected. As you say, it is better to be lucky than to be smart. - Or, in my case, you'd better be lucky if you're not all that smart.
Paul
*********************************
November 6. 2017 Update
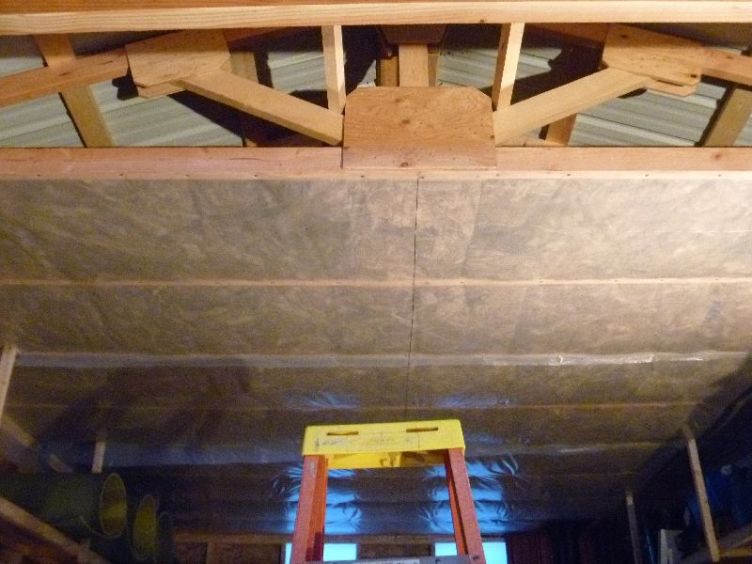
Here's Windswept patiently waiting for me to get the insulating done. Second picture shows progress on vapor barrier and insulation
Click on the above photos for a larger image
*************************************
December 18, 2017 we got the following update from Paul
Hi Ron, I wish you well in this holiday season. Thanks for all you do. I have been plugging away at the barn for what seems a really long time. My wife, Carol, says she is glad that she doesn't have to pay me.
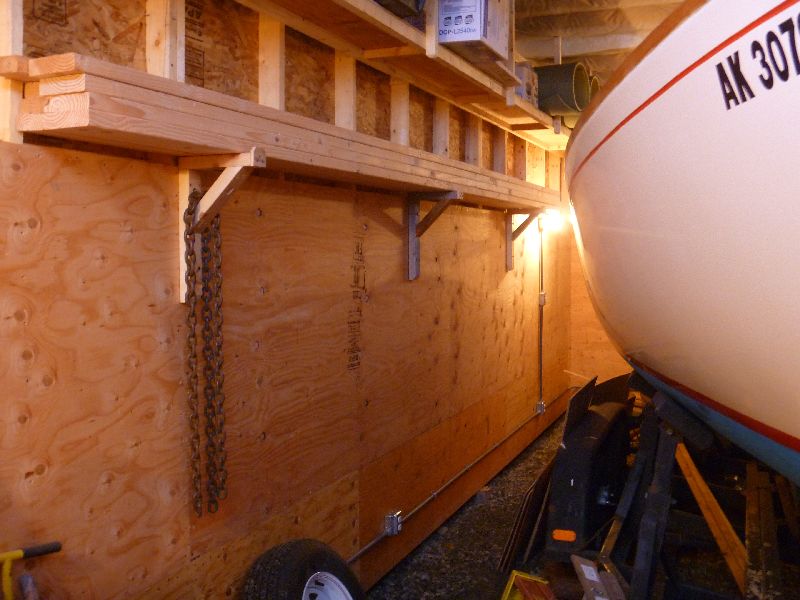
Progress so far: I got the ceiling insulated and the vapor barrier up, but not sealed yet. I've insulated 4 feet of the walls and covered that area with full sheets of 1/2" plywood. The original bottom 2 ft of wall already had plywood on both sides so I didn't insulate that, I will probably blow chopped fiberglass in those spaces next summer. I used full sheets of plywood on the walls in order to strengthen the walls between the supporting posts and to make them so they could handle abuse. I will eventually insulate the upper 4 ft of the walls and cover that area with sheetrock. I don't yet know how I'll finish off the ceiling, either thin plywood or sheetrock. The walls will be painted white when I can open the doors to get good ventilation, probably next summer.
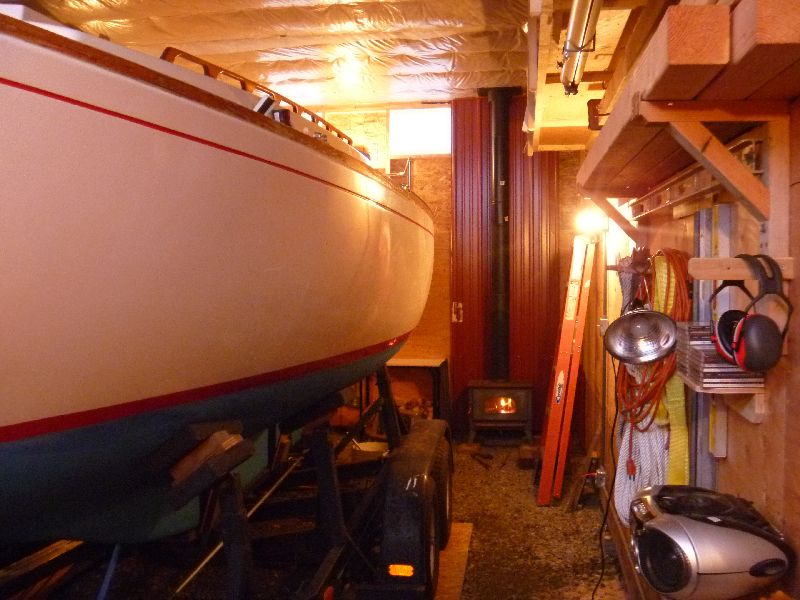
The last project I just finished is the wiring. I didn't put the wires in the wall because I wanted to be able to make changes later, if necessary. All the wiring is in conduit and the conduit is exposed on the walls so changes later will be simple. There are 8 receptacles on the walls and 5 lights. Each light has it's own switch so I can regulate the light depending on where I'm working in the barn. There is a light on the back wall that illuminates the cockpit and also a receptacle box to plug in an extension cord or two to run into the boat for a drop light or power tools.
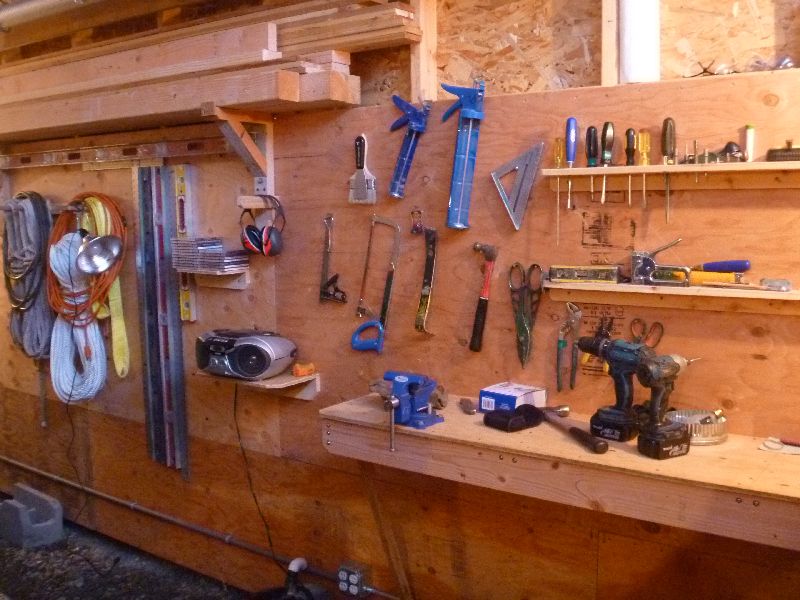
The pictures in order are : port side, starboard side, work bench, and cockpit light and plug in. The plywood on the walls makes attaching brackets and shelves easy. The wood stove is small but heats the space fairly well and should be more effective when all the insulating is complete. The doors are also not yet insulated.
Thanks Ron,
Paul
Click on the above photos for a larger image
***********************************
|


